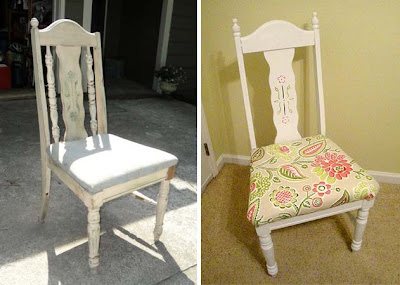
I have a serious problem. I can’t bear to see a piece of furniture being thrown away. It could be the ugliest, most broken down chair and I still feel the need to save it from Mt. Trashmore. That was the case with “Daisy” this poor ugly chair that I found on the curb awaiting the trash trucks a few weeks ago. I threw her in the back of my car and brought it home.
 |
| Two missing parts |
Only when I got home did I assess her condition. Moldy seat, chipping and peeling paint, structurally falling apart, cobwebs, missing parts…
 |
| GROSS! Stained and moldy seat. |
…and then a dead roach dropped out! Ewwww! I must be insane. But, I still saw potential through all the disrepair.
This chair had some serious structural issues. I knew it was a case of tear her down and rebuild. This intro kept playing in my head the during the whole process:
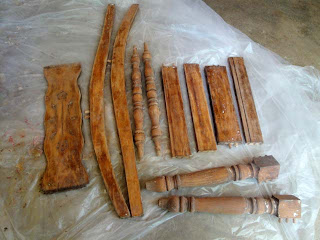
I pulled apart the chair (mostly with my bare hands and then with some assistance from a hammer.)
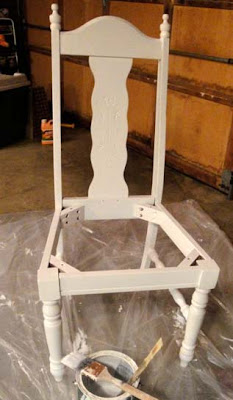
Until I was left with a skeleton of a chair.
I stripped the paint layers off the chair using the same technique as I did for this chair (see details here.) Unfortunately this chair had 5 layers of paint, therefore it took several hours and several re-applications of Citri-strip to get down to the wood.
If you remember, there were several missing parts on this chair. I had a lightbulb moment when I realized that I could used the spindles from the chair back for the missing parts to connect the legs.
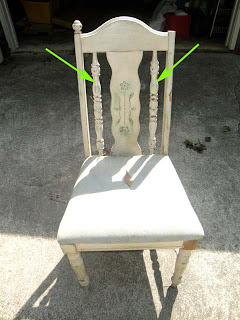 |
| I removed the back spindles. |
 |
||||
| Almost a perfect size and I had two of them! |
I cut down the spindles on the miter saw (but these could easily be cut with a hand saw).
And then notched the ends so they would fit into the holes on the legs. (I did have to enlarge the holes on the legs slightly using my drill and a 3/4″ spade bit.)
 |
| Notching the spindles. Cut around the diameter, then cut from the end in towards the first cut. Repeat on all sides. |
After dry fitting all the pieces back together, I used Gorilla glue to glue the chair back together.
I clamped the chair tight by using rope to wrap around the chair.
Daisy had also lost one of her decorative corner finials. So, I bought two new finials at Home Depot for $5.
In order to screw on the new finials in, I had to plug the hole with wood. (As promised: a tutorial on filling holes in wood.)
I also filled the holes where the spindles used to be with wood putty.
Next, I primed Daisy. Just a side note here, one reason the original five coats of paint on Daisy were peeling and flaking is that the proper prep work wasn’t done. No sanding to scuff up the glossy polyurethane and no primer. It is so important to sand (rough up your surface) and use a primer. If you cut corners here, you might as well kiss your beautiful finish goodbye in a few years. Especially if the chair is exposed to the elements.)
Finally, I added two coats of white paint (sanding lightly between coats.)
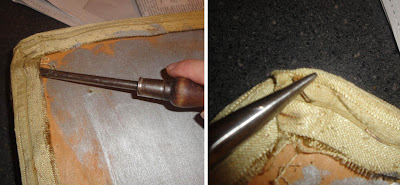
The chair seat was in really bad shape. Therefore I decided to cut a new one out of plywood using my jigsaw.
 |
| Trace old seat on plywood, use ruler to make straight lines, cut out seat using jigsaw. |
I checked my fit and then re-upholstered my chair. Check out this post to see how to re-upholster a chair seat.
Then for the finishing touches or the frosting on the cake. You can definitely do this step! The inset carving controls your brush for you. Kind of like bowling with bumpers.
And my chair is finished. Isn’t she beautiful!
Hard to believe that 48 hours ago this chair was definitely worthy of Mt. Trashmore.
The chair is super solid now, and doesn’t move at all thanks to the Gorilla Glue.
How about one last look at the before and after pictures?

