NolanBedView
Today we are going to talk about our Camping Themed Boy’s Room, But first, I have been having the best time meeting most of my favorite bloggers at Blissdom.
Dear sweet Home & DIY bloggers, y’all really rock!
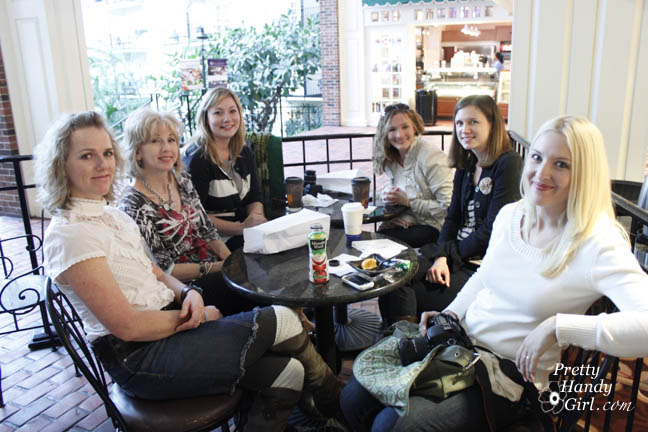
A few of those rockin’ women bloggers:
Sandra (
Sawdust & Paper Scraps), Rhoda (Southern Hospitality), Shaunna (Perfectly Imperfect), Ashley (Pure + Lovely), Erin (Two Story Cottage) and Layla (TheLetteredCottage)

While I am here, I figured you might love a good before and after. Here is my son’s bedroom shortly after we moved into our home.

NolansRmBefore2
NolansBeforeRoom
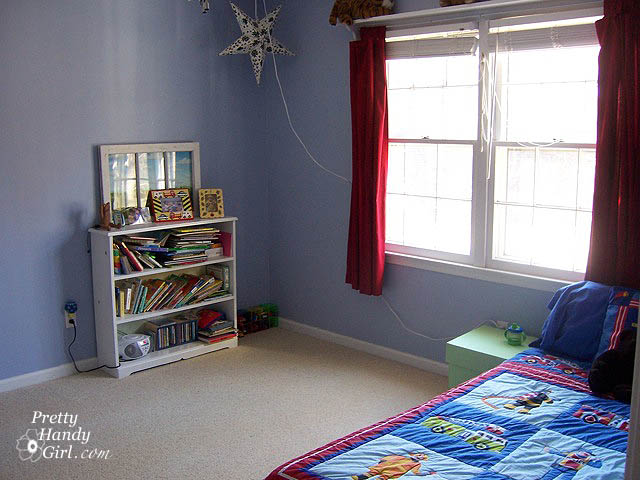
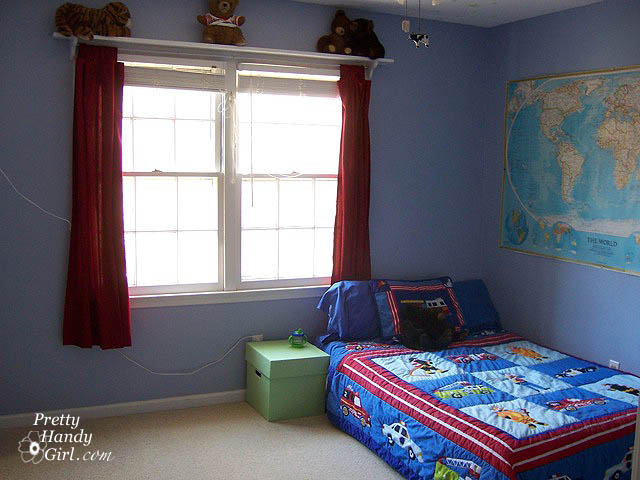
Pretty boring, huh? Poor guy didn’t even have a bed frame. But, frankly, it let me sleep better at night knowing he wouldn’t roll out of bed.
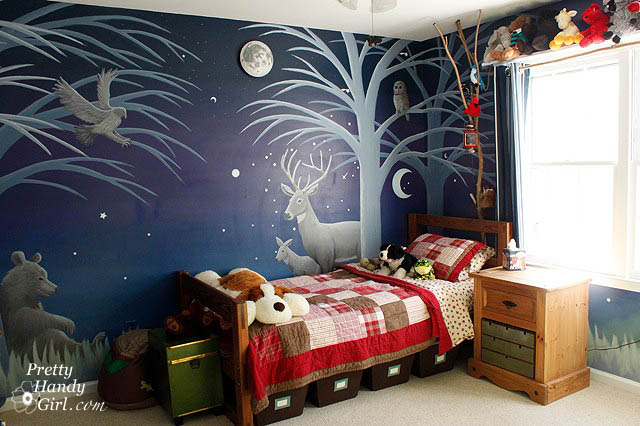
Two plus years later, we moved beyond the rolling out of bed phase AND something divine happened. I met a “real” mural artist and it was like finding a clone of myself! I promptly hired my clone to help me paint a mural in my son’s room.
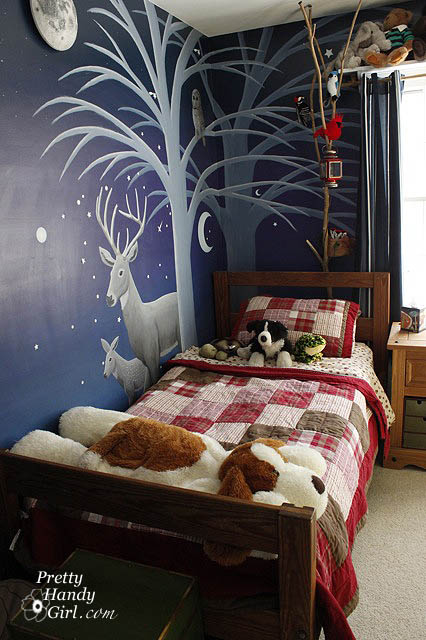
A beautiful woodland and mountain theme!
DayWall
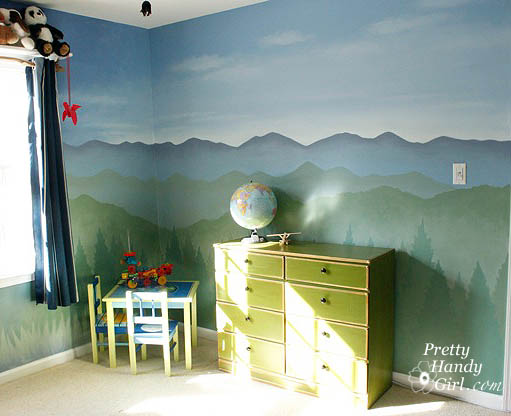
Tom Barber (mural artist in Raleigh, NC) painted most of the background and I painted the animals (because wildlife illustration was my major in college.)
NolansNightWalls
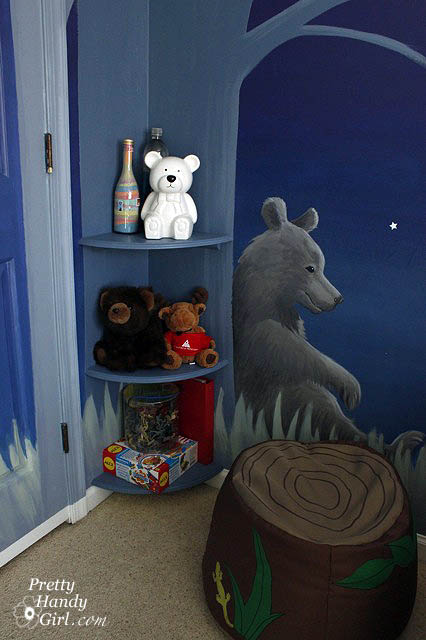
I bought some corner rounded shelves at Home Depot and installed them in the corner where Tom painted a big tree.
SecretCloset
A perfect spot to curl up with a good book.
CornerNook
The closet is my son’s super secret hideaway.
HiddenCloset
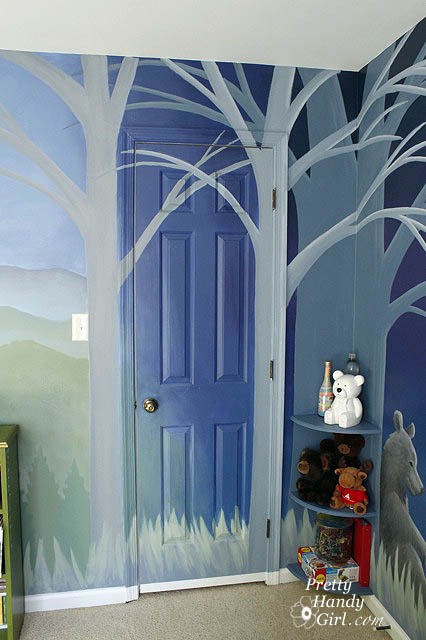
When you open the door you are met by a tent.
Tent
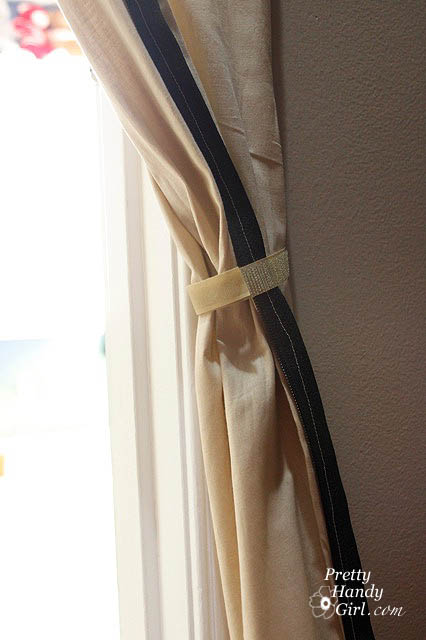
Pretty Handsome Son can either close it up or secure the tent flaps on the sides with the velcro tie backs.
Tieback
The tree is made from some crepe myrtle branches that we had to trim from our trees out front.
Tree
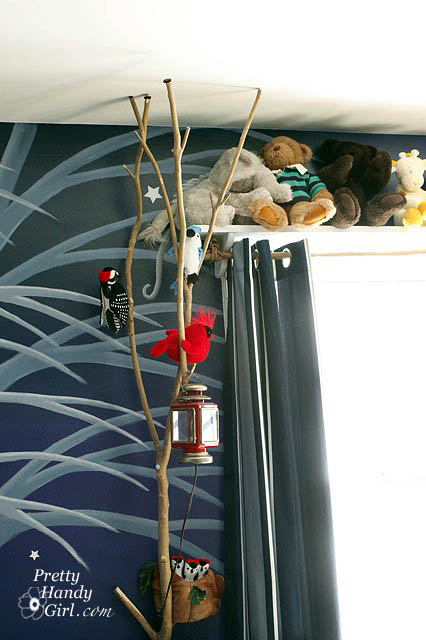
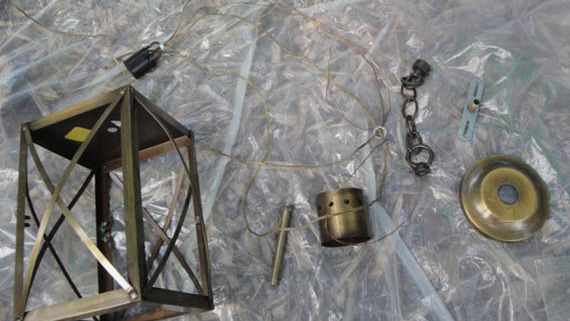
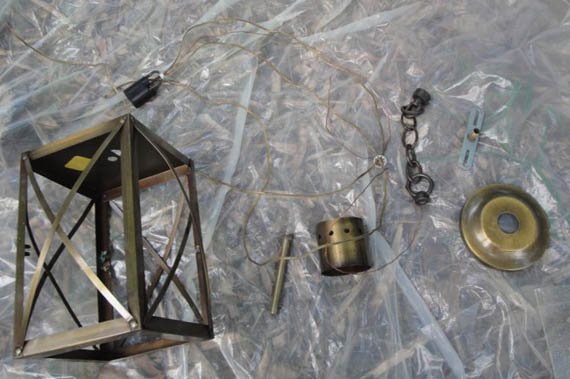
The lantern in the tree was an old oil lantern. I drilled a hole in the bottom and inserted a candelabra light kit. It is the perfect amount of light for him to read stories by.
Lantern
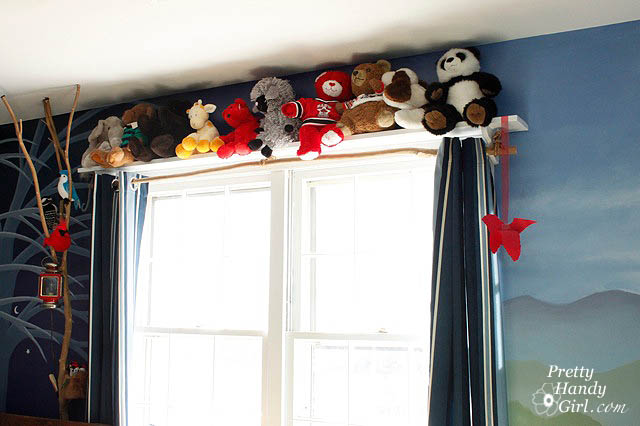
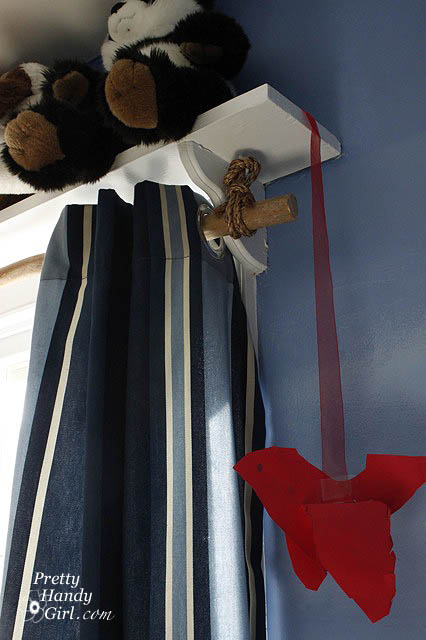
I used a larger branch for the curtain rod. And tied the rod to the shelf with some rope knots.
WindowView
CurtainRod
And I had to add this adorable bird that my son made in preschool. No kids room is complete without his or her artwork.
KnotandBird
He sleeps soundly under the light up moon on the wall.
BedView2
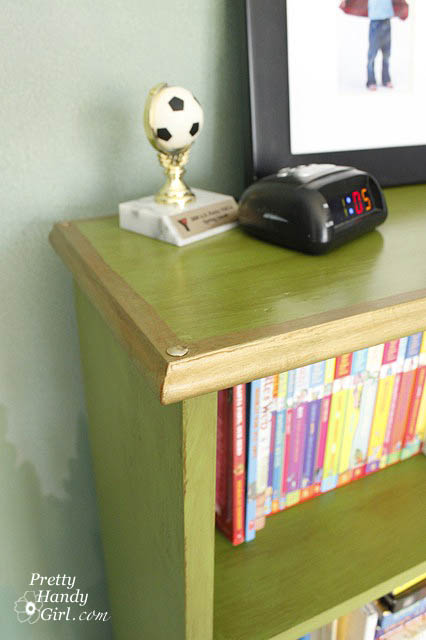
The bookshelf was re-painted and I mod podged old US Geological Survey maps onto the back.
mapbookcase
Thumbtacks
I wish I had a room like this when I was a child. Heck, when he outgrows it (which I hope he never does), I’ll move into his Camping Themed Boy’s Room!
Before:
After:
BedandTree
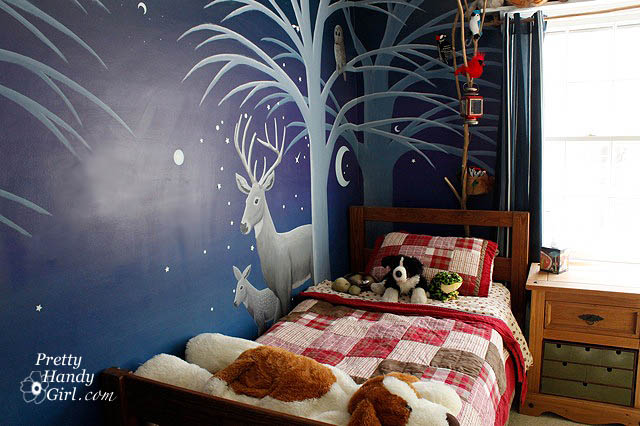
Bedding from Target Woolrich collection.
home_tour

If you have been following my blog, you may remember this light fixture that I rescued bought at our local Habitat for Humanity ReStore. Read below for a Pottery Barn Inspired Lantern.

Originally I thought about using it as a light in our foyer, but that plan changed after I found myself drooling over these lanterns at Pottery Barn and Restoration Hardware. I love going into PB & RH, but rarely have the nerve to plunk down the money they want to steal
claim from my wallet.

Instead, I decided to transform my dated light fixture from the ReStore into a stylish lantern.

This is a relatively easy project that anyone can do! Yes, that means you.

Begin by removing the glass from the light fixture. (A note of caution: You should wear gloves. In other words, do as I say, not as I do!)

My light fixture had little metal prongs that easily bent to release the glass.

Next take apart your light fixture. Just start trying to unscrew parts. If they resist, grab your pliers.

I decided to save the wires, ceiling canopy and other wiring parts. Who knows, perhaps I will want to use it as our foyer light some day.

Okay, okay, also because I am a bit of a pack rat. I’m admitting one of my faults here: not being able to throw anything away. Don’t get me wrong, the producers of Hoarders are not knocking down my door, but I would prefer to Craig’s List, FreeCycle, reuse, or recycle anything I can’t use.

When all the parts were separated from the lamp, I needed to break the chain to the top of the light fixture. Here is an easy way to open up links in a chain that is not soldered together.

Place two screwdrivers inside the link you want to break. Lean one to the left and one to the right and apply pressure in opposite directions. The link should separate enough for you to remove the chain.

While the lantern is in pieces, you can rough up all the metal surfaces with sand paper. I actually did this to all the parts so I could paint them and potentially use them in the future. Wipe off the metal with a damp rag to remove any particles.

Now, you can re-assemble your light fixture (using only the parts you need to make your decorative lantern.)

I used brown Rustoleum spray primer. I like using a darker primer when my top coat color will be dark.

Be sure to rotate the parts and the lantern so you get all the sides coated with primer.

Now the most gratifying step, spray your lantern with your finished color. I coated the lantern with 3 light coats of a satin black spray paint to allow the lantern to look less new and more like old rustic iron.

And here is my new (old) Pottery Barn inspired lantern! $5 for the lantern + $6 for spray paint  = $11

What do you think of that, Mr. Pottery Barn merchandiser who wants to charge me $59 for the same size lantern?

Update: I received several emails and comments on this lantern and a few of you have been inspired to create your own! If you post it in your blog, I’d love to share your results.

Amanda at The Hand Me Down House, shows how she painted hers. She made the glass look like colored glass with Modge Podge and food coloring! Yes, you read that right. See her tutorial here.