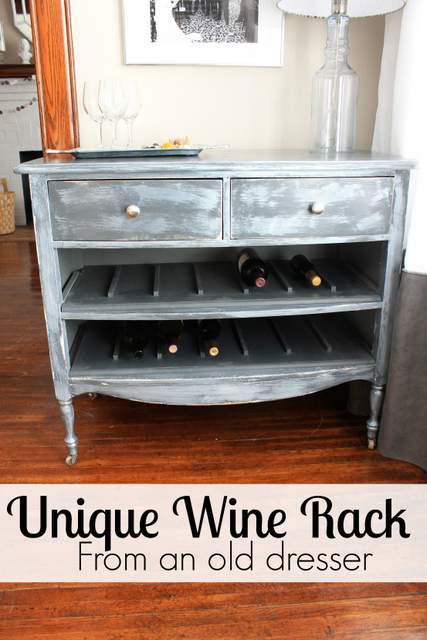
Hi everyone! It’s Jessica from Décor Adventures, back again and ready to show you a furniture makeover project I’m just in love with. This isn’t just any furniture makeover. This is how to turn an old dresser into a rack to hold your favorite reds and whites – wine that is!
One of my favorite things to do is redo furniture. Chairs, mirrors, tables, dressers, you name it. A while back I found this dresser at a thrift shop for only $10 and took it home only to find the drawers didn’t work well at all. I had an idea to ditch the two large drawers and turn this piece into a wine rack. If it doesn’t work for clothes, why not make it work for wine! Here is how to make your own unique wine rack from a dresser.
Materials
Many of these materials are based on how I painted the dresser and how we cut the shelves. We cut them ourselves with a table saw, but if you don’t have one, you can have them cut at the home improvement store or use a circular saw.
- Dresser with a few drawers removed
Paint:
- primer, paint, stain, paint brush and roller;
- Furniture wax or sealant/polycrylic (or whatever you might want to use to finish the dresser)
Racks/Shelves:
- Two 2’x4’ sheets of ½” MDF
- Two pieces of quarter round to finish fronts of shelves;
- Several feet of ½” square wood dowels {they come in 36” pieces}
Tools:
- Table saw {unless you have the shelves cut to size at the home improvement store};
- Nail gun
- nails
- air compressor
- Random orbital sander {Optional if you distress the dresser}
- Miter saw or hand saw
Supplies:
- Wood glue;
- 220-300 Sand block or sand paper.
Instructions
These instructions will be in a three sections, so you can easily see how this project comes together. First you will paint or stain your dresser, {or maybe you love it as is and will leave it}, second you will prepare the shelves and put them together to create the wine racks, and last you’ll put the whole dresser together.
Preparing the Dresser
This was a piece I bought at a thrift store and it was already painted but I had to fix it up. The back was not painted and didn’t look very pretty so I ended up painting that too. You can see in this picture how wonky the bottom large drawers were.


