
How to Paint a Miniature House

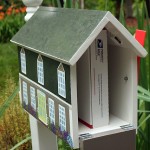
Yesterday, I unveiled my mini-me house mailbox. I appreciate the kind comments (even it they were coerced ;-). )
Today, I wanted to give you a little tutorial on painting a mailbox to look like your house. If you can color in a coloring book, you can create a painting of your home!
Materials:
(I’ve included affiliate links for your convenience. I earn a small percentage from a purchase using these links. There is no additional cost to you. You can read more about affiliate links here.)
- 1.5″ flat painter’s brush
- paint roller
- primer
- latex house paint (use your home’s leftover paint if you have some)
- fine grit sandpaper
- flat brushes
- round brushes
- small square sponge
- palette
- acrylic paints
- palette knife (optional for stirring)
- spray bottle with water to keep paint wet
- rag for clean up
- jar of water (keep used paint brushes in the water until you can clean them)
- 3M ScotchBlue painter’s tape
- combo square
- water-base polyurethane
A Lesson on Paint Brushes:
Before we begin I want to share with you a little primer on paint brushes. All you really need are an assortment of big to small round and flat brushes. Typically 3-5 of each will suffice. Make sure that the brushes still have their original shape or you will pull out your hair (and the paint brush’s hair!) If you have a frayed brush, keep it! They make wonderful hair and texture brushes.
Here is a quick diagram of the strokes you can achieve with round and flat brushes.

The shape of the stroke changes depending on the pressure you apply while painting. Fine lines happen with less pressure, fat lines with more pressure. And if you turn a flat brush sideways you can get thin lines. Explore on a scrap piece of paper to see all the different strokes you can make with your brushes.
ALWAYS keep your paint brush wet when it has paint on it. After you have finished using the brush, wipe any excess paint off the end and then keep the brush end submerged in water until you can properly clean the brush. After the brush is clean, squeeze out excess water and re-shape the tip so it will dry to a point/chisel.
When you are painting with your brush, always draw the brush away from the bristled end. Never scrub or push the brush backwards. This will cause the bristles to bend and fray.
If you take care of your brushes, they will last for decades!
Prepping the House for Painting:
Before you can paint your mailbox, it is important to prime the wood. Roll primer onto all the surfaces (both inside and out!)

Let the primer dry and gently sand any rough spots.
Mask off any areas that will be white (like the trim areas) using painter’s tape. Paint your house (mailbox) the overall color of your home. I used the paint that we had leftover from a recent siding repair. (If you don’t have any on hand, have a sample pot mixed up from a swatch. But, make sure that it is latex and suitable for exterior use.)

Once the house color has dried, take out your home trim color and paint inside the mailbox and all the trim areas (if you have a shaky hand, you can mask outside the trim areas first. (I prefer to paint and wipe any mistakes immediately with a damp rag.)

Transferring Details onto the House:
Take a photo of your home straight on. Upload the photo. Measure your surface area. If you followed my mailbox plans, it should be approximately 19″ x 11″. The easiest way to accomplish this is to take your print out to a copy shop and have them help you enlarge your image to the size of your surface. If you prefer to do a little cut and paste at home, here is how I did it:
Enlarge your photo until the sides of the house picture equal the side measurement of your mailbox.

Crop your photo into three sections. Each should fit nicely on a letter sized print out. Overlapping image areas are a good idea.

Print out each section and trim off the white border.

Tape each section on top of one another, overlapping the excess on each panel. Rub white chalk (or pencil if your home is a light color) on the entire back of your pieced together print out.

Center the print out onto the mailbox side and use a pencil to trace all the windows, doors, and any other architectural elements you want in your painting. Remove the print out and your lines have been transferred.
![]()
I used a combination square to redraw the windows and door straight and evenly spaced (but I’m a perfectionist like that.)

Painting Your House:
Mix up your acrylic paint colors (regular acrylic is fine) for the roof. I used a gray mixture for the base color. It doesn’t have to be prefect, but you should have decent coverage.
Turn your flat brush on its side and make a line around the windows and other architectural elements. Then fill in the roof areas.

Take a small square sponge and dip it loosely into the colors that make up your shingles. In my case, that would be black and green. Don’t mix the colors, it looks better if you get a mottled look. Sponge over the gray roof with these new colors.

Wipe off any paint that may have ended up on the trim. Let the roof paint dry, then you can go back and use the flat brush dipped in the trim color to clean up the lines later.

Fill in the windows and doors using the same color as your window trim. Use the flat brush to make side by side vertical strokes to fill these areas quickly. You will probably need to go over these flat areas a second time for better paint coverage.

Mix up a light blue color and dip your flat brush into it. Fill in the window pane area with your flat brush. By swirling your brush on the windows it will give the look of a reflected cloud filled sky.
Use a smaller flat brush to draw the smaller windows on the storm door.

When the blue paint has dried, dip the round brush into the white paint and paint the grilles onto the windows.

It looks a little sloppy, but that’s okay. Don’t obsess about perfection. Most people will be looking at your mailbox from several feet away ;-). Plus, it gives the hand-painted look (not machine printed!)
It is a good idea to paint your house numbers somewhere onto the mailbox. You could use stencils to paint them on the door.

If you want some pretty flowers and landscaping on your home, check out Mural Maker’s tutorial for painting a flower garden using the dip dot technique. Super fun and easy!
Allow your painting to dry at least an hour, then coat it with at least 5 coats of polycrylic sealant. Don’t be alarmed when rain hits the finish it will cloud a little. This goes away when it dries. If you choose to use oil-based polyurethane, it will yellow over time.

What do you think? I know you can handle this. If you do paint your own house mailbox, I’d love to see the results!

I chose to paint the front of the house on both sides of the mailbox. After all, no one wants to see all the plastic toys that are on my deck ;-).

I think my neighbors are enjoying the new mailbox, because they keep slowing down to look as they drive by.

Have a great rest of your week and check back on Friday when we talk mailbox posts and how to mount the mailbox.
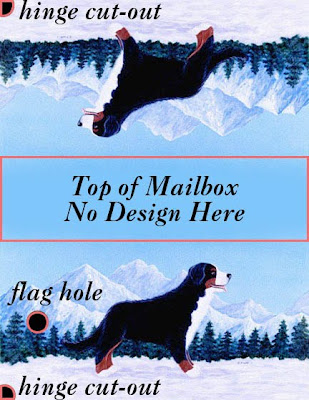
If you liked this post, you may enjoy some other hand-painted mailboxes I created on magnetic material:
I’m working on this project for my Mother and I couldn’t find any useful or detailed info on the internet. Your site is exactly what I was looking for! Thanks for all the helpful step by step instructions, and for such a great lay out and presentation! I appreciate all your help and for also taking the time to help out a stranger!
Sincerely, Jacob
u r amazing!!