
How to Build a Chunky X Farmhouse Table
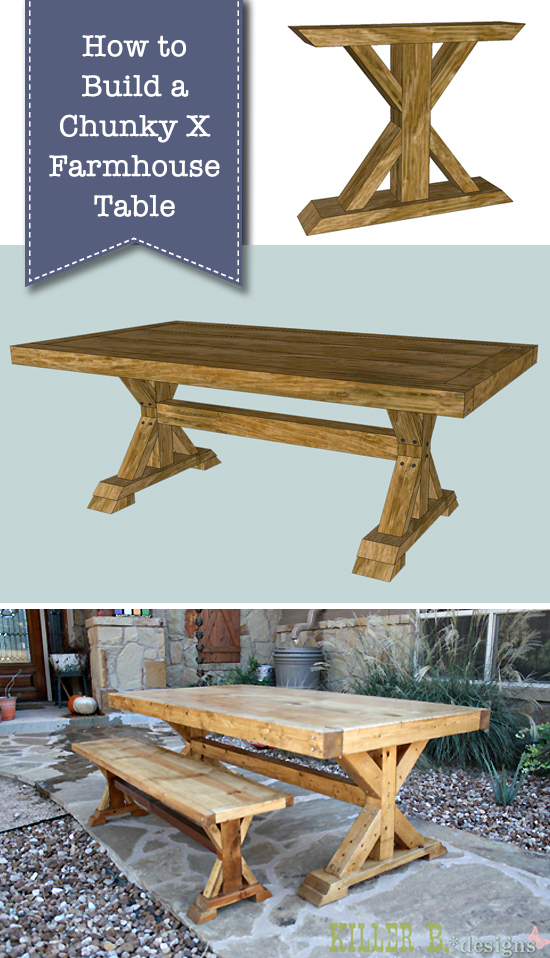 How to Build a Chunky X Farmhouse Table
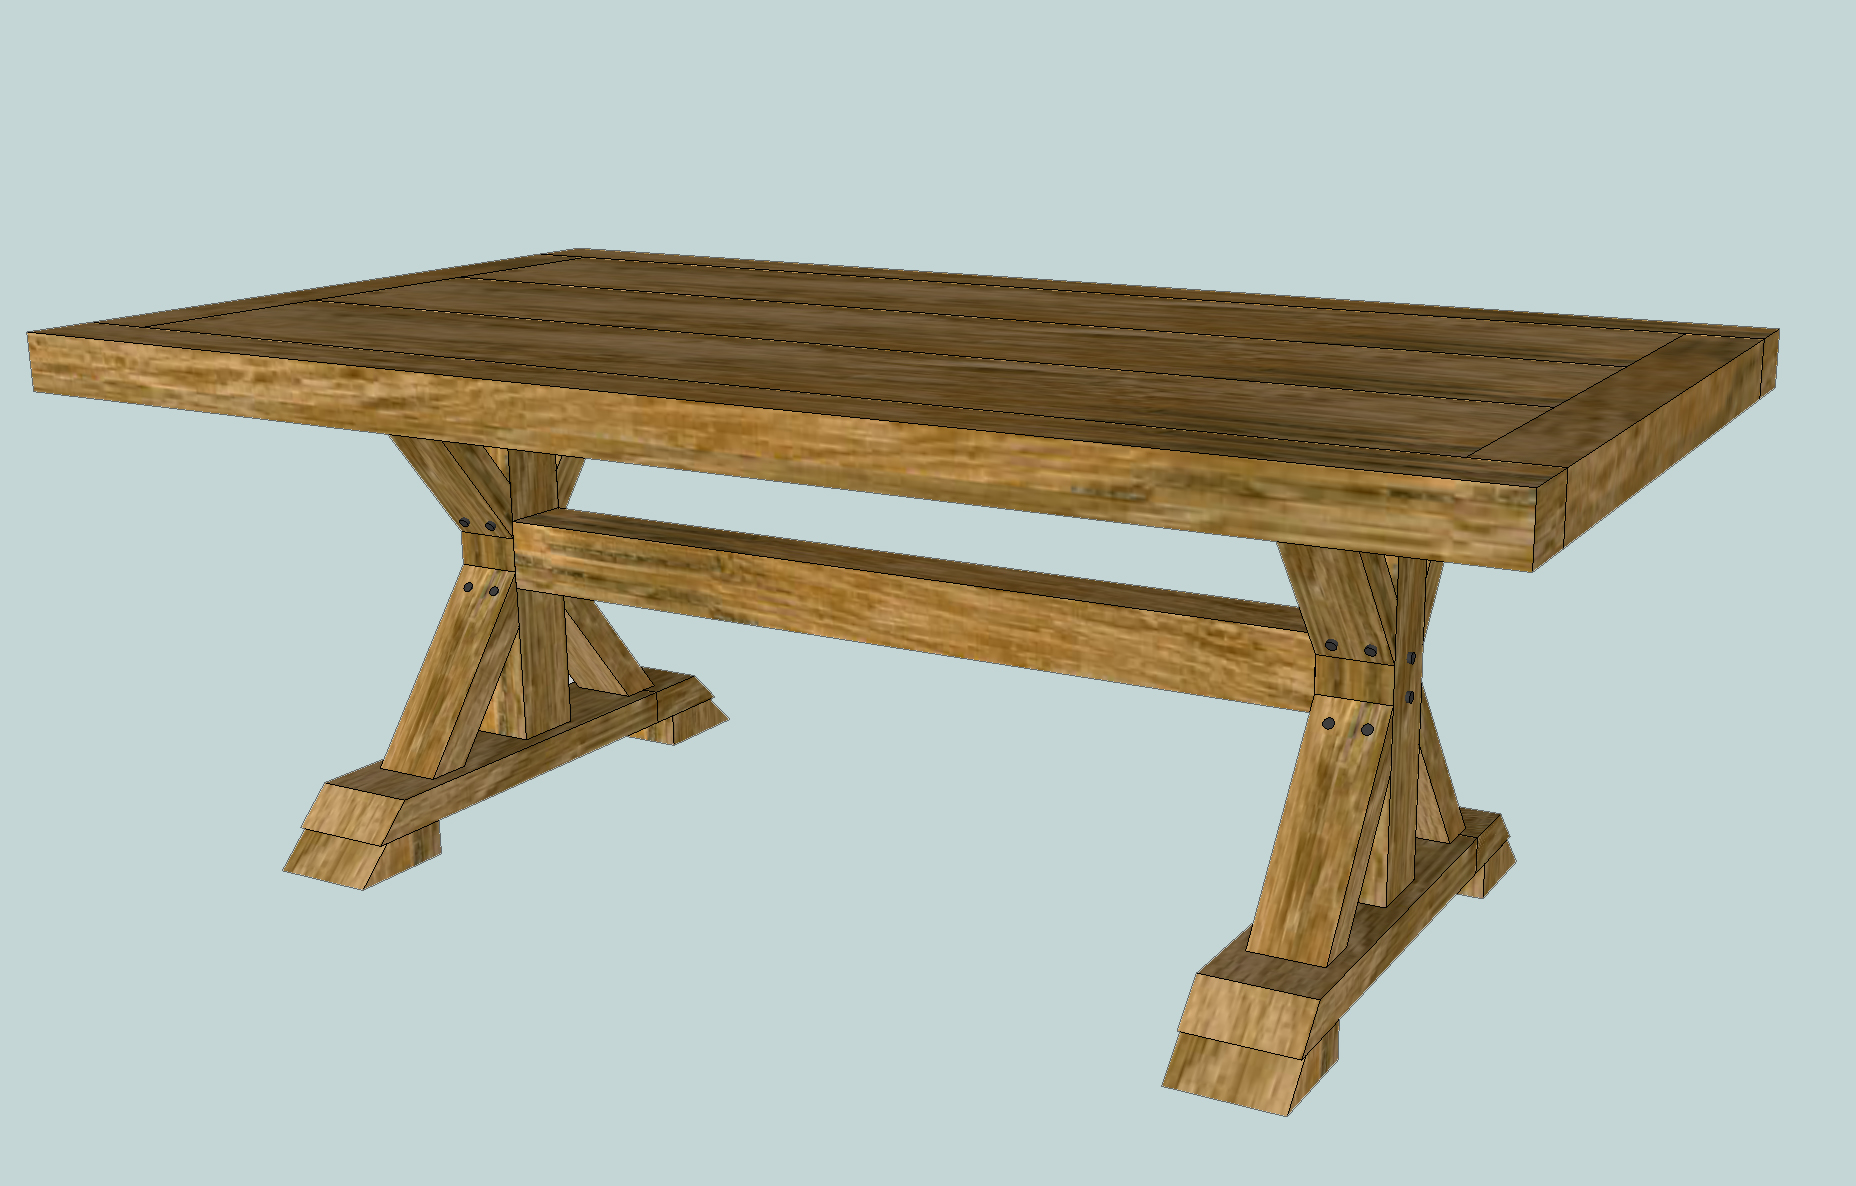
There’s something about 4×4 lumber that makes furniture look amazing. Maybe it’s the sturdiness, maybe it’s the shape. Whatever it is, I love it! A friend of mine recently asked me to build her a new dining table, and I was happy to oblige. She liked the X-Base Pedestal table I built my sister, but wanted a rectangular shape with a heftier top. So I edited the plans a bit to make two straight bases with a stretcher, and used some posts around planked 1×12’s for a beautiful, solid table. It’s certainly heavy enough to last a lifetime! In this post we are gonna learn How to Build a Chunky X Farmhouse Table.
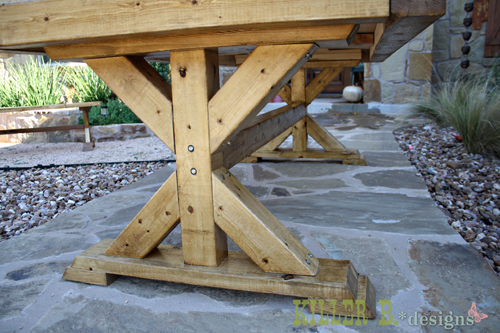
The base uses the same measurements from Ana’s plan. I decided to use 2×6’s for the top and bottom to make it even more sturdy looking.
Another nice change this time was splurging on pretty hardware. I used 5″ lag screws instead of screws, and it really does lend the table a professional feel.
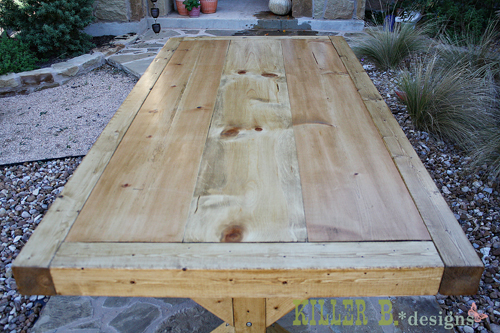
The top was quick and easy to put together. I just have three 1×12’s planked together with kreg pocket holes, and used the same pocket holes to attach the posts. Then a few more carriage bolts on the sides help keep the posts together.
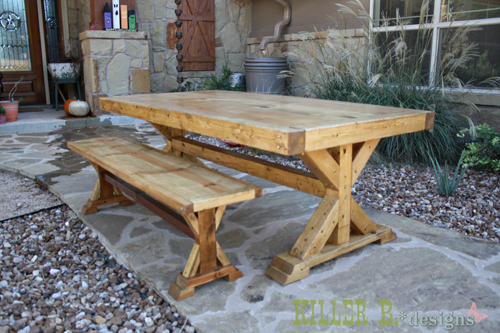
This is such a gorgeous set, and may be one I have to re-create for my own dining room! I was happy to build for a friend, and love that it will have a good life in its new home.
You may want to construct the table top and the legs, then move the table into place before connecting the legs to the top. This table will be large and heavy.
Materials you’ll need to build your own Chunky X Base Table:
Please note, using nominal US lumber (i.e. 2×6’s = actual 1.5″ x 5.5″), the finished size of this table should be 41 1/2″ wide x 80″ long x 28″ tall.
(I’ve included affiliate links for your convenience. I earn a small percentage from a purchase using these links. There is no additional cost to you. You can read more about affiliate links here.)
Lumber:
- 3 – 2x6x8′
- 5 – 4x4x8′
- 3 – 1x12x8′
- 2 – 1x3x8′
Hardware:
- 44 – 1/4″ x 5″ lag screws
- Box of 1 ¼” pocket screws
- Box of 2½” wood screws (to assemble bases)
- Wood glue
Tools:
Cut List:
- 4 – 2×6 @ 30″ cut at a 30 degree angle (top and bottom of table leg bases)
- 2 – 2×6 @ 30″ cut at normal 90 degrees (spacers for on top of table leg bases)
- 4 – 2×6 @ 6″ cut at a 45 degree angle (feet)
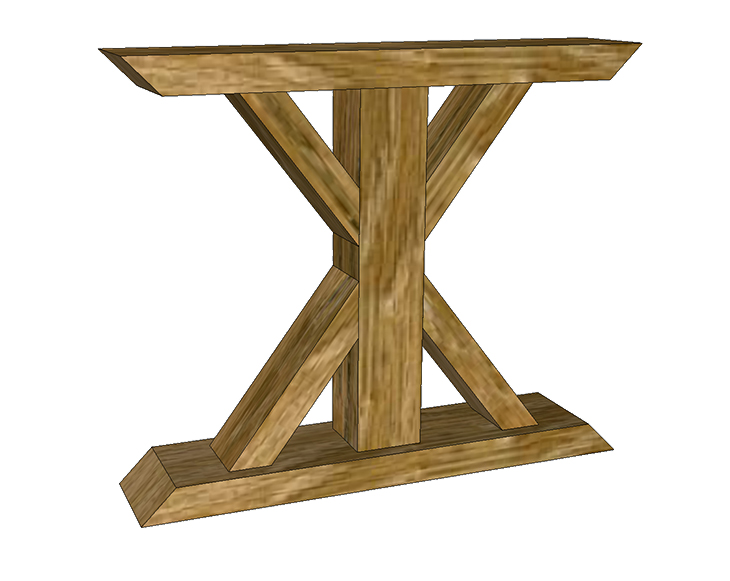
- 8 – 4×4 @ 13″ cut at a 45 degree angle (cross bracing for the X shape)
- 2 – 4×4 @ 21 ¼” (center upright support of the table legs)
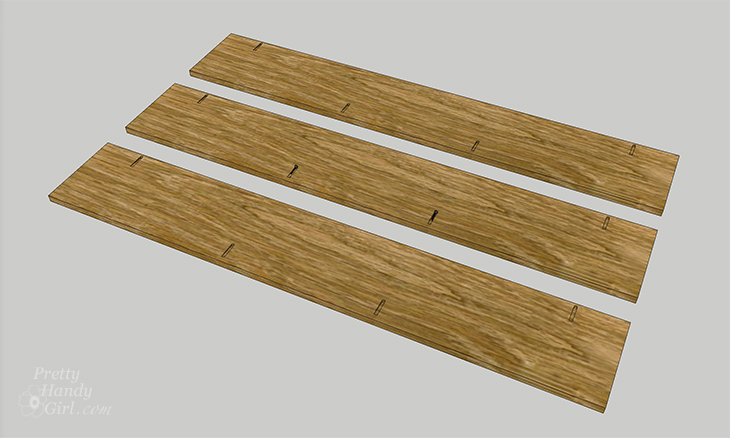
- 3 – 1×12 @73″ (table top)
- 3 – 1×3 @ 34 ½″(cut this after your 1×12’s are attached to be sure of measurement as 1×12’s can be 11 ¼” to 11 ½”)
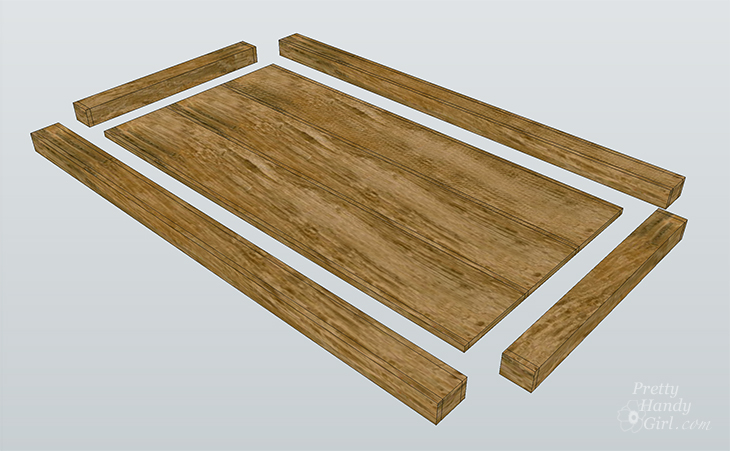
- 2 – 4×4 @ 80″ (long border pieces for table top)
- 2 – 4×4 @ 34 ½″ (cut this after your 1×12’s are attached to be sure of measurement)
- 1 – 4×4 @ 61″ (stretcher to connect table legs. Cut after legs and table top are built later in instructions).
Instructions:
Important Note: I highly recommend pre-drilling all holes before driving lag bolts or screws. Choose drill bits that are slightly smaller than your screws and lag bolts. This will prevent the wood from splitting.
Table-Top:
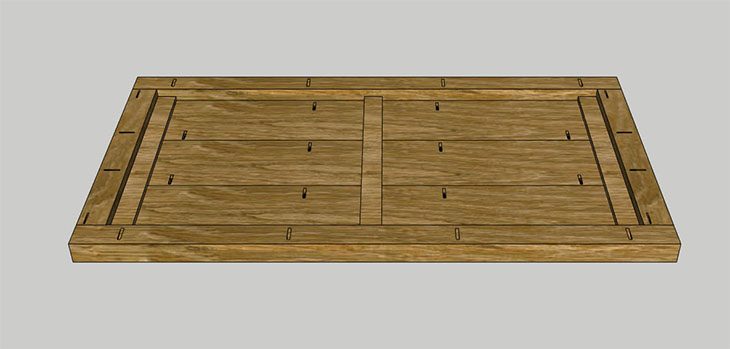
Lay the 1×12’s on a flat surface.
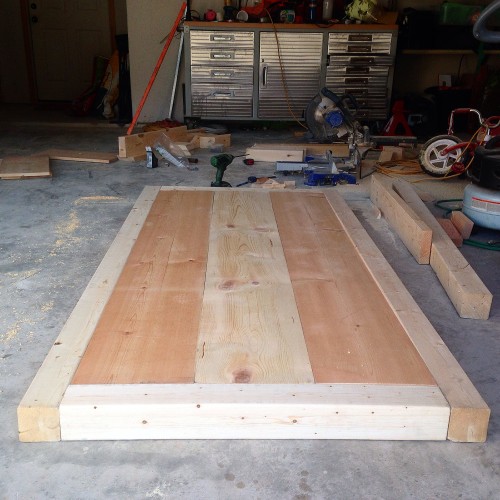
Connect three 1” x 12” x 73” with several pocket screws (adding wood glue at the joints) as roughly shown below.
Add additional pocket screws along the perimeter of this table top surface for connecting to the 4×4 border lumber.
Cut two 4×4’s to the same width as your 1×12’s now that they are joined. The measurement should be close to 34 ½”. Cut your three 1×3 cross pieces to the same width.
Drive two lag screws through the corners of the 4″ x 4″ x 80″ lumber into the two 4x4s you just cut. Then secure the three 1×3 cross pieces (using wood glue and/or the 1 ¼” screws) you just cut to the underside of the 1″ x 12″ boards. Space them evenly for the best support, but leave space on the outer edges of your table top for connecting the legs later.
Legs:
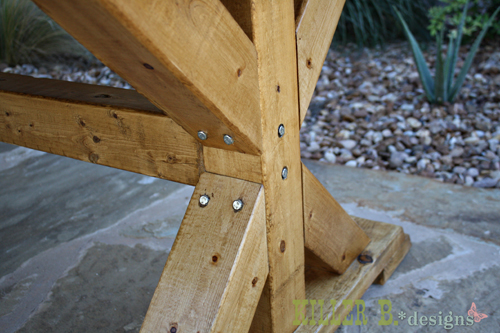
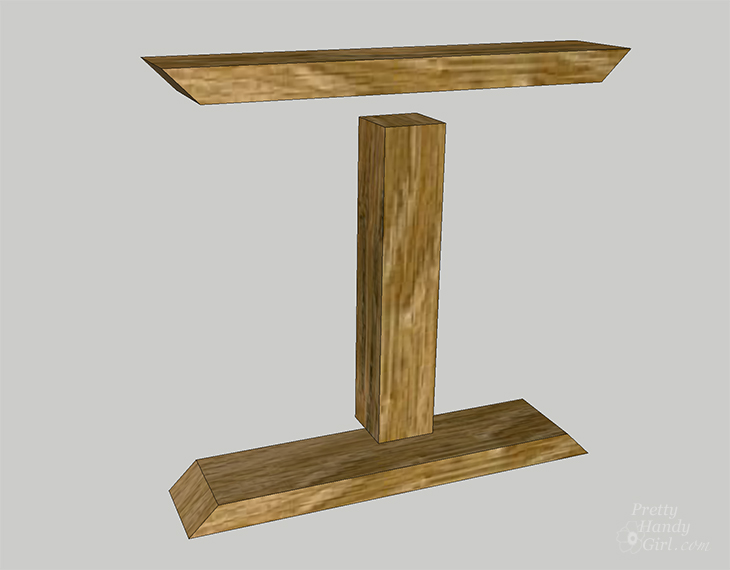
Use four 2 ½” wood screws driven through the 2″ x 6″ x 30″ top and bottom pieces to connect to the 4″ x 4″ x 21 ¼” upright support.
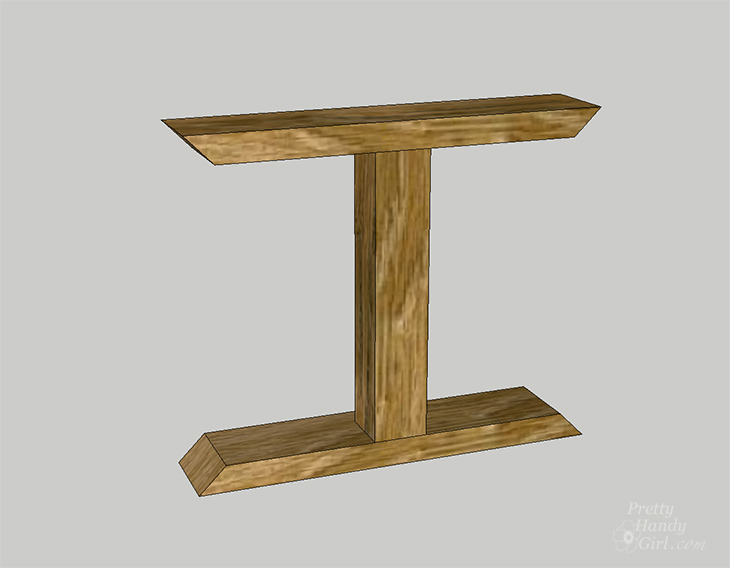
Attach the 4″ x 4″ x 13″ angled pieces to the top and bottom 2″ x 6″s and the upright supports using lag screws (two into the top and bottom of each 4″ x 4″ angled into the 2″ x 6″ pieces.)
Attach the 2″ x 6″ x 6″ feet to the bottom of the table legs with four 2 ½” wood screws on each foot.
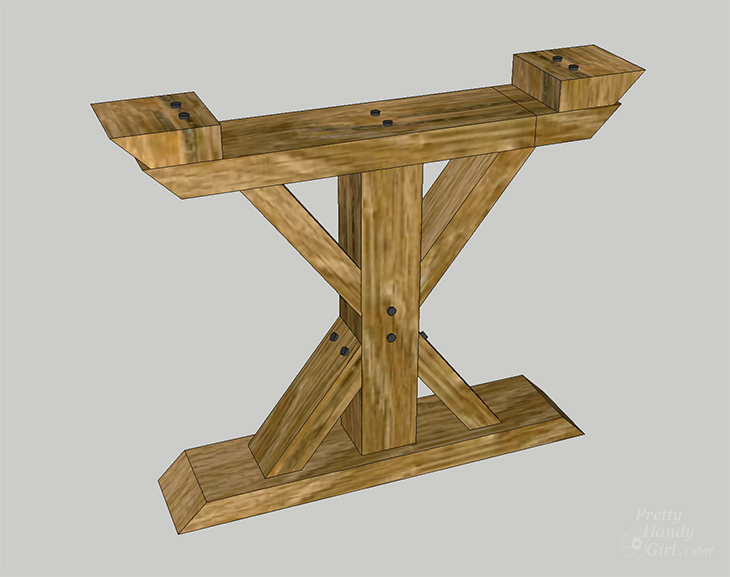
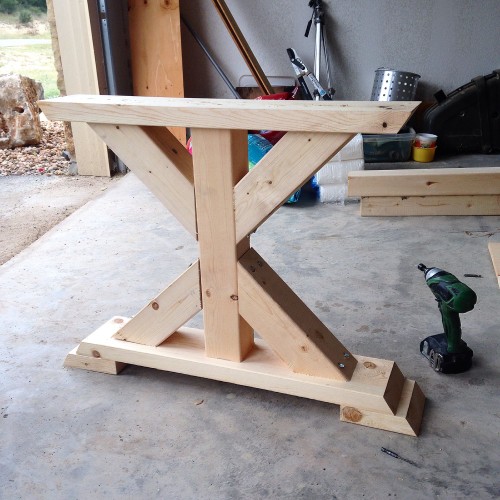
Repeat for the other table legs. Your table legs should look like this:
Attaching Table-Top to Legs:
Use 2 ½” wood screws to attach the 2×6 @ 30″ spacers to the underside of the table top where the legs will eventually attach. (This will elevate the table top so you can see all of the table leg as shown when the table top is secured.)
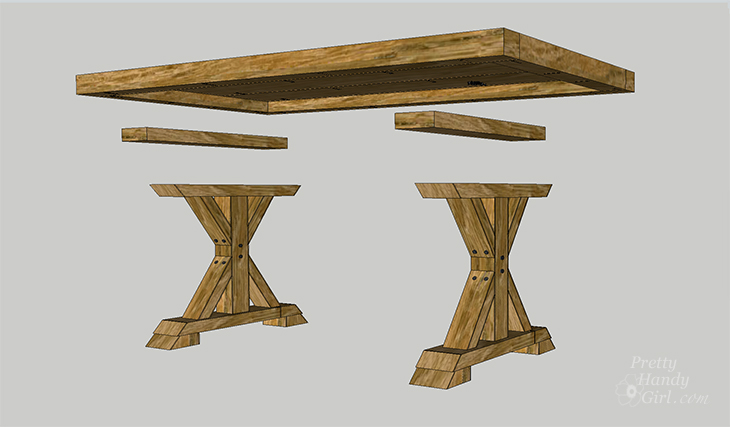
Measure the inside dimension of the table top from one spacer to the other. Cut the last 4×4 to this length (should be approximately 62″.) Attach the two table legs to the 4″ x 4″ x 62″ stretcher and two lag bolts through each leg and into the stretcher as shown below.
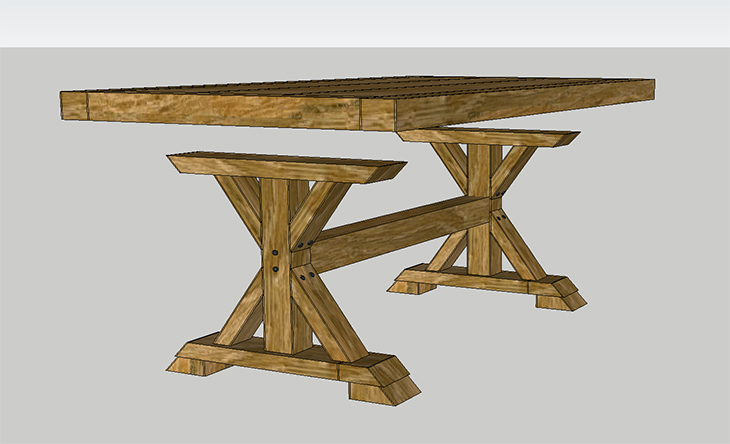
Add the table top and secure the legs to the spacers with 2 ½” wood screws through each leg top into the spacer.
And your table is built!
Wrap-Up:
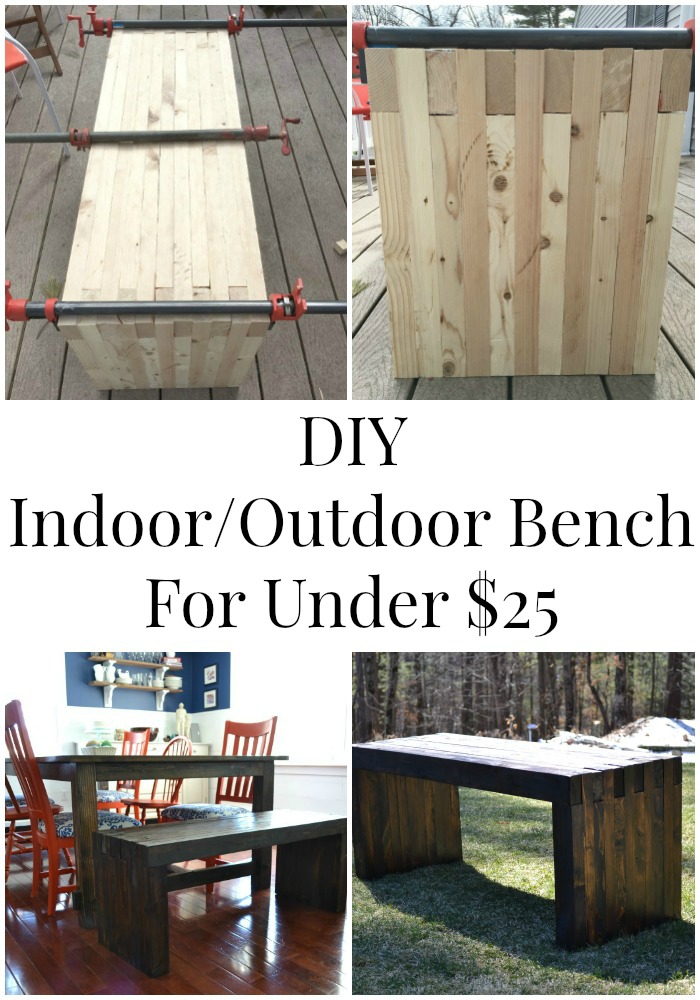
To build benches for your table, you can follow Shanty 2 Chic’s X farmhouse benches which are the same style.
I hope you liked this tutorial for How to Build a Chunky X Farmhouse Table. Be sure to have a helper on hand to help you move this beast! It is definitely made rock solid.

~ Read more of Brooke’s Tutorials ~
If you liked this tutorial, you’ll love the instructions to build your own farmhouse table.
Or How to Build an Indoor/Outdoor Modern Bench:

Hi, great project!! Curious to know how exactly you screwed in the carriage bolts in the corners of the table tops without nuts on the end…should this just be lag bolts? Thanks for the info
Jordan, good catch. Sorry about the confusion. Use lag screws not bolts.
Did you find any? I know Home Depot carries then where I live.
Also looking forward to doing this table. Just finished the benches from Ana’s site.
Do you have an estimated cost for this project?
Sorry I don’t. You should be able to get a cost by going online to your local home improvement center.
Hey Brittany,
Where did you find untreated 4X4 posts?
Thanks
You’ll have to shop at a wooodworkers supply shop like a Woodcraft or a lumber yard. And you might need to cut it down.
What kind of lumber did you use? I am having a hell of a time finding 4x4s hardwood in the area I live and I want to make sure this table stands the test of time. I was looking for a hard maple or white oak but with no luck.
Thanks!
If you are really struggling to find 4×4’s you can sandwich and secure 2×4’s together. Otherwise, look in a woodworking supply or true lumber yard (not your home improvement super store.)
How did you fasten the table top, did you put screws through the top of the table?
“Add the table top and secure the legs to the spacers (on the bottom of the table top) with 2 ½” wood screws through each leg top into the spacer.”
Hello, You said you used Pine for the table, was that pine everywhere? I can find pine 4x4s anywhere….
How old is your oldest table like this? Just wondering how it handles expansion and contraction with changes in humidity over time.
What type of wood did you use to build your table?
Pine
Are there plans out there for the matching bench in the photo above?
what wood do you use for this?
What are the actual table measurements? Length, width and height? Thank you!!!
Also curious to what stain.
Building this table today! And the legs seem awfully short?? I just want to make sure that it really is 21”
If you feel like it’s too short, measure another table and see what it measures. Then be sure you add in the height of the feet and 2 by lumber under the “x” and on top of it.
in the cut list and directions you mention a 1×3 but a 1×3 is not mention in the lumber list. is something missing or wrong?
Dan, thanks for pointing this out. I just added it to the lumber list.