Hanging Art easily using Hang-o-Matic
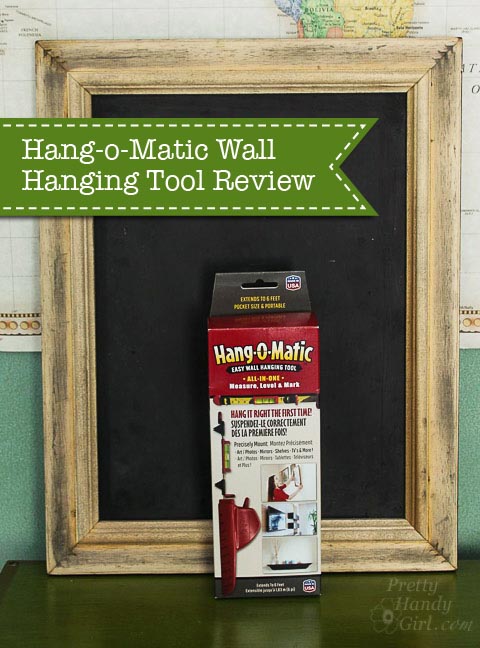
This is one of the multitude of gadgets that gets sent to me for review. Most don’t make it to the light of the blog. But, this little gadget has proved useful in my toolbox. Stick around to learn how you too can Hang Art easily using Hang-o-Matic. And why I gave this little tool a second chance.
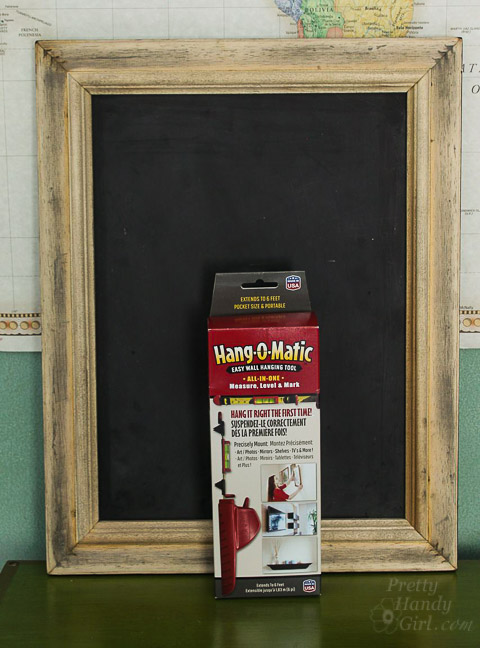
The creators of Hang-o-matic sent me this tool to try out. The first one I received was defective. The moveable clip was loose and wouldn’t stay put. I explained to the creators that I didn’t like the tool because the point wouldn’t stay where it was set. Apparently there had been some production issues and they shipped me a second one. I was doubtful, but after trying the tool a handful of times, I have to admit it is the perfect tool when you are hanging art, decor, or mirrors that have two hooks.
Instructions for Hanging Art Easily using Hang-o-Matic:
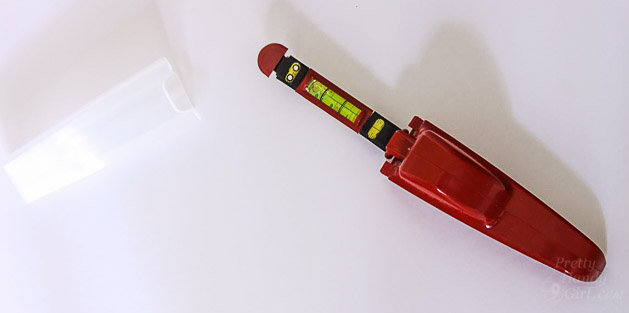
Remove the cover from the ruler/level section.
Mark the height you want to hang your art with a pencil.
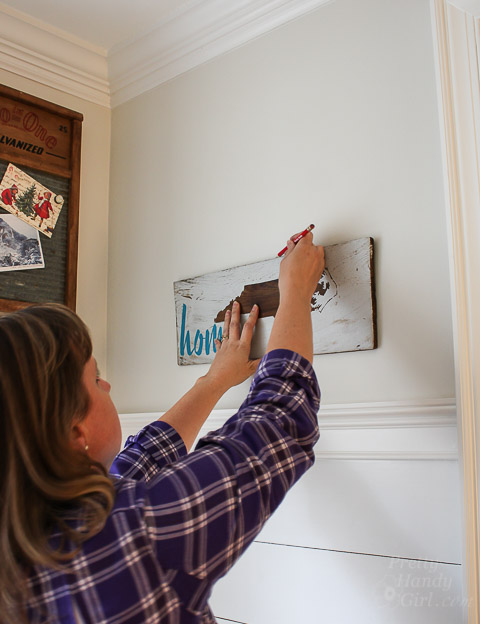
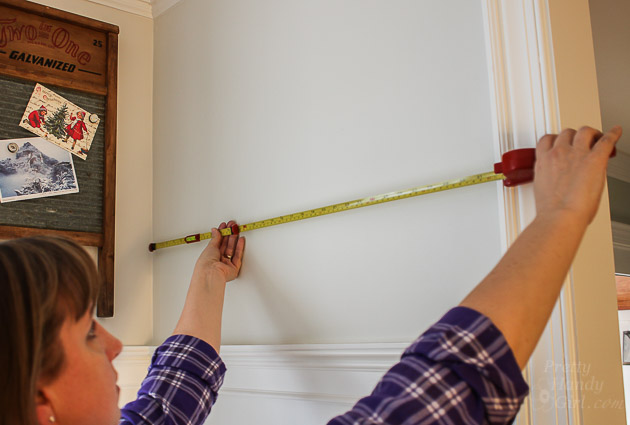
Use the tape measure in the Hang-o-matic to find the center of your wall.
Turn your art piece to view the back. First measure how far down the hanging clips are. Transfer this measurement onto the wall where you made the mark for the top of your art. Place the end point of the Hang-o-matic in the center of your first hanging clip. Line up the sliding point with the 2nd hanger.
Place the Hang-o-matic onto the wall at the height of the hangers.
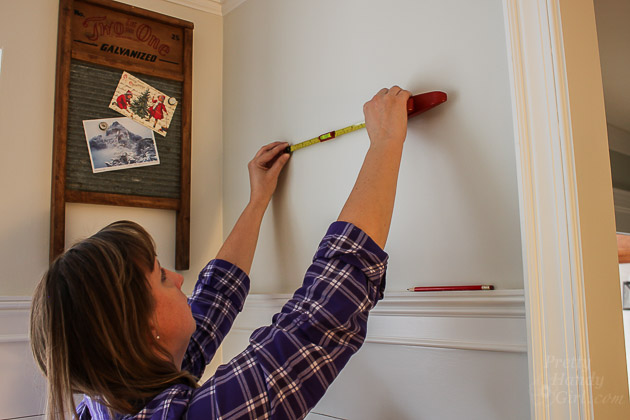
Level the Hang-o-matic using the attached bubble level.
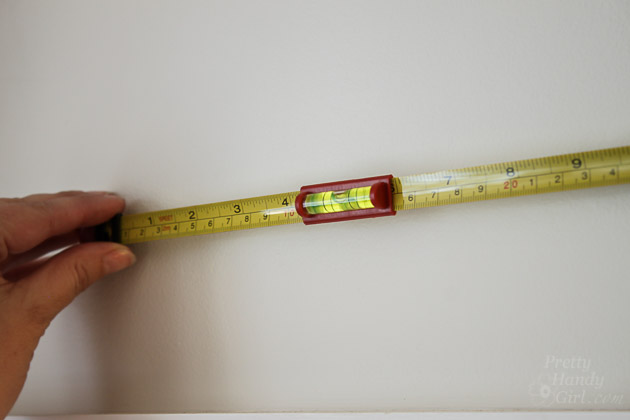
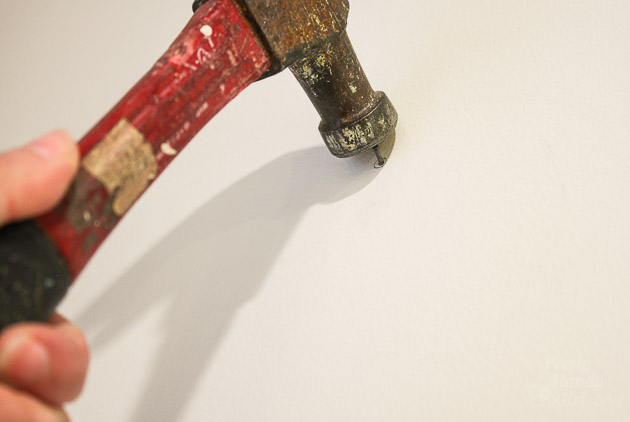
Press both points into the wall to leave a mark. The tool leaves a small double dimple making it easy to find.
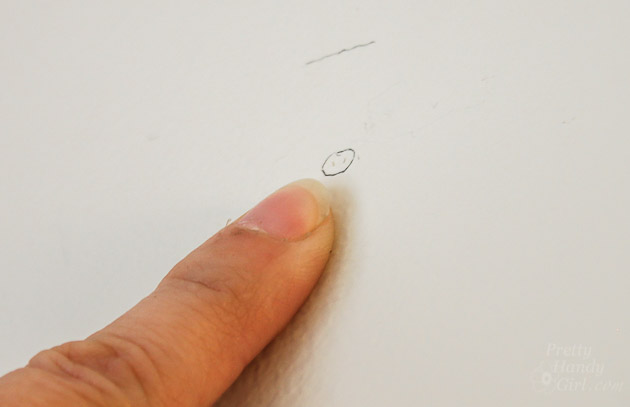
Hammer a nail into both marks.
Hang your picture up. BOOM! You’re done.
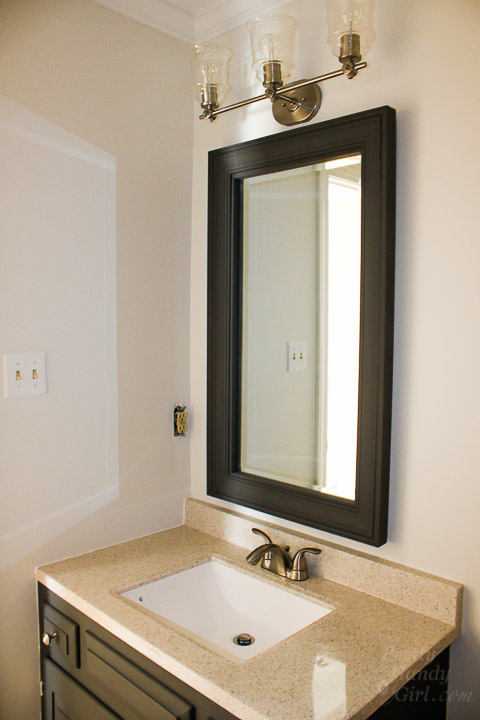
I would have struggled and spent a lot more time measuring to hang this heavy bathroom mirror at my client’s house. Luckily the Hang-o-matic saved me time and the headache of any potential mistakes.
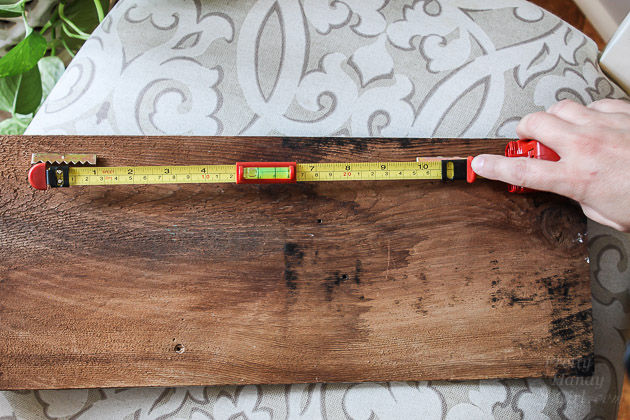
The points are sharp enough to leave a dimple on wood so you can use it on doors or paneling.
Here’s a quick video that shows how easy the Hang-o-matic is to use:
Want to buy your own? Purchase on Amazon (affiliate link) or find a retailer near you.
Do you have any tips, tricks or gadgets you like to use when hanging wall art? Do tell!
![]()
Disclosure: This is a product review. I was sent a complimentary Hang-o-matic to try. I was not paid to mention Hang-o-matic or told what to say. I will always let you know if you are reading a sponsored post or product review.

I am glad you reviewed this! I think this makes it much easier to use and I really should buy one! I am in the process of redoing the house one baby step at a time!
Where has this been all these years with all the artwork that I’ve hung! Thank you for this, a real keeper. X
Definitely a nifty tool.
much more technical then putting a dab of lipstick on the sawtooth hanger and pressing the picture against the wall. The resulting lipstick mark on the wall is where I put the hanger.