How to Easily Test for Lead Paint
Good morning boys and girls! Today I have a tale with a moral for you. Go ahead and gather around and put on your listening ears.
This is the story of a woman named Mrs. Noggin.

She moved into an old house built in 1940. A friend told her that old homes could contain lead paint, so she turned to the yellow pages to find someone to check her home for lead paint.

First, she called Mr. Nose. Mr. Nose claimed to be the most knowledgeable expert in the field. He could sniff lead paint from a mile away.

He spent about 15 minutes with his snout held high, then pronounced her home safe. But, she didn’t feel safe. So she called Mr. Tongue. He claimed to be the most professional expert lead paint detection service in the area.

He spent 20 minutes licking every painted surface in her home and then gave her a licked stamp of “lead-free” approval for her home.
She was still a bit concerned so she contacted Eyeball Lead Paint Detector. He told her to rest easy because he could spot lead paint in a snowstorm while blind-folded!

He spent only 10 minutes searching her home. His eyes blinked quickly as he scanned each room. Then he told her that he hadn’t seen a speck of lead paint.
Mrs. Noggin felt better and settled down for her coffee and some YouTube browsing.

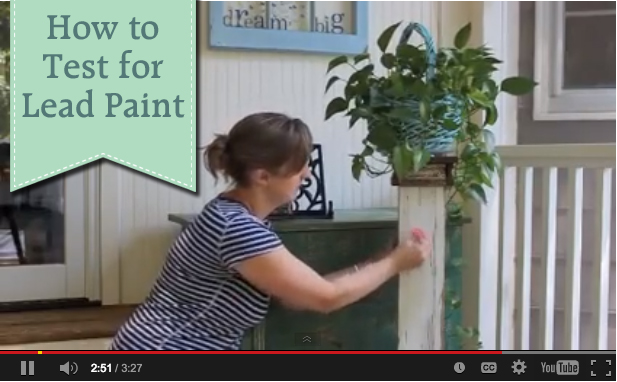
That’s when she stumbled upon this video:
Poor Mrs. Noggin. She should have watched the video before calling the “so-called” experts.
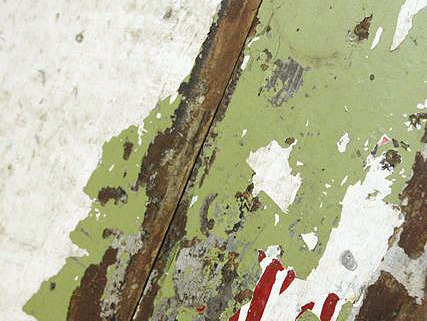
She had no idea that lead is not detectable by sight, smell, or taste (although lead paint does have a sweet taste making it attractive to kids and pets when they lick or chew on it).

The moral of the story boys and girls is to use your head to detect lead! Spend a few bucks to purchase your own 3M LeadCheck Swabs. You’ll have the results in seconds and avoid costly testing.
If the area you are testing has multiple layers of paint, the top layer may be clear, but underlayers may still contain lead. If you are going to disturb the paint, it’s best to use a razor blade to cut through all the layers of paint and then test with the LeadCheck swab.

In all seriousness, if you test and the results are positive, you should definitely proceed with caution. One teaspoon full of lead dust can be enough to contaminate your home. If lead paint is used on a surface in your home (doors, windows, trim molding, floors, etc.), it’s best to hire a certified lead paint abatement specialist. Lead paint professionals are trained and certified to handle lead paint removal safely.
For items that can be thrown away like toys, furniture, or other items, contact your local solid waste management facility to determine how to properly dispose of the item.
I contacted our county’s solid waste management department and was told that our landfill can accept lead-painted furniture as long as the lead paint is not in liquid, fine chips, or powder form. They told me I don’t need to bag it, but I did anyway because I don’t want anyone to accidentally be exposed. Plus, I am fearful that a curbside treasure hunter may unknowingly take home my lead-laden pedestal.

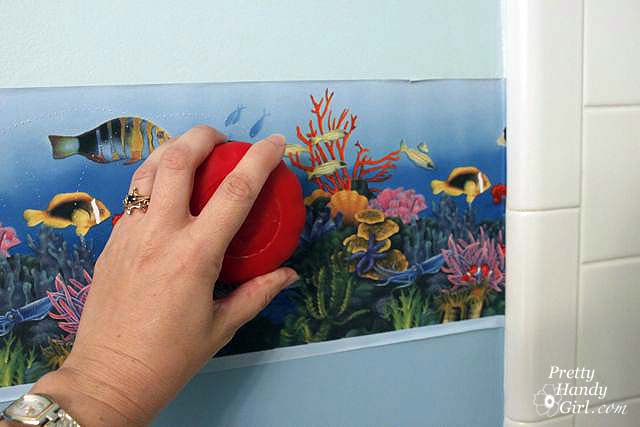
I also called the National Lead Information Center and asked about my green cabinet that had tested positive for lead paint (where the paint wasn’t chipping.) The representative told me that I can coat the cabinet in a few coats of a topcoat (like polyurethane or polyacrylic) to protect myself and my kids. I will definitely not sand it, which would cause the lead particles to become airborne. Instead I’ll gently clean the surface with a disposable wipe. Then once it is dry I will coat it with multiple layers of polyurethane.
She did recommend having my children tested for lead in their system. Unfortunately, the most accurate test requires a blood draw.
For more information about lead paint contact one of these resources:
National Lead Information Center: 1-800-424-LEAD
Consumer Product Safety Commission: 1-800-638-2772
EPA Website


