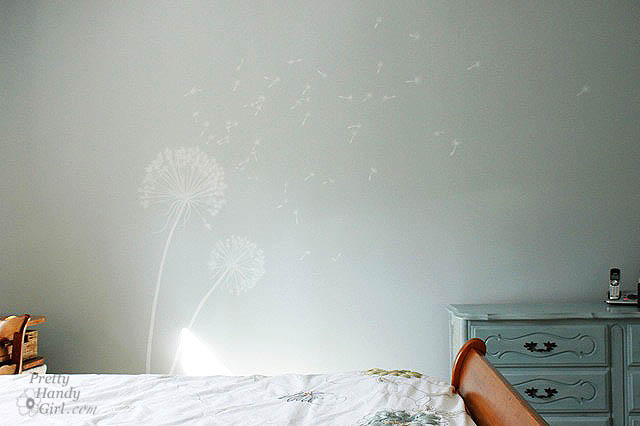
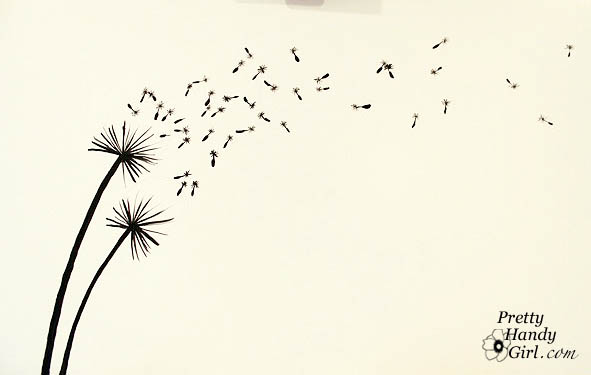
I’m back from a wonderful weekend getaway with three of my fellow mom friends. We enjoyed laughter (with a few snorts), good conversations (with no interruptions), cake (without a care about calories) and a few glasses of wine (with no whine from children!) It was heaven. As promised, I finally have the tutorial for painting this dandelion wall graphic.

I know some of you may be intimidated by painting something graphic on your walls. But, I’m hoping if I break it down for you it won’t look so hard.
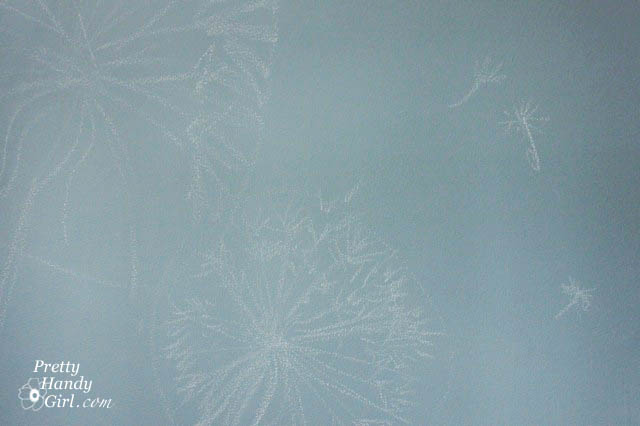
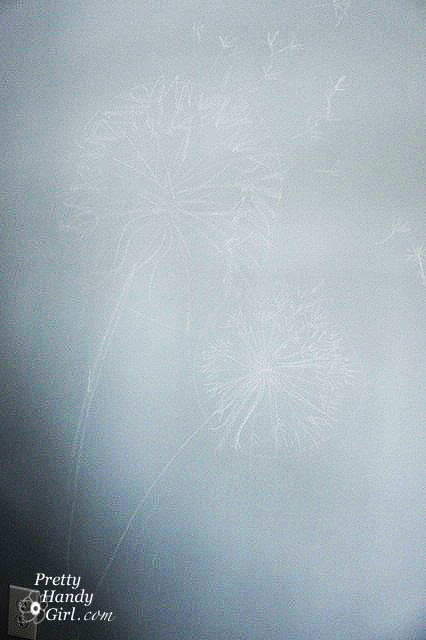
Start by sketching out your design using chalk or pencil. I personally prefer chalk, but if your walls are too light you can use pencil.
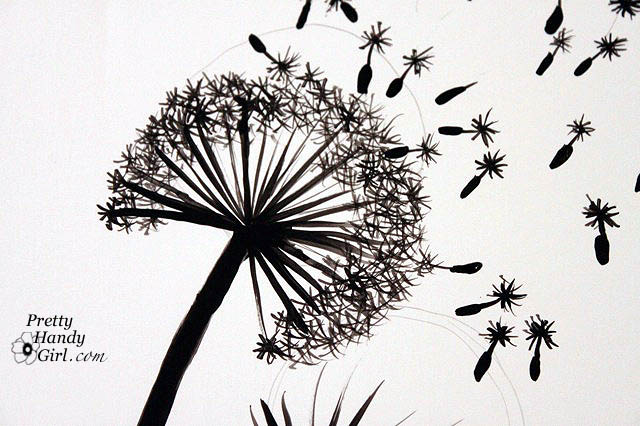
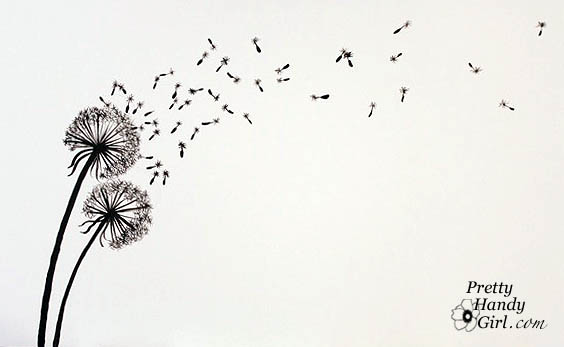
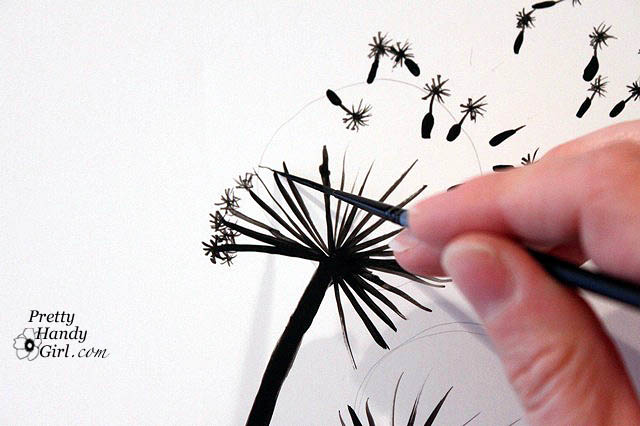
From here on I’ll show you the design using black paint on white paper (because it will be easier for you to see.)
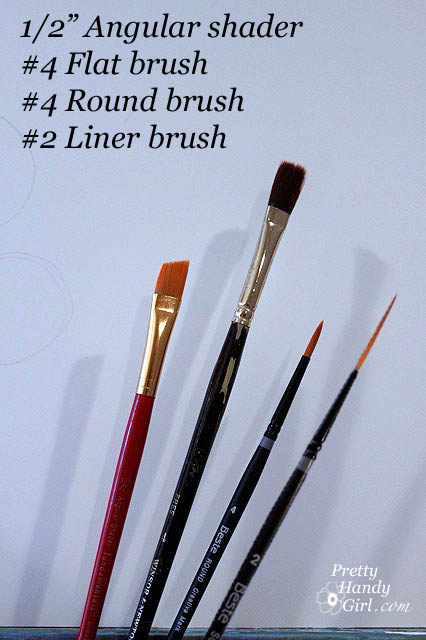
You will need a few different paint brushes. These are the ones I used:
Chose a contrasting paint color for your mural. For ours I used a mixture of 2 parts white ceiling paint mixed with 1 part of the wall color. But, you could use straight white or black for a more striking graphic.
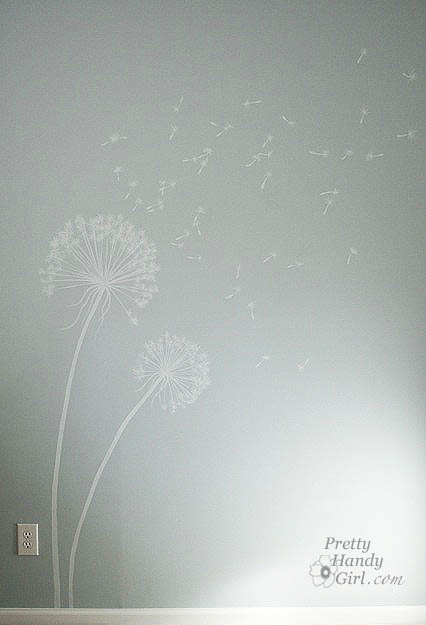
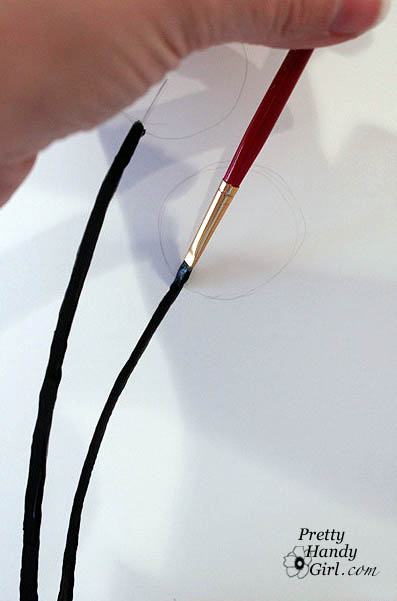
Start by using the flat brush and paint the two stems first.
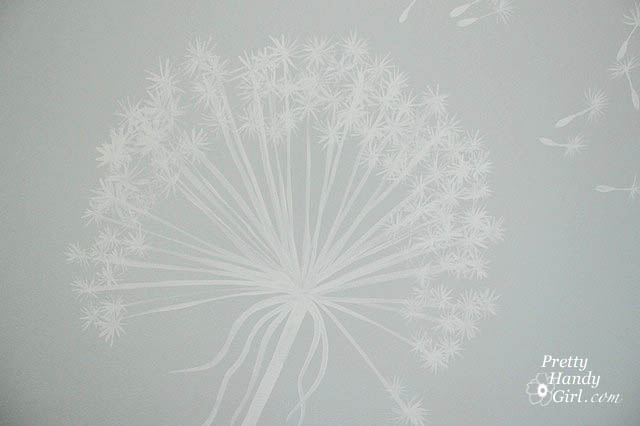
Next use your round brush or liner to make the lines on the dandelion head.
Lightly set the brush on the wall and drag it away from the center in a straight line.
Think of it like drawing a very large asterisk on steroids.
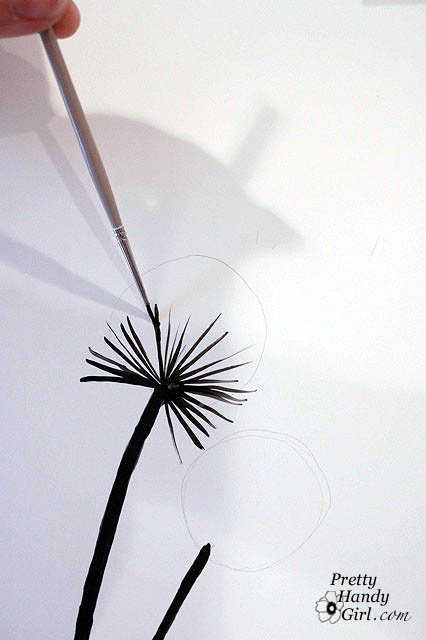
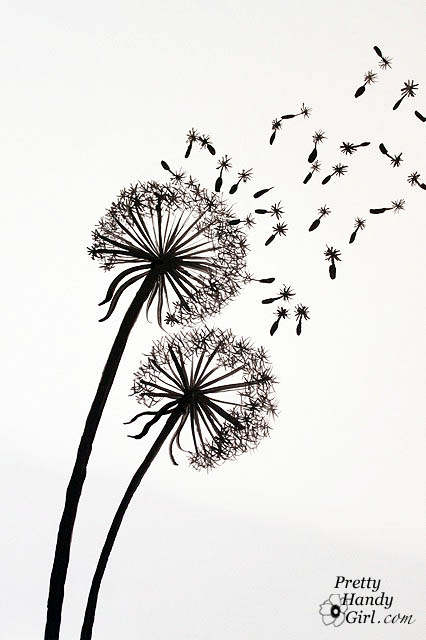
When you are done with the two heads they will look like this.
Next you will paint the seed for each fly away fairy (did you call them fairies as a kid?)
Gently press the round brush down to make each seed. Do not drag it.
Randomly make your seed heads at different distances and angles.
Try not to be too symmetrical. And be sure to paint more seeds closer to the flower and fewer as they blow further away.
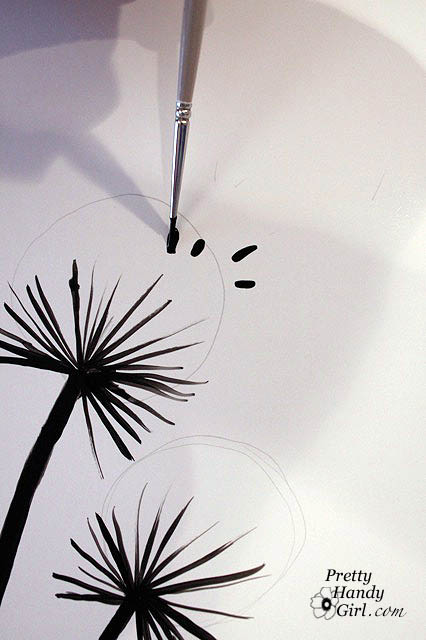
Next take the liner brush and add a stem to all the seed.
Be careful not to use too much paint or too much pressure.
Make an asterisk on the end of each seed stem. Add extra arms until you like how it resembles a dandelion fairy! Keep in mind that these don’t have to be perfect.
They will be viewed from across the room. So, don’t stress out.
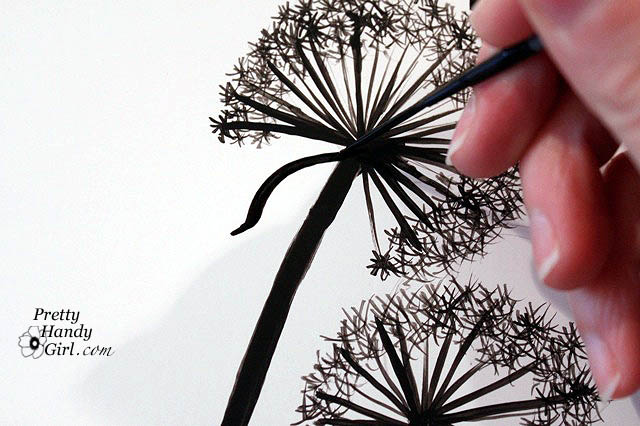
Add more “asterisks” around the head of the dandelion until it looks full.
Continue adding until your dandelion head is filled out.
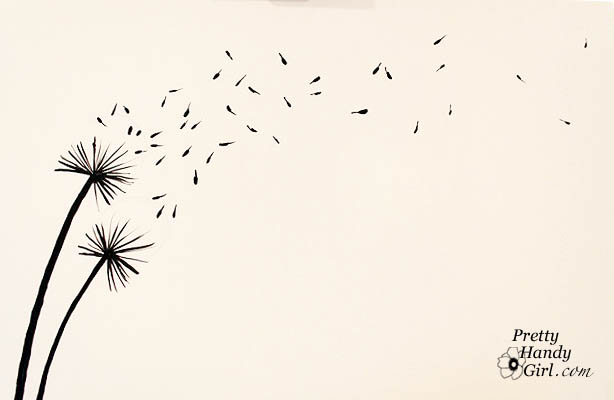
Finish up by adding leaves to the underside of the dandelion. Use your liner or round brush to create an an elongated “S” shape.
Now step back and admire your work! If you really screw up you can always take some of your wall color and paint over your mistake.
Now you too can have a peaceful windblown dandelion mural on your walls.
What do you think? Will you try it?
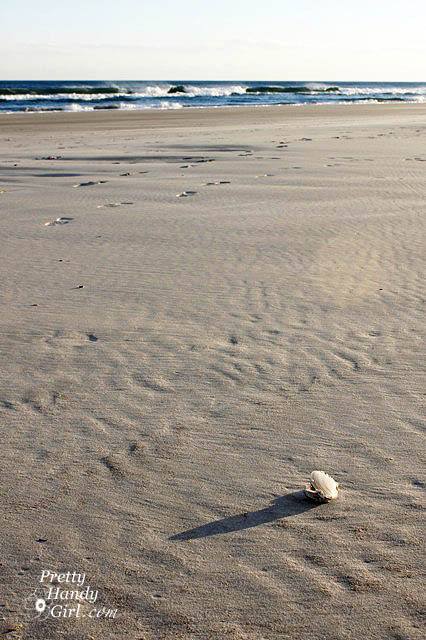
Speaking of peaceful, Topsail Beach was very peaceful (despite a strong wind and cold temperatures.) Here are two of my favorite pictures from the weekend.
A Solo Flyer at Sunrise
One Lone Clam Shell

You might also like:


This paint effect is so pretty! You are definitely hand with an artist brush! 🙂 See you in a little over a week my friend.
What a wonderful tutorial! I love how it looks on your walls – subtle. But I also love the black on white too!
Would love for you to stop by this weekend and share it on Passion for Paint!
looks great I just might try that one if it looks crappy its just paint 🙂
Wow. I would never have the patience for this! You are amazing!
Oh, that's beautiful. The painting and the beach pics! I love them both!
Have you joined my giveaway going on now? I hope you can! http://alittleknickknack.blogspot.com/2011/01/giveaway-with-sometimes-i-swirl.html
So lovely! Thanks for sharing!
Cristina from ohmyohme.com
This is so pretty!! Thanks for posting a tute! I'd love for you to link up to my new linky party, Tute {Yourself} Tuesday!
LittleEme.blogspot.com
I am impressed!! Seriously that is amazing!
-Rene
That's gorgeous! I can't draw AT ALL but I really feel I could do this with your fabulous directions! Thanks so much for this, I'll be linking.
Way cute!
Those look amazing and it almost seems like I could do it…NOT!!! I am like Kim, not enough patience to make it look good! However, you make it look easy!
That looks great and you have way more patience than me. Thanks for sharing the tutorial for those who may try it.
Hello, I would like to let you know that you have been awarded The Stylish Blogger Award and The Versatile Blogger Award. Congrats!
Cindy @ http://thepurplefroggieclaystuff.blogspot.com/2011/01/stylish-blogger-award-and-versatile.html
This is beautiful and such a great tutorial! I have bookmarked this idea. 🙂
I love this! I love little detailed projects where I can use my super thin brush. Hmm where can I put a dandelion… 🙂