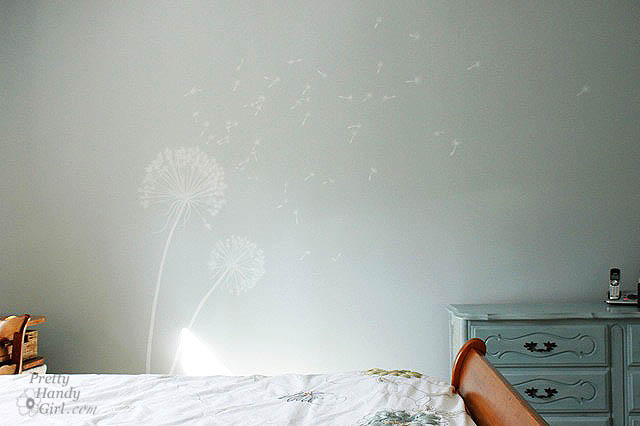
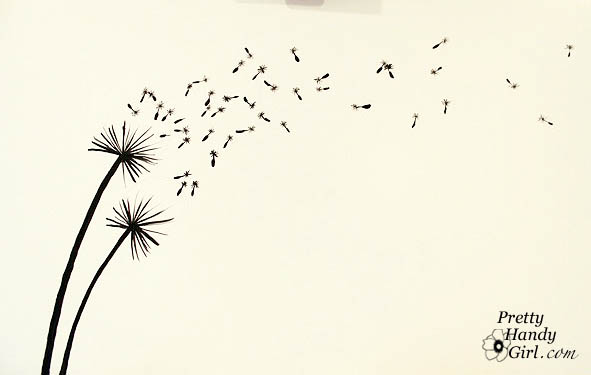
I’m back from a wonderful weekend getaway with three of my fellow mom friends. We enjoyed laughter (with a few snorts), good conversations (with no interruptions), cake (without a care about calories) and a few glasses of wine (with no whine from children!) It was heaven. As promised, I finally have the tutorial for painting this dandelion wall graphic.

I know some of you may be intimidated by painting something graphic on your walls. But, I’m hoping if I break it down for you it won’t look so hard.
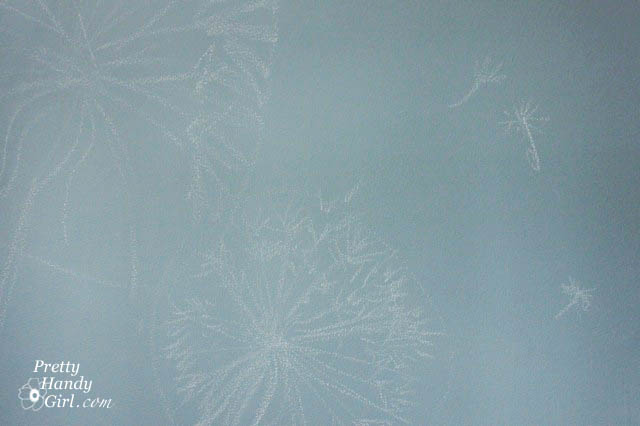
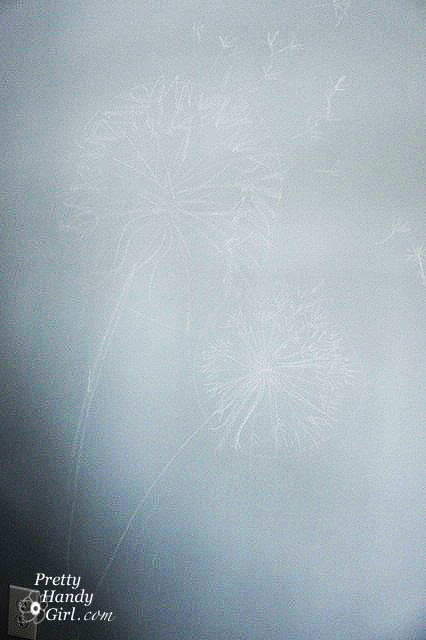
Start by sketching out your design using chalk or pencil. I personally prefer chalk, but if your walls are too light you can use pencil.
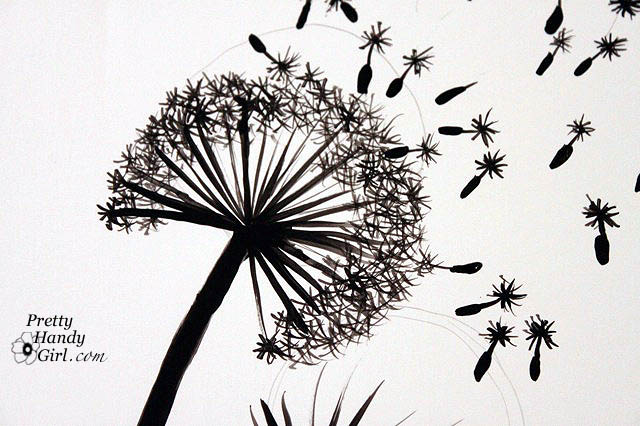
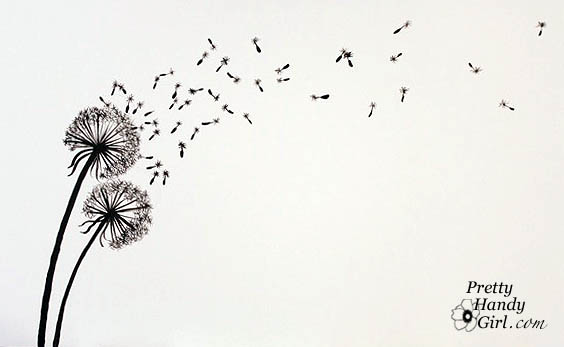
From here on I’ll show you the design using black paint on white paper (because it will be easier for you to see.)
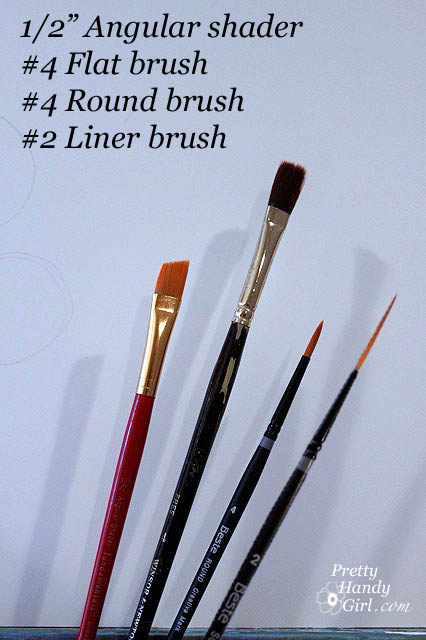
You will need a few different paint brushes. These are the ones I used:
Chose a contrasting paint color for your mural. For ours I used a mixture of 2 parts white ceiling paint mixed with 1 part of the wall color. But, you could use straight white or black for a more striking graphic.
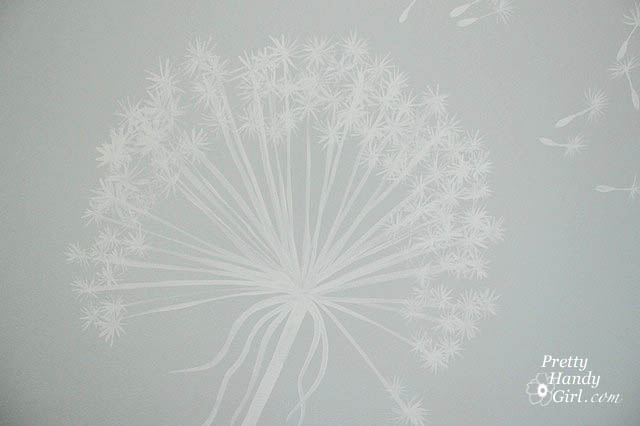
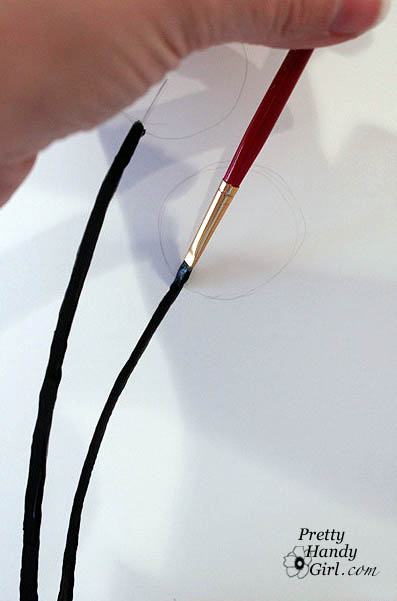
Start by using the flat brush and paint the two stems first.
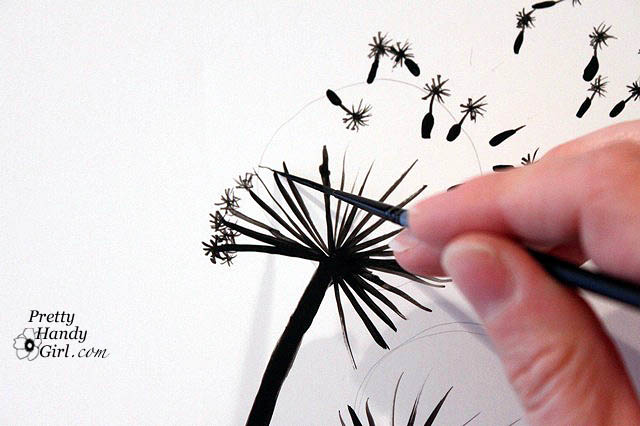
Next use your round brush or liner to make the lines on the dandelion head.
Lightly set the brush on the wall and drag it away from the center in a straight line.
Think of it like drawing a very large asterisk on steroids.
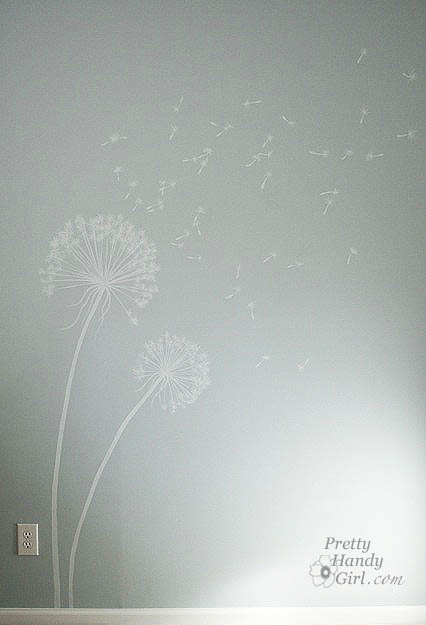
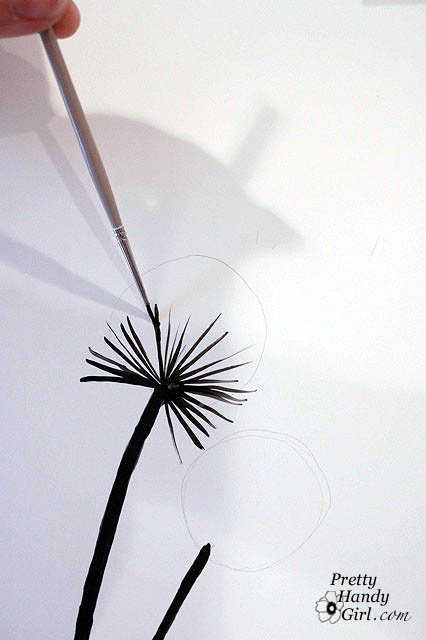
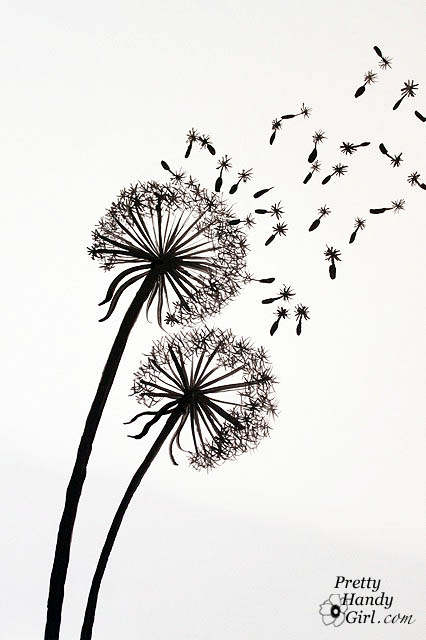
When you are done with the two heads they will look like this.
Next you will paint the seed for each fly away fairy (did you call them fairies as a kid?)
Gently press the round brush down to make each seed. Do not drag it.
Randomly make your seed heads at different distances and angles.
Try not to be too symmetrical. And be sure to paint more seeds closer to the flower and fewer as they blow further away.
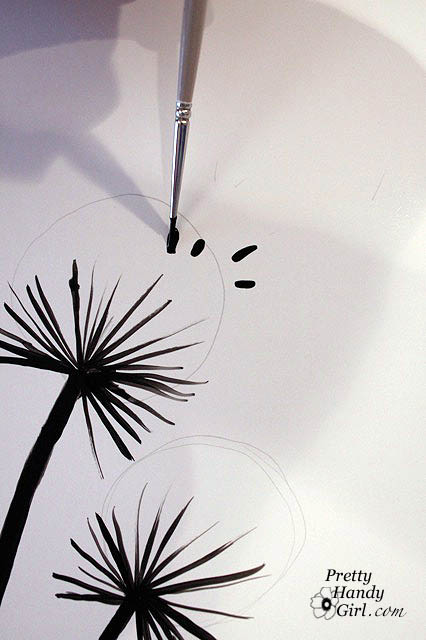
Next take the liner brush and add a stem to all the seed.
Be careful not to use too much paint or too much pressure.
Make an asterisk on the end of each seed stem. Add extra arms until you like how it resembles a dandelion fairy! Keep in mind that these don’t have to be perfect.
They will be viewed from across the room. So, don’t stress out.
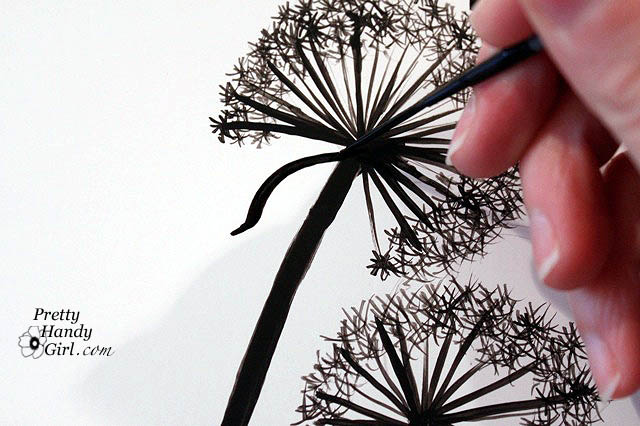
Add more “asterisks” around the head of the dandelion until it looks full.
Continue adding until your dandelion head is filled out.
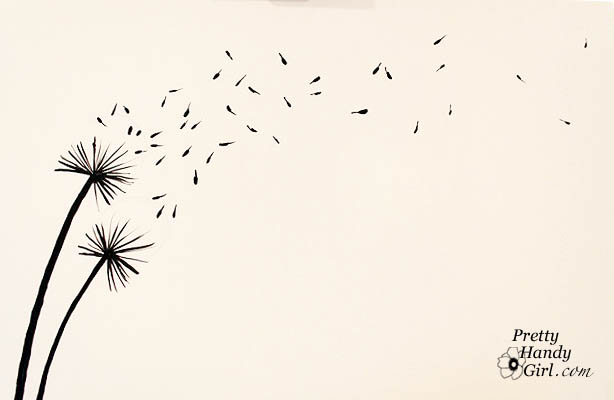
Finish up by adding leaves to the underside of the dandelion. Use your liner or round brush to create an an elongated “S” shape.
Now step back and admire your work! If you really screw up you can always take some of your wall color and paint over your mistake.
Now you too can have a peaceful windblown dandelion mural on your walls.
What do you think? Will you try it?
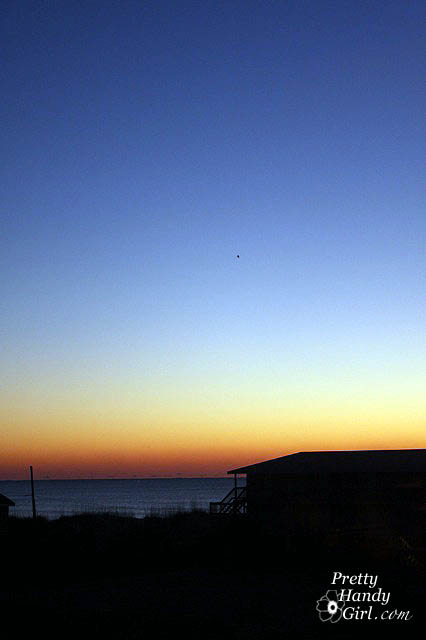
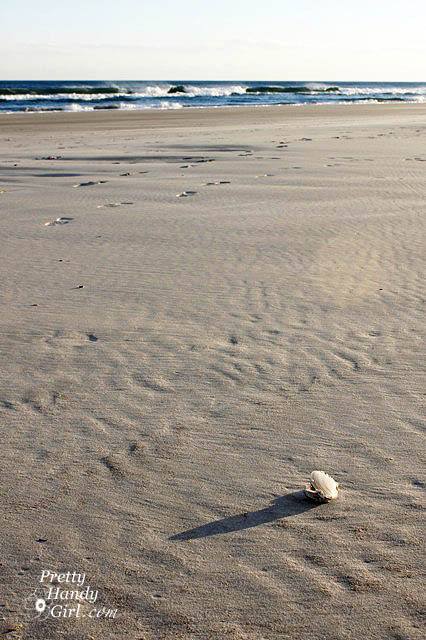
Speaking of peaceful, Topsail Beach was very peaceful (despite a strong wind and cold temperatures.) Here are two of my favorite pictures from the weekend.
A Solo Flyer at Sunrise
One Lone Clam Shell

You might also like:


your work is amazing.i like to try it.thanks 🙂
love the tutorial and your photography too.
I absolutely love this…I’m going to try this on canvas, I’m thinking 3 pieces…thanks for the great tutorial!
Hi,
I am inspired! I just might have to try this dandelion graphic- and for someone with VERY limited artistic abilities, that’s a huge leap.
You mentioned Topsail Beach and it brought back memories. When I was 12yrs old, my family lived in Hampstead, NC for a year and we went to Topsail Beach all of the time. We’ve since relocated to the midwest. About 4 years ago, I took my daughters back and we rented a condo for the week right on the beach. It was lovely…. Sounds like you had a very peaceful break 🙂
I absolutely love this! I’m obsessed with doing this but I would like to do it on shower curtains. Any suggestions? I have you saved in may favorites! You are amazingly talented! Thanks for the many inspirations!
You should be able to do that as long as it is a fabric shower curtain. Just use fabric paint. If you are talking about a plastic liner, you might be able to paint with acrylic paint, but I’m not sure how it would hold up over the years.
i love it!!! thanks for the tutorial!
Love the dandelions! Your tutorial is AMAZING, I think I might be able to handle that! Love your blog, you are mighty talented girl!
Donna @ http://www.d-eatrunplay.blogspot.com
Very pretty! I'm your newest follower. thanks for the tutorial ! 🙂
Woohooo! I copied you, then linked you on my blog! Trust me, yours looks WAYYYY better than mine turned out, but I sure did appreciate your inspiration for a little DIY big wall art! Mad props!
This tutorial is AMAZING!!!! you did a terrific job. Thanks so much for linking up to Topsy Turvy Tuesdays. I am featuring this on my blog tonight!
Came across your blog from OnePrettyThing. Thank you for sharing. I find this inspirational. 🙂