Door & Picket Fence Nightstand – I "Picked It" from the Trash
My best friend from elementary school will be flying in today from New York. I have a sweet little retreat all made up for her in our guest room. I promise to post pictures of the whole room in the near future (when the sun – and sons – cooperate with me.)
Our guest room is full of discarded treasures: a rebuilt curbside chair, an upholstered bench, a full size bed, and a little curved desk. But, one of the focal pieces in the guest room is a night stand made from a discarded door and leftover picket fence pieces.

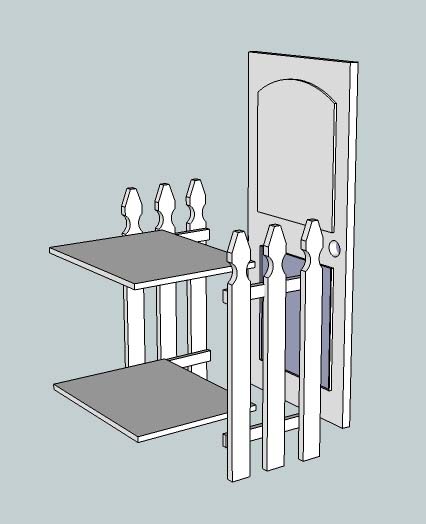
So, here is the tutorial for you. I hope you will excuse my first attempt at using Google Sketch Up. These sketches should give you a pretty good idea how to construct the night stand.
I started by cutting two boards for the shelves. They were cut to the width of the door and the depth of the picket fence sections.
I cut two cleats out of 2″ x 4″ boards (shown in green).
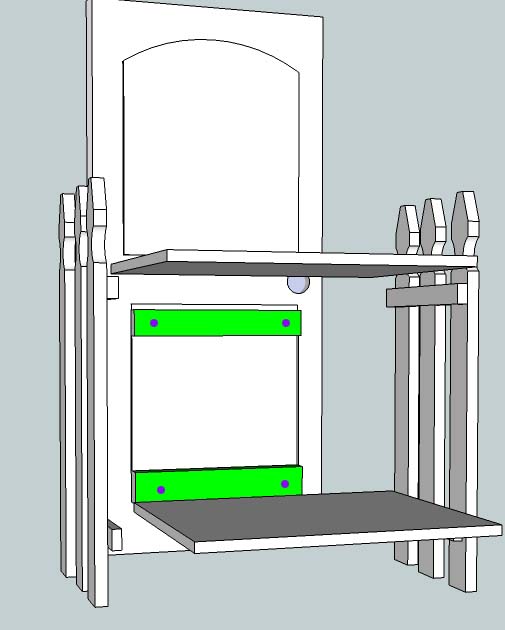
And screwed them to the door (purple circles), making sure that the top of the cleats were level with the top of the horizontal cross boards on the picket fence.
I braced the picket fence pieces to the door using L-brackets.

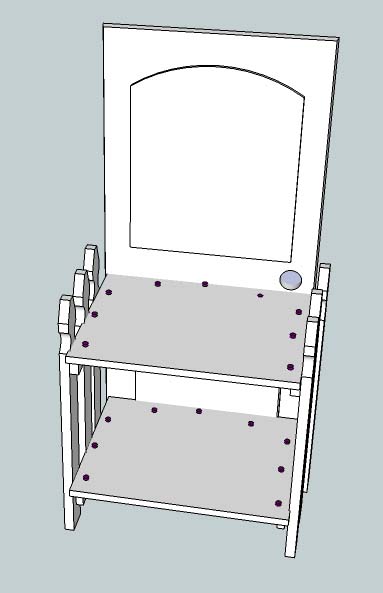
I laid the two shelves on top of the cleats and cross boards. And drove screws down to hold it in place (purple circles).
Next, I cut some face boards (shown in aqua below) to the same width as the nightstand front.

I used finish nails to nail them to the front, then added some decorative moulding to the face boards.
I used wood putty to fill all the screw and nail holes, and caulk to smooth the seams of the moulding (see here for more details on caulking and filling nail holes.)
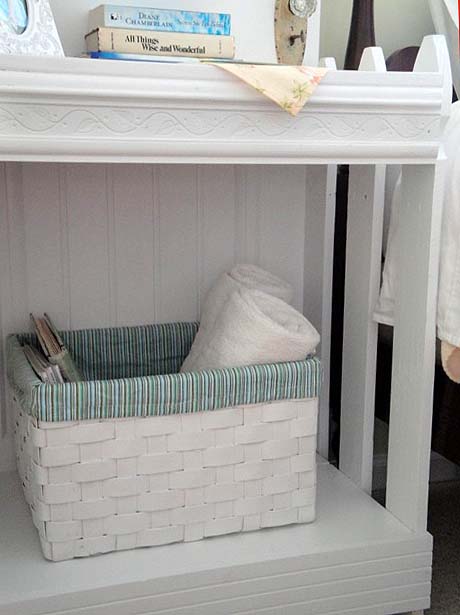
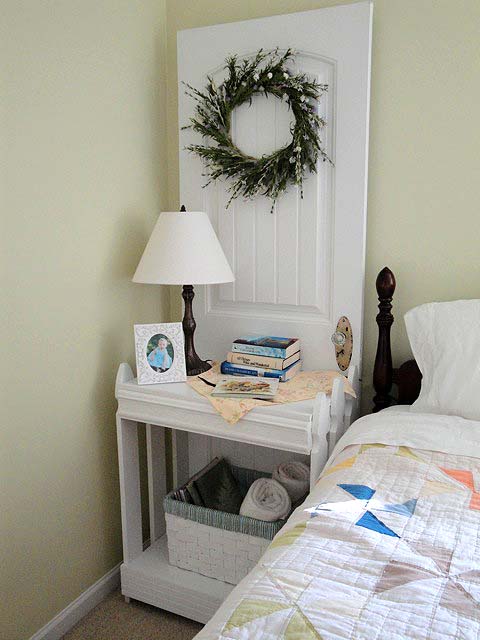
Then I painted the nightstand white and accessorized it. I’m still deciding whether I should distress and glaze the nightstand. Feel free to give me your opinion. I am all ears.
Here is my door & picket fence nightstand, all ready for our first guest since re-decorating the guest room.

If you are ever in the Raleigh, NC area, you MUST eat at NoFo,
then shop upstairs after your meal.
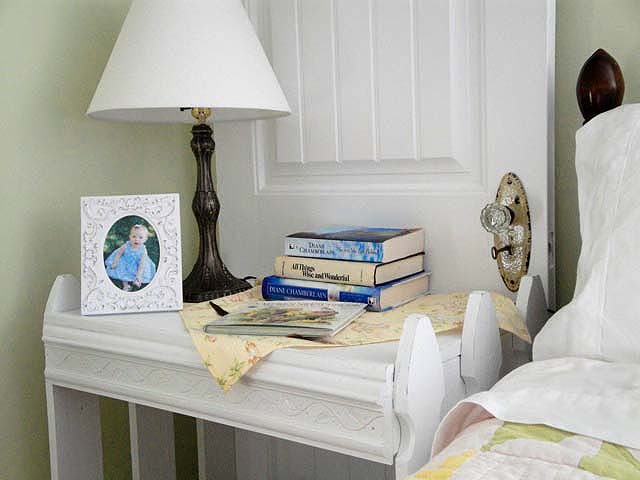
A goodwill lamp and a picture of my niece who lives too far away!*
*(bold comment solely for the purpose of guilting my sister into moving closer.)
Sharing with the CSI Project White Challenge:
Great results! La
Thank you so much for linking up to http://www.thetshirtdiaries.com. I am having a Stash-Busting September party. Check the blog for details soon…
Pretty Handy indeed! Love the few posts I've seen so far. And, I've got to check out google sketch up.
Susanne.
How ADORABLE!! I love that you posted detailed plans on how to make our own! Thank you:-))
Desiree- http://CamelotArtCreations.blogspot.com/
That is one cute table. I love the vintage knob and key. I'm sure any guest would love to use the room.
Wow, you are handy! Thanks for the visit and encouraging words this week for me! I will need to check out more of your blog for inspiration! I'll use a powersaw someday!
This is a fabulous post with great diagrams. New follower!
Ah, great project to do,
THis was great…so glad you shared again. Anytime….would you just mind adding my link, button, whatever saying you are joining my party. Thanks so much.
Great illustrations(for us directionally prone folk)and I love this idea, that door knob is to die for!
So fun! Very creative.
I love that idea!!
This is over the top! I have never seen this done and just love the unexpected, great job!
That is adorable!
Wowsers…that is just beyond amazing!!! Absolutely gorgeous! I'll have to show this to my MIL, my FIL recently made a headboard out of an antique door they had.
This is such a cute idea! I especially love how you have the key hanging out of the lock. Such a welcoming retreat for your guests!