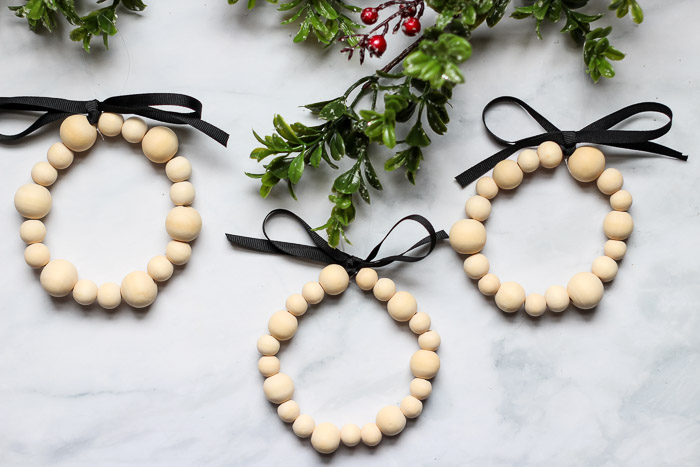
DIY Wooden Bead Christmas Ornaments
Ready to do some Christmas crafting? You’ll love how simple these wooden bead Christmas ornaments are to make and they look amazing on any Christmas tree.

DIY Wooden Bead Christmas Ornaments
Crafting with wooden beads is a popular trend and I can definitely see why! Not only are they inexpensive, but the fun things you can make with wooden beads seem endless. After you’ve finished making a few of these wooden bead Christmas ornaments, you may want to whip up a few of these personalized keychains too.
What I love the most about these DIY Christmas ornaments is that they can fit in with any type of Christmas decor. Leave them unfinished with a simple bow for a minimalistic tree, paint the beads in different colors for a modern tree, or add a big buffalo check bow to fit in with a rustic tree. Let’s dive into the tutorial so you can get crafting.
Materials:
(I’ve included affiliate links for your convenience. I earn a small percentage from a purchase using these links. There is no additional cost to you. You can read more about affiliate links here.)
- Assorted wooden beads
- 24 gauge wire
- Wire cutters
- Needle-nose pliers (optional but good to have)
- Ribbon of choice
- Beading line or fishing line
- Optional: Jute twine or Bakers twine
Instructions:
Step 1 – Decide on size and layout
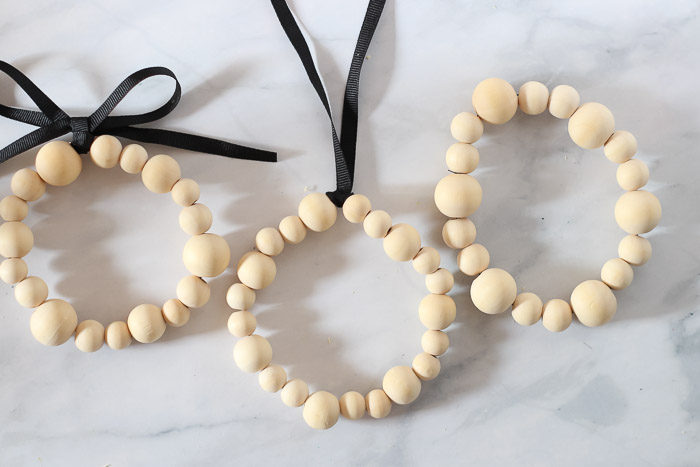
For the first step, determine what size you’d like the finished wooden bead ornaments to be. The ornaments I made for this project ranged from 3.25″ to 3.5″ in diameter. If you have a small tabletop tree, you may consider smaller ornaments.
Before starting, you’ll also want to determine the pattern of beads you’ll be using. It’s helpful to lay them out in order so that you don’t get confused or lose track when stringing beads onto the wire.
Step 2 – Cut wire to length
Using wire cutters, cut a length of wire to double, plus 1″ of your finished ornament size. The ornaments in this tutorial are roughly 3.5″ in diameter, so I cut a piece of wire to 8″ long. Loosely bend the wire to fold in half, leaving a loop at one end.
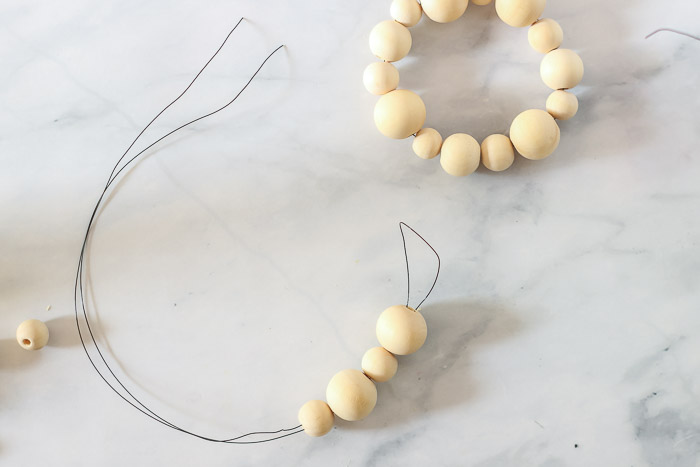
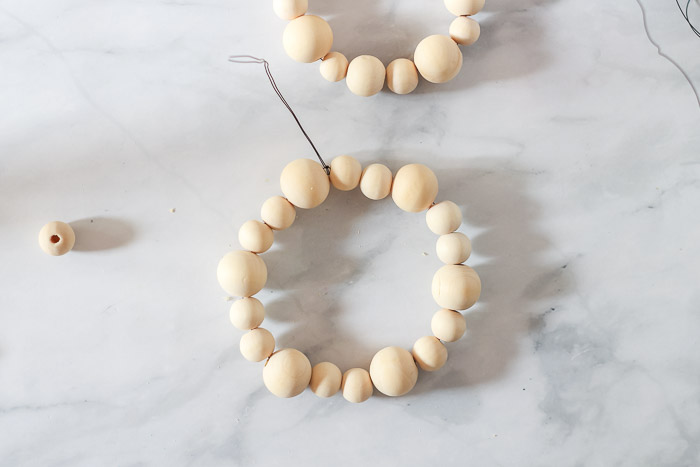
Step 3 – String beads
String the beads onto the wire so they end at the looped side. If your beads slip off the end, gently stretch out the loop so that it keeps the beads in place until you are finished stringing.
Step 4 – Tie the ends
The next step can be a little tricky, especially if you don’t leave yourself at least an inch of wire to play with. Slip the double ends of the wire through the loop at the other end.
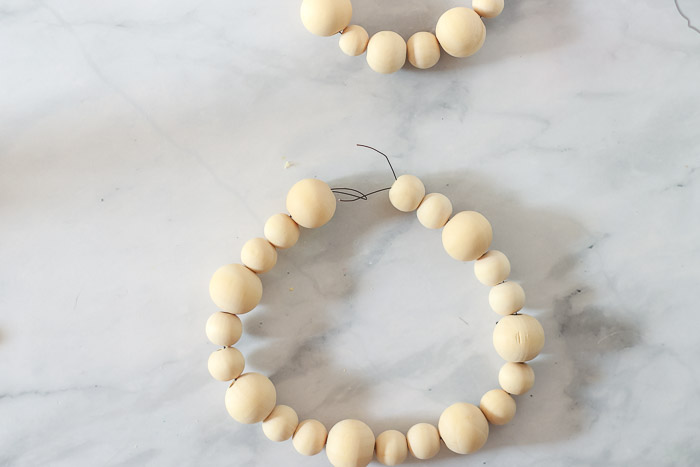
Then using your fingers or pliers, wrap the ends of the wire around until it is tight and secure. Snip off any extra wire.
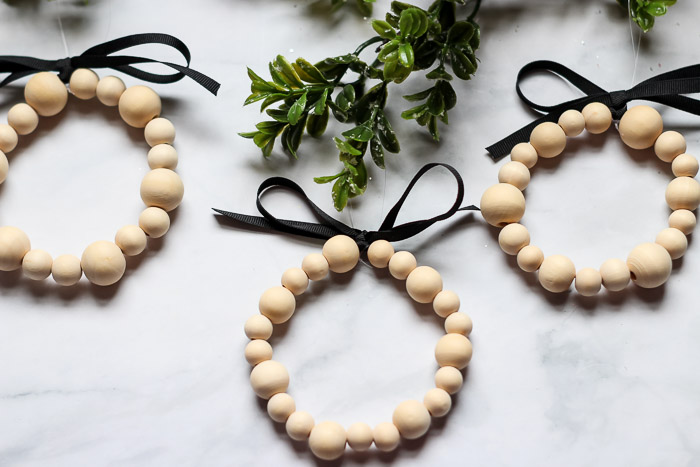
Step 5 -Add a bow
Cut a piece of ribbon to approximately 8″. Fold the ribbon in half and loop around the ornament. Stick the ends of the ribbon through the looped side and pull taught.
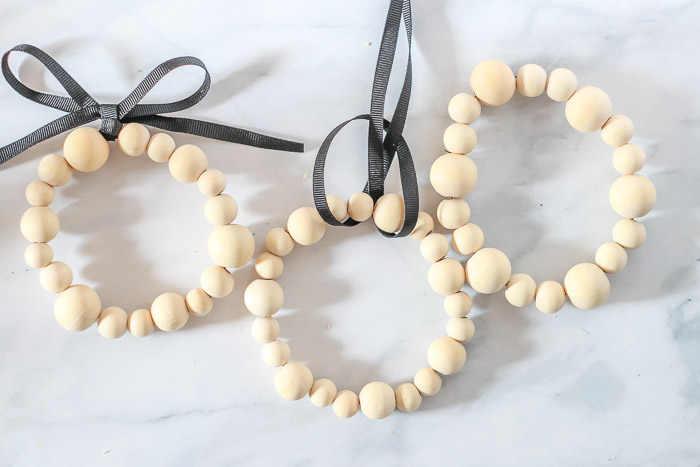
Finally, tie a simple bow with the loose ends of the ribbon, like in the photo below.
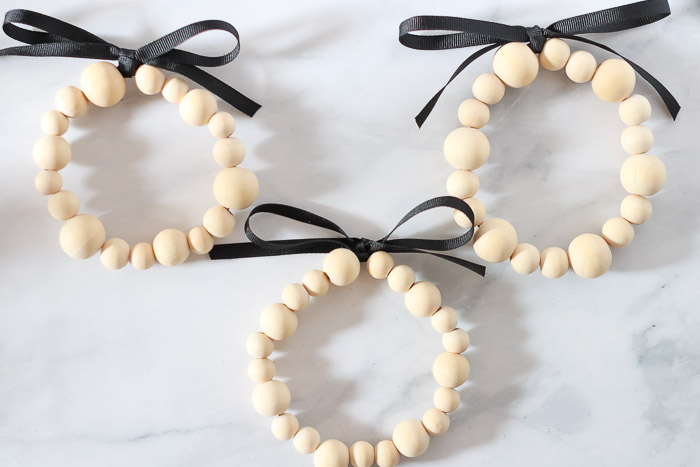
Step 6 – Hang on the tree!
Use some beading or fishing line to hang your finished wooden bead ornaments on the tree! You could also use jute twine or bakers twine to hang them as well.
I want to know: Will you leave the beads unfinished or will you paint yours?
These would make super cute napkin rings for the holidays as well, don’t you think?
Don’t forget to pin this tutorial for later!
![]()

I’m Amanda, and I am the creator and voice behind the food and DIY blog, Domestically Creative. What started as a place to share updates with friends and family after we moved from Illinois to Tennessee and then to Texas, turned into a passion for finding creative and frugal ways to feed us and decorate our homes.
I have always had the “make it myself” attitude and I’m not afraid to bust out the power tools or get creative when it comes to decorating our home on a budget. You can usually find me scouring the local thrift stores, garage sales and estate sales looking for my next makeover (like this litter box cabinet), or dreaming up ways to make our new house feel more like home. My most recent project was giving my home office a much needed facelift. Some of the plans included creating a fun inspirational accent wall and adding pegboard to store my craft hoards.
I currently call Missouri home, where I live with my husband, dog, and 2 cats in a pretty dull, late 90’s split level. My husband and I both love to travel the U.S and recently purchased a small travel trailer to tag along in our journeys. In our free time together we can usually be found working together on a home project, exploring a new place, or just lounging with our pup, Delilah.
I’d love for you to connect with me on social media via Facebook, Instagram, Pinterest and Twitter!
See all of Amanda’s tutorials HERE.


Leave a Reply
Want to join the discussion?Feel free to contribute!