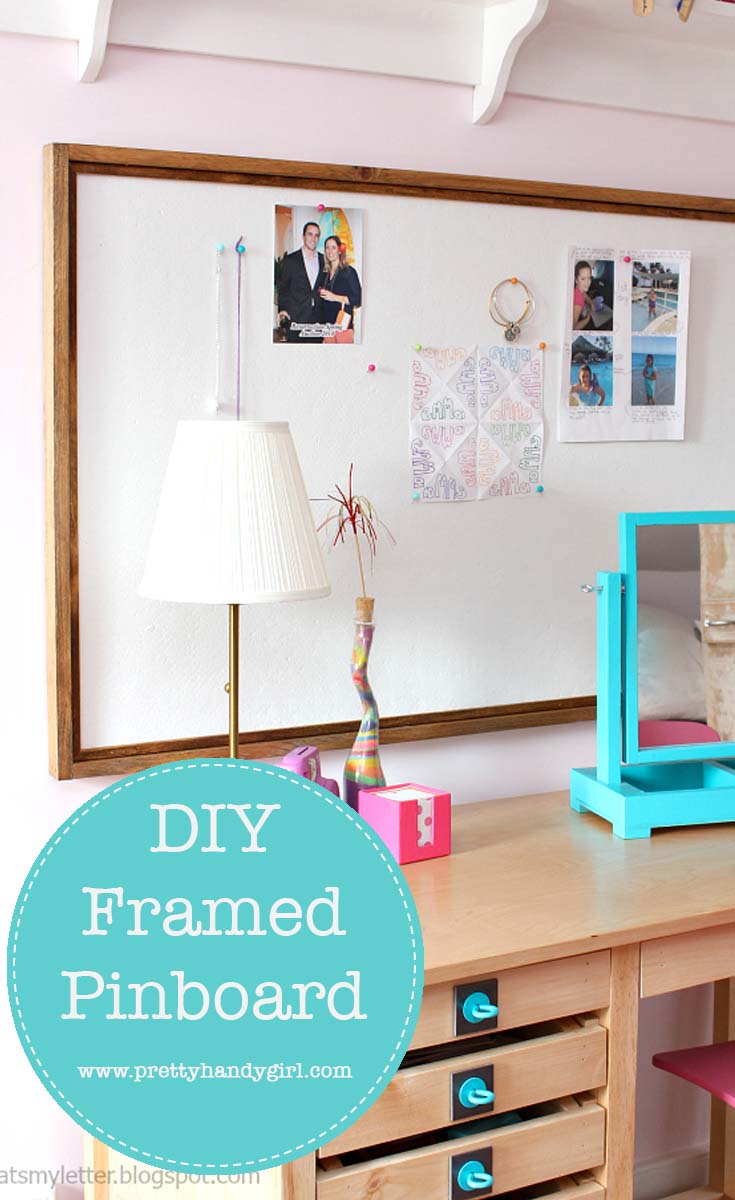
DIY Framed Pinboard

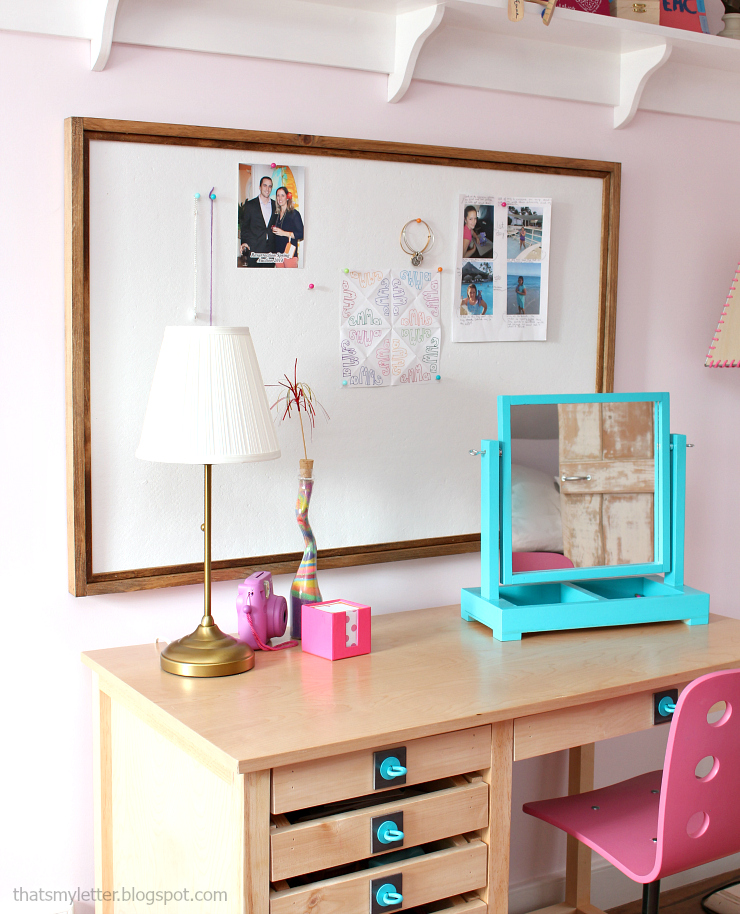
Pretty Handy readers it’s Jaime here today from That’s My Letter sharing how to make a DIY Framed Pinboard. I’m always looking for solutions to make my tween girls’ bedroom space more functional. I decided to take advantage of the wall space and make large framed pinboards for all their bits and pieces.
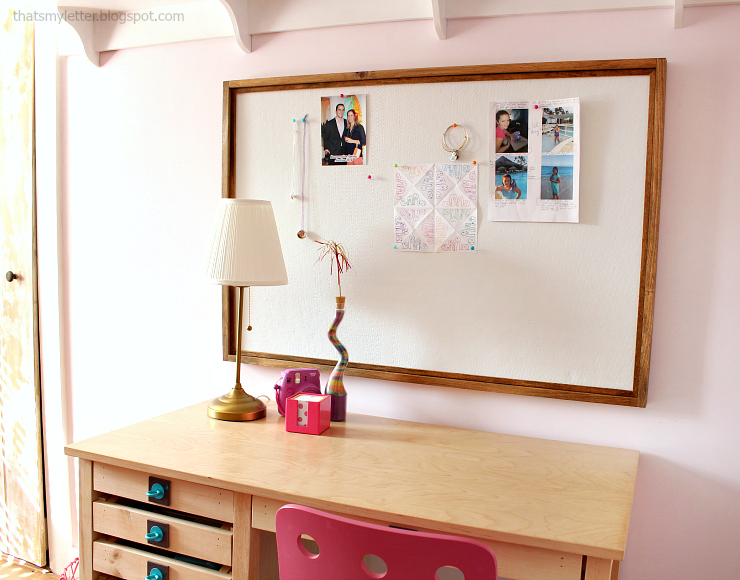
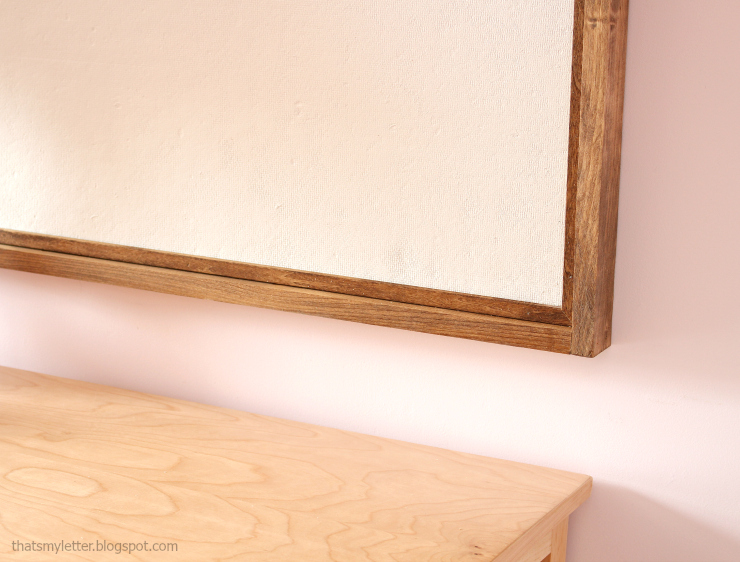
The frame pinboard is the perfect spot to display photos, hang jewelry and keep all the collectibles on display. This pinboard is made from homasote which is much sturdier than traditional cork and you can paint the homasote any color you desire. Homasote is available in a large 4′ x 8′ sheet which allows you to cut it to any size you like, big or small! Plus, you can make more than one.
(I’ve included affiliate links for your convenience. I earn a small percentage from a purchase using these links. There is no additional cost to you. You can read more about affiliate links here.)
Supplies:
- homasote (one 4′ x 8′ sheet)
- flat moulding (1/2″w x 1/4″ thick)
- 1×2 pine boards
- french cleat
- wood glue
- wood stain
- circular saw
- nail gun
- 5/8″ brad nails & 1 ¼” brad nails
- primer & paint
Step 1: Cut the homasote to desired size. Use a circular saw or table saw (a jig saw will work as it’s a fairly soft material.) Prime and paint the front side of the pinboard.
Step 2: Stain the framing pieces prior to attaching to pinboard. Cut flat moulding to fit around the homasote. Miter both ends at 45 degree angles. Use wood glue and 5/8″ brad nails to attach flat moulding to homasote.

Step 3: Cut 1×2 boards to fit and secure to side of pinboard. Attach with wood glue and 1 ¼” brad nails.
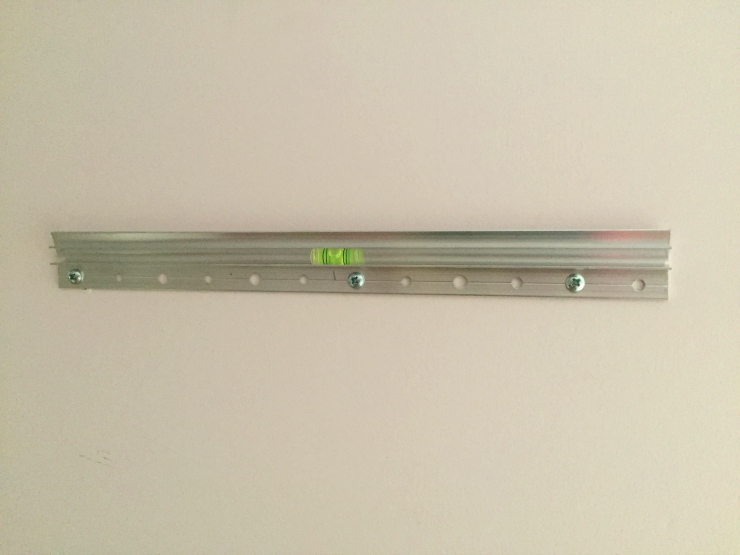
Step 4: Attach a french cleat to upper center back of homasote.
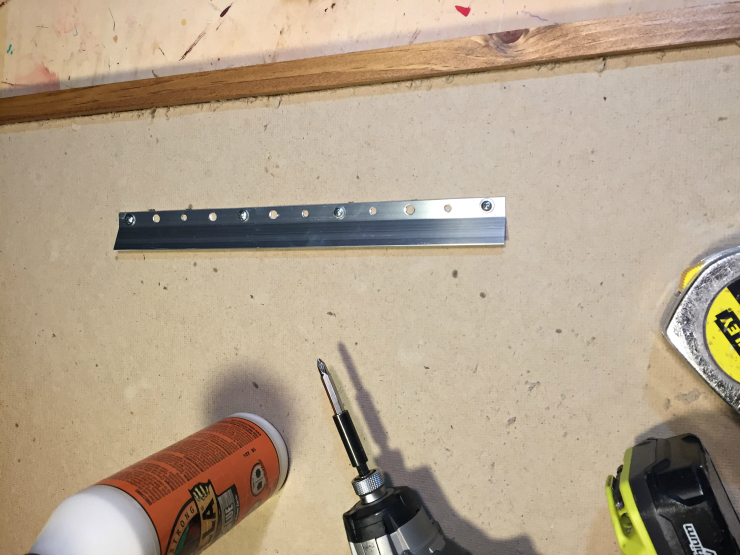
Step 5: Attach wall portion of cleat using wall anchors and screws. The wall cleat comes with its own level so you can be sure to install properly.
Hang and enjoy! Now my girls have plenty of space to display all their favorite things and enjoy photos and memorabilia without it cluttering up their desks.
Do you have a spot for a framed pinboard? It would look great in your kitchen or mudroom, too. The framed edge creates a beautiful finished look and you can paint or stain to coordinate with your decor. Keep making and building all the things!
 ~Read more of Jaime’s tutorials~
Pin for later!


With havin so much content and articles do you ever run into any issues
of plagorism or copyright infringement? My blog has a lot of exclusive content I’ve either written myself or outsourced but it appears a
lot of it is popping it up all over the internet without my agreement.
Do you know any methods to help reduce content from being ripped off?
I’d truly appreciate it.
How at the pinholes on the board? Would they “hide” like a hthat y sort of do in cork?
I was going to ask about desk also
I like it! THanks for the instructions. I love that desk. Did you make it yourself?