I am a lucky gal to have a very wonderful friend in my life.
 |
|
This is my good friend Renee
|
A few months ago Renee called me with some super exciting news. She was pregnant with her second child. This was a much anticipated pregnancy and the phrase, “Good things come to those who wait” enters my thoughts when I think about how long she and her husband Toby have wanted this baby.
I wanted to do something very special for my good friend. Especially something to help with those pesky pregnancy nesting tendencies. I knew that she had been struggling with storage solutions for the hallway between her garage and kitchen. This was her catch-all location and it was a narrow 38″ wide hallway I might add.
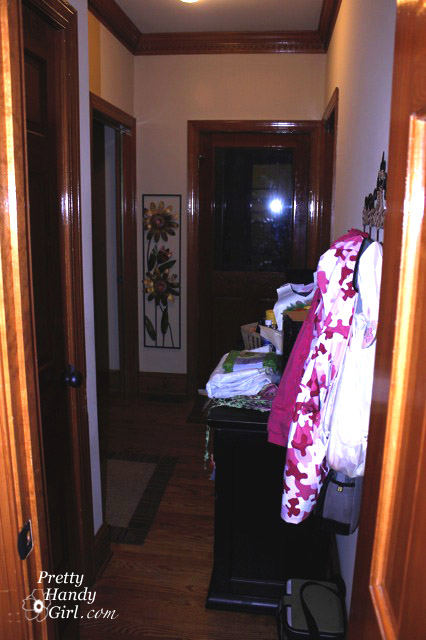
Plus, there are six doorways coming off this hall. Yup, talk about a challenge! This hall has access to a bathroom, a storage closet, the garage, the bonus room, the back deck and the kitchen.

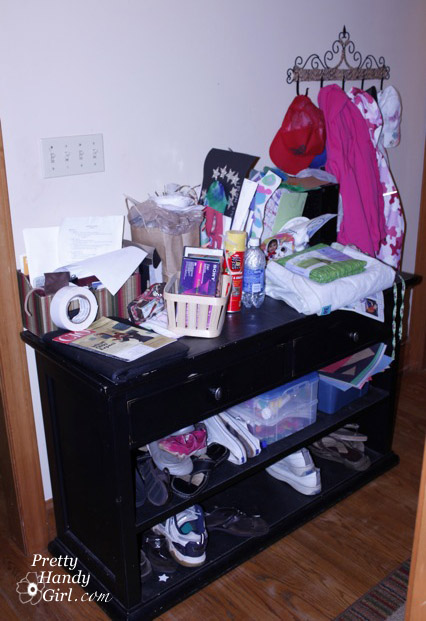
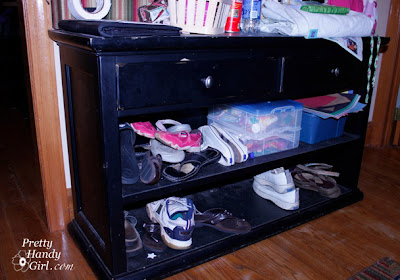
Smack dab in the center of this hallway was a console unit that she bought in an effort to get some storage and organization. Well, needless-to-say, it wasn’t working for her.
 |
|
She bought this console off of Craig’s List to help organize the hallway.
|
Renee, really needed a highly functioning location to store anything and everything that didn’t need to come into her home.
Initially I drew up some quick sketches and showed them to her and her hubby. They both liked the idea, so the next step was to take some measurements and tape out our plans.

We taped the outline of two storage towers, a bench with storage underneath, and coat hooks. (Do you like our hanging coats? The vertical strips of tape.)
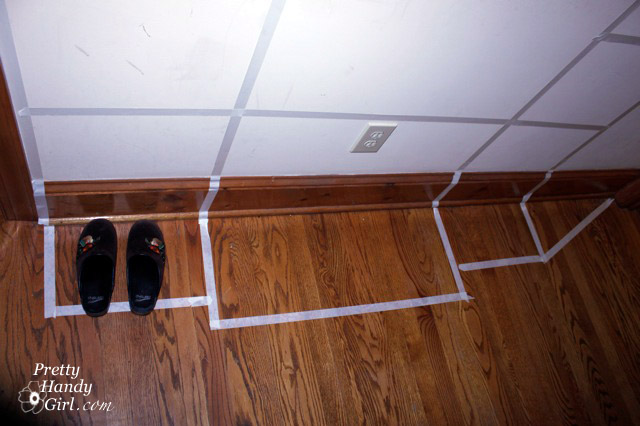
Plus, we taped the footprint of the unit. It was very important to keep the shelves as shallow as possible, so as not to impede the traffic flow.
Renee was tasked with buying some baskets to use on the storage towers and picking out a paint color for the back of the towers. She knew she wanted bead board behind the coat storage and she wanted black coat hooks. Buying triple hooks allowed her to maximize the amount of coats and bags that could be hung.
Then we got to work. (Yes, I said we! Renee helped with all the steps, because she wanted to learn some new DIY skills. I think she learned a lot on this project!)
We used Ana White’s blog (previously Knockoff Wood) plans for the storage towers, but altered them to fit our size requirements. The tutorial for the rest of the storage unit that we built is here. In the meantime, I hope you will enjoy these after pictures!
First off, you might notice that the before pictures weren’t just cluttered. The lighting in their hallway was pretty dismal. Thanks mostly to a builder grade flush mount light fixture and one CFL bulb. But, we fixed that too.
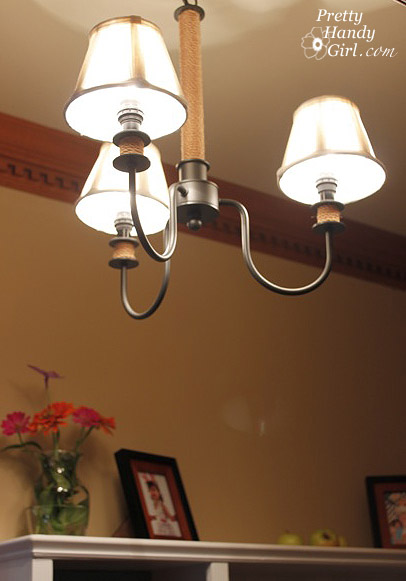
So, do you recognize that chandelier?! My twitter followers saw the picture here. $10 at the Habitat ReStore! What a steal!
 |
|
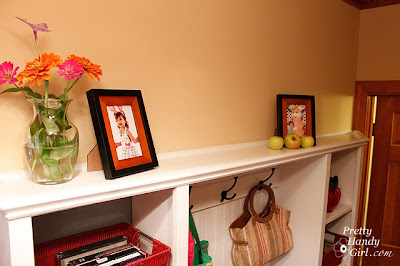
A pretty place for flowers and pictures on top of the unit.
|
 |
|
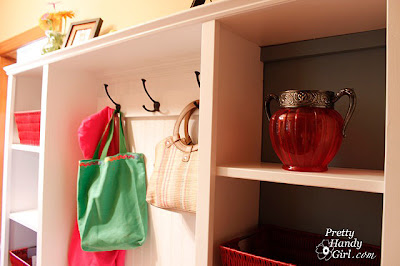
Coats and bags have plenty of hanging space.
|
 |
|
The cranberry red baskets allow each family member a place to put their things.
|
 |
|
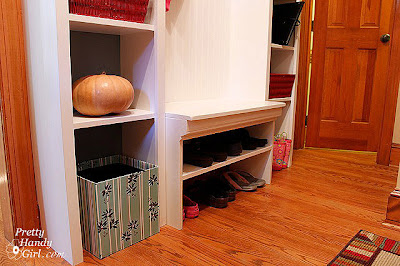
Plenty of shoe storage for the whole family.
|
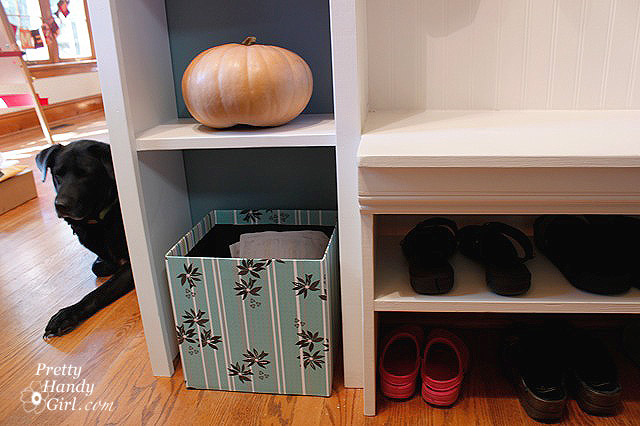
Here is the tutorial for that cute little blue striped storage box above. Its purpose is to halt all the junk mail. Renee can flip through the mail and put the junk mail in there to be recycled.

It is sitting happily around the corner in her large kitchen. Renee bought some storage bins that we used in the lower half for more storage.
 |
|
Now Renee’s daughter has plenty of access to her arts and craft supplies.
|