15 of my Favorite Painting Tips, Tools and Paint
I have painted almost every room in our home now. Make that almost every room in two homes! You could say that over the years I’ve learned a few tricks of the trade and have acquired quite a few painting tools. But, only a handful are my tried and true gear that get pulled out for every painting job.
(I’ve included affiliate links for your convenience. I earn a small percentage from a purchase using these links. There is no additional cost to you. You can read more about affiliate links here.)
Here they are:
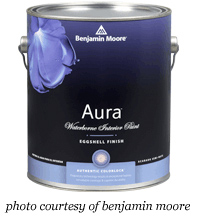
I have to tell you that I’m a bit of a paint snob. When we bought out first house, I got to know our local paint guy because I practically lived at the paint store. He pulled me aside one day and told me that Benjamin Moore Aura was his favorite paint. Since that day, I’ve been a big fan. The price is definitely higher than most, but for the time savings and finished product, it is worth it! I have been able to paint two rooms with only one coat, and let me tell you we never scrimp on coats. Normally we paint two coats regardless, but our dining room and living room honestly didn’t need the second coat because the before color wasn’t too different and there were no spots showing! This year I’ve tried several other brands, but I keep coming back to good ole Benjamin. The Aura paint has really great coverage and a very even finish. Plus, the durability and scrubability (is that a word?) for removing smudges and gook from the walls is unsurpassed. In all fairness, I know several other DIY bloggers that swear by Sherwin Williams — I just haven’t tried it yet.
2. Benjamin Moore Satin Impervo (water-based):

If you have little boys you know how rough they can be on doors, doorways, and all the trim in your house. Our baseboards alone have stood up to many matchbox demolition derbies. When I choose a paint for our trim, I know it has to have superhuman properties. Luckily I’ve found the Impervo paint by Benjamin Moore is up to the challenge and stands up to a lot of abuse.
3. ScotchBlue Tape:

Painter’s tape is a necessity for clean lines AND for securing drop cloths to the floor right up to the baseboard. I’ve been using ScotchBlue for years and I can tell you that the painter’s tape you used 5 years ago has changed. I know 3M is working on improving for better seal with less stick! We always have a supply of ScotchBlue in my tape drawer and we definitely go through it!
4. Pro Masker 2000:
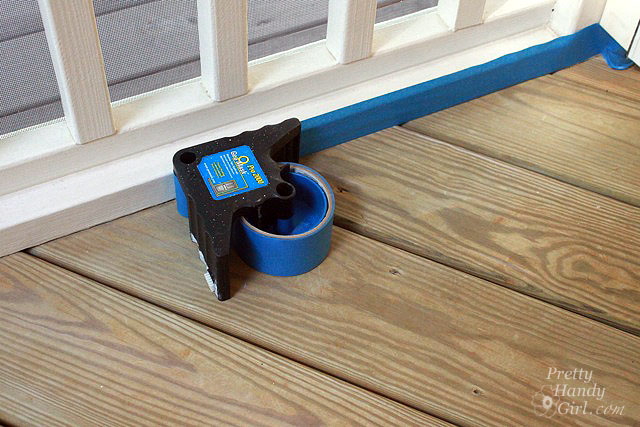
I used to be a taper and taped off every room we painted. (Now, I’ve gotten much better at cutting in with just a brush.) In a desperate attempt to save time, I bought this paint tape dispenser and was thrilled to shave some time off my taping tasks. You can watch a brief video here. I still tape off some edges when I know it will take me more time to be meticulous than to tape off some trim.
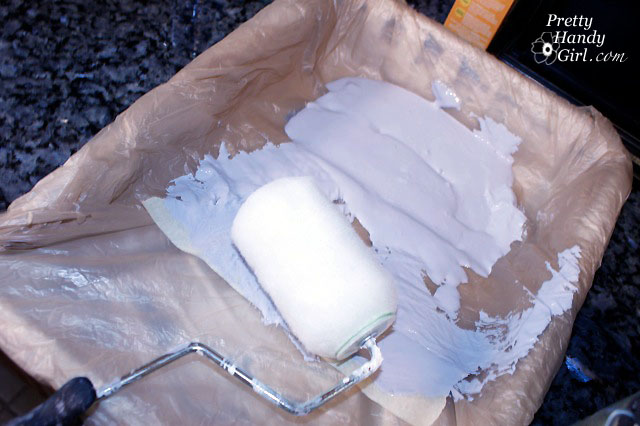
5. Metal Paint Tray with Hooking Legs (and Plastic Bags):
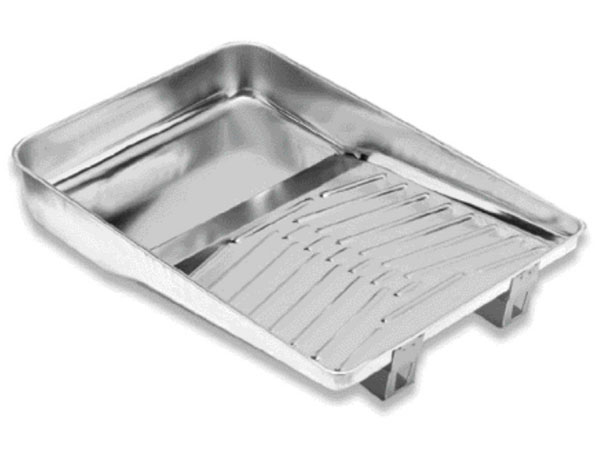 I have a no-frills metal paint tray. It has legs that can hook onto a ladder, which comes in handy when painting high on a ladder. This paint tray is the first and last tray I’ll ever need because I like to line it with plastic grocery bags for easy clean up and for protecting the tray from a multitude of layers of paint (did I mention how many rooms I’ve painted in our home?)
6. Paint Mixing Drill Attachment:

Okay, I know you already know how much I love my cordless drill. Which is why you’ll understand why I jumped at buying this paint stirrer drill attachment just to have an excuse to pull out my drill for another project! Honestly, unless you like the slow process of thoroughly mixing old paint or blending colors, you’ll want one of these for your own!

Having a small pail to hold paint for painting trim while balancing on a ladder just makes sense (unless you like step aerobic.) This handheld paint pail has a magnet inside that will hold your paint brush from being completely submersed. I haven’t tried this upgraded version myself, but that seems like a great addition.
8. Rolling Edger:
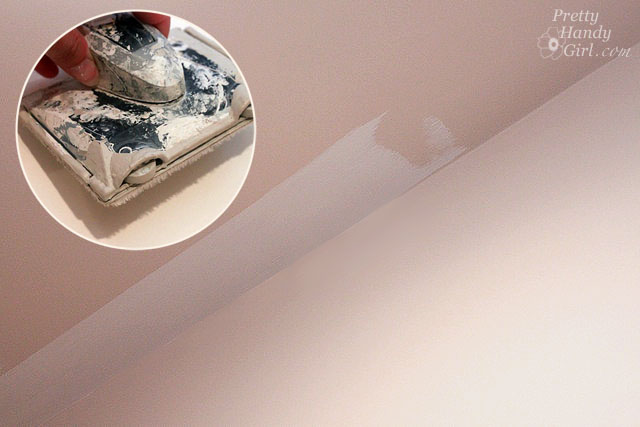
I’ve tried so many edging gadgets that I could build a wing on my garage just for paint gadgets. I always come back to this basic edger. It is a simple tool that does a great job with a clean edge on inner corners…
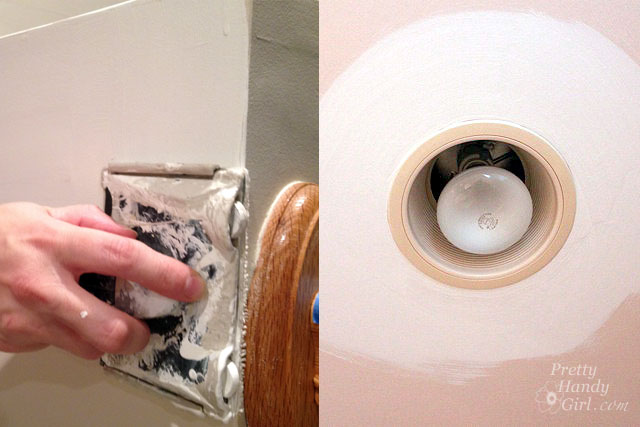
…outer corners and around objects. The bristled pad is removable for easy cleaning. We’ve never had to replace ours because I don’t let the paint dry in it. When buying a basic edger, there is one option that you really should consider: a hole to accept an extension pole.
9. Extension Pole:
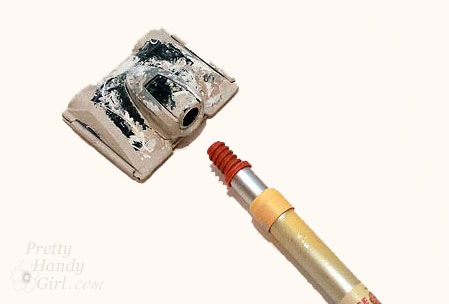 An extension pole is a necessity for high walls and ceilings in general. The extension pole can screw into any paint roller base and edgers that have a hole for the extension pole. Buy one today, your neck will thank you but your chiropractor will miss you.
10. Drywall Tape Knife:
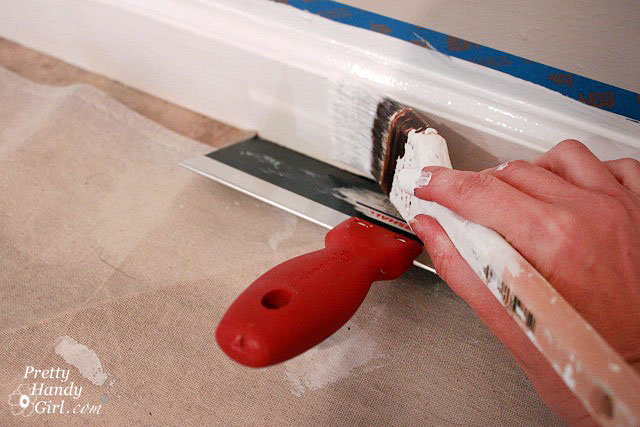
Painting trim is the final step in painting a room. At this point you see the light at the end of the tunnel and are ready to finish already. I recently gave up taping off the carpet and flooring and use a drywall taping knife as a painting guard instead. It was quick and easy to use. Simply push it under the baseboard, paint and wipe off the blade once in a while.
11: Two Step Stool with Tall Handle:

Unless you are 6’4″, like my brother, you’ll likely need a step stool for painting crown molding and the top of the wall. I have a Cosco brand that has a long handle for grasping at that moment that you realize you leaned too far to one side. (Not that that ever happened to me. No Way!)
12. Lined Drop Cloth:

Have you ever dripped paint? No? Liar!! Have you ever stepped in and tipped over an entire gallon of paint? Ummm, yes, I did do that once. Several years ago we bought a double-sided drop cloth set from Costco. I’ve been thrilled with the security of knowing that I can dip my shoe in paint at any given moment and my floors will be safe. One side is canvas and the back is coated with vinyl. This is the closest match I could find. A double-sided drop cloth may cost a little more, but they are re-useable and never need to be thrown away. 😉 Happy Earth Face!
13. Rustoleum Spray Paint Handle:
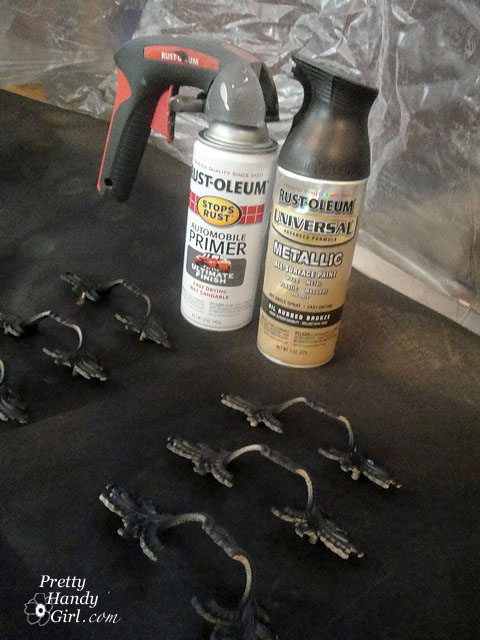
Ever have trigger finger? No, not the itchy kind. The kind that cramps up after spray painting a fleet of furniture. That’s the same moment you realize you forgot to wear gloves. Only now it looks like you are wearing a black glove — but you’re not — it’s paint. The Rust-oleum Spray Handle is the best thing since spray paint! It fits on almost all spray paint cans except the ones with the built-in-trigger top like show on the right above.
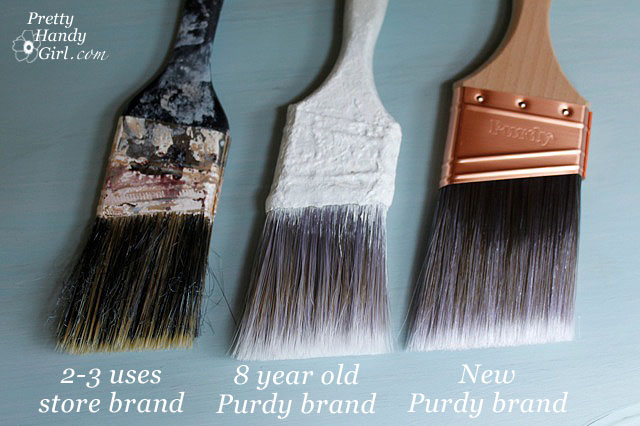
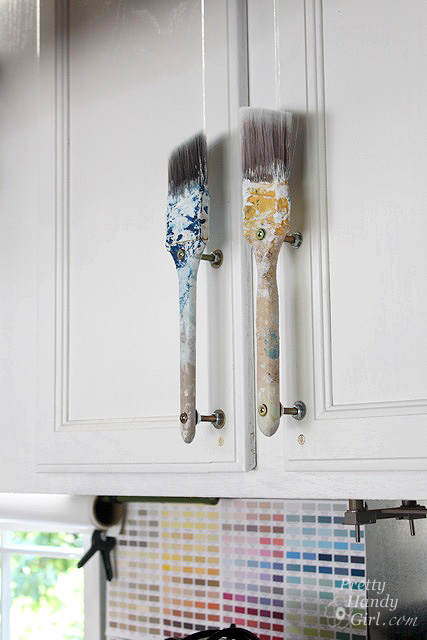
14. Purdy Brushes:
My love affair with Purdy brushes may be considered a little extreme. I love them so much that I immortalized two as cabinet handles in my garage:
These are seriously good brushes! I’m still using the Purdy brushes I bought when we lived in our old house. (And did I mention how many rooms we’ve painted?) Sure, they cost a little more, but they hold their shape and if you clean them right, you will never have to buy new ones! One 2.5″ and a 1″ brush are all you really need (unless you are good at recruiting friends to help you paint.)
15. The Paintbrush Cover:

The Paint Brush Cover is the newest addition to my painting tool box. Sal emailed me about half a dozen times to try to get my attention about the Paint Brush Cover. (Yup, if you don’t get a reply from me right away, try try again.) I’m so glad he was persistant because I love this painting accessory. When I get interrupted while painting with a phone call (or more likely to break up some brotherly bickering), it is so quick and simple to set the brush in the cover and seal it up. The Paint Brush Cover is like tupperware for your paint brushes. And if you are going to spend money on good brushes, you better make sure that you don’t let the paint dry out in them!
I was truly pleased when after a week with pneumonia, I returned to the room I had to abandon painting, to find that the brush I had stored in the Paint Brush Cover was still wet and the paint was ready to use! I was one happy DIYer!

On my wishlist:
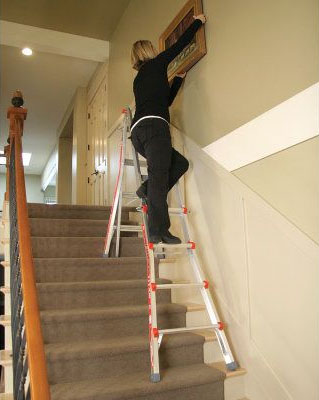
As a big painting enthusiast, I’ve gotten myself into some tight spots while painting. But, none are more awkward than painting over stairs. The edger on a pole works okay, but inevitably I’ll bump the ceiling or the wall that wasn’t supposed to be painted. I tried the Little Giant Ladder at the Southern Ideal Home Show last year. I am definitely very skeptical of infomercial type products, but from what I saw (and witnessed while climbing two stories up) was impressive. The ladder can contort into all types of configuration which makes it ideal for painting stairways.
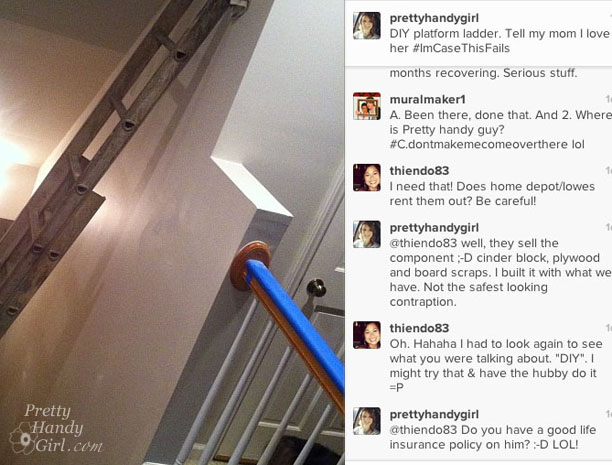
Unfortunately I didn’t buy one at the show. Which resulted in my attempt at a DIY Ladder Platform:
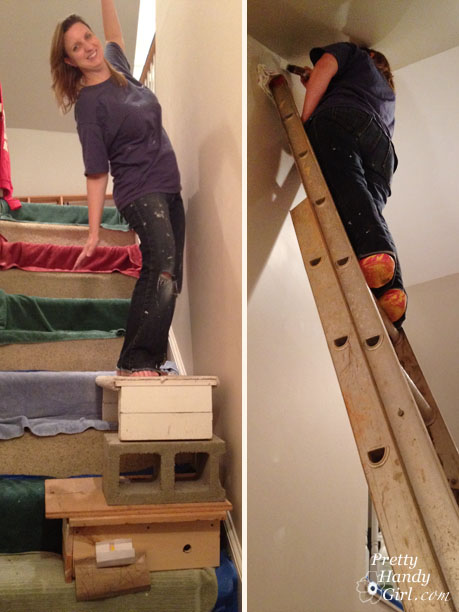
Why yes, that is a cinderblock; my DIY Aerobic step; and a few other scraps of wood. Although scary looking, it was actually sturdy, as you can see by my stair surfing antics. But, I don’t know that I can endorse my platform.
If you are into making your own, you can check out the platform that Matt & Shari made. It might be a little less risky.
Ready to start painting? Check out these tutorials on painting a room like a pro:
Step 1. 80% of a professional paint job is in the prep work.
Step 3. painting your room and finishing touches
 Disclosure: There are several links in the above post. They are affiliate links and I receive a small commission on any purchases made when clicking on the link. You are not charged anything extra.

I love all the tips. I hate painting, but love how it looks afterwards. Unfortunately, I have to paint because I can’t afford to hire someone. Part of the reason for my distake in painting is that all the houses in Texas (or so it seems) have textured walls and ceilings. This makes taping useless which is very frustrating. In our last house, I bought blue paint…always paint a swatch first. It was bright blue…and I was painting it in our girls bathroom. It was so obnoxious and I couldn’t afford to go buy more paint, so I used small bottles of paint I had around the house and painted sea creatures to make it seem like the blue was the ocean. In the end, it turned out really cute, but I totally freaked out at first. Now I always buy samples. 🙂
Crystal,
Oh dear! Glad you were able to improvise the sea creatures. And yes, samples are a must!
I LOVE your paint brush cabinet handles!
Thanks Barbara 😉
I also use Cindys shower cap trick! And I’m chuckling at Janae with the pink speckles on her glasses! That was me until I thought of covering them with plastic wrap. Well, a girl’s gotta improvise at times, right?
I know I look a sight, but I don’t care. Well, except that one time when I answered the door to a hunky delivery guy….! My face was as red as the paint I was using……
Gabby, ROTFL!!! Saran wrap on the glasses. Hunky UPS (right? because the hunky ones are UPS drivers.)
I “liked” the paint brush cover on facebook, definitely will have to get one before I paint again!
We are getting ready to remodel the basement and I let the 3 kids help help paint drylock on the foundation walls. They better stay in school, because they are not going to make it as painters! There is a track of paint splatters around the entire basement floor. I tell myself it doesn’t matter because we will be putting flooring over the top, but it still bugs me Ha. Well not as bad as the time I kicked over a full gallon of primer on my bedroom carpet, never could get that cleaned up all the way. Had to eventually replace the carpet!
Cringing just thinking about the primer spill. Yikes!!!
Once my husband was home painting (can’t remember what — I’m typically the one who does the painting!) when I got a call from the school wondering where I was to pick up our son, since school had let out 45 minutes earlier. As I was on my way over to the school I got a frantic call from my husband. He had gotten caught up in painting, lost track of time, and had forgotten our son. But, he was on the way! Since I was closer to the school I went over and picked up our son, and then met my husband in the parking lot so he could take our son home. My husband felt horrible for forgetting, and had left the house in such a rush he hadn’t even stopped to put shoes on. He would have looked pretty funny going into school in paint splatered clothes with no shoes! 😉
I’m getting ready to paint our kitchen, so the brush covers would really come in handy! 🙂
Holly, oh no!!! Too funny, the barefoot paint spattered husband ;-D.
So proud that i already do most of the ideas. I’m a purdy girl, too. Still wouldn’t mind somebody else painting the trim around the top of my almost done kitchen reno.my kids say they would do it, but it wouldn’t meet my “impossibly ” high standards. Just want it to look good, that’s not too much to ask. I am fading floetrol to the paint for the first time. I’m hoping that will make things a little easier, too. Thanks for the post.
Betty, I’d love to hear how the Floetrol works for you. I have a bottle, but haven’t used it yet.
Like the paint brush cover. I totally agree with your tips and I have learned some new ones. Can’t wait to get a paint brush cover. My husband will love it!
We had a few gallons of paint left over from a big project and I tripped as I was on my way to the car to take it back to the store and it spilled all over the garage. Luckily my dad was in town and calmed me down and helped me get it cleaned up.
Dad’s are good for calming daughter’s down ;-). So glad he was there.
i don’t have a funny story, but we have painted a lot of rooms in our home and love the paint tips / paint brush saver. I’m a big fan of purdy too, and it always annoys me if my hubby fails to properly was the brush and then wrecks one. The saver would be a life saver!
I went to work with pink paint speckles on my glasses. My boss kept looking at me funny, so I finally asked her what…and she asked what I was painting pink. Now everyone is used to me coming to work with random spots of paint on me!
LOL! That is funny, but I’m actually laughing because you didn’t realize it either. ;-D. Thanks for the laugh.
I don’t have a funny paint story, but I think you are awesome cuz you can do all that painting! My hands don’t let me do that…but…I’m impressed with your abilities…
Awww, thanks Connie. Sorry to hear about your hands. Arthritis?
Liked the Paint Brush Cover on Facebook!
I helped paint my nephew’s nursery recently. We were attempting to paint the trim around the closet a light blue when I noticed the paint wasn’t really looking right as I applied it. I started picking at an area of existing white paint and it peeled off like it wasn’t bonded at all! Apparently the trim was made of some kind of plastic material – not wood – so the paint wasn’t sticking. They decided to wait on a full closet redo to fix it.
Yikes! Sounds like you might need a good primer.
I love red so I painted my dining room tomato red. I put a chair rail around it and then painted stripes on the bottom half…using a small cut-off foam brush, a flattened out make up brush and a regular brush. It took me weeks to finish it and I loved it. A few years later we had to put our house on the market and after months and months of no bites the realtor told me I needed to probably repaint the dining room…so I sadly did. When it finely sold…at the closing…the buyer said…”At one point wasn’t the dining room red and stripes? I thought I saw that in a picture when it was first on the market.” I said, “Yes, but I didn’t figure it was for everyone.” then she said…”too bad you painted it…that was my favorite room!”. I could have screamed. Oh well…the house sold…that’s what mattered!
That’s a total bummer ;-(