Photography Tips – Better Composition and Lighting Tips
I know y’all have your favorite blogs. If you think about one of them now, can you tell me what it is you love about the blog? Okay, maybe the subject matter or the writing. But, how does the site look? Is the design appealing? How about the photos? I know I am personally drawn to blogs that have beautiful images. One of my favorite blogs to read is Centsational Girl. Her photos are true candy for the eyes! Just one look at her post and you can pick up all kinds of photography tips
See what I mean? Kate’s photos are simply beautiful!
She had a post a while ago offering some tips for better photography and how she uses Picasa to edit her photos. After reading that post I really began to push myself to create more attractive photos.
In the spirit of paying it forward, I want to share with you a few secrets for taking better photographs for your blog or just for yourself.
A good picture starts with a good composition. Here are some examples of photos I took and how I made them better:
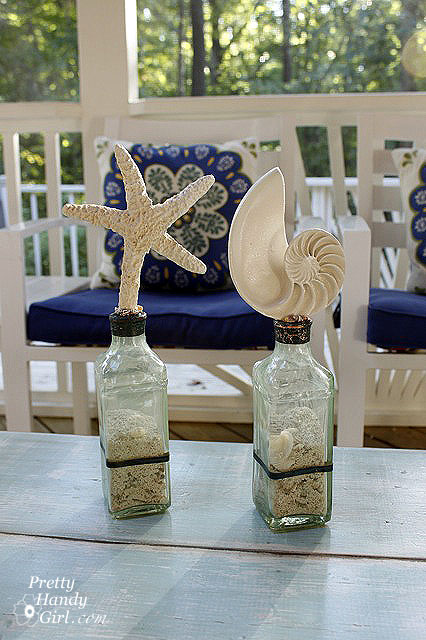
Two bottles on a pretty coffee table. {cue the crickets}
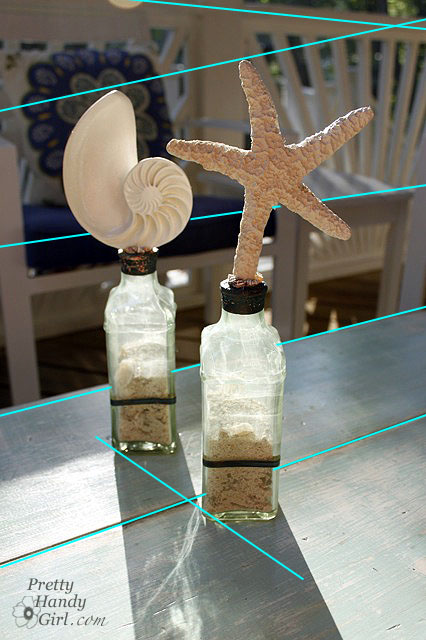
The above image is suffering from a busy background (the pillows, chairs, and railing) that is competing for attention with the bottles. Plus, there are multiple straight horizontal lines crossing the photo. Horizontal lines are not very interesting. Take a look:
Now, let me show you interesting:
Much better, wouldn’t you agree? Do you see all the angled visual lines?
Here is what I did:
- I staggered the bottles to give them more visual interest and to create a diagonal line between the bottles.
- Next, I moved my camera around so I was shooting diagonally across the table. See the back edge of the table, now that is an appealing visual line.
- Finally, I moved the bottles into a beam of light which gave them more drama, and darkened the background so it wasn’t competing for attention.
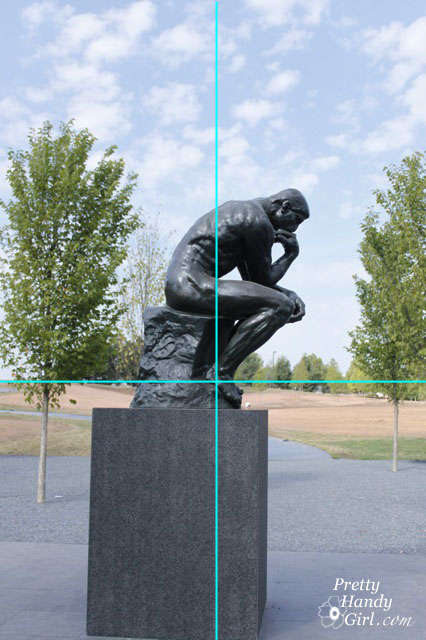
Okay, let’s try another one. Here is another example of a “ho-hum” photo. I can just hear Rodin sighing at this unexciting photo.
As a rule of thumb you should try to never let your horizon line be in the middle of the photo. Try to use the rule of thirds and have it be at 1/3 or 2/3 vertically on the photo. And you want to avoid putting your main object centered into the middle of the picture.
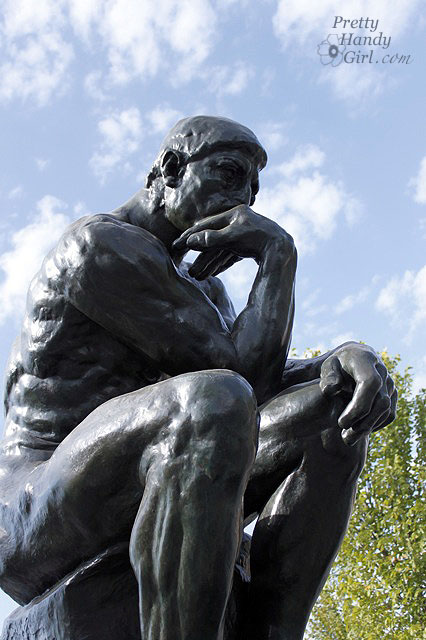
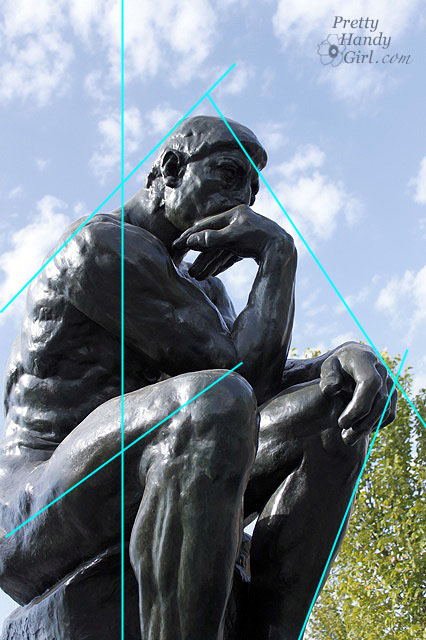
Mr. Rodin was a fabulous sculptor. I “think” his Thinker deserves better! How do you like this?
Look at all the triangle shapes that are created when I brought my subject in closer:
- To create more drama, I got up closer to the sculpture and filled the frame with the subject.
- I put Mr. Thinker off center in the frame, not smack dab in the middle. By doing this it broke up the symmetry in the photo.
- Once again, look at the nice diagonal line running up the man’s back and on his thigh. Diagonals force the viewers eye to move around the photo. Capturing these compelling lines is one of the most important photography tips I can give you.
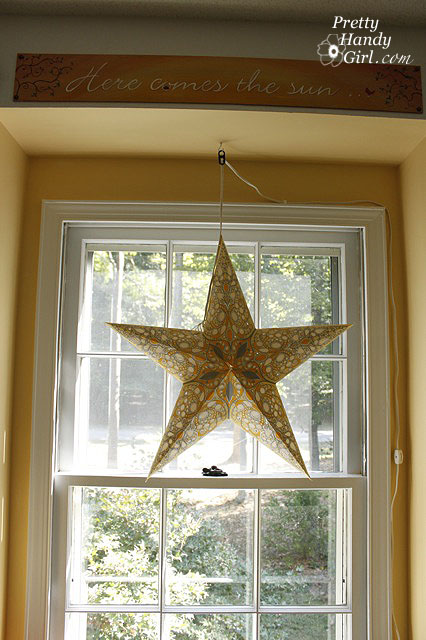
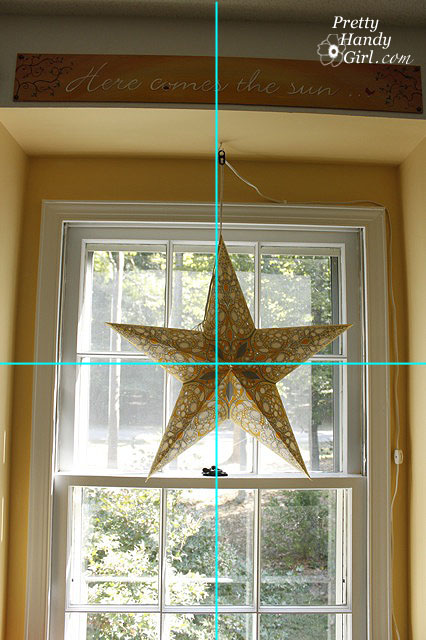
Let’s look at an indoor photo now. Here is a photo of a star light. Excuse me as I yawn. Bored to tears here.
The star is centered almost perfectly up and down and side to side. This make for a perfectly blah photo.
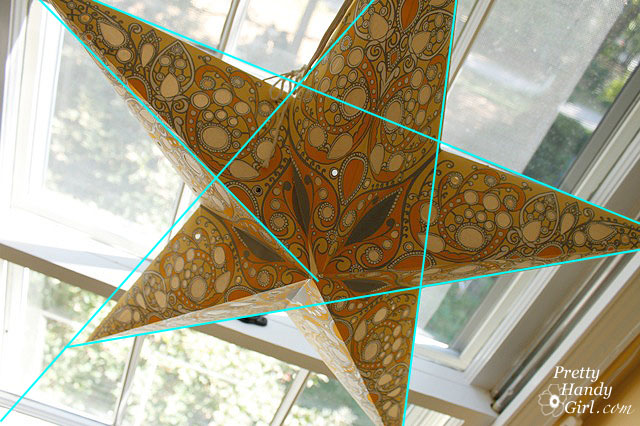
But, look what happens in the next photo.
Suddenly there is excitement. The diagonal lines and triangular negative spaces really make your eyes move around and draw attention to the details in the star.
You too can create drama in your photos.
- Change the perspective. (Climb up on a chair, get down low, or swing around to the side.)
- Fill the frame with the subject.
- Focus on creating diagonal lines when looking through your viewfinder.
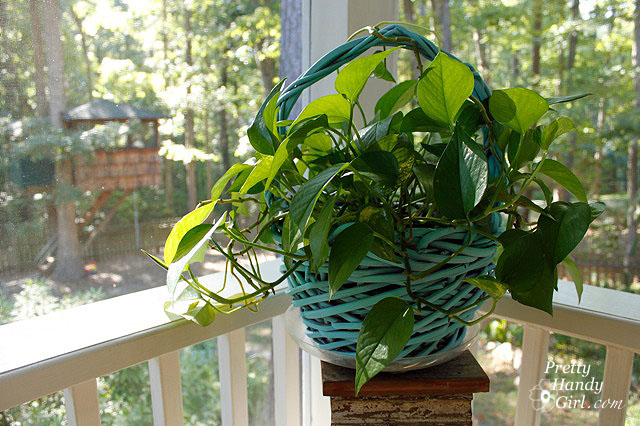
Here is another photo I took on my porch. Okay, not too bad. The plant is off center. The railings form a slight diagonal.
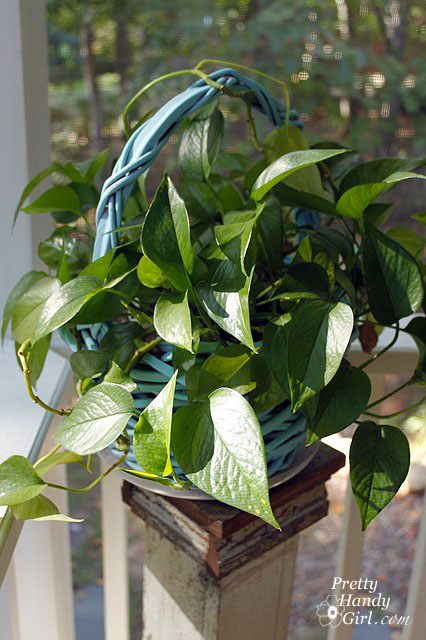
But, look what happens when I tilt the camera to a vertical presentation.
- Suddenly the focus is on the plant and the light bouncing off the leaves.
- The treehouse is no longer competing for attention in the background .
- And, I’ve filled the frame with the plant.
- Can you see the different diagonals? Hint: basket handle and pedestal
Always think about how your photo will look in a horizontal or vertical presentation.
Let’s talk about lighting. Your goal is to use natural light as much as possible. Avoid photographing at night, indoors (away from windows) or using a flash. If you are a blogger, sometimes you finish a project at midnight and can’t wait to photograph it. Below, you can see my sad little puppy bookend. The colors are flat and the whole picture lacks any contrast or excitement. Always remember this important photography tip – Natural lighting is your best friend.
If you have no choice and absolutely have to photograph is less than optimal conditions, read this post to learn how to deal with poor lighting situations.
Otherwise, wait and take that photo in the morning. You can thank me later.
Look at the natural light bathing the puppy and books. Suddenly the light plays on the still life and creates moody highlights and shadows. Now that puppy looks a lot happier.
Okay, this tip goes out to all you lucky ducks that own an SLR (single lens reflex) camera. Do you know how to set the light source in your camera? If you don’t, your photos may end up like this:
Hey, who smurfed my gift bag? Time to look in your manual and take that baby off the auto setting. In the Canon Rebel (and most SLR cameras), you can choose the lighting source like this:
With all these choices, I choose the one most appropriate to my light source. Sometimes I have to try one or another one to see which gives me the best color representation.
By programming the correct light source as shade in my camera menu, the photo suddenly loses its bluish cast and displays the correct colorful richness of the gift bag.
I hope some of these tips help you.
Here are some photography blogs full of photography tips that will help improve your photography skills:
My3Boybarians – In addition to many tutorials and tips, Darcy has put together a months worth of lessons in: 31 days to better photographs. In addition, she occasionally hosts a Twitter photo chat. Follow her on Twitter for more information.
i heart photos – Amy & Angie may love faces, but they share the love by posting tutorials and tips to help improve portraiture photography (and more.)
And Susan from Between Naps on the Porch has a great list of free photo editing sites.
Now get snapping and send me some photos you are proud of! I’d love to see them.
If you liked this post, you will surely love some photography secrets for shooting indoor photos.








Blimey, what a great tutorial! I’ve spent two days trawling photography sites for tips on how best to do my current client’s food photography for his restaurant. This is the first blog post that has given me genuinely new and fresh information. I love the examples of how to change and shift perspective to create new angles and lines. Really well done!
Inglesa, I’m so glad you found my tips helpful!
Great photography tips. Btw, I LOVE your blog background. So pretty.
Thank you Linda 😉
Whoa, this is pretty cool, I learned quite a bit on composition. I like the example you used with the two bottles, I believe it’s the first photo you took. Keep this up, I like it.
I will use this website as reference when I start doing little fun project on my Cannon T4i 🙂
Cheers,
Nice tutorial. Great, simple, well done. Thanks —
Thank you so so so much for these tips… I am a beginner not even a novice so much so I dont even have my camera yet so maybe novice is a wrong term. However I am in the process of getting a DSLR camera any day now. So I wanted to start reading up and getting as many tips as I can ahead of time. Of course my next step might be an actual class like Camera’s 101!! Then Photography 101. Again Thanks Bunches for this blog