Are You Woman Enough to Handle My Power Tools? – Plywood Sign Tutorial

There is a joke on our street that Pretty Handsome Guy isn’t allowed to touch my power tools. Okay, it isn’t really a joke, it’s a fact. He knows he is not allowed to use them without me around (smart guy.) 😉
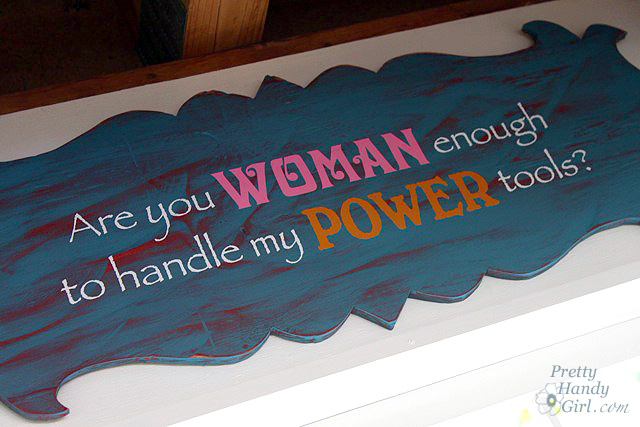
Before the Woman’s Day shoot I decided at the last minute that I wanted a sign that really labelled the workshop as a “Woman’s” workshop. In an instant I had a creative spark and came up with this question, “Are You Woman Enough to Handle My Power Tools?” Then I called my good friend Leen the Graphics Queen and asked her to make a wall decal for me. (Did you know she can create custom wall vinyl for you too?! And you don’t even have to be a close friend! But, I’m sure she’d be your friend immediately if you met her because she’s a sweetheart like that.)
Once the vinyl arrived, I set about creating a fancy and feminine sign with some scrap plywood. Here’s how to create your own custom wooden sign.
Materials:
- Plywood or wood board
- Craft paper/newspaper/paper bag for template
- Pencil
- Sharpie
- Scissors
- Jigsaw
- Clamps
- Sandpaper
- Optional: Dremel and File
- Red spraypaint
- Aqua latex paint
- Paint brush
- Dry rag
- Drill
- D-rings for hanging
Instructions:
Make sure your plywood is large enough for your lettering and allow several inches for waste and space around the quote.

1. Cut craft paper to the same size as your wood.
2. Fold the craft paper into quarters.
3. Draw the design onto the craft paper.
4. Cut out the design.
5. Center craft paper design on plywood.
6. Using the sharpie, trace the template onto the wood.
Clamp your wood to a work surface. Let half the sign hang over the edge for cutting clearance.

To cut an intricate pattern with a jigsaw you will need to make several cuts instead of trying to make tight turns while your blade is in the wood. Below is an illustration of how I cut out the pattern. First I cut all the red lines. Then come back in from another angle to finish the cuts (as shown by the yellow lines.)

Flip the sign over and cut the opposite side.

After the sign is cut, smooth the rough edges with sandpaper. I used a Dremel with a sanding bit to get into the tight curves. And I used a file to sand the tight notches.

Spray paint your wood a base color. (side note: Yup, I skipped primer because I wanted a rustic look and I wanted some of the grain to show through.)

Brush on the top paint color.

Wipe off some excess paint to reveal a little wood grain.

After the paint has dried, sand and distress any areas on the sign that you want to be more revealing.

Installing the vinyl lettering:
Mark a centered vertical and horizontal line on the transfer paper on the vinyl. Mark center lines on the plywood as well.
Gently peel off the backing of the lettering. Line up the crosshairs to center the phrase.

Use an old credit card to burnish the letters onto the sign. Slowly pull up the transfer paper.

Erase the pencil marks on the plywood sign. (Read here for more detailed directions when working with wall vinyl.)

Secure “D” ring hooks onto the back of the sign at each side.

Hang the sign on two nails and admire your capabilities!

My sign hangs prominently over my miter saw. Just a gentle little reminder. Tee hee.

Are you woman enough to make this sign?!
Have a great weekend y’all! I’ll be at the Atlanta Habitat ReStore at 2pm on Saturday, June 23rd. Oh and that day just happens to coincide with my birthday. Saturday (and every other birthday) will pale in comparison to my birthday last year!


Hi!! I love this… I have few tools but I would like to own more but my husband says is too dangerous… How do you guys learned how to safely use them? How can I start?
Love the shape!
Love your blog! I have nominated it for the sunshine award.
Love that sign and happy birthday!
Hey happy birthday to you!
Great sign, love the tute, , awesome and sooo cool:-D
The sign is so cute!! And have a happy birthday tomorrow!!
Brittany I’m definitely borrowing that one. My hubby doesn’t even change a lightbulb, forget about touching my tools. I just finished a ‘curvy’ jigsawed headboard in the same fashion, great minds think alike! Enjoy the weekend.
Happy Birthday! I love the sign!
The perfect sign for the workshop. We have a his and hers side — ha!
LOL! My husband isn’t allowed to touch my power tools either! He breaks everything he touches so he can’t touch mine…. I need a sign like that for my workshop!
Susan
Homeroad
Love this! It’s perfect for that space, Brittany. And thanks to your “signspiration”, I now have an idea for a leftover scrap of plywood that’s been hanging around… 🙂
Haha Brittany! I absolutely love your sign! You did a wonderful job on it too. I need to make me one of these to put in my garage over my work bench. I am the only one in our household that uses power tools so this sign is fitting!
Carrie