
Using Asphaltum Glaze to Antique Furniture
I’ve seen several talented furniture rescuers (Miss Mustard Seed comes to mind) using Valspar Asphaltum glaze on their shabby chic creations.
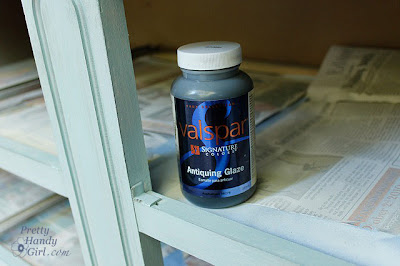 |
| Valspar Asphaltum Antiquing Glaze |
I have to tell you right now, I had not been very successful with this glaze. Every time I tried to use it, I ended up wiping it all off and ditching my efforts. However, I finally figured out the technique for using this glaze (on this project). The trick can be summed up with “less is more”!
I poured out a quarter size dollop of the Valspar Asphaltum glaze.

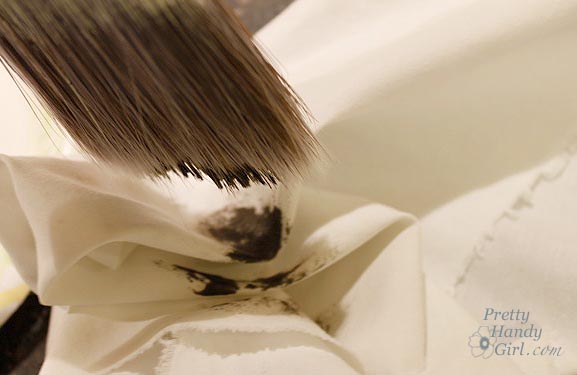
Then gently dab your paint brush into it. Dab almost all of the glaze off onto a rag.
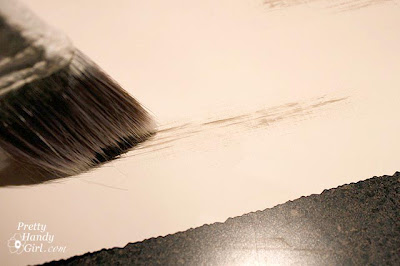
Next, lightly brush the glaze over your surface. The picture below shows using TOO MUCH!
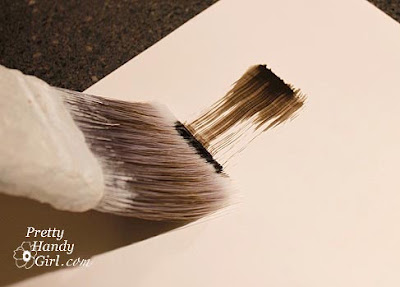 |
| Too Much Glaze |
This is the amount you should see when you drag your paintbrush over the surface. Very dry brush and hardly any glaze on it:
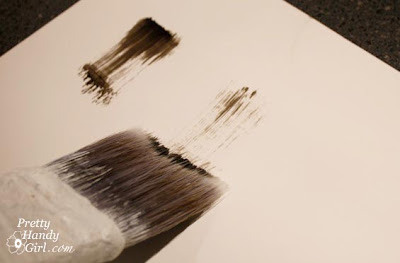 |
| Just Right |
If the results still look too dark to you, go ahead and wipe the glaze off with a rag.

You can also drag your brush sideways. This works especially well on furniture edges.
 |
||
| Just Right, Sideways Dragging |
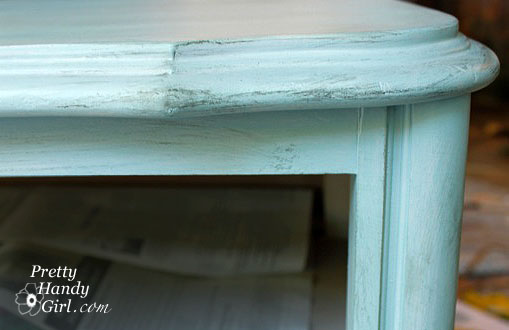
Here are the results of using the asphaltum glaze on this dresser.
Now that you’ve seen the technique, what do you want to try this out on?


I love your blog. The dry brush technique worked out great on my cabinet. The instructions on the the jar say to use a “rag in a circular motion.” Glad I found this before I started!
I would like to see your cabinets. I am planning on glazing mine soon!
Thanks for the tip, I have never used that glaze, I am going to have to try it. Especially since I have seen it on your piece, it really is a show stopper.
I have some recipes for glazes. If I can find them, I'll post them in the next few days. There is a shop "Go for the Faux" in Ft. Worth, Texas. They have a great product…a clear glaze base that can turn so many different colors into a great glaze. You can google them. I buy it by the gallon. I've used Asphaltum previously. I tend to like brown tones better, but I was satisfied with it at the time that I chose it. Cherry Kay
I would like to see your cabinets. I am planning on trying to glaze mine!
I've never tried it, but that's gorgeous!!! Now I need to find something to try glazing.
Great technique! Glazes are always tricky to work with and it pays to play around with it, just like you did. Thanks so much for the mention. 🙂
I use an aging toner from Caromal Colours, you can apply it to the whole surface or just in focus areas then wipe off … if you want a lot of the toner to remain then use a dry cloth for wiping off, if you don't want much of the toner to remain then use a damp cloth to remove. I will be doing my kitchen cabinets soon with paint and toner from Caromal
Ah! I've a lovely tiny side table that could use some roughing up. Maybe that's the piece for this glaze. They say it's ideal for over metallics though, so maybe it'd be great for some picture frames I picked up at a yard sale.
Hi Brittany, I just discovered your blog. I love painting furniture too. Can't wait to see more of your work and read all your great tips. I'll be following!
I am so glad you posted this, I have a new side table (new to me) that I was going to try this on but I didn't know how.
Thanks!
That looks so good! My desk is crying out for a re-do, so maybe I'll give this a shot. I LOVE the color you chose too!
I am a big fan of dry brushing. Sometimes I like to glaze covering the entire surface and then wiping it off. I wonder what the best glaze is for that? If you find out let me know.