Trick or Treat Bags Using Elmer’s #GlueNGlitter and Recyclables
My kids like to raid our recycling bin. They make the most imaginative things out of milk jugs, strawberry pints and toilet paper rolls. In fact, my five year old has been making his own Halloween costume from paper bags and tape. So, when #CollectiveBias sent out a challenge to make trick or treat bags with Elmer’s Craft Bond Glue Spots and Elmer’s Foam Board, I knew right where to head for supplies: Walmart AND the recycling bin! I hereby invite you to join me (and my escort) as we gather the supplies for this project.
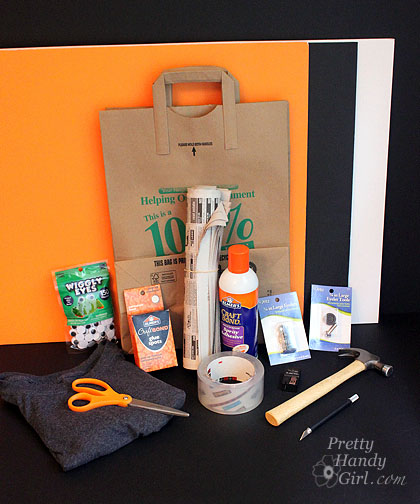
Materials:
- Paper grocery bag
- Newspapers (look for black and white with lots of text (fewer pictures)
- Elmer’s Craft Bond Spray Adhesive
- Clear packing tape
- Elmer’s Foam Board (White and Orange)
- Black posterboard
- Elmer’s Craft Bond Glue Spots (pop-up medium)
- Elmer’s Glue-All Multi-purpose Glue
- Scissors
- X-acto knife (with a new blade)
- Cutting board or surface
- Metal edged ruler
- Grommet and Grommet kit
- Hammer
- Sharpie pen
- Men’s old t-shirt (rope or ribbon)
- Googley eyes
- Pom-poms
- Other craft supplies
- Large letter printed out on letter-sized paper (first initial of your child’s name. I used Garamond Bold.)
Instructions:
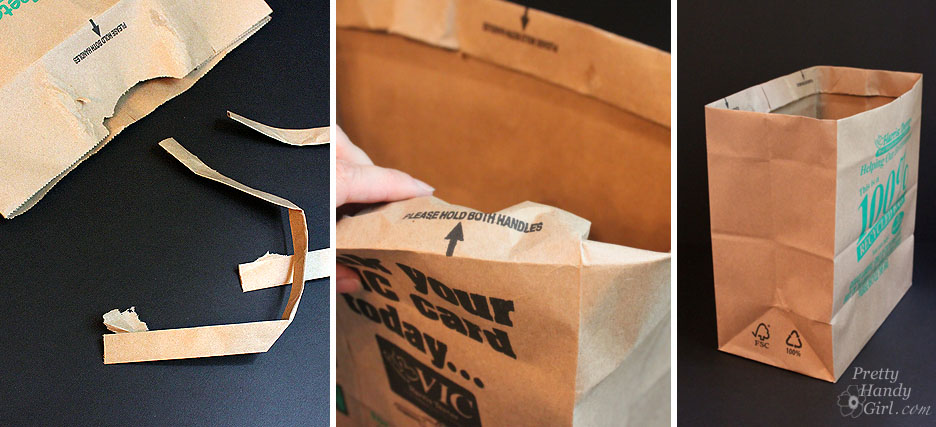
Start by removing the handles from the paper grocery bag and then cuff the top of the bag by rolling it under two times.
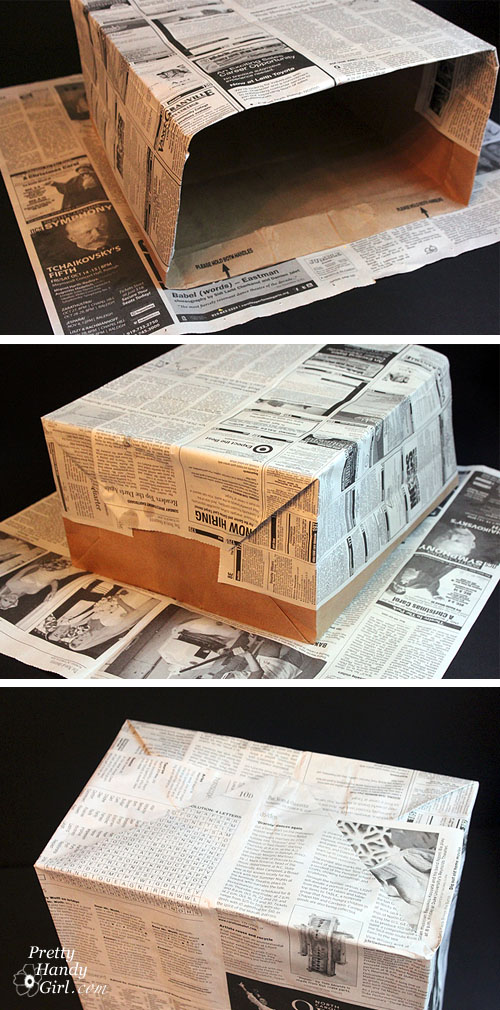
Pick out two sheets of newspaper (I used the obituaries. Truly Halloweeny don’t you think?!) and bring the paper bag and newspapers outside and spray them with spray adhesive.
It is important to wrap the paper bag with the newspapers as soon as possible for a maximum bond.
Wrap the bag neatly like a present with the newspaper. Use clear packing tape to tack any loose edges down. Also add a strip of packing tape to the inside of the bag cuff for extra support for the handle (should your child bring home pounds of candy!)
Take out your sharpie pen and draw lines in a spiderweb pattern on the bag.
Set the bag aside and collect the orange foam board, x-acto knife (with a fresh blade), pencil and the letter print out.
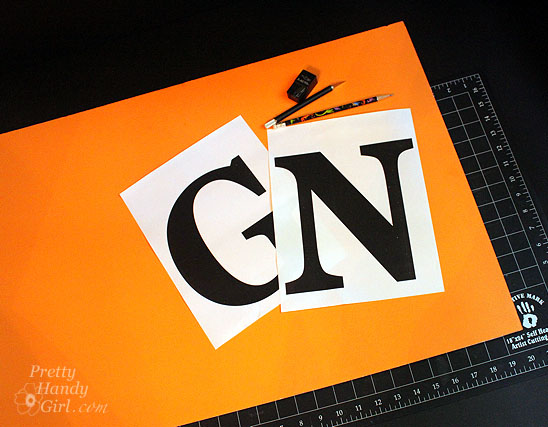
Set the letter on top of the foam board. I usually line the edge of the letter up with the edge of the foam board for less material waste.
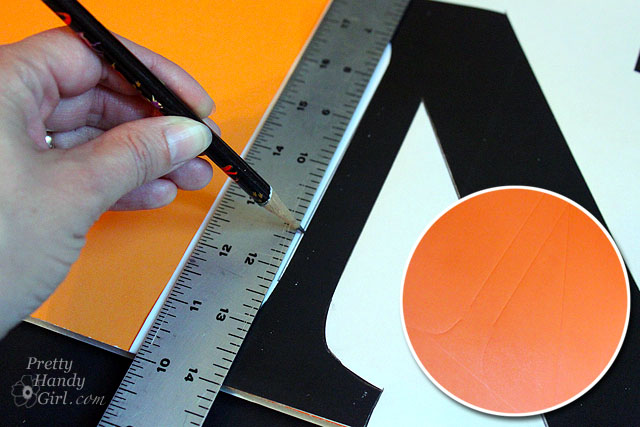
Press firmly with the pencil as you trace around the letter. When you remove the print out you should see an indented outline.
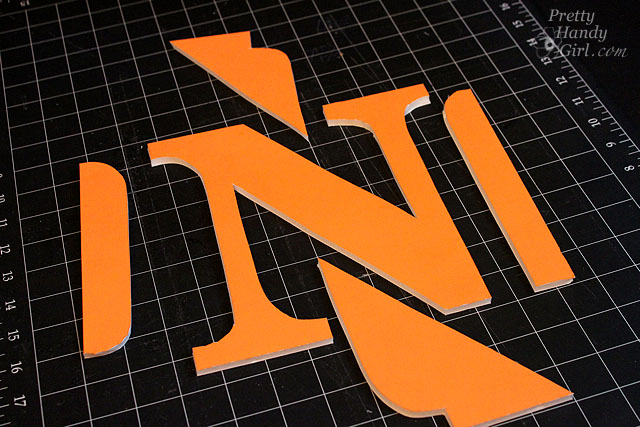
Using the x-acto knife, cut out your letter shape. Use a metal ruler to cut straight lines. If your knife starts to tug and pull at the foam board, put a new blade in.
Clean up any ragged edges with the x-acto knife.
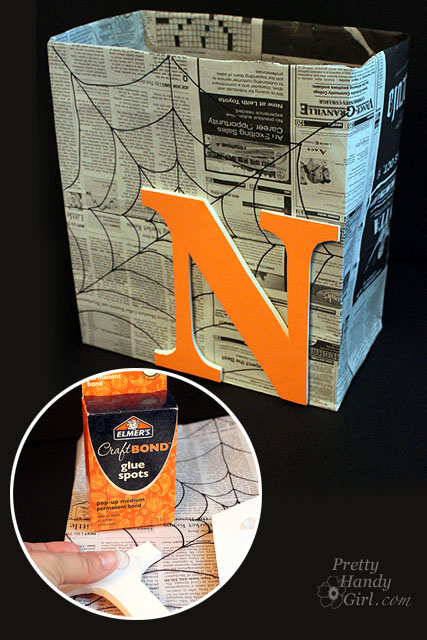
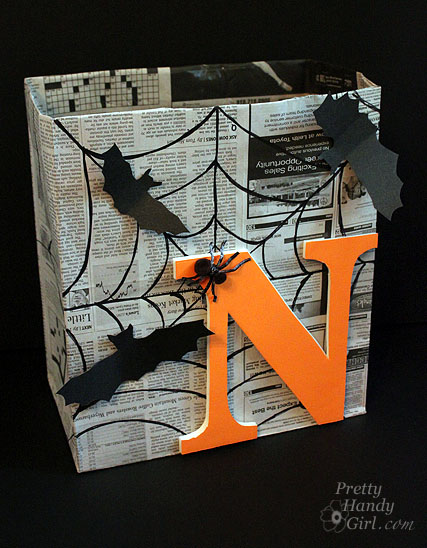
Use a few Elmer’s Craft Bond glue spots to affix the Elmer’s foam board letter to the bag.
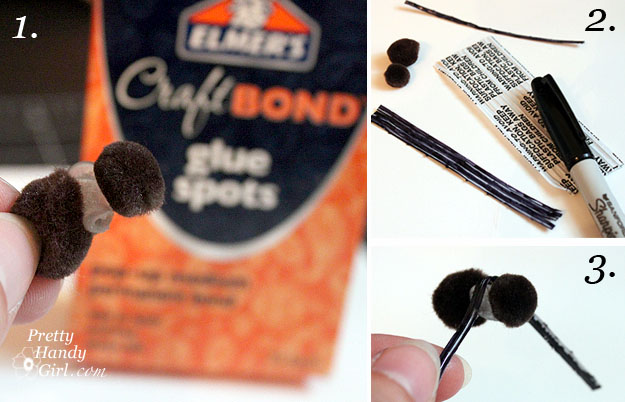
To create a little spider, glue two pom-poms together with another glue spot. If you have black twisty-ties you are good to go aren’t you special, you don’t have to color them. (I only had white ties so I colored them with the black sharpie.) Wrap four twisty-ties around the middle to create the spider’s eight legs.
Use another glue spot to glue the spider to the bag.
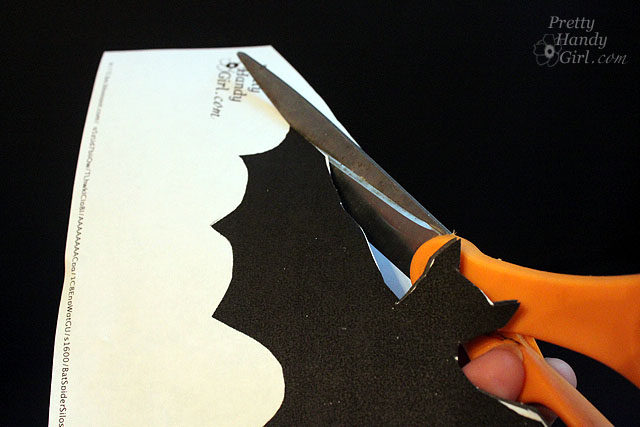
Print out a bat silhouette downloadable template and layer it on top of black poster board. Cut out a few bat silhouettes.
Use a glue spot on the center of each bat to glue them to the bag. Fold the bats wings up for more dimensional interest.
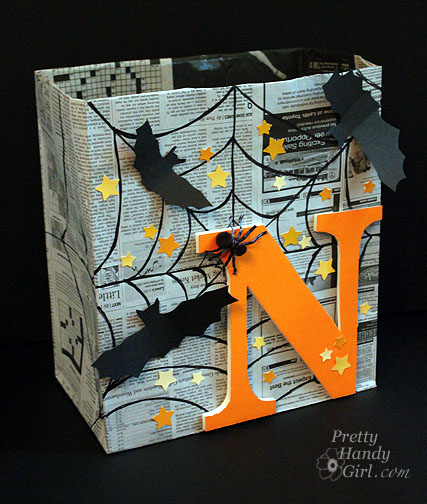
Add stickers (or pre-punched paint chip stars using Elmer’s Glue-All multi-purpose glue) to the bag.
I incourage you to decorate your bag anyway you like. Bust out your craft supplies for inspiration.
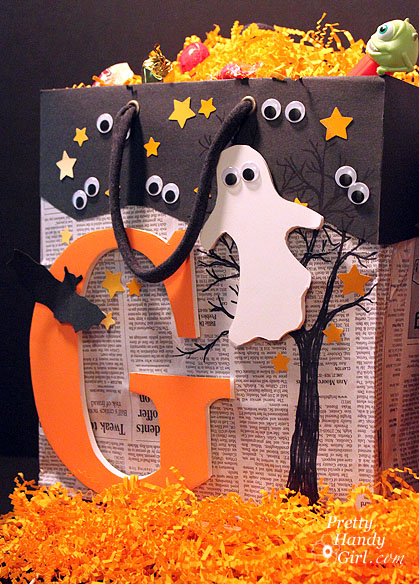
If spiders and bats aren’t your thing. How about spooks and spirits?
To add the handles, follow the directions on your grommet kit. 1. Punch a hole in the bag at the top of the bag using a hole punch. 2. Insert a long grommet through the hole. Lay a short grommet on top. 3. Hammer the grommets together using the metal rod tool that came with the grommet kit.
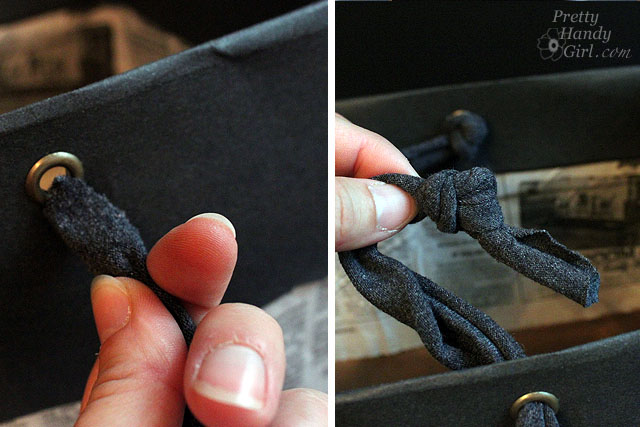
Cut off the sleeves from a t-shirt. Cut two 2.5 – 3″ wide strips. Then stretch the sleeve loop in opposite directions. This will make the shirt material roll.
After you have stretched and rolled the sleeve loops, cut them at the seam. Then thread each end through the grommets on the bag and tie a double knot on the inside of the bag.
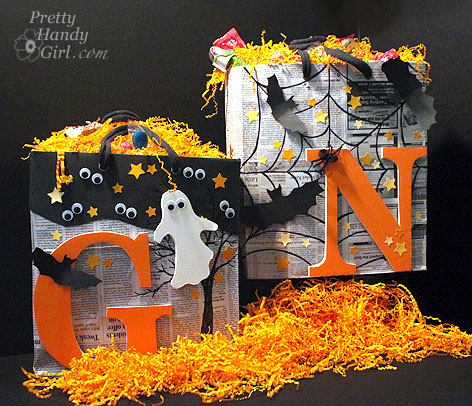
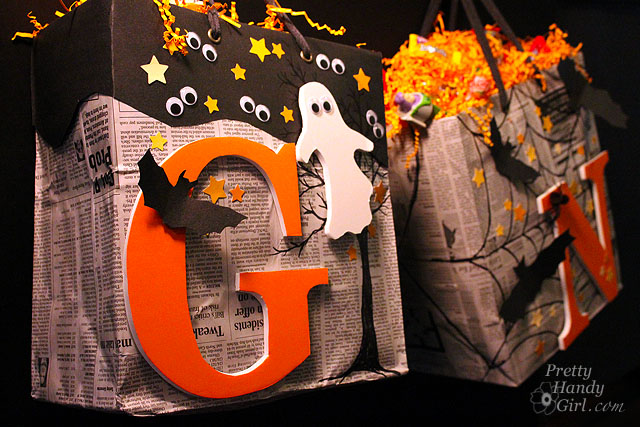
Now gather up your little trick-or-treater and give him this unique candy collection bag! My sons’ had the biggest smiles on their faces. Definitely worth the effort to make these bags.
This eency weency spider is my favorite!
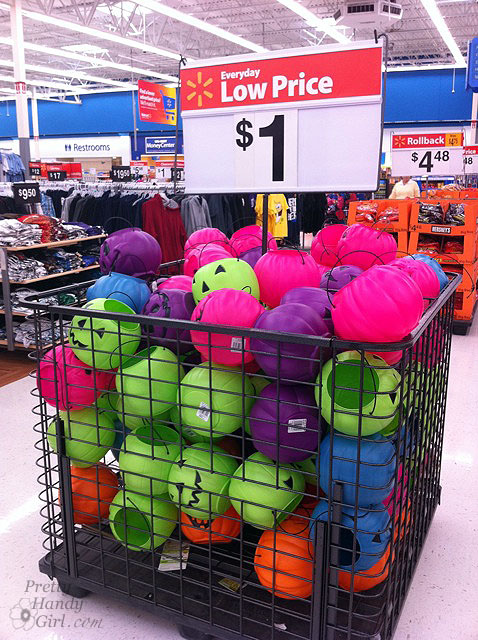
Way more personalized than these generic plastic pumpkins, don’t you think?!
Which one is your favorite? I can’t decide, because I love them equally as much. Spook or Spider?
Eeeeeekkk, we can hardly wait for October 31st!
Disclosure: This project has been compensated as part of a social shopper insights study for Elmer’s #gluenglitter #CollectiveBias #CBias. The ideas and opinions shared in this post are purely my own from my own crazy creative head.











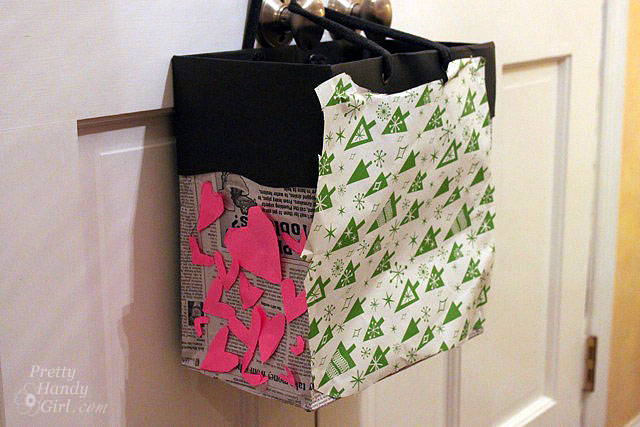


Love the idea of using newspaper obituaries, so clever! Those turned out great, and loved the one for all the holidays too 🙂
LOL! you like that huh? Not too morbid using the obits?
I am always so impressed with your creativity! I love the details in your tutorials.I am inspired to try many of your projects because I think with your detailed instructions I may just be able to make something that turns out ok! Thanks for helping us “not so creative” people believe that we too can be handy!
Deb
These turned out so cute! Your photos are amazing and I love the details you put into creating them.
Thanks Amanda!
What a sweet little boy!! I LOVE your bags!! Fabulous!!
Super cute treat bags! I love that they are huge to hold mucho candy.
Kathy, yup, I think my boys are going to appreciate that too! Although, we’ll have to rein them in. LOL!
WOW! I am posting mine tomorrow and maybe I need to redo mine…lol!
Your bags are amazing!!! I need some of your crafty genes!
What a fantastic job! I absolutely love them and love even more that your son made his own with every holiday represented!!! So stinkin’ cute!!!
Sara, my 5 yr. old is a cutey. He says he’s making his own costume. Can’t wait to see what he comes up with !
These are so cute Brittany! Would be great for party favor bags and regular brown paper lunch bags too. Great project!
Maybe you need to make a dozen of them for Maddie’s party! I’ll warn you, they take some time ;-). Better yet, have the kids make their own.
Hi Brittany-
Much better than a pillow case or a plastic pumpkin to go trick or treating with. Your bags are works of art.
I am sure you took lots of photos of your son with his all- season creation so when he is 25 your can show him just how adorable he was when he was 5. Very cute 🙂
Thanks Diane. I love that my kids think creatively too ;-).
these are soo cute and crafty. What a great way to make unique trick or treat bags with just recyclable materials and some imagination. I have to say I luv the Ghost and spirits one cause I’m a huge chicken with spiders. lol…
LOL! I understand your fear of the spiders. I don’t mind them too much, in fact I’m trying to be a lot more brave around the kids when I see one.
Too Cute! I think the little ghost bag is my favorite! Great idea Brittany!
You did such a FANTASTIC job!! Such a cute project. I am so jealous of your awesome skills using an x-acto knife- I am so NOT good at using them.
I do have one question- can ya make me one with an M? Hee hee. 😉
Monica,
Do you use a fresh blade each time? That is the #1 problem when using an x-acto blade. Wish I had time to make you one ;-).
Brittany
That last photo really gets me. Oh, so wonderful.
Your bags are adorable–I know your boys loved the fact that you spent the time to make these for them. But your five-year-old’s creation of a multi-holiday bag? That really takes the cake. Looks like he inherited his mom’s creativity! 🙂
Richella, isn’t he creative, that five year old. I just don’t know where he gets it?! LOL!
Adorable bags! So creative and unique!!
Carmen and the Primcats
Thanks Carmen 😉