Saving Etta: Side Porch Update
Saving Etta: Side Porch Update
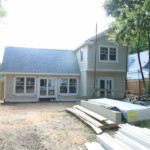
While there was a lot of progress on the exterior of the house, the side porch was built after the interior walls were framed and shortly before the exterior siding was put on. Truth be told, the side porch build started way back before the framing process. In fact, if you really want to get technical, some thought went into the side porch materials before the back of the house was removed.
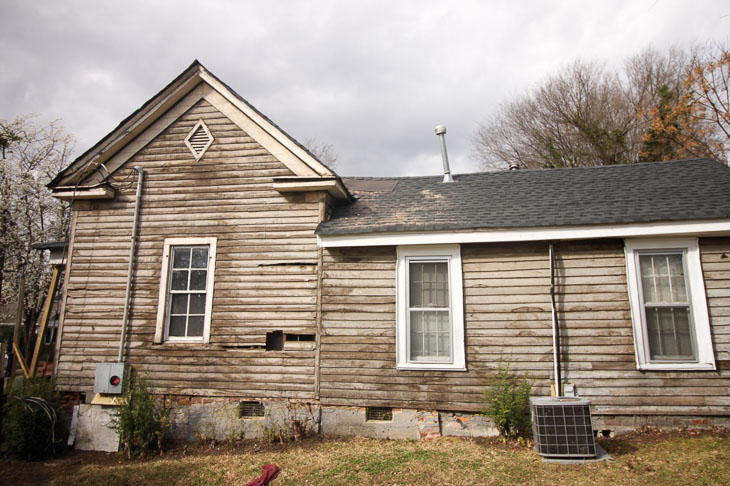
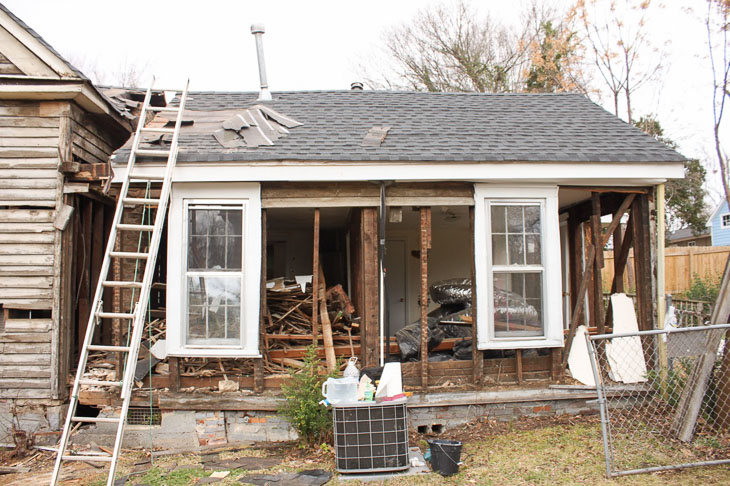
After the aluminum siding was removed, I could see the original wood siding that clad Etta’s walls. Oh how I wanted to keep the old siding, but most of the siding was filled with large holes, cracked, and brittle.
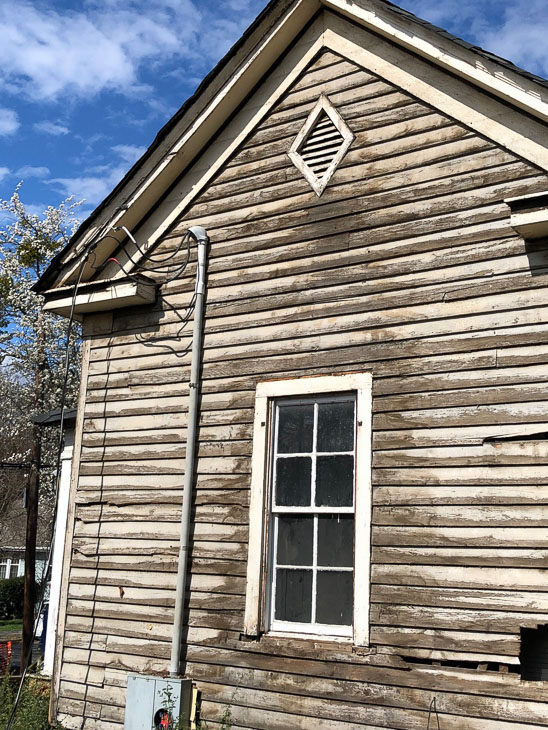 After assessing all the pieces that needed replacing, I would have needed new siding for 2/3 of the original house. Plus, the new addition siding would never match the old. It was an unfortunate decision, but I chose to remove all of it. Before the excavator arrived, I began carefully pulling the old siding off the house and saving any pieces that were in decent shape. I knew I could use them somewhere, and hoped it would be on the porch ceilings!
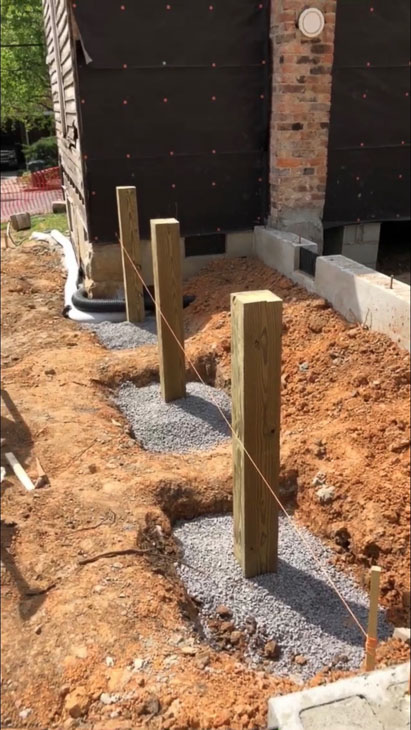
The siding (and copious amounts of bead board from the interior of the house) was safely stored away in a trailer for later use. Shortly after the demolition and foundation footers were poured, I began preparing for the side porch construction. While the concrete was still wet, I sunk anchor bolts into the fresh concrete footers under the side porch location.
After the mason finished building the foundation, I cut three 6×6 pressure treated Southern Yellow Pine (SYP) posts and secured them to the anchors. Then I filled in around the base of the posts with drainage rock to prevent water from pooling around the posts. Although the lumber is moisture and bug resistant, I still didn’t want them sitting in direct contact with the soil or allowing water to pond around the bases. As someone who has seen the destructive capabilities of water, I’m always trying to build to prevent water from deteriorating the materials.
Speaking of being a quality builder, let’s talk about choosing materials for exterior building projects. One thing I knew early on was I wanted to retain the look and feel of this house built in 1900. Back in the day, composite decking didn’t exist. I knew I wanted to use real wood for the porches, that’s why I’m proud to introduce Wood It’s Real as a sponsor of the Saving Etta project.

A few other reasons I decided to use Southern Yellow Pine for the decking:
- Refinish: As the wood ages, it can be refinished and stained again as needed. When composite materials get scratched or faded, it cannot be sanded down.
- Strength: Southern Yellow Pine is categorized in the soft woods category, but it actually has the strength of a hard wood. SYP is not like soft interior SPF (Spruce, Pine or Fir) framing lumber. They are two different species.
- Temperature: One of the biggest complaints I’ve heard about composite material for decks is it gets hot! In fact, one of my carpenters told me he has tons of work at the beach replacing composite decking because it can warp from the heat of the sun.
- Beauty: The wood grain is beautiful and takes stain nicely. Being a designer and artist, I like having hundreds of stain colors to choose from instead of a few stock colors.
Side Porch Progress:
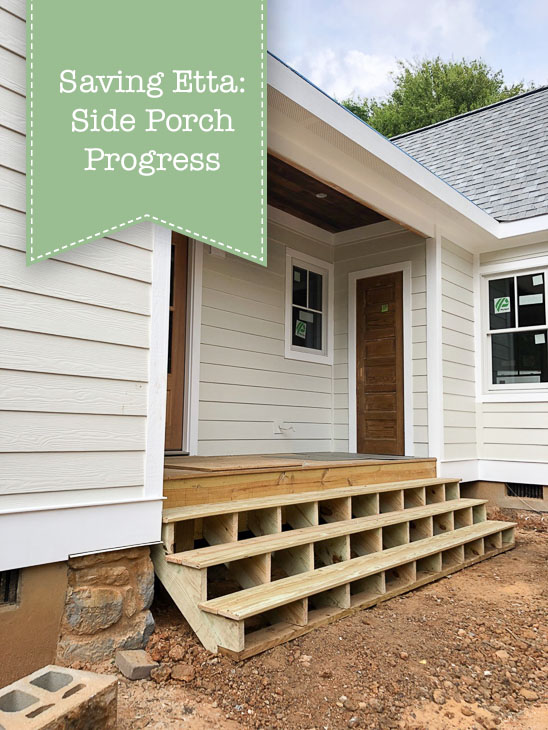
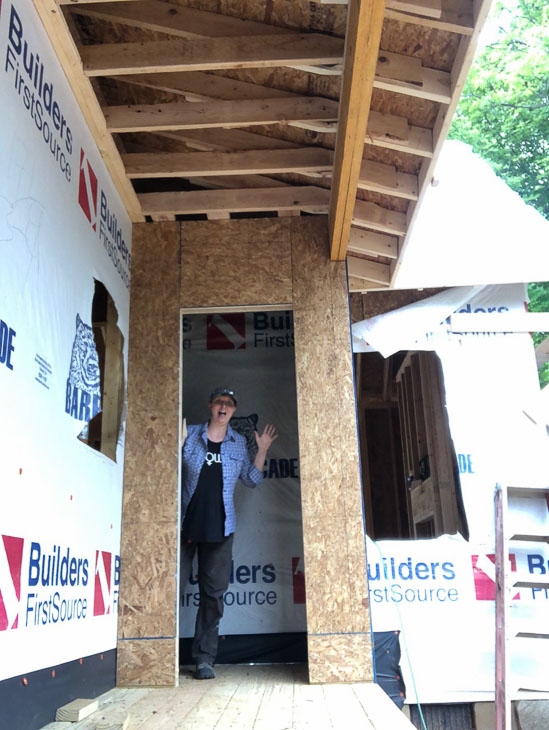
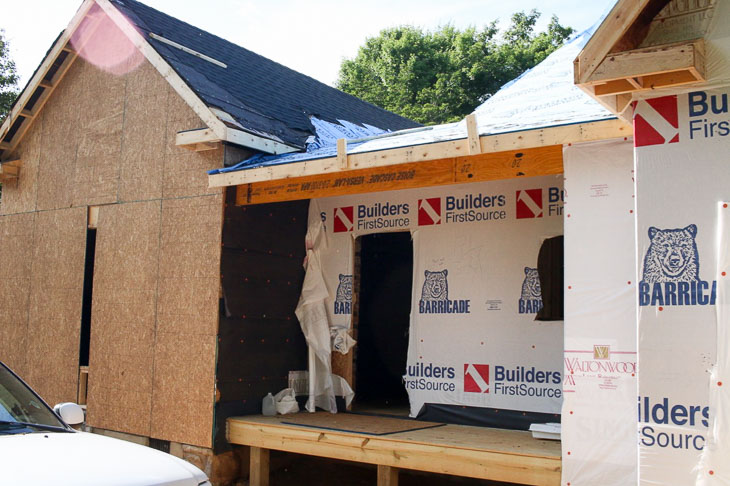
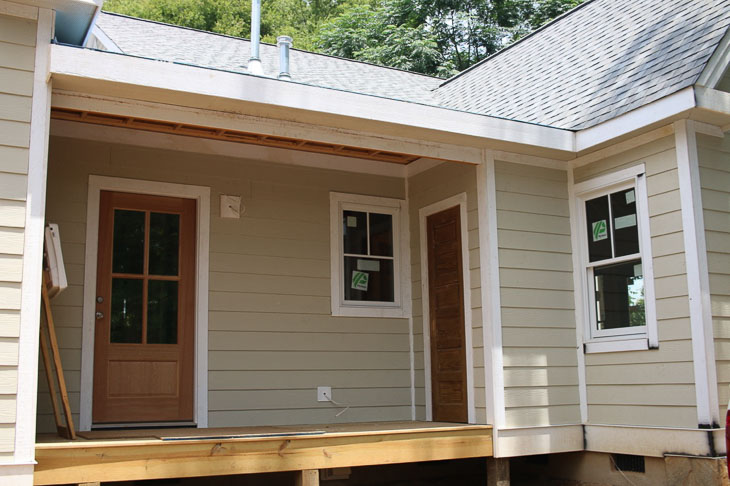
I wish I had progress shots of the side porch build— but as often happened—I left for some errands and when I got back to the house “poof” a side porch had magically appeared! As you can tell by the picture below, I was super excited to find the porch built and the little storage closet framed in.
The floor boards are all pressure treated Southern Yellow Pine. To be able to stain the deck sooner, I requested kiln-dried deck boards from my lumber supplier. Regular pressure treated lumber has to dry completely before you can paint or stain it. (Otherwise, the paint might peel off as the wood dries out.)
Within a few days, the framers also installed this salvaged wood door. I wish I could say it came from Etta’s interior, but it didn’t. However, the door is from the same era.
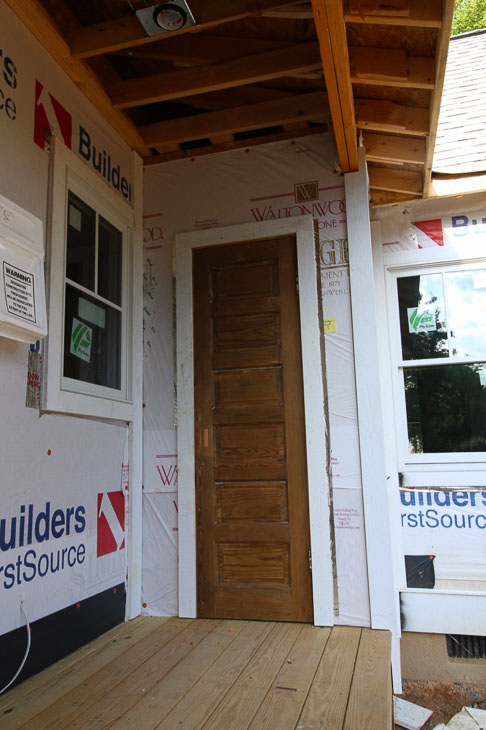
I salvaged it from one of the houses on the old frat house row near NC State. All the houses were built from 1895 – 1920. Unfortunately they were slated to be torn down to make way for apartments. Luckily one of my local followers tipped me off to this travesty. She and I worked with the demolition contractor to salvage doors and windows from the houses. Sadly about a week or two after we salvaged things from the houses they were leveled. Honestly, I can’t drive by there because I want to remember the street with all those beautiful old houses on it. (Granted, they were all in rough shape.)
Back at Etta, the side porch didn’t get steps right away, so we used a little “DIY” step stool for months.
In the meantime, I went to my stash of salvaged siding and pulled out the best pieces to clad the porch ceiling. Although I knew they were likely painted with lead paint, I double checked my suspicions using a Lead Check test kit.
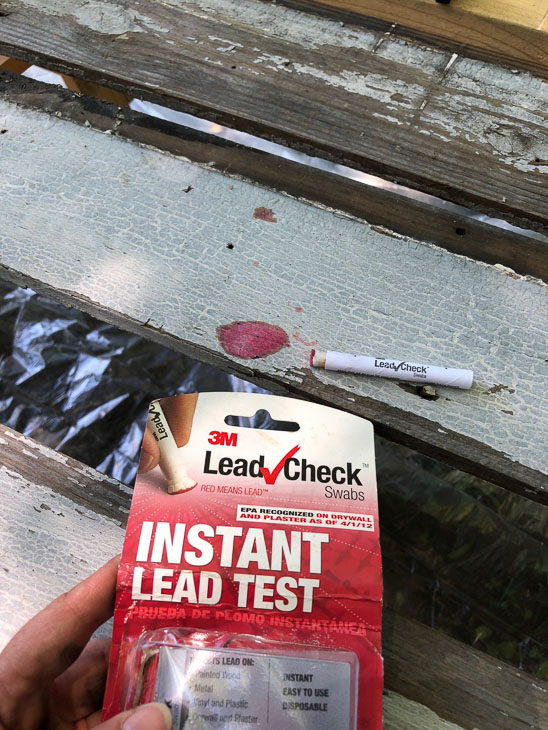
That red spot indicates the presence of lead paint. Which meant I needed to remove and seal any of the paint that was chipping off. Working outside with a mask and a tarped off area, I scraped the paint using a ProScraper hooked up to my ShopVac with a new bag and filter to capture all the dust.
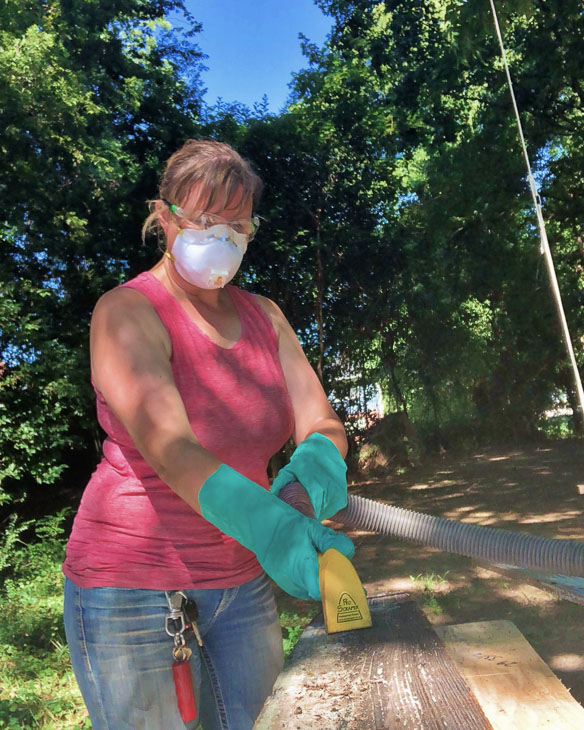
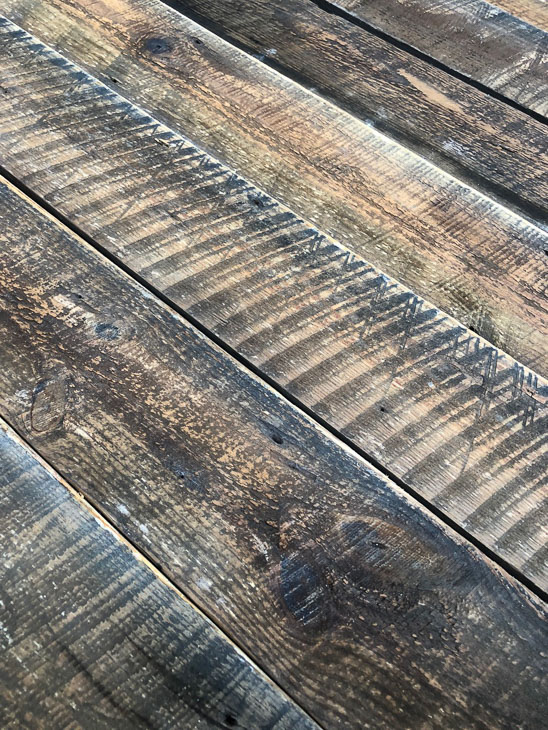
After the majority of the paint was scraped off, I carefully cleaned up the siding and rolled up the tarp to dispose in a sealed bag. Then I turned the siding over and gasped at the beautiful old saw marks and wood grain.
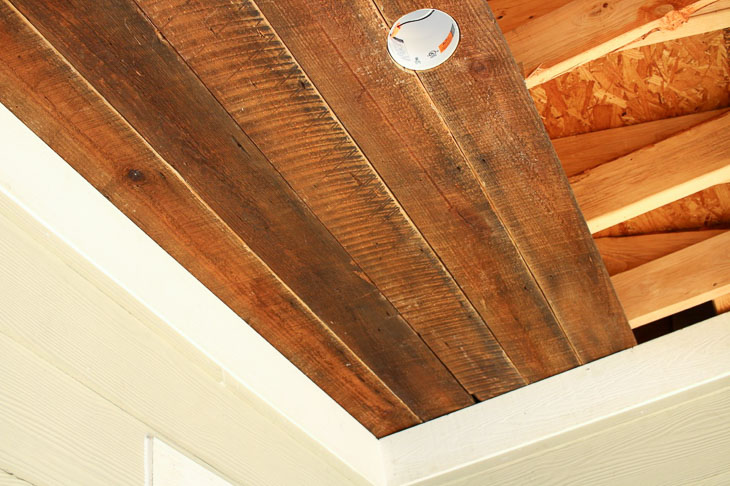
Even though the painted side of the siding would not be seen, I still used an encapsulating primer over the paint just in the off chance someone took them down one day.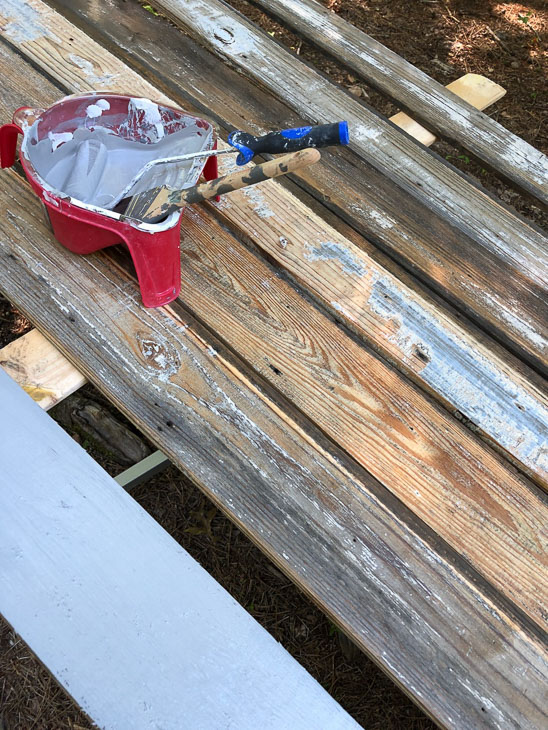
After the primer dried, I coated the back sides with a clear deck sealer to protect the wood from the elements (even though they had more than weathered 118 years of being exposed to the elements.)
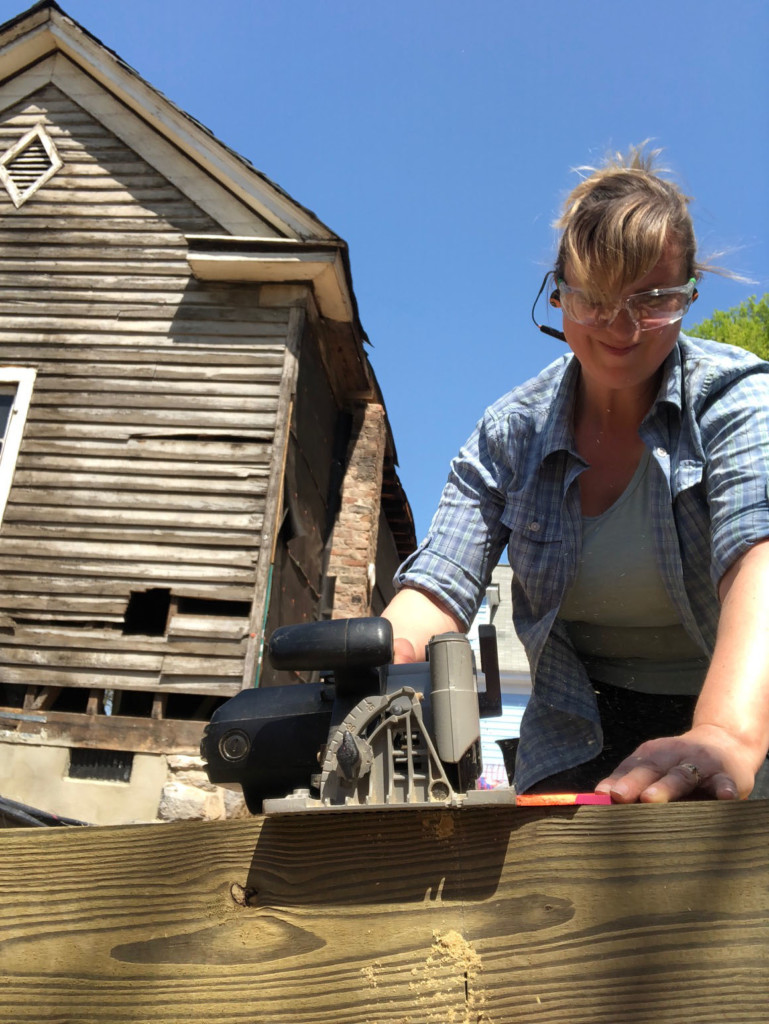
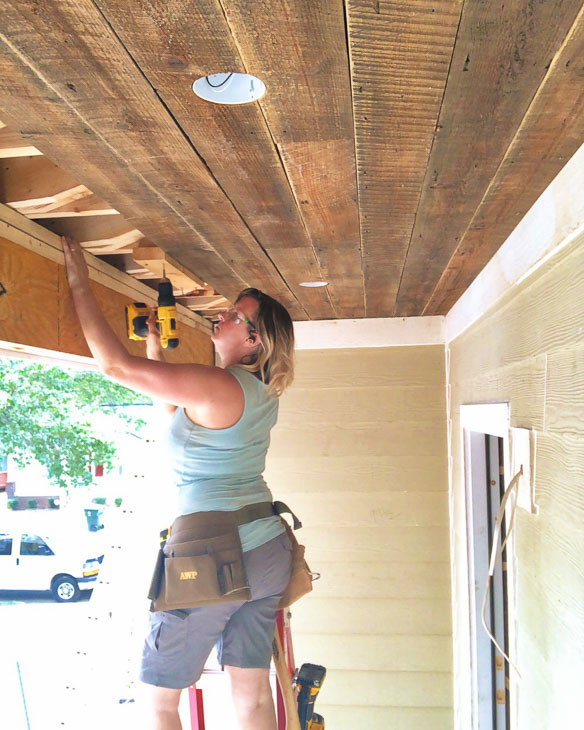
It took me two days to cut and install the siding on the side porch ceiling. It was two of the hottest days in Raleigh. And working overhead was not for the faint of heart.
But, in the end I was thrilled with the porch ceiling.
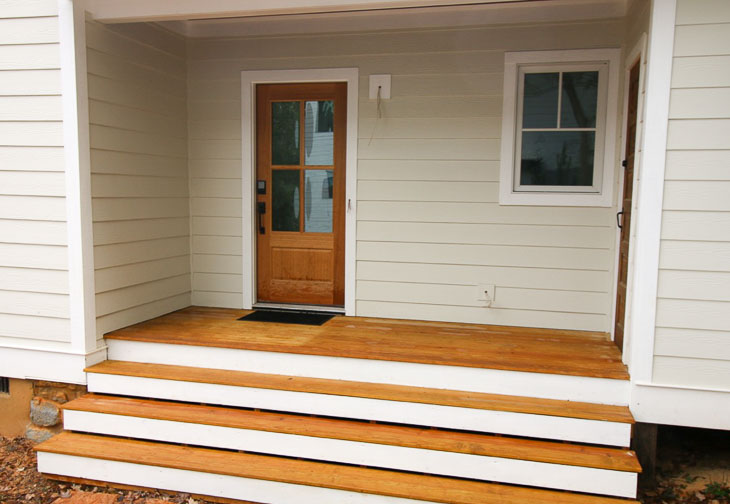
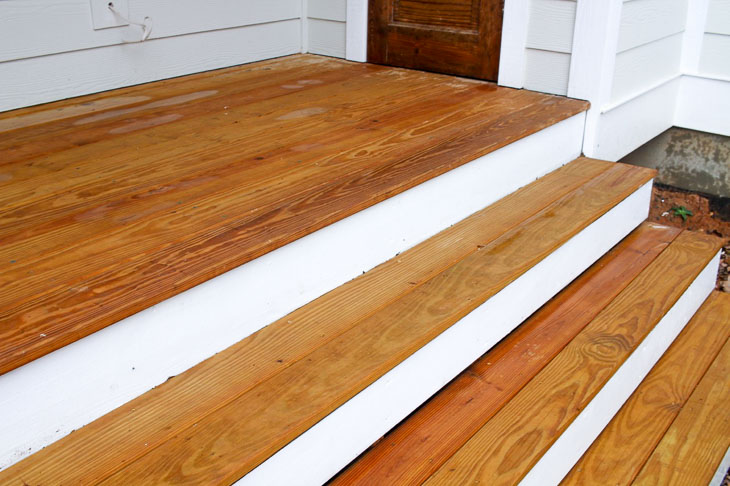
After the side porch ceiling was complete, I used brown caulk to seal any gaps between the old siding and the large nail holes to prevent bugs from getting through them. After the week of climbing ladders and that little DIY step, my gluteus muscles were incredibly sore. It was time to call my framer and schedule him to come back to build the side porch steps. By now, I was worried one of my subs (or worse yet, an inspector) would trip and fall on the little “step stool”.
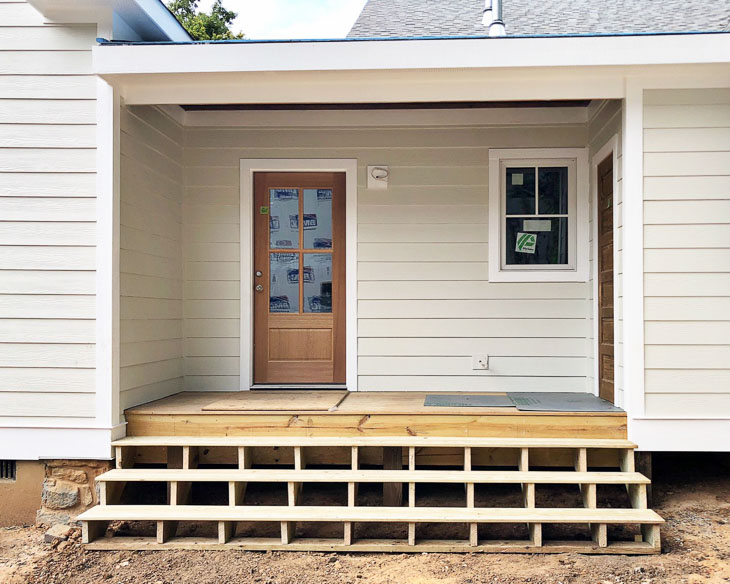
The stairs were a huge improvement. I added the risers and painted them to match the trim color.
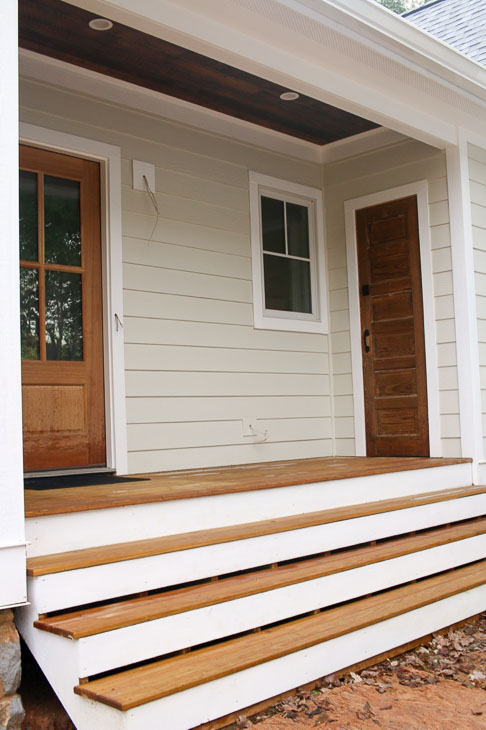
The stair treads are also Southern Yellow Pine. Be sure to read more about why SYP is the best choice for your exterior projects at Wood It’s Real.

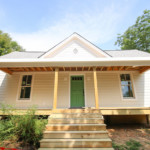
I hope you enjoyed this update from the Saving Etta project. Stay tuned for more updates inside the house!

Disclosure: This post is a sponsored post for Wood It’s Real. It was written as part of their sponsorship of the Saving Etta project. I was not told what to write. All words and opinions are my own. I am very particular about the brands I work with, and only partner with companies that provide quality materials and/or services.
Really impressed! Etta is looking really good!
Wow, totally impressed as these updates come in. Keep going!
I’m really impressed with the care you take with future generations in mind, for example sealing the lead paint side of the old boards. Etta is looking quite beautiful and retaining a lot of her former glory. I love the little shed door. Kudos, Brittany!
It’s really looking good! I’d be happy to have one just like it!
Thanks for posting the updates! I like seeing Etta’s progress. It’s looking good!
I was worried it no longer looked like it should. Times change and people want other things. Railing on porch?. Older people will have a hard time on all those stairs wirhout something to hold onto.
I can’t wait for every Saving Etta update! I love the side covered porch, the small storage nook, the ceiling made with Etta’s old siding. Having grown up in a 1870 house in N Vt, and my grandparents weekend farmhouse built in 1810, I adore old houses and their history, the charm and craftsmanship that made them what they are, historically and architectural art.
Congratulations!
i so enjoy these updates and am quite proud of you.
Wow! She is looking so good! It’s a shame more old homes are not being saved but at least you have saved one!
I love people like you, that reuse/salvage/re-purpose things from the house. The porch ceiling looks great! I like the touch of using a bell drain spout instead of using a downspout. The house looks so much larger with the porches.
I’m concerned for you because you took down the lead painted wood before you tested to see if it was indeed lead. From what I’ve seen, you should have checked first and if positive, have it safely abated.
Your siding turned out gorgeous! I love it!
Paige
http://thehappyflammily.com
Love the ceiling and the salvaged door! Glad to see some older materials come back in after seeing so much new be added in recent posts. Looking forward to seeing more old materials incorporated on the front porch and throughout the interior. 🙂