Painting Metal Patio Chairs: 5 Easy Steps to an Awesome Makeover

What’s worse than a rusted, faded, and drab looking patio chair?
Not being able to enjoy your outdoor space because of them!!
We all want to be proud of our homes and be able to have friends or family over. Don’t let a little paint get in the way of having fun with your loved ones. I’ve made the mistake of thinking that repainting a metal chair will take forever and isn’t worth the time or effort. But I’m here to tell you that if my wife thinks the chairs in this post look good then you will, too.
By the end of this short tutorial you’ll transform your chairs from looking worn out to AWESOME in 5 easy steps. I did make a few blunders though, so please read on so you don’t fall victim to the same mistakes.
Here are the supplies you’ll need:
- Wire brush with scraper
- Random orbit sander
- 60, 120, 220 grit sand paper for sander
- Bucket, water, and sponge
- Drop cloth
- Rust Oleum Universal Paint & Primer (I chose oil rubbed bronze)
- Respirator
- Protective eyewear
(Affiliate links are included for your convenience. Brittany earns a small percentage from a purchase using these links. There is no additional cost to you. You can read more about affiliate links here.)
This project will take you about two hours and it the end you’ll be super stoked with your chair’s makeover. So let’s get to it.
Prep Work: It Makes All the Difference
Thoroughly inspect your entire chair for peeling or cracked paint.
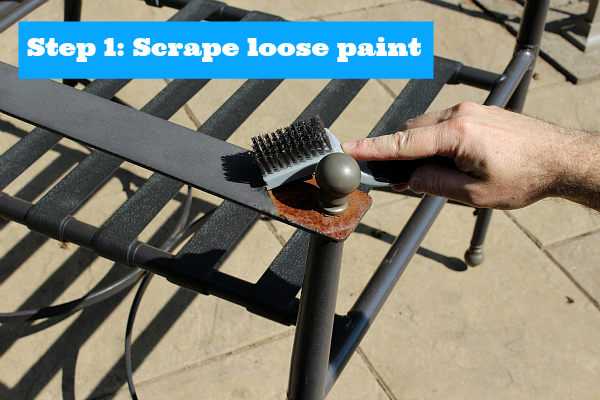
Step 1 – Scrape off loose paint.
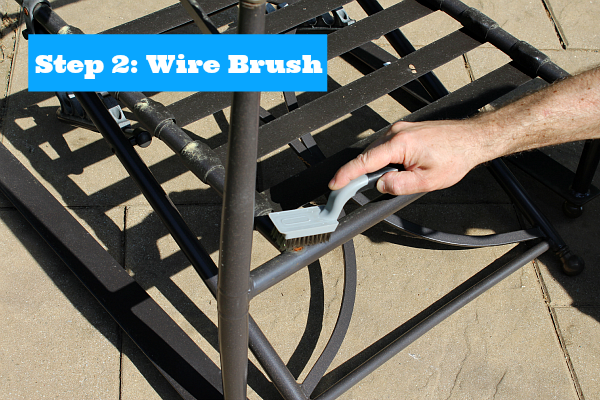
Step 2 – Use the wire brush to remove small chips and rust. Wire brushing is the best option for rounded or oddly shaped areas. Both of these steps are super simple and shouldn’t take you more than 15 minutes. You don’t need to get all the paint off and completely smooth, just be sure to remove the loose or flaking pieces.
We had some rust spots where the paint wore away over the years. The chair arms were super rusty in certain spots and that’s where a random orbit sander comes in handy.
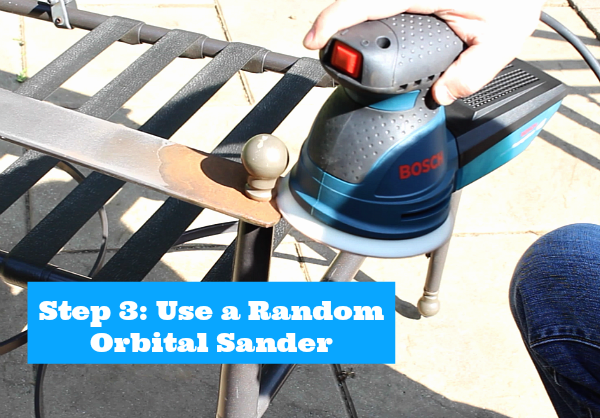
I must say that Bosch makes kick-butt tools and this sander didn’t let me down. The directions will clarify which kind of sand paper grit to use and what setting is best for your project.
Step 3 – Use 60 grit paper first then 120 with the sander setting on 6. One thing I learned was that you should place the sander on the surface before turning in on and move it without applying pressure. Let the sander do all the work. The 60 grit took off all the remaining loose paint that couldn’t be removed by hand. And the 120 grit smoothed out the transition between the rust spot and the existing paint.
Step 4 – After using the sander, remove dust and dirt with a bucket of water and sponge.
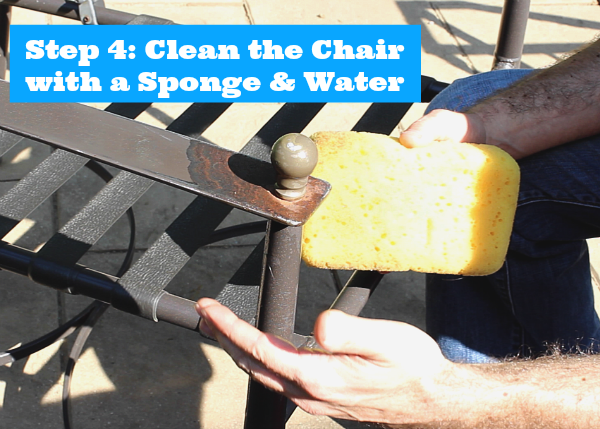
Let the chair completely air dry before moving onto Step 5: painting.
Rust-Oleum Paint Has Never Let Me Down
I’ll tell you something about paint: Rust-Oleum should be on your short list because it’s never let me down. What do I mean by this? The coverage is superior, it sticks to everything, and the finish is professional. (And I’m not paid to say this!)
I decided to use Rust-Oleum Universal spray paint because it has primer in it, too.
This cuts WAY down on time spent painting, which comes in handy when you try to fit in projects over the weekend between kids’ activities.
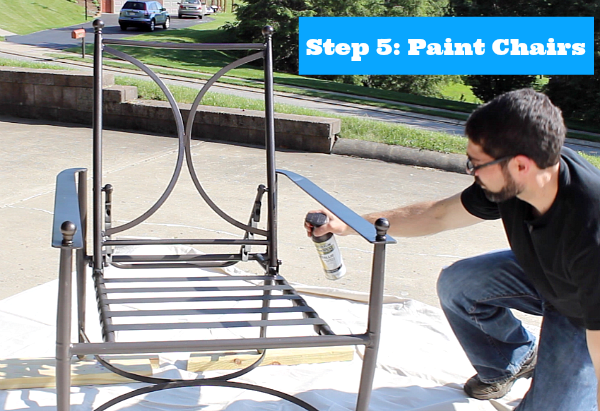
Step 5 – Paint the chairs. There is a method to painting patio chairs, albeit debatable. I chose to paint the front of the chair from the top to the bottom first.
Next, I worked my way around the chair in a clockwise direction starting on the left hand side. I let the chair dry for 30 minutes.
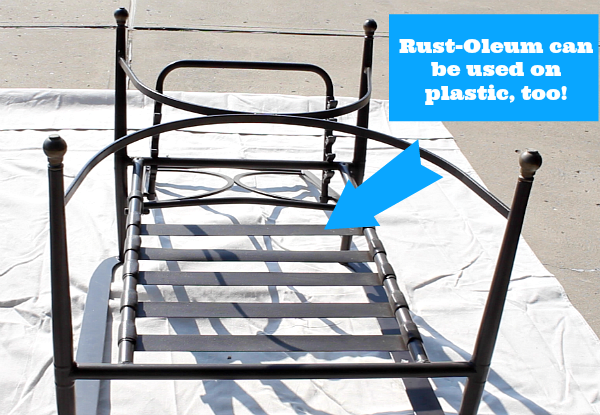
At this point you can turn the chair upside down and paint the bottom. The cool part about Rust-Oleum’s Universal paint is that it can be sprayed on metal and plastic. This comes in handy for adjustable patio chairs like these ones. The height adjustments on the chairs are plastic as are the slats that hold the cushions in place.
Here are some tips to help you with your paint spraying:
- Shake the Rust Oleum can for about 30 seconds
- Hold the can 6-10 inches from the chair
- Smoothly move from left to right for horizontal sections and from top to bottom for vertical areas
- Let paint dry for 30 to 45 minutes before applying a subsequent coat
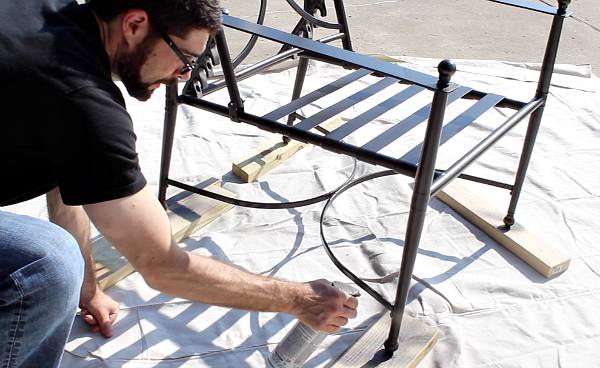
- Place the legs of the chairs on top of old pieces of wood
That last tip, using old pieces of wood, will help you get an even paint job on the bottom portion of the chair’s legs. This is even more important if you have a drop cloth on top of concrete that you don’t want to ruin. In the off chance the drop cloth isn’t fool-proof the old pieces of wood will absorb the spray paint.
Oh, and make sure you keep the chairs away from the edge of the drop cloth. Why you ask?
Because the overspray will definitely get on your driveway. Yes, I’m thick-headed and for some reason didn’t think of this. Lesson learned. Thank goodness we have a power washer. Fortunately my wife didn’t notice. Otherwise I could have been in some deep trouble.
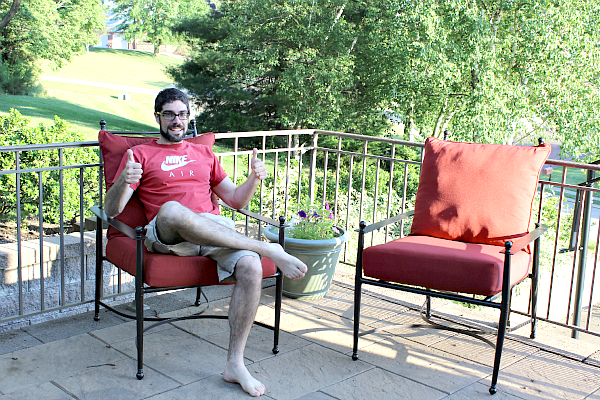
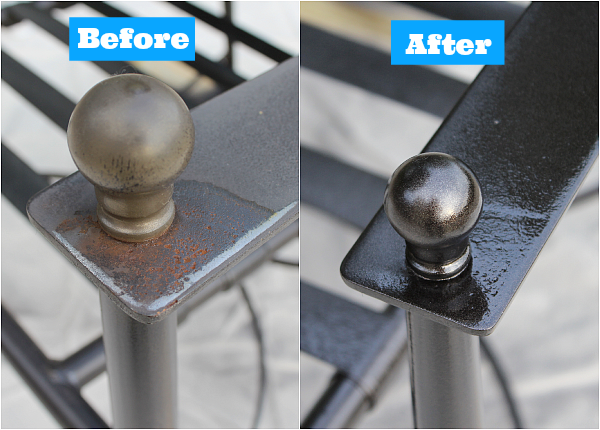
Here’s a nice before and after picture to show you the HUGE difference just a little paint can make.
After 24 hours you should be able to add cushions to your chairs and enjoy you’re favorite mixed drink.
What do you think,could your chairs use a makeover?
Take care and have a great day!


Thanks for this great article. I appreciate you took the time to write it up. Its coming in handy for us now because a new set is so expensive and we’d rather spend the money on a new conversation set versus a new dining set.
I just noticed you wrote this up a few years ago. Any updates on how they are holding up? If I can even get three more summers out of a spray paint can, I’d call that a fantastic bargain.
They’ve held up very well. More that three years and I’m pleased. A few spots need to be touched up, but we leave these chairs out all year!
My chairs have a mesh in the sitting area that cannot be removed. What is the best way of covering it?
Try using painter’s tape and newspaper.
Jeff…I just read your post. Thanks. Did some other research about the slats you say are plastic. Actually they are vinyl according to what I read. Do you think the rust oleim will stick to the the vinyl without flaking off in due time?
We just did this to a patio set someone was giving away and it looks brand new now! We also used spray paint with the primer already mixed in with the spray paint. It does have a glossy finish but should we spray a clear coat over the spray paint to try and protect the color or would it just be a waste of money?
Susan, you could probably skip the clear spray, it doesn’t have a UV coating to my knowledge. But, each additional coat will protect your surface from scratches or chipping.
Hey there,,,
Your chair designs are so lovely .. many times i find that type of designs its because of i want a perfect chair for my living room.. i really appreciate with your great work.. this information is so pretty chair.. thanks for that info it will be more helpful ..thanks a lot.. for further details please visit on this site like :
http://allsurfacerespray.com
Glad it helped Marie. I let these chairs sit out over winter and they still look great. So I hope you get the same results 🙂
Jeff…I just read your post. Thanks. Did some other research about the slats you say are plastic. Actually they are vinyl according to what I read. Do you think the rust oleim will stick to the the vinyl without flaking off in due time?
Dick, with the flexing of vinyl, it’s hard to gauge if it will rub off after a period of time. I’d call Rustoleum to see if they can recommend a paint for you.
Thanks for the great tutorial, Jeff! I have the EXACT same patio chair set and a matching chairs and dining table, and I had custom cushions made for them years ago, so I really wanted to keep the same set and touch them up!
I cleaned my Mexican metal table and painted with Rustoleum Rust Reformer. I painted the table base with a Sherwin Williams outdoor enamel paint. It sat out on my patio through the hot Texas sun and the first winter we had in many years. No rusting or damage. Can anyone suggest what I can put on the base of the table legs so the paint does not scrape off when moving the table on a concrete patio? Thanks for any suggestions.
Just purchase a lovely iron patio piece and I am excited to refinish. Thanks for the great tutorial as it will be very helpful
Great tutorial, Jeff! Thanks for sharing! The chairs look amazing.
Your chairs look great! My chairs are definitely in some need of tlc, thanks for the great tutorial!
Nice chairs, I like to perfect things myself, but I like classy stuff – a few months ago I made a really cool chair for my living room (something like this http://www.askwiki.net/How-to-Upholster-a-Chair ), I didn’t really make it myself, I just improved it like you did. It came out pretty nice – almost as nice as your patio chairs. I would paint mine, but I’ve never been good at it.
Great tutorial Jeff! Love the oil rubbed bronze choice! And think you did an awesome job on the chairs!
Thanks Matt, ORB is my favorite choice!! Fortunately my wife likes it, too. Otherwise I’d be in deep trouble.
Jeff, what a timely article for my husband and me as we are soon to receive an old family pstio set. I am wondering if you have ever used Rustoleum’s Rust Reformer and if so what were your thoughts about it.
Great post.
Hi Nancy,
I haven’t used Rust Reformer but always get great results from Rustoleum. For some reason it seems to stick and last a looooong time. Which is what I like paint to do. LOL. Thanks for your kind comments.
You don’t say how many cans of paint it takes to paint a chair. I have about a dozen chairs, tables and accessories on my deck. I took everything to an auto body shop and they painted them using auto paint. It cost $200, but it would have taken me awhile to paint that many pieces. This was about 7 years ago and the paint still looks good.
Hey Diane,
It will depend, but I used 3/4 of a can per chair. So at almost $7 per can you would spend $84. But I like your solution as well. I’ve heard of people using auto body shops to repaint their appliances and it working out great.