Outdoor Patio Table Planter, Vase and Serving Station – a #LowesCreator Idea
Wanted: A better name for this invention I created!
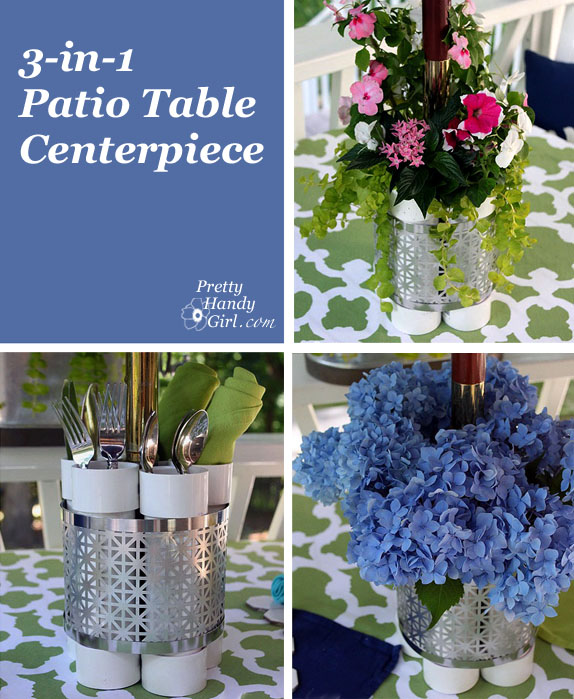
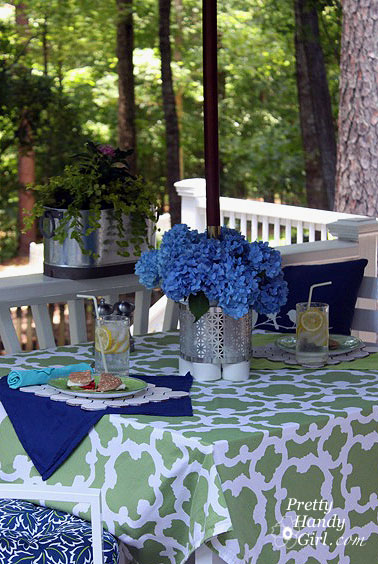
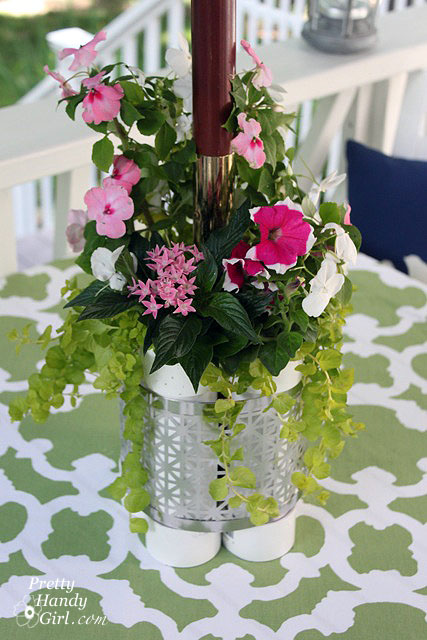
What is it? I consider it a multi-purpose centerpiece for your umbrella-shaded patio table. But, it can also be a serving station for utensils and napkins. Add some water and it becomes a vase for the table. When the flowers wilt, plant some shade loving flowers into it and you have a living centerpiece! So, my working title was: Plant-a-ma-bo-a-ma-holdey-flowers-n-stuffin-vase. But, I don’t think that anyone would be able to pronounce that. (Nor would that be very SEO friendly.)
Whatever the name, I’d love to share how easy it is to make this outdoor living table centerpiece.
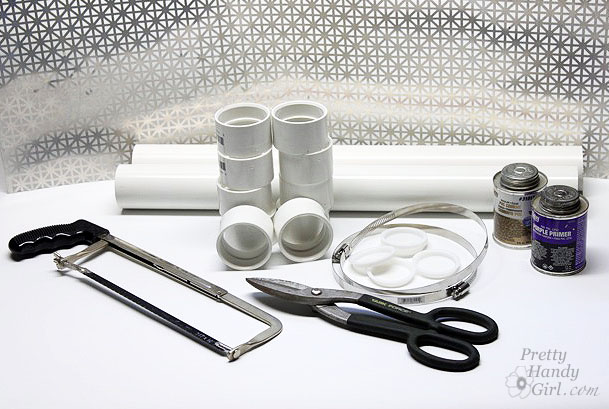
Materials:
(I’ve included affiliate links for your convenience. I earn a small percentage from a purchase using these links. There is no additional cost to you. You can read more about affiliate links here.)
- Hacksaw
- Sandpaper
- File (optional)
- 2 – 2″ x 2′ PVC pipes
- 10 – 2″ PVC couplings
- 5 – 2″ PVC test caps
- 2 – 6″ -7″ Hose clamps
- Flat head screw driver
- Outdoor window and door caulk
- Caulk gun
- PVC Primer
- PVC Cement
- Tin snips
- Union Jack radiator screen (found in the hardware section near the flat sheet metal)
Instructions:
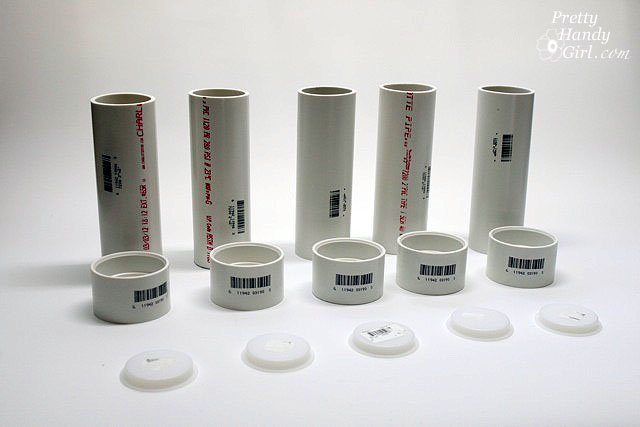
1. Measure and cut the 2″ PVC pipes into 7″ tall sections. (side note: It helps to have a stop block set up and a miter box so that all your pipes are the same length.)
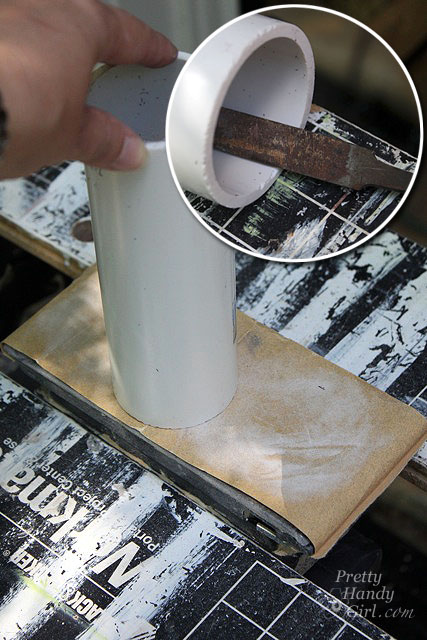
2. Stand the pipes side by side and sand down any that are taller.
Sand and file any rough edges around the top and bottom of the pipe.
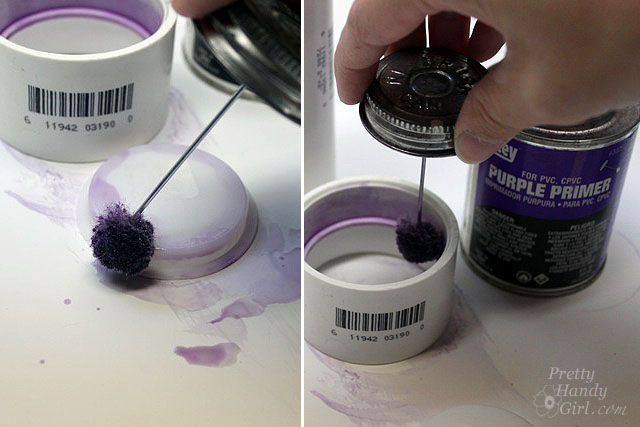
3. Brush primer around the bottom edge of the pvc pipe. (side note: Try not to let the primer drip if you use the purple colored pvc primer. It will stain the pipe.) Wipe the primer inside the edge of the coupling and around the test cap rim.
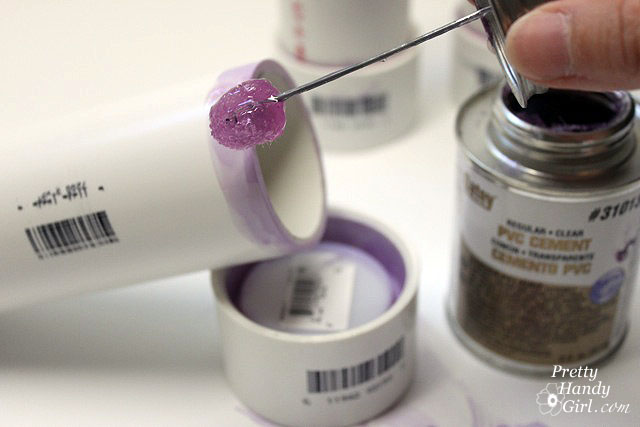
Brush the PVC cement onto the primed PVC areas.
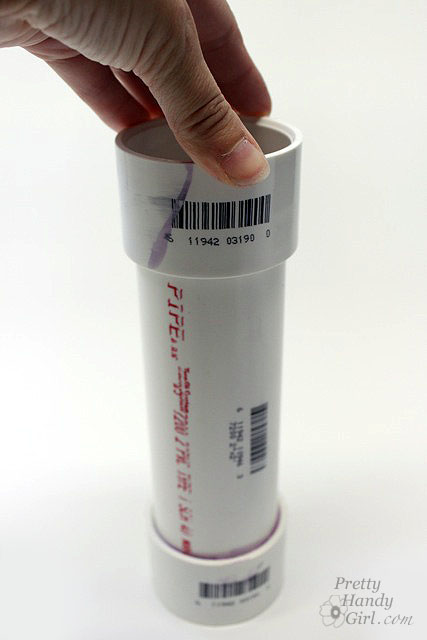
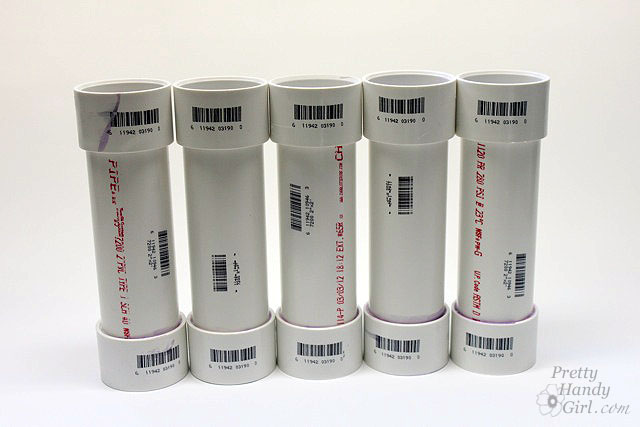
4. Immediately press the PVC pipe down onto the coupling (with the test cap facing up). Be sure to face all the writing and bar codes the same direction. You can turn all the tubes toward the umbrella so the writing is hidden.
5. Repeat the same procedure to glue another coupling to the top of the pipe (minus the test cap.)
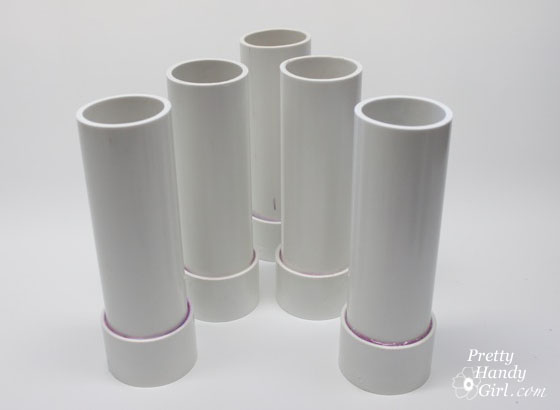
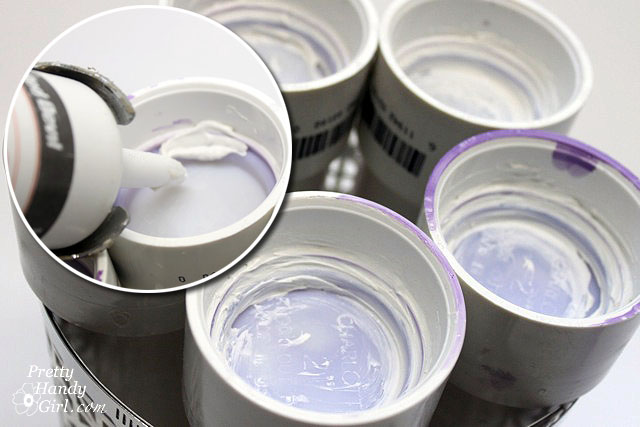
6. Turn the pvc pipes upside down and run a line of caulk around the bottom of the test caps. This will help create the water tight seal. (Or you could run the caulk on the rim of the test cap before you insert it into the coupling. Let me know if you try this and if it works better to caulk before gluing.)
This is what your tubes should look like:
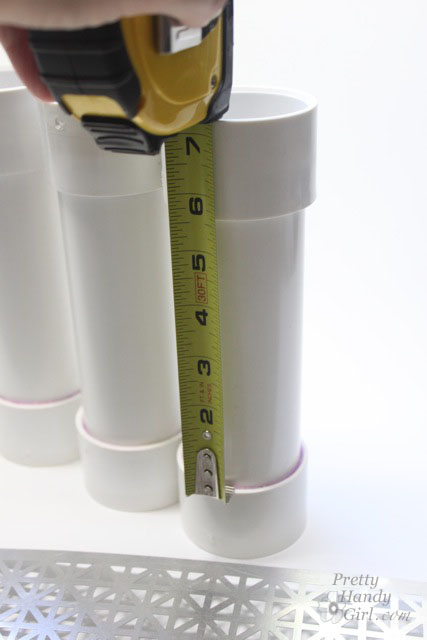
7. Measure the distance between the couplings.
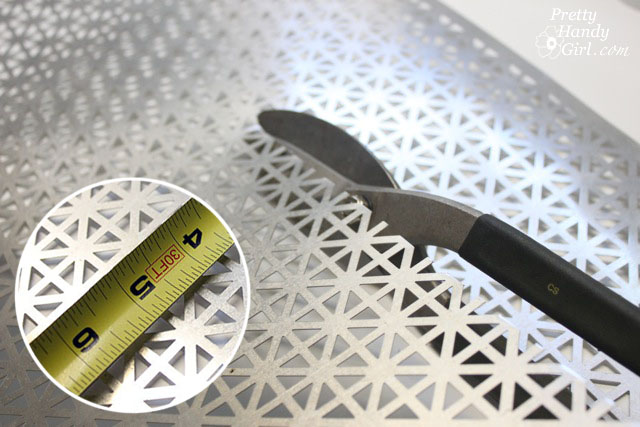
Mark the distance onto the radiator screen and cut it to size with tin snips.
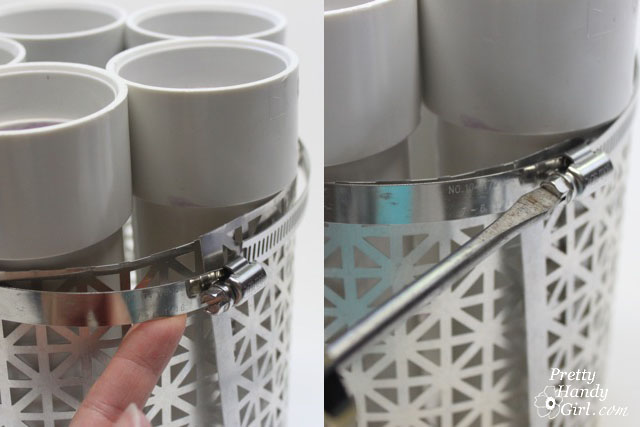
8. Gather the PVC Pipes, radiator screen, hose clamps and flat head screwdriver. Bring them out to your patio table. Wrap the pipes around the umbrella. Bend the radiator screen around all the pipes and open up the hose clamps. Secure the top and bottom of the screen with the hose clamps. Tighten the hose clamps with the screwdriver.
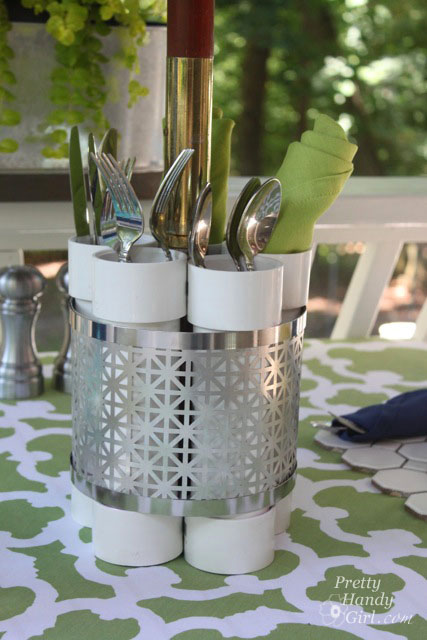
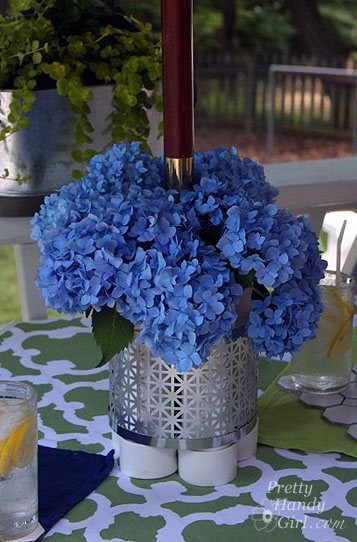
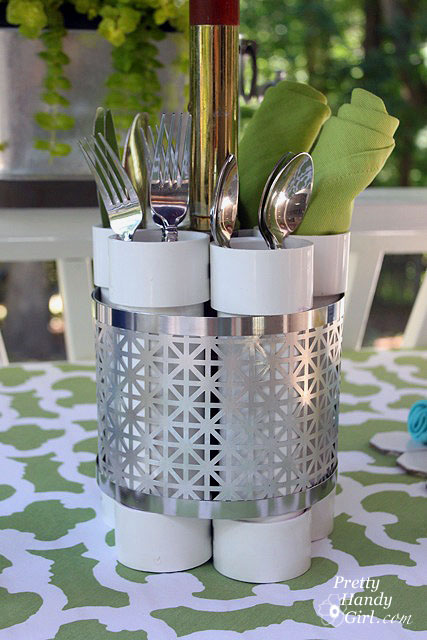
This is how your centerpiece should look:
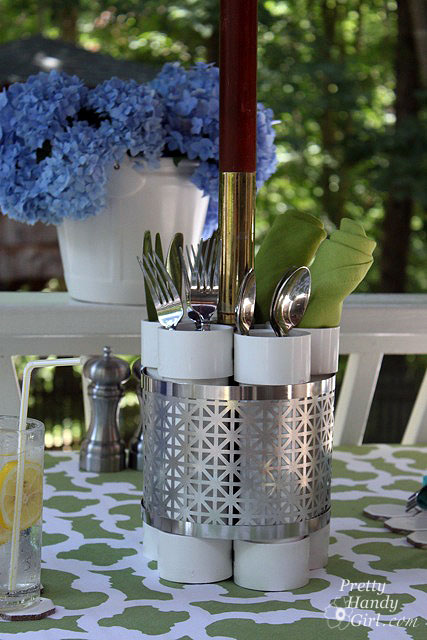
Time to decide what to put into the centerpiece! You can place utensils in the pipes for a party. (side note: I stuck some paper towels into the bottom of the pipes to keep the utensils elevated.)
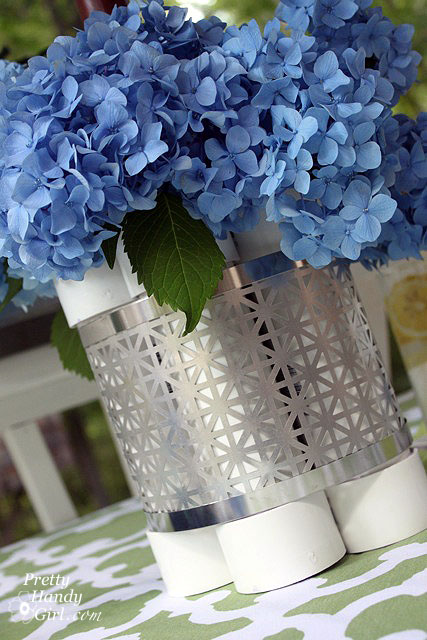
Or, for a fresh floral arrangement fill the tubes with water and place fresh cut flowers inside.
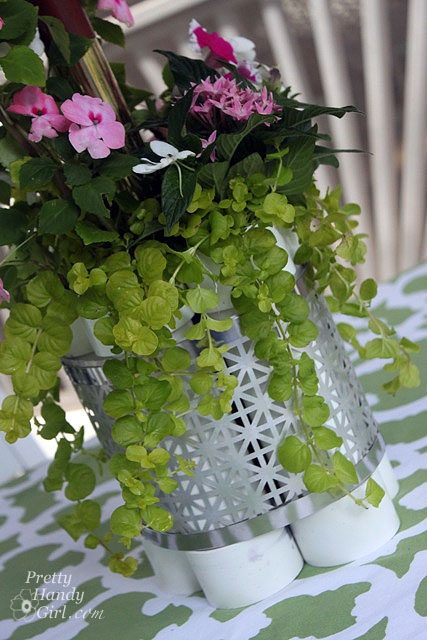
For a more lasting arrangement. Fill the tubes with rocks on the bottom. Then add soil and plant some shade loving flowers.
The flowers make an attractive living centerpiece for your patio table.
So which way would you use this invention:
As a vase?
And do you have a better name than Plant-a-ma-bo-a-ma-holdey-flowers-n-stuffin-vase?

Disclosure: I have partnered with Lowe’s as a Lowe’s Creative Influencer. I was provided with a Lowe’s gift card to complete my project. The tutorial, photos and opinions expressed in this post are my own. I was not told what to write. #LowesCreator







Great Post … Thank You!
Loved it & Shared it 🙂
http://www.pinterest.com/pinaholicmyrie/garden-diy-outdoor-project/