Message Center for the Mudroom
If you came by for my mudroom tour, you saw this message center made from a curbside window frame.
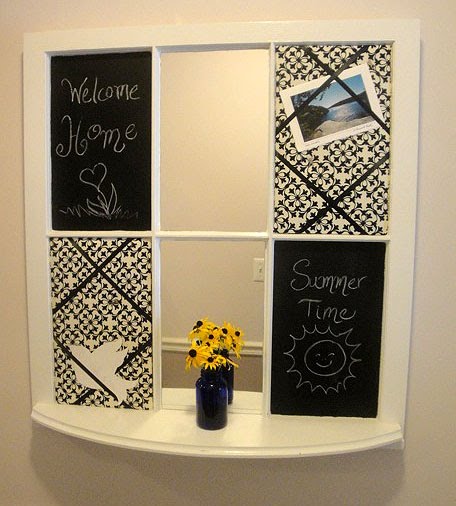
This was a super easy project and I built it in about 2 hours.
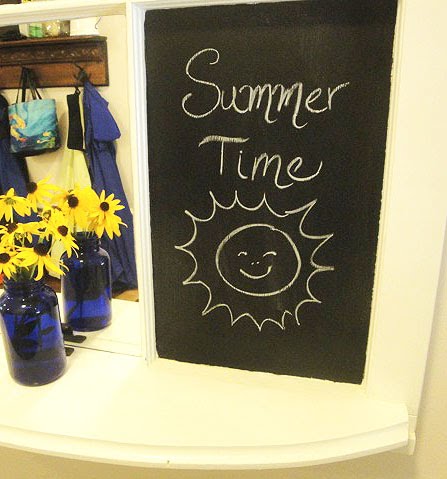
First, I gave the whole window a fresh coat of white paint. Then, I taped off the edges of the upper left and lower right windows and used 2 coats of chalkboard paint in those panes.
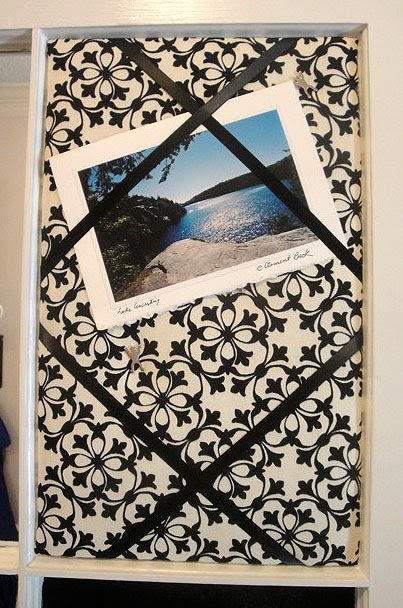
While the paint dried, I cut two pieces of foam core to size for the upper right and lower left panes. Then added some batting and wrapped the fabric around. I used a hot glue gun to attach the fabric to the back of the foam core. Then positioned the black ribbons on top and glued them to the back of the foam core as well. While the glue gun was still heated up, I ran a bead of glue around the edge of the window panes and inserted the two upholstered foam core pieces in place. (Pictorial directions for the upholstered foam core can be viewed here.)
Next, I had some leftover cheap mirror glass* that I used for the the mudroom coat rack. I used my glass cutter and cut those two panels down to size. Then I put some E-6000 onto the window pane and inserted my mirrored glass. To seal and hide the edges of the mirror, I used white bath and tile caulk around the edges of the mirror.

* Cheap Mirrored Glass Source: Find those $10 back of the door full length mirrors. Buy one at Walmart, Kmart or Target. Just peel off the glued frames and paper backing and cut your mirror pieces from it.
To build the little curved shelf, I actually already had the curved board leftover from another project. But, you can cut a piece of 1″ x 6″ with a jigsaw. Then use a router to give it a decorative edge. Then sand it, prime it and paint it.

To attach the shelf, I used 3 L-brackets on the underside and painted them white to be less noticeable. I also nailed a piece of 1″ x 2″ (painted white) to the bottom of the window so I could screw the brackets into it.
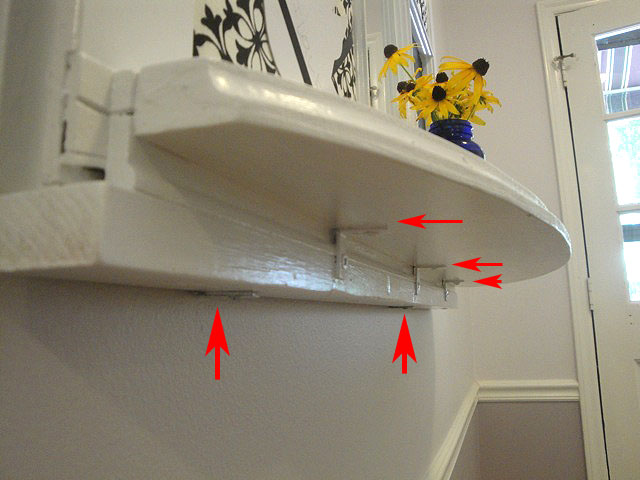
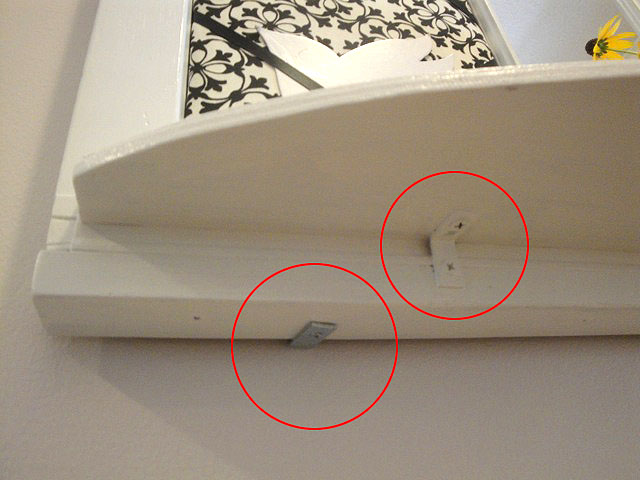
Once the message center was finished and dry, I located the studs on our mudroom wall and hung the window with two L- brackets on the bottom (see pictures above) and one on top.

Now I have a cute place to welcome guests, hang postcards and birthday invites, and check for ORT (object remove from teeth) before heading out the door.

this is a great tutorial. i’m going to have to try this….i love it!!!
Brittany, thank you very much for your response. My mudroom is looking great. I have been trying to see how to remove a pane and can not find answers. Do you know how to do it?
I would like to put the light switch and the phone on the same pane. This is the link to my inspiration: http://pinterest.com/pin/19701362/
Please help me, I am stuck.
I found a mirror for behind the door at Home Depot for less than 6 dollars. This is a good thing because I found out I am a terrible glass cutter. I am almost done with my project and is good because is about time.
Brittany thank you again for all your help I will post pictures soon I hope.
I love your window idea and I am trying to copy it. Where I want to installed there is a light switch, any idea of what can I do? I was thinking to remove the glass from one of the window panes and use it where the switch is and hung a pencil basket. Please, please please, give me ideas. I already made a bench and gave it 4 coats of primer/paint, I want to do board and batten but need to figure how I am going to do the message center. Thank you so much for your wonderful ideas.
I think removing the one pane is a fantastic idea. Go for it! And don’t forget to send me pictures. I can’t wait to see how it turns out.
What a great idea! Thanks for linking up to We Can Do It Cheaper!
I love this project.. Cute blog, I'm following you now, I also put your button on my link party page!
This is awesome! I love everything about it! way to go!
gail
I featured you just now. It's funny, I don't like to leave my initial "canned" comment about Craft Gossip if I've already featured you before. So I always do a quick search to see if I've already featured a blog, and this is your 4th one LOL! So I guess the canned comment won't be needed ;-D Here's your feature! http://homeandgarden.craftgossip.com/old-window-to-message-center/
Found this post through a link you posted and I absolutely love your message station! So well done & creative! I shared your project on my blog… http://capturethelittlethingsathome.blogspot.com/2010/09/more-ideas-for-monday.html
This was one of my favorite projects at last week's Mad Skills party, so I will be featuring it tomorrow morning!
madincrafts.blogspot.com