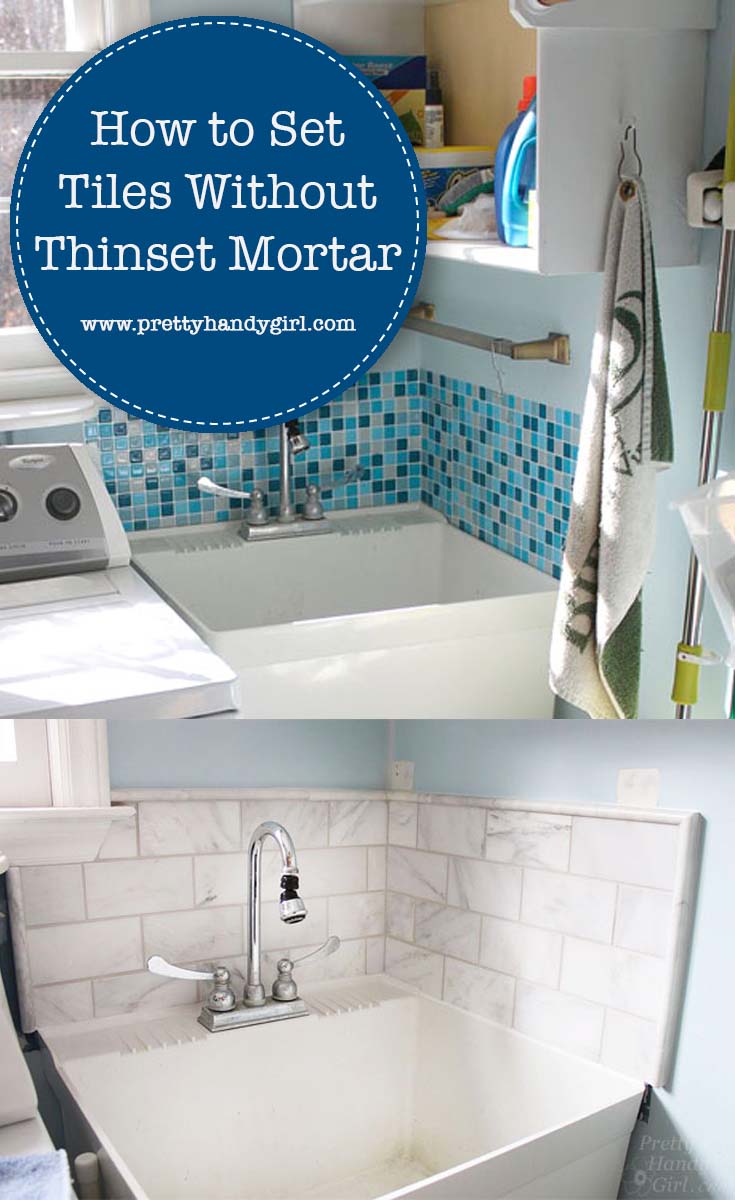
Tile Setting Marble Tiles without Thinset Mortar

You may remember years ago when I installed Smart Tile adhesive tiles in our laundry room. Well, truth be told, they weren’t looking so smart after 3 years and a water leak. I had a few leftover marble subway tiles from our kitchen backsplash and decided to use them to freshen up the laundry room. While I was at Lowe’s I decided to try Mussel Bound tile adhesive used for tile setting without thinset mortar. I figured this would be a good place for a trial in case I didn’t like the product.
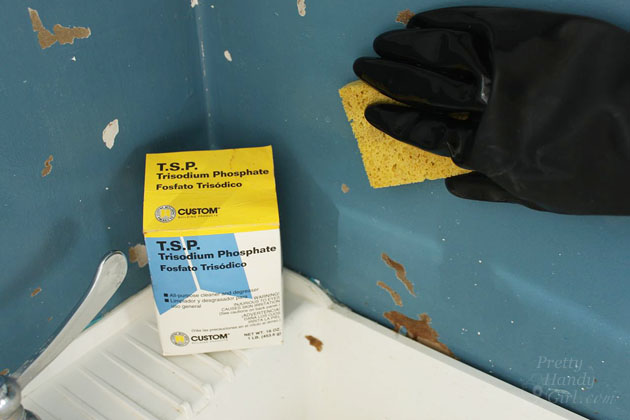
To remove the Smart Tiles you are supposed to use a hair dryer or heat gun to soften the adhesive. The tiles on my wall were already peeling off and they came off very easily.
There was some minimal damage to the drywall, but if I had used the hairdryer it probably would have come off cleaner. To minimize any issues, be sure to clean your wall with a mixture of TSP (Trisodium Phosphate) and water using the instructions on the package.
Wipe the walls clean with a damp sponge after cleaning.
Ready to start tiling with less mess?
Materials:
(Contains some affiliate links)
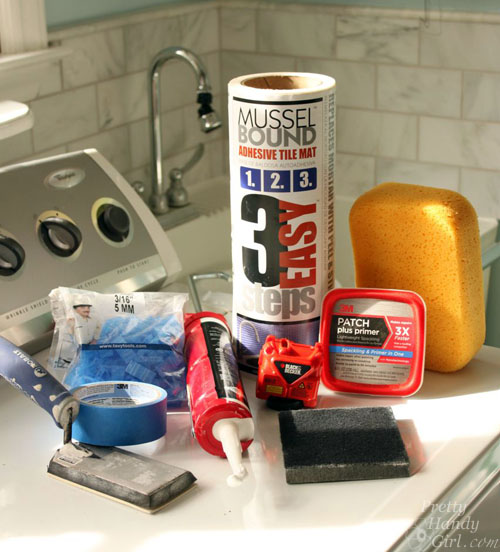
- Mussel Bound Adhesive Tile Mat
- Tiles (used Carrara Marble Tiles from TheBuilderDepot.com)
- Marble Pencil Tile
- Tile Spacers 3/16″ T-shaped
- Tape Measure
- Pencil
- Laser Level
- Level
- X-acto Knife
- Metal Carpenter Square
- Cutting Mat
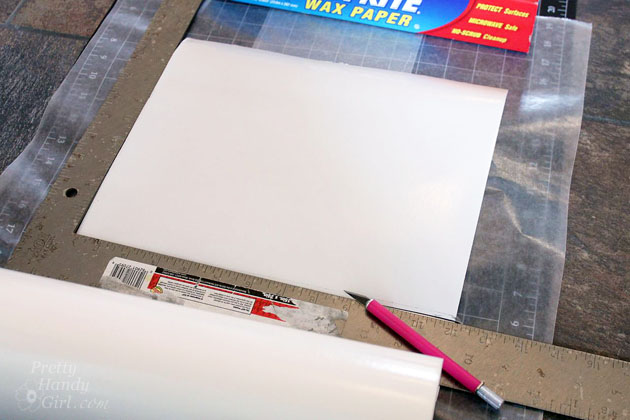
- Wax Paper
- Grout Float
- Grout Sponge
- Painter’s Tape
- Silicone Caulk
- Unsanded Grout (used Mapei Frost)
- Rag
Optional: Grout Shield
Instructions:
Before you begin, layout your tiles and spacers to determine the height you desire for your backsplash. Transfer this height onto the wall around the sink.
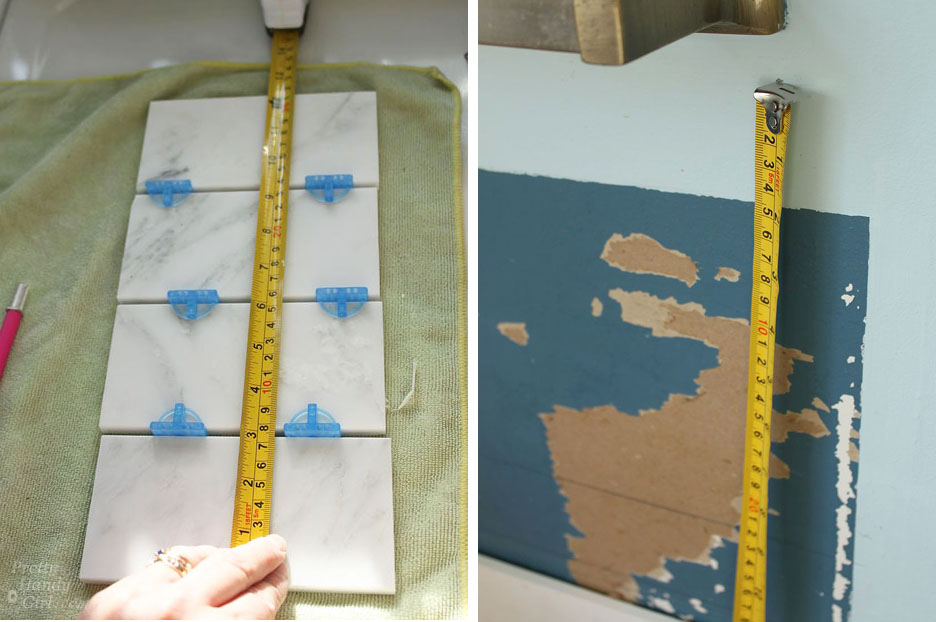
Use a laser level to mark the bottom and top lines of your backsplash.
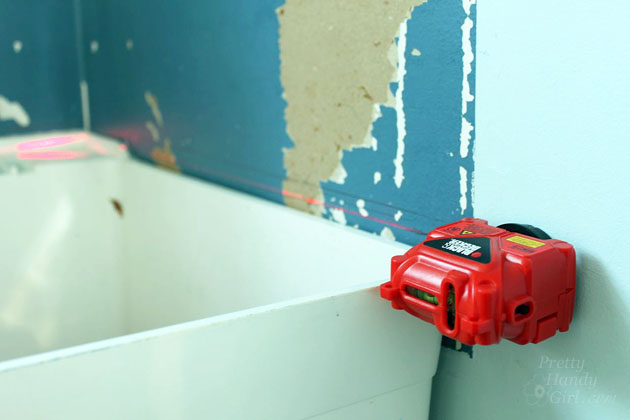
Transfer the top and bottom lines onto adjoining walls.

The Mussel Bound Adhesive Mat directions suggest applying directly to the wall and cut it at the bottom with an x-acto knife. I found it easier to pre-cut the adhesive sheets before applying them to the wall. You need to create a non-stick surface to cut on. Lay down a cutting mat first. Roll out wax paper on top of the cutting mat.
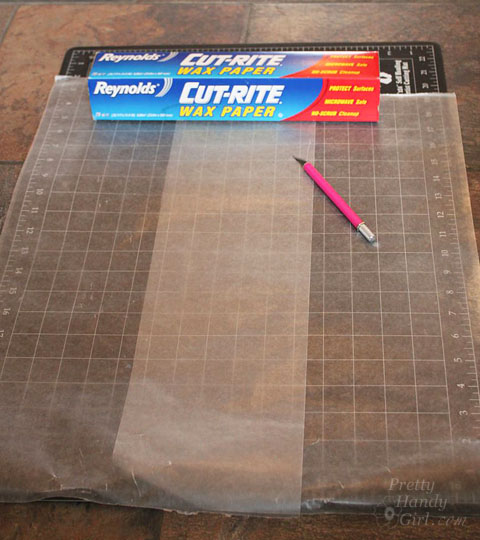
Use pencil to mark the height of the backsplash onto the adhesive sheet. Use the x-acto knife and a metal ruler to cut the sheet to size.
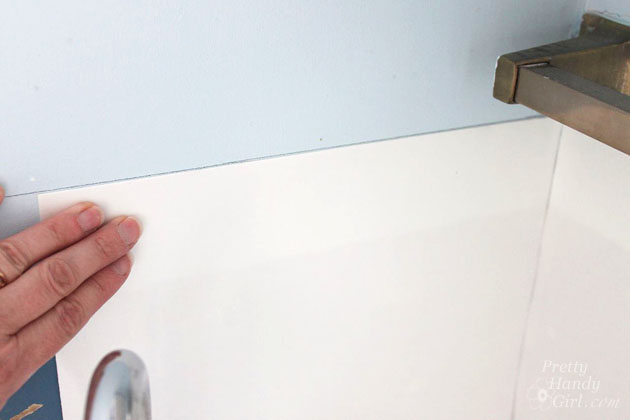
Line up the top of the adhesive sheet with the line on the wall.
Trim around windows and obstacles with an x-acto knife.

Measure the space for your next sheet and continue cutting and applying the Mussel Bound tile adhesive sheets.

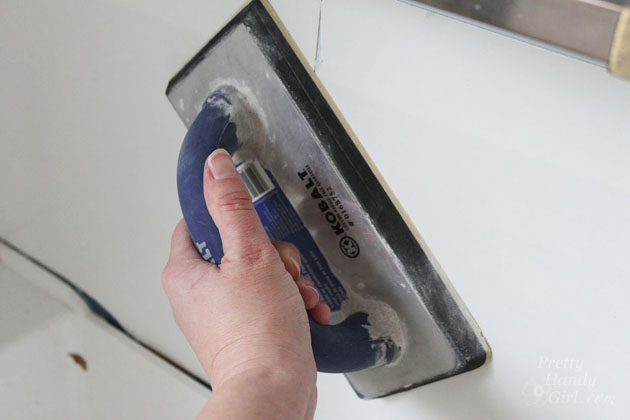
Use a grout float to press the adhesive sheets firmly against the wall.
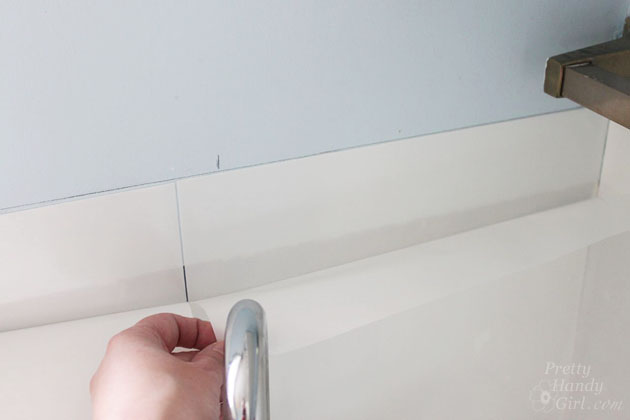
Peel the protective paper down to expose enough for the first layer of tile.
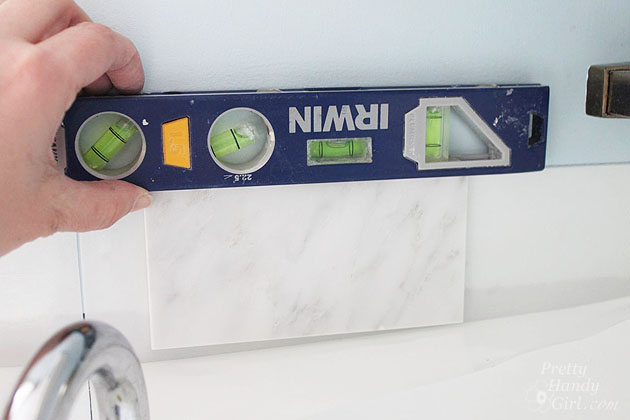
Mark the center of the backsplash and line up the first tile with that mark. Use a level to make sure the first tile is perfectly level. Press the tile firmly into the adhesive sheet.
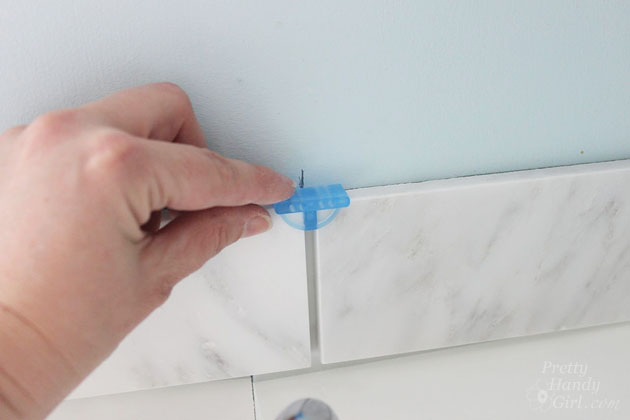
Set a second tile lightly into the adhesive, level…

…and insert a spacer. Then press firmly into the sheet. If you mess up, removing the tiles is tricky, but can be popped up by pushing a thin blade or putty knife behind the tiles.
Continue setting tiles and spacers. Check the level as you go.
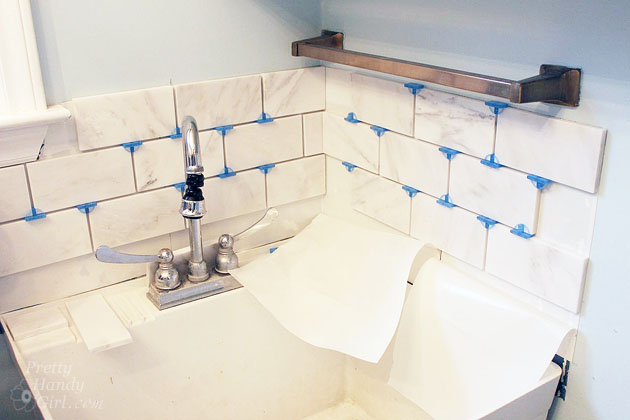
When you get to the edges you’ll need to cut tiles to fit. One downside of the Mussel Bound adhesive is that you can’t set a tile that is wet. If you used a wet saw you must allow the tiles to thoroughly dry before setting it. If you don’t wait, the tile will not adhere properly.
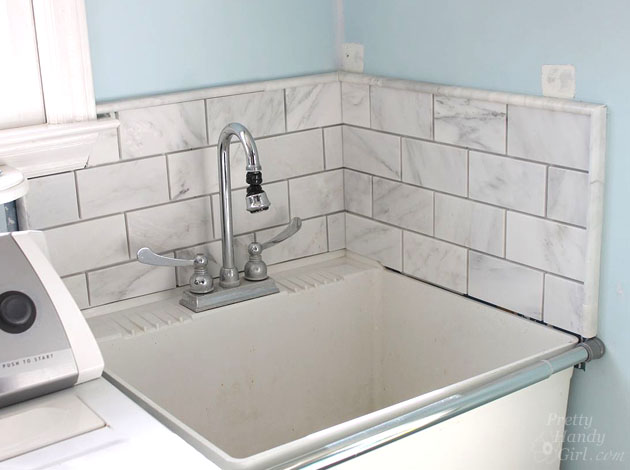
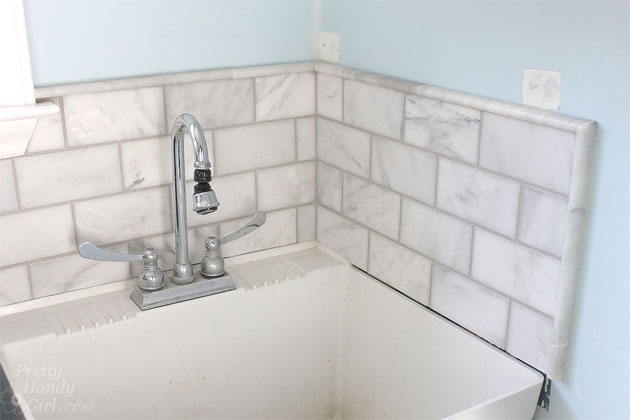
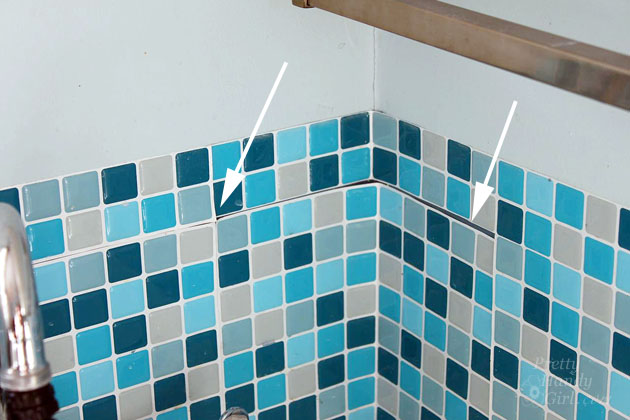
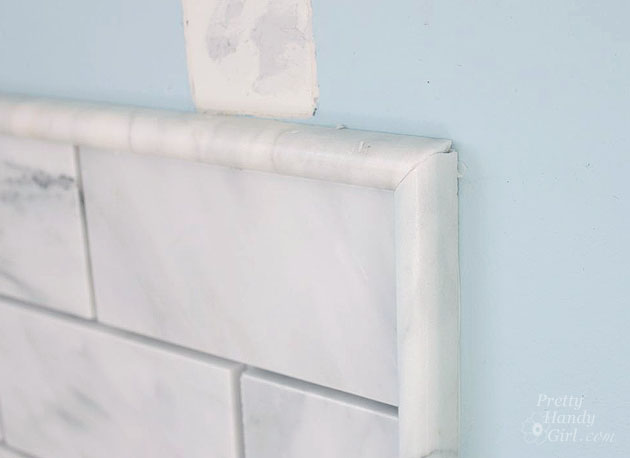
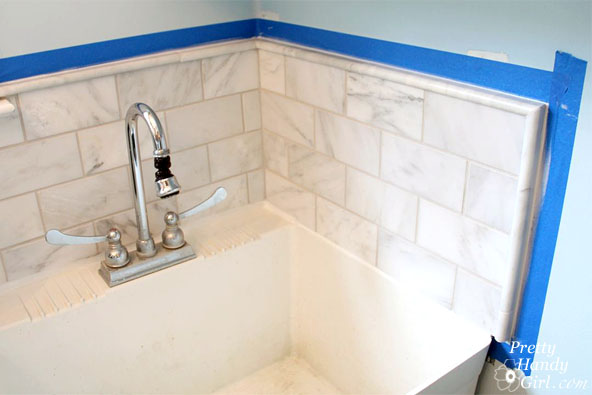
To finish the edges of the backsplash use pencil tiles. For a finished look, miter the corners of the pencil tiles. This isn’t easy and chunks may break off. But, you can fill the gaps in with grout or caulk.
Grout time!
I’m going to breeze through the grouting process. If you need more step-by-step instructions, you can read my tutorial on grouting a backsplash.
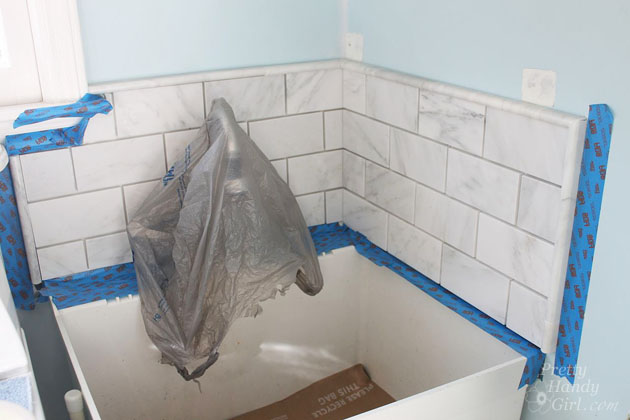
Begin by protecting the wall with painter’s tape. Cover the faucet and any surface that might get grout dropped on it. (If you are feeling ambitious, you can shut off the water and remove the faucet.) Flattened cardboard boxes work great for protecting counter tops and the sink.
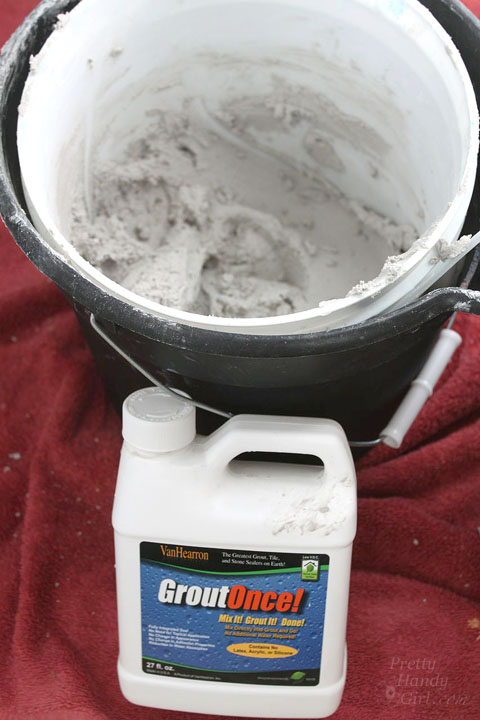
Mix up your grout. To extend work time, set your grout into a larger bucket with water and ice in it. I prefer using a grout sealant that is mixed into the grout. It lasts longer and doesn’t have to be reapplied in a few years. The additive grout sealant can be tricky to find, here’s a link for Grout Shield for your convenience (affiliate link).
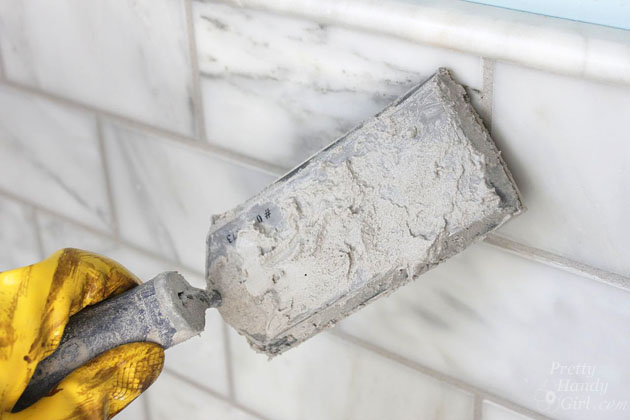
Apply the grout with a grout float. Squeegee the grout into the grooves at a 45 degree angle.
Use a damp (almost dry) grout sponge to wipe the grout off the tiles. Rinse the sponge frequently and repeat until there is no grout on the tiles.
Let the grout dry and buff the haze off the tiles.
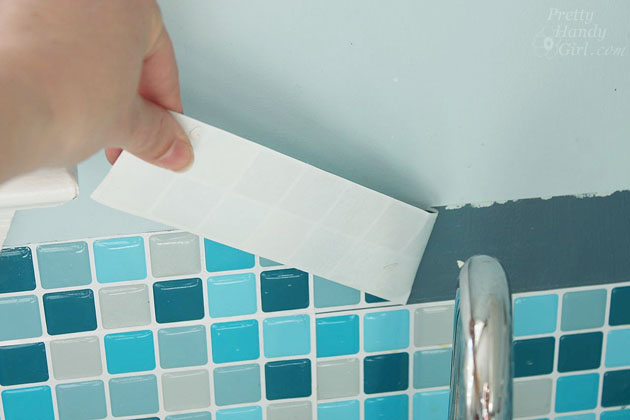
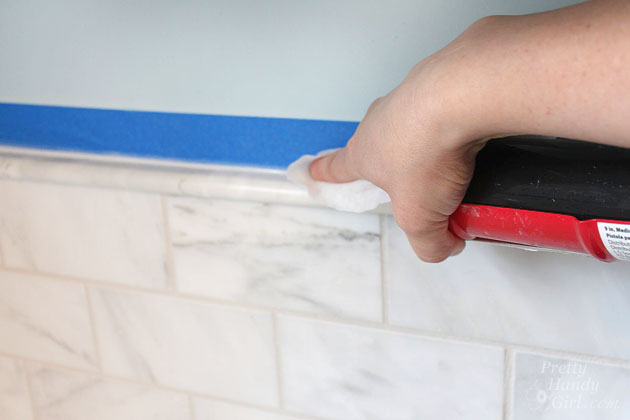
Apply painter’s tape around the edges of the backsplash.
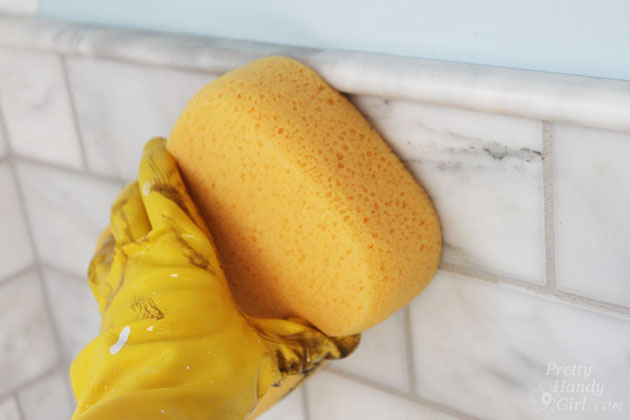
Seal the top, bottom and sides of the backsplash with silicone caulk. View my tutorial for applying caulk here.
Remove the tape while the caulk is still wet.
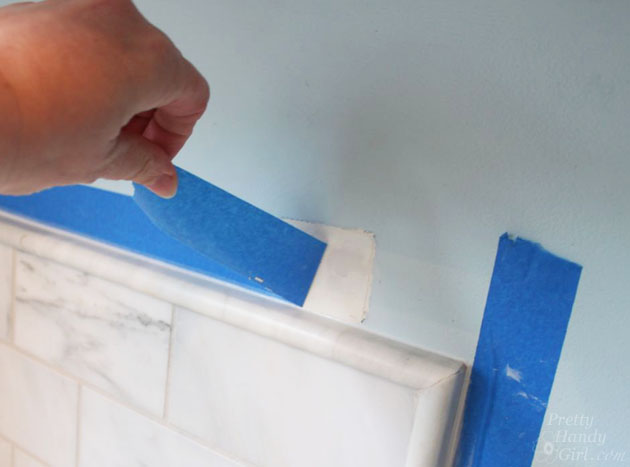
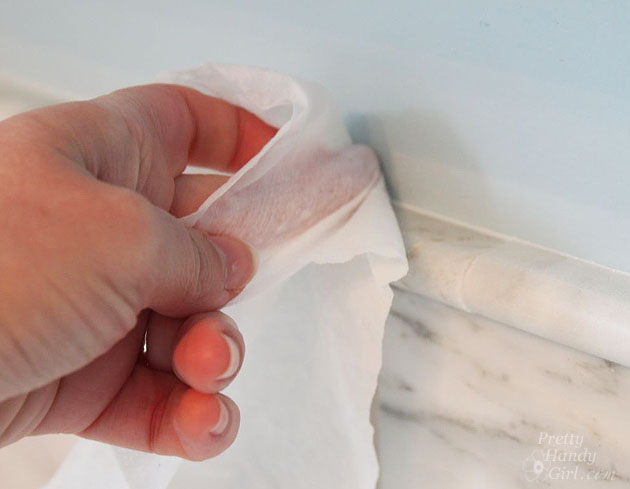
Use a moist baby wipe to clean up any caulk that isn’t smooth against the wall.
Congrats! You are done! Do you remember the before?
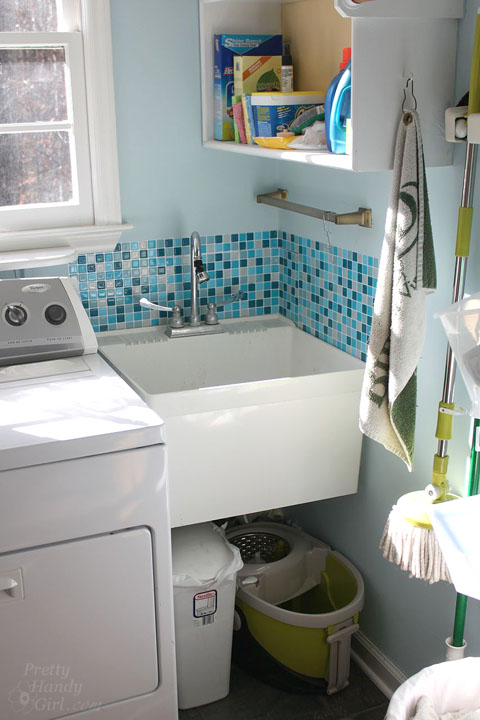
And the after:
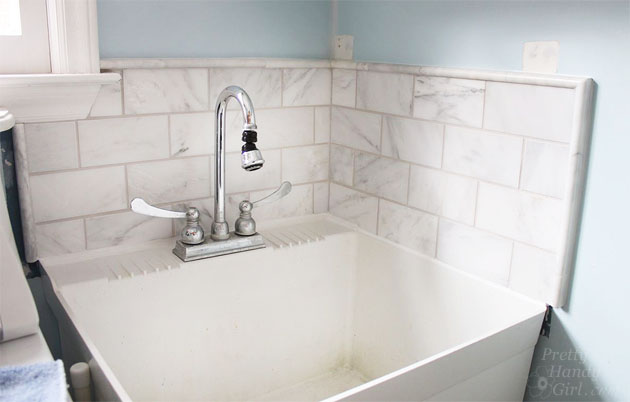
Much better! I’ll be sharing a few more of the updates I made to the laundry room later this week. Stay tuned.
![]()
Pin for later!

Hi there,
I’m wondering if now, 2 years in, how is your adhesive mat is holding up? We are about to start a very similar project and I would love to know how you feel about this sticky paper after a few years? Is it holding up? How do your tiles look? We would use it as backsplash behind a sink as well! Thanks for any advise!
After reading all of the wonderful reviews, I decided to give it a try. I have wallpapered, tiled and even laid brick for 20 years (yes, using the traditional mortars, so am not unaware of the how-to’s of working with tile and adhesives, prepping walls, etc.). We thoroughly prepped the kitchen backsplash area as directed (Abrasive wash, rinse, rough sanding, wash, rinse). We waited overnight to be sure it was dry. We applied as directed (although I wish I had thought of using the the wax paper for cutting), and it looked great! Figured we would wait a day before starting on the tile. When we got up the next morning, there were bubbles everywhere! I tried taking the blade and cutting through a bubble, then pressing again for a longer time. That bubble stayed down…but another popped up. It was awful! There was no way I was going to try to put tile over that — and the tile we purchased was fairly heavy.
Luckily, the store gave me my money back and went to the traditional thinset. However, it took two days to scrape off the pieces that DID stick! Not sure if it was just a bad batch, or what. Seemed like such a great idea, but I just could not trust it again.
SO now that you have had some time to let it sit and be for a bit, how’s the marble taking the musselbound? Any signs of sloughing/break down of adhesion or bleed through the tile?
I am doing my backsplash after a full kitchen reno, and wanted to try this, but am hesitant of buggering up a lot of money in marble tiles…
Cheers,
R
No problems at all. All is still solid and intact. The grout keeps any water from getting to the musselbound. I think a kitchen backsplash (under cabinets) is a perfect place to use musselbound. That being said, I think it’s easier to use thinset mortar if you have a lot of tiling to do. It allows for easier tile positioning.
Thanks so much for your reply! one more question–did the white caulk go below the pencil trim as well? I have a bit of a space between the top tile and trim (I am using tumbled carrera and it is a bit irregular). Thanks so much again for your great blog!
No, I used grout between all the tiles and pencil tile. The caulk was only used between the outside perimeter where the tile meets the wall.
I see you used gray grout. What color for the caulk for the pencil trim. It looks great! I’ve finished the tiling and am now mitering the edges of the pencil trim (you’re right–not easy!) and I have to fill in the little nicks. I am using the same color tile / trim. Thanks!
The grout was Mapei Frost grout. The caulk is white.
Can I do this in a kitchen for a backsplash?
Patrice, sorry for the delayed reply. Yes, you can use for a backsplash.
Aha! I think I’m off to the big box store!
Doh! I didn’t know that Brittany! I thought they just had the mesh. I’ll pay closer attention. LOVE your art… and it is an art to put such designs together. Yay!!
Thanks always!!
Thanks for the post, it came at a perfect time. I’ve been considering a product like this for mr renovated powder room. Can you share how you installed the pencil tiles around the edges? This is the only part I haven’t got a handle on yet. This is the last piece of the powder room project and I can’t wait til I can get this job done. Love the new look in your laundry room!
Sue, the pencil tiles was an after thought, but if I had thought about it ahead of time I would have sized my adhesive mat a little taller and wider to accommodate the pencil tile. Instead, I cut thin strips of the adhesive mat to put on the wall and then pressed the pencil tile onto the mat. Easy ;-)!
Impressive transformation Brittany! My brain had not entirely kicked in yet this morning when I read this so when I saw your title “Tilesetting Without” … under it said “Mac & Cheese” (an add) Of course, I clicked to be gone with that & it revealed the word, “Thinset.”
Anyway, this is such a clear tutorial & good to keep in the back of my brain for my laundry room someday. Thanks for this!
LOL. Oh so sorry about that. You just reminded me I need to complain about some annoying ads lately.
Is there any chance of the grout cracking over time, since it’s not installed on a super-rigid surface?
Christine, the mat is thin and attached to the wall which is rigid. There shouldn’t be anymore chance of the grout cracking than when installed the traditional way. That’s not to say the grout can never crack. If you have wall movement, it’s possible, but it would crack regardless of whether you used an adhesive mat or thinset.
Home Depot carries a product called Simple Mat. Basically the same idea..super adhesive sheets–really sticky side on the wall, peel off cover and expose a slightly less sticky side, slap the tiles on, grout, done…but I wouldn’t recommend it around a faucet or anywhere in the bathroom..that sticky adhesive is not water proof. I’ve used it to tile table tops with 1″x1″ glass tile with great success. The downside is, once the tile is in place, you can’t move it. At least with mortar, you have some “wiggle room” and time to make minor adjustments before it sets up.
Nancy, I wouldn’t use this product in a shower or areas that get saturated, but behind a faucet should be fine as the tiles and the grout protect the mat and wall behind it from any water. You definitely point out the major negative of this product, repositioning the tiles is not easy.
Beautiful! Truly beautiful outcome and thank you for the explicit directions. I bet that Mussel Bound Mat would be great for glass tiles … no worry about adhesive showing lines. I like that!
Thanks!!
Christina, yes, that would be a good use, although most glass tiles today have a white backing so you don’t see the thinset.