How to Survive without a Kitchen during Renovation
I’ve been asked many times how we’re surviving without a kitchen. I have to admit, there were a few weeks of adjustment for us, but now things are humming along relatively easily. We have a makeshift kitchen and a dishwashing set up that works for us. But, living without a kitchen is a bit like being on SURVIVOR. Come on in and I’ll show you the behind the scenes peek into our lives and share some tips to help make your kitchen remodel a little easier should you choose to take on the challenge!
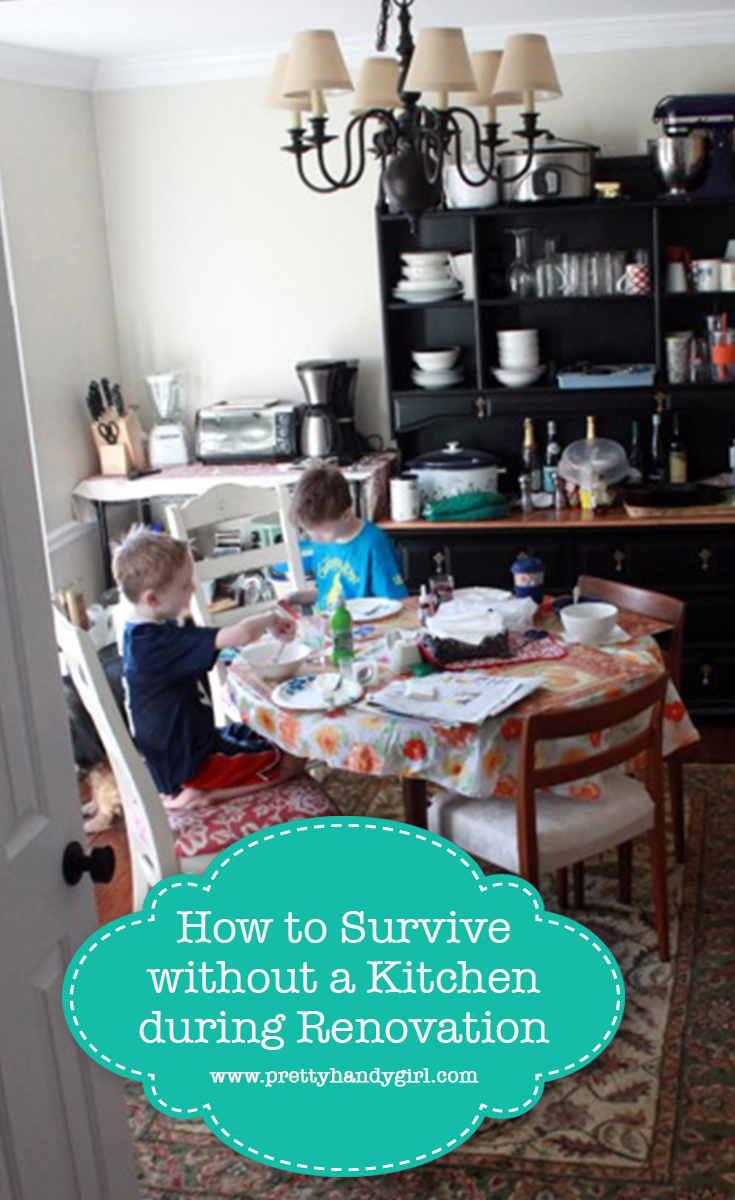
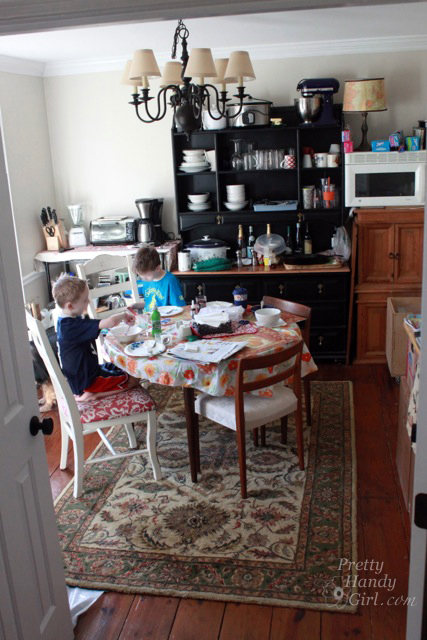
First, before emptying your kitchen, plan a spot for your alternate kitchen. A room that is large enough to accommodate a small table and chairs, your basic dishes, the refrigerator (optional) and some counter space is the ideal. For us, the perfect spot was the dining room, which normally didn’t see a lot of use. In fact, my sons remarked that it felt like it was a holiday when we first started living out of our dining room because we only ate in there on holidays before the kitchen renovation project.
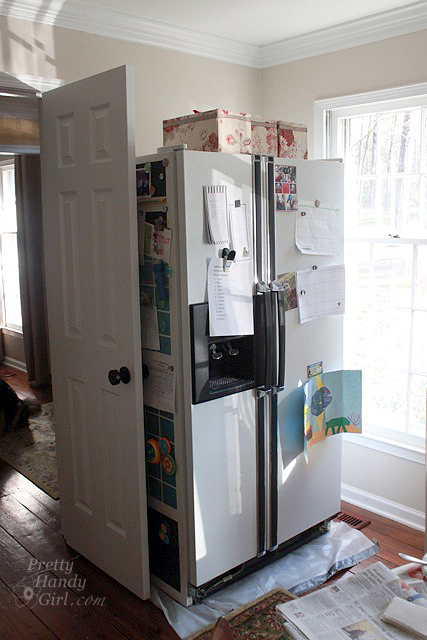
Second, take time to think through a little space planning where everything will fit in this new space. Measure the fridge and see if you can fit it somewhere in that space. If not, find a location nearby that you can locate the fridge (the closer to your makeshift kitchen the better.)
How to Survive without a Kitchen during Renovation
Third, collect all your daily necessities from the kitchen (dishes, pots, pans, small appliances, etc.) Be brutally honest when it comes to these necessities. You really want to have the bare minimum in your makeshift kitchen. This is not the time to have your specialty pans and spices at hand.
Fourth, box up all the non-essentials from your kitchen and label the boxes with the contents on the sides.
Fifth, move everything out of the kitchen, except the range (more about that later.)
Dishwashing and water
Living without a sink is definitely the hardest adjustment. Having a convenient location to wash your dishes is key. Also a location to stack dirty dishes until you can clean them is a huge help.
We have a tray that sits in the makeshift kitchen. During and after mealtimes we can fill the tray with dirty dishes and then transport them to the dishwashing station to eliminate multiple trips.
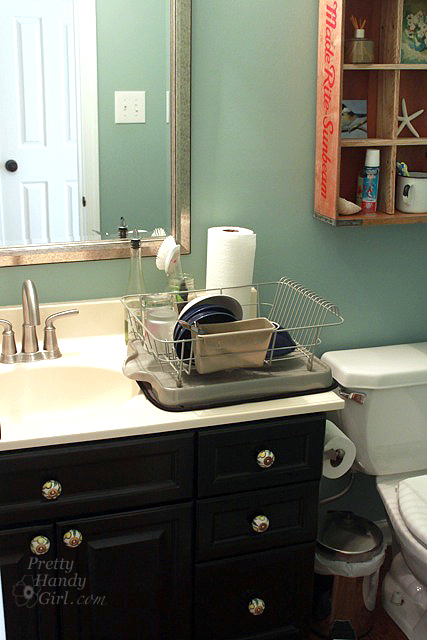
We washed dishes in the bathroom sink for a little while, but that proved a huge pain in the butt. It just wasn’t deep enough and it took forever to wash them. Plus, there was very little space for a drying rack and frankly there was something a little gross about going to the bathroom next to your clean dishes.
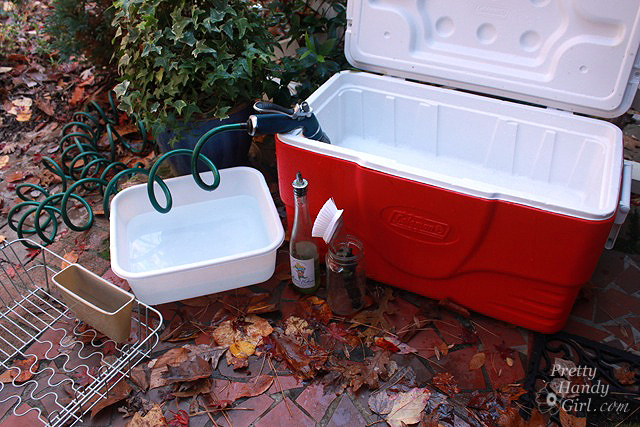
A step up from the bathroom sink is what I call the DIY Farmhouse sink. I discovered that a Coleman cooler makes a really fabulous farmhouse sink! Fill the cooler with warm soapy water from inside the house. Wash your dishes in the cooler and empty the soapy water by pulling the plug. If you have a garden hose nearby, you could spray the soapy water off the dishes and then stack them in the drying rack to bring inside. This worked for a while until the weather turned cold or it rained. Then I moved the cooler indoors and put it in the bathtub. If the weather stays mild you could set up a cooler on a folding table on a covered porch for a more semi-permanent solution.
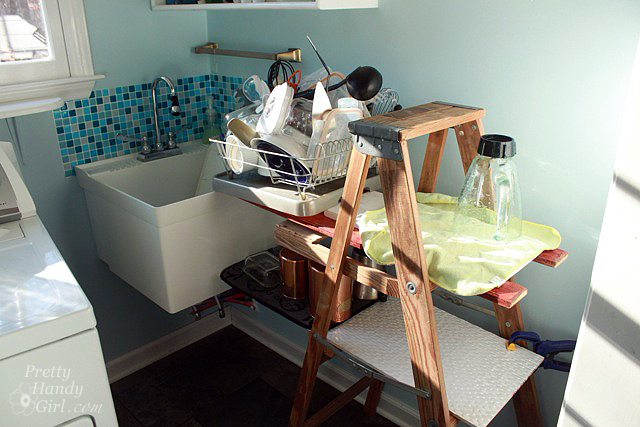
If you have a utility sink in your laundry room, you can set up a dishwashing station in there. This has proved to be the best solution for us. No more bending over, and the sink is large enough to set a small plastic dishpan inside to wash and rinse dishes.
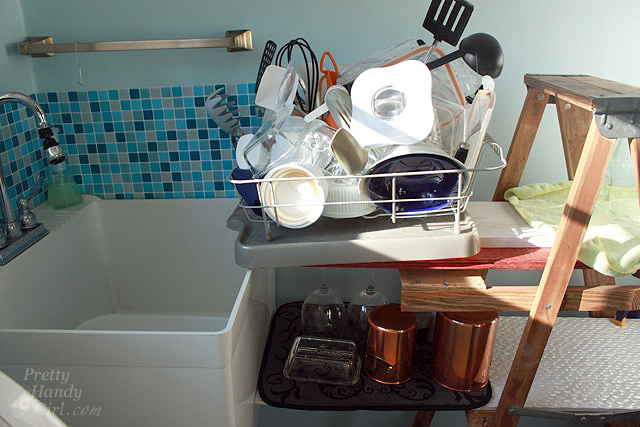
I also set up a small ladder and some scrap boards for a larger drying rack.
After the dishes are dry, we can carry the drying rack with all the dishes still in it back to the makeshift kitchen and put them away.
Water Dispenser
This isn’t a necessity, but having water accessible in your makeshift kitchen is a bonus. A water cooler with bottled water has been a huge convenience during our renovation. If you ever wanted one, use this as an excuse to buy one while you are renovating.
Countertops and Prep Space
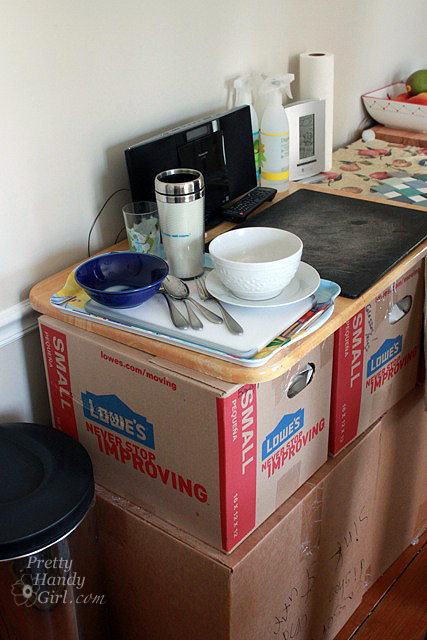
Not having a space to spread out your meal preps is another inconvenience. But, you can set up makeshift counters by utilizing the moving boxes you filled. While you have most of your kitchen packed up, you’ll have to store the boxes someplace anyway. Stack them up and use scrap boards or folding tables for the tops of the counters. Make clean up easier by covering the boards with plastic or oil-cloth table cloths. Have one or two cutting boards set up for chopping and food preparation. If you need to access any of your specialty cooking items that you packed away, you can find them by looking for the labeled box. Just keep in mind that taking apart your makeshift counters means you have to disassemble everything.
Cooking
Ahhh, the biggest question everyone has is, “How are you cooking?” In the beginning while we were still in shock, I did accept offers of help from friends in the form of meals. This was huge, because neither of us could think clearly (especially with all the HEPA filters running 24/7.) But, as the meals dwindled, we became more resourceful and were ready to get back to being self-sufficient.
- Grill – cooking outside on the propane grill is great for everything from the usual burgers and hot dogs to shish-kabob and grilled pizza (I’m seriously in love with this Corn Pesto Grilled pizza.) You can also use the grill like a regular stove top by leaving the lid open and setting your pans on the grate.
- Microwave – The microwave gets a daily work out for heating meals like soups, reheating leftovers and making scrambled eggs (put the scrambled egg mixture in a microwave safe bowl and stir every 30 seconds of cooking until they are the desired consistency.) You can also boil water for pasta in the microwave. We had the built-in microwave removed and moved into our makeshift kitchen instead of buying another countertop microwave. Here are 6 ideas for microwave cooked meals. And I’m sure you can find many more by googling “Microwave Meals”.
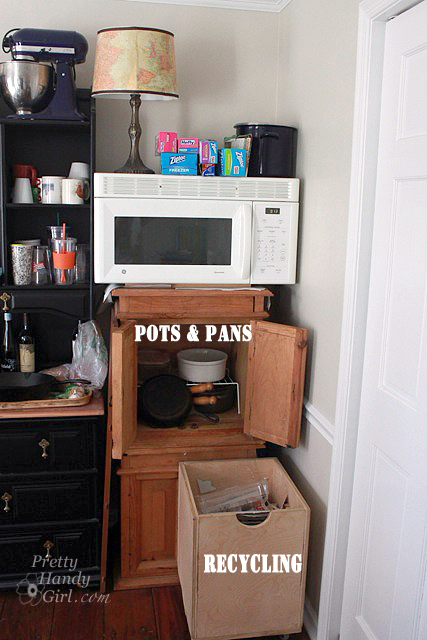 Just a peek at some of our storage spots. Stacking side tables and shelving is the key to maximizing storage space in your makeshift kitchen.
- Crockpot – I haven’t used the crockpot as much as I should, but this is the easiest way to cook when you are kitchenless. There are numerous crockpot recipes online. Here’s a link to a few in my Pinterest board of crockpot recipes.
- Toaster Oven – If you have a decent sized toaster oven, you can use it as a mini-oven. Ours is big enough to bake nuggets or reheat two slices of pizza.
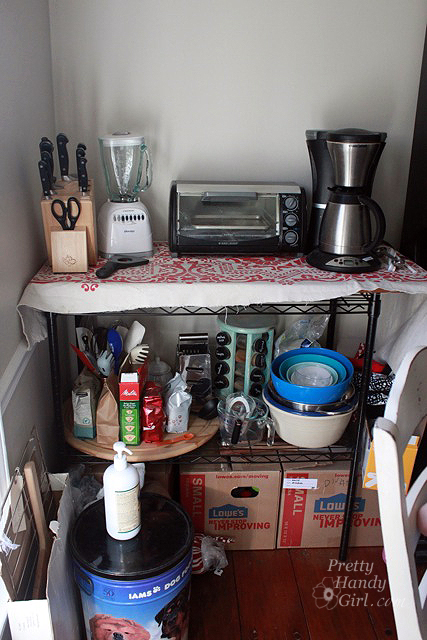 We put all our small appliances in one spot. More storage is available underneath. Plus, a lazy susan puts utensils and other necessities in an easy to reach location.
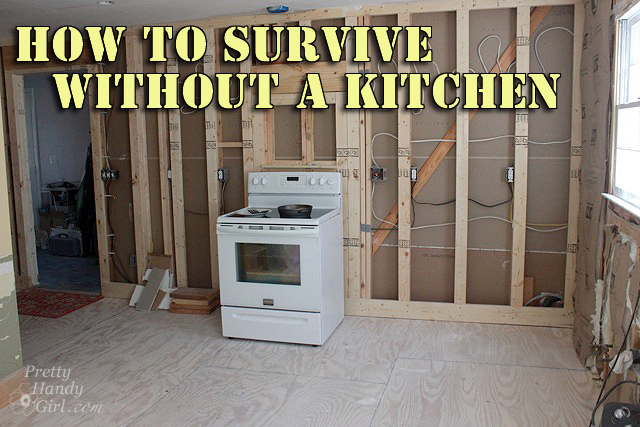
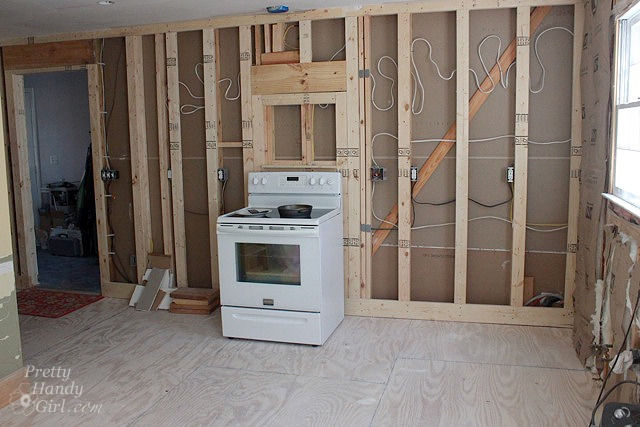
- Oven/Stovetop – As soon as the subfloor was back in the kitchen, we moved our range back in and plugged it in. The oven sits all by its lonesome in the middle of the gutted kitchen, but I cover it with plastic when not in use. And although I still have to wipe off drywall dust from the top every night, it’s worth it to have an oven and cooktop again. If you are making due without the oven/stove, you can use a small plug in hot plate for frying or boiling water.
- Pre-made meals – While using a makeshift kitchen you want to keep meal prep and dishes to a minimum. Buying pre-made meals is a huge time and effort saver. Recently, I picked up a few pre-made meals like salmon, shrimp and stuffed peppers at Costco. Of course, TV dinners and freezer meals are also easy to make, but they aren’t the healthiest choice in the long run.
 Cilantro Lime Shrimp from Costco with spaghetti noodles added makes for an easy to make dinner.
- Carryout – in the beginning we did eat carryout more than usual (2 times a week.) But, our waistlines and our wallets were being negatively impacted by all the restaurant food. We quickly moved back to cooking ourselves using the resources above.
Dishes and utensils
Before our kitchen was packed up, I grabbed 8 place settings (enough for two meals for each person in our family.) We also stocked up on paper plates and paper products, although we use our regular plates more now that we have a decent dishwashing area.
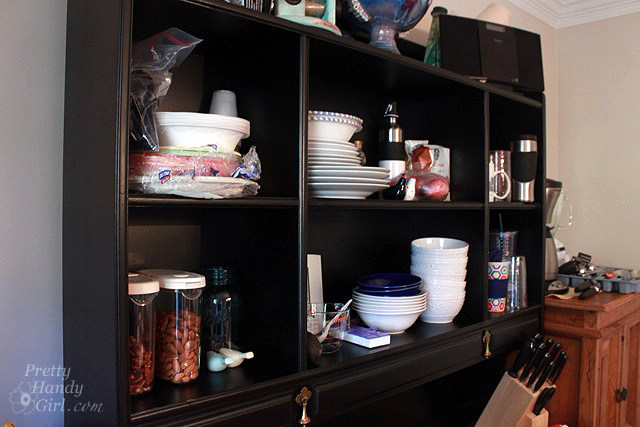
Pantry
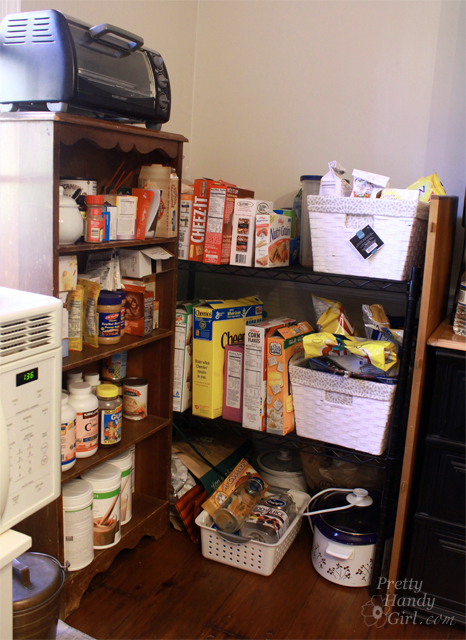
Hopefully you have a separate pantry that you can keep stocked and accessibly during renovation. If not, plan on setting up temporary shelving for your food. If you have pets that might get into your food, pay attention to how accessible your food is to them or put up a barrier to keep them away. Wire shelves and small bookcases make a great space for pantry food storage. Big baskets work wonders to corral snacks and like items.
Dining
Set up a small table in your makeshift kitchen if you have the room. Taking the leaves out of a larger table can make it a more manageable size that will work in your space. This may sound like a no brainer, but turning the table so the chairs are diagonal to the walls allowed us more room to walk around.
Contain the mess
During renovation, set up plastic sheeting in the doorways of your kitchen while it is under construction. Things will likely get messy and you want to contain the dust and mess as best you can. In order to keep the rest of the house as clean as possible, change your air filter monthly instead of quarterly. And use higher quality and higher MPR air filters to catch the small particles.
Words of advice
Establish a routine early on so everyone gets used to it. Show children where to stack their dishes and where everything is so they can adjust. Bring your pet’s food and water into the makeshift kitchen if it was in the kitchen before. Show your animals where their food and water is to minimize stress on them. But, most importantly, be prepared to roll with the punches. Renovations rarely happen without a snag or hiccup here and there. And they almost never finish early. Make sure you take time to relax and de-stress. Get out of the house to clear your mind. And focus on the finished product.
I have been equating our experience to the SURVIVOR™ TV show. I have to put up with the less than desirable conditions and challenges of a kitchen renovation in order to win the kitchen of my dreams ;-).
Good luck to you and remember you are going to have a beautiful new kitchen when this is done!
 You can read more about our kitchen renovation in these updates:
- Polybutylene Pipe Leak turns into Moldy Mess
- My World Upended, Asbestos Discovery and Removal -All You Ever Wanted to Know About Asbestos
- Planning New Kitchen Layout and more
- Planning Colors and Materials for the New Kitchen
- Let the Demolition Begin
- How to Remove Soffits
- Move Back in the Kitchen Temporarily and Throw a New Year’s Party
- Termite Damage and Kitchen Update
- How and When You Should File for a Permit during a Kitchen Renovation – Your Questions Answered
- Everything You Should Know about Termites and Termite Damage
- Structural Engineer Plans and another Kitchen Update
Pin for later!




Thank you! Big help!
Congrats on making it through the renovation!! I’ll bet your boys thought it was somewhat like camping!?!
When I was 5, my parents bought 5 acres of property and built our house – every bit of it, from digging the basement, pouring foundation walls, digging septic systems, etc. We worked on it every evening when my Dad got home from work until it got too dark out to work by headlights of vehicle and flood lights and all day both days of the weekend. It took a full year from ground breaking to move in. I remember most it, and drove nails in subfloor right along with everyone else (my one nail to my Dad driving 10 nails… LOL). My favorite was snapping the pretty blue chalk lines!
It was definitely a sacrifice for my parents, but financial it put them way ahead!
Reading your blog above reminded of my Mother saying throughout the build that should couldn’t wait until ALL she had to do was clean it – no building, no dust, no design decisions…. haha!!
The little things in life (a working sink) that make us happy and we take for granted!!
Love your posts, thanks for showing that women can handle this stuff too. You give me confidence for things that sometimes I doubt if I can handle alone!
Libby, wow, it sounds like we had similar experiences growing up! My dad had a full-time job but worked on renovating our house (added a second story) on evenings and weekends. Looking back, I realize now how exhausted he and my Mom must have been ;-).
OH how I wished to have seen this over two years ago. I think I was so overwhelmed that I didn’t even get a chance to think how to make it work. Great information!
Wow! You are one tough cookie. You have some great info. here and I can’t wait to see the final product. I’m excited for you! 🙂
That are some really great ideas and tips for surviving the renovation! If you write your next post about surviving the bathroom renovation it would be great 😀 We are renovation our bathroom for a week now and it’s really annoying. Thanks for sharing this.
Amazing tips! I wouldn’t of thought of a lot of these, thanks for sharing! Great resource for the (hopefully near) future when we buy!
I wish you had posted this 6 weeks ago when we first started our kitchen project! I thought I was nearing the end of mine when we decided to add the element of a new counter top. Whooops, there we go again. Glad to see the tips.
(I always love your blog, btw. I don’t often post but always read and get inspired to do it myself.)
I think this is a true testament to how resourceful one can be when faced with a situation that is less than ideal. When we were hit with hurricane sandy and without power for nine days we had to learn how to do things quite differently than we were used to. “Like Robinson Crusoe, it’s primitive as can be”…lol
Maude
I couldn’t even imagine how could I survived without kitchen. But finally you find solutions for everything when you have to! Well done for your patient…!
Hah! You are Pretty Handy!! (@_@)/
Oh these renovations! We went through a water heater nearly falling through our ceiling-water everywhere on hardwood floors-well, it all turned out ok! You are doing a great job and your post is just great!
Wow! You rock! Thanks for sharing that! You are doing much better than I did. Bravo!
Hahahaha. Well, thanks for asking. You inspired this post, which I hope will help others who go through a kitchen renovation ;-).
🙂 Ahhh I feel special now! You know the funny thing is, my “renovation” happened so quickly I didn’t have time to think about what I was going to do without a kitchen. It was back before I started stalking blogs too. So I had no idea that there were other women out there doing the same thing I was doing. I think your post will help a lot of people. I know it would have been a huge help to me. I have pictures that are horrible of us trying to cook hotdogs while the kitchen was in pieces! The stove and fridge were still there but the sink was gone and for some reason the we had the kitchen table shoved in the kitchen, so we couldn’t even walk! (I have no idea what I was doing at that point!)
Oh Lori, the first time we were kicked out of the kitchen I couldn’t think straight. The second time, we moved ourselves out after New Years and I was able to really think things through and we had already learned from our mistakes ;-).
That’s like what happened to us! I went to put in a new faucet and realized the leak was much worse than I thought. I had to rip out the whole cabinet! As small as our kitchen is, that was half the kitchen! I didn’t have time to think, there was mold starting to grow, I had small children in the house, I had to handle it! I found it at about 10am on a Sunday morning and by that evening all the bad stuff was out of the house and I was standing there going “What do I do now!?!?!?!”. 🙂