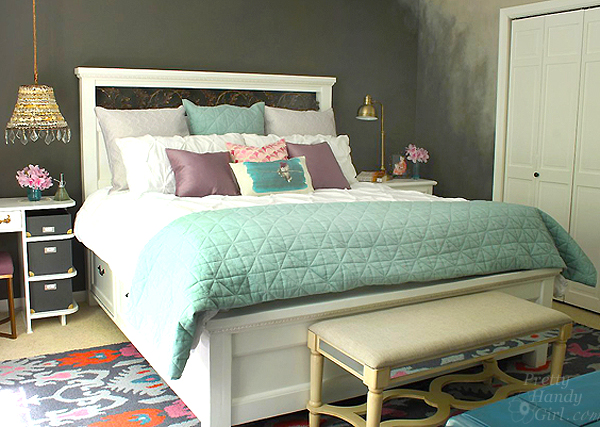
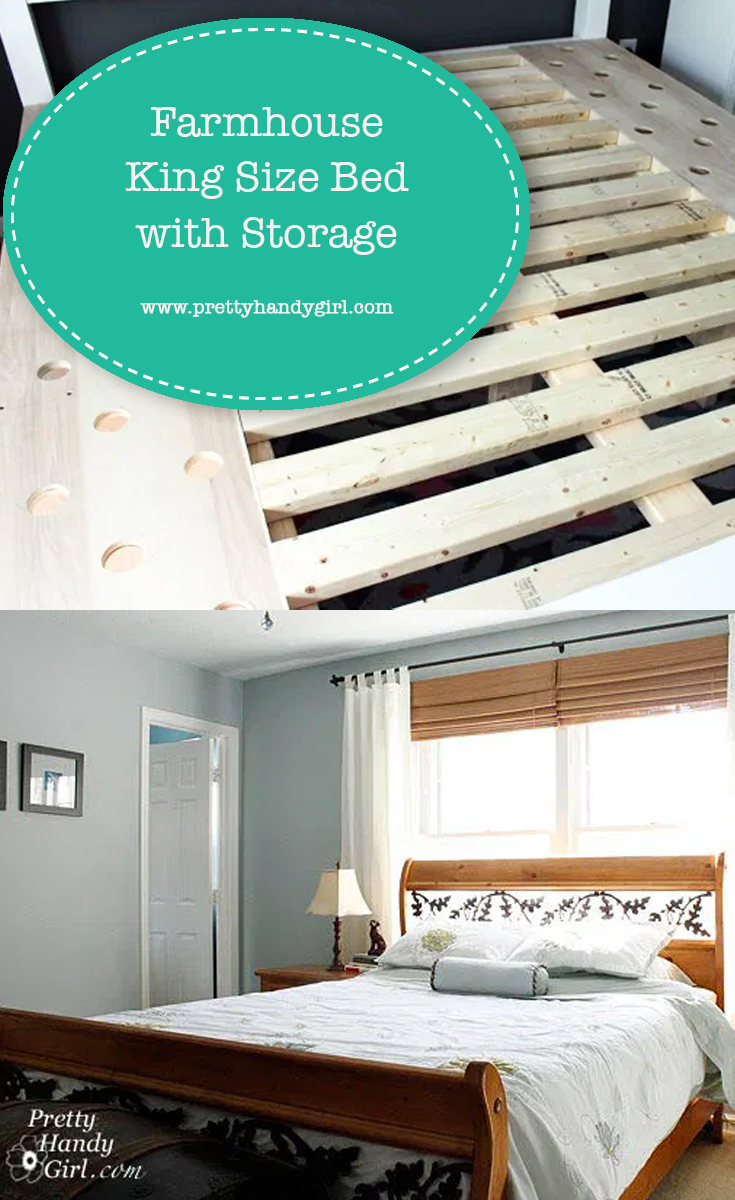
Farmhouse King Size Bed with Storage
The master bedroom is almost finished. If you’ve been following along, I decided to give our bedroom a makeover when we upgraded our mattress to a king size. That decision has resulted in a few “give a mouse a cookie” decisions. Every time we needed a new mattress, we discussed whether it was time to upgrade to a king. Each time we decided to stick with our queen. Besides the savings, I was attached to our oak leaf sleigh bed. The wrought iron leaves are my favorite part of the bed.

Farmhouse King Size Bed with Storage
This time as the mattress buying decision loomed, I did extensive research and discovered Savvy Rest’s Serenity latex layered mattress. Who knew that this DIY mattress would last us for decades! (You have to read about this mattress, it will probably be the last mattress you ever buy!) Given the length of time we’d be sleeping on it, we decided it was finally time to make the switch and move up to a king. But, I have to admit, I was sad about saying goodbye to the oak leaves. A few sleepless nights later and I had formulated a brilliant plan of how I could use my beloved oak leaves in the new bed:
I ended up altering Ana White’s Queen size farmhouse bed with storage drawers plans by sizing it for a king-sized mattress. Plus, I altered the headboard design to incorporate my beloved oak leaf wrought iron.
Ana’s plans are great, so I’m going to send you to her site to download the basic plans. Then, I’ll give you the details and show you the modifications I made.

Building the King Size Farmhouse Storage Bed:
Cut List: (alterations to Ana White’s plans denoted in red)
Headboard:
*1 – 3/4″ Plywood @ 26″ x 69″
2 – 1×4 @ 69″
1 – 2×2 @ 69″
1 – 3/4″ L shaped corner moulding piece cut to 69″
2 – 4×4 @ 60″
2 – 2×4 @ 69″
1 – 2×4 @ 76″
1 – 2×6 @ 78″
Footboard:
*1 – 3/4″ Plywood @ 15″ x 69″
2 – 1×4 @ 69″
2 – 4×4 @ 19″
2 – 2×4 @ 69″
1 – 2×4 @ 76″
1 – 2×6 @ 78″
Storage Boxes:
*4 – 3/4″ Plywood @ 15 1/2″ x 80 1/4″
*8 – 3/4″ Plywood @ 15 1/2″ x 13 1/2″
*2 – 1/4″ Plywood @ 79 1/2″ x 15″
Support Center:
3 – 2×4 @ 80 1/4″
4 – 2×4 @ 10″
2 – 2×4 @12″
13 – 2×4 @45″
Drawer Boxes:
12 – 1×10 @ 23 1/4″
12 – 1×10 @ 14″
*6 – 1/4″ Plywood @ 24 3/4″ x 14″
*Plywood cut into 9 1/2″ strips can be substituted for 1x10s, use at least 1/2″ plywood, for direct conversion, use 3/4″ plywood
Drawer Faces:
*6 – 3/4″ Plywood @ 25 1/2″ x 13 1/4″
12 – 1/4″ hobby stock, 2 1/2″ wide @ 8 1/4″
12 – 1/4″ hobby stock, 2 1/2″ wide @ 25 1/2″
* I used PureBond plywood for the plywood lumber because I didn’t want to be sleeping on wood glued with formaldehyde.
General Instructions:
Download Ana White’s plans for the basic (and easy to follow) plans to build the bed. Then come back here and I’ll show you my alterations.
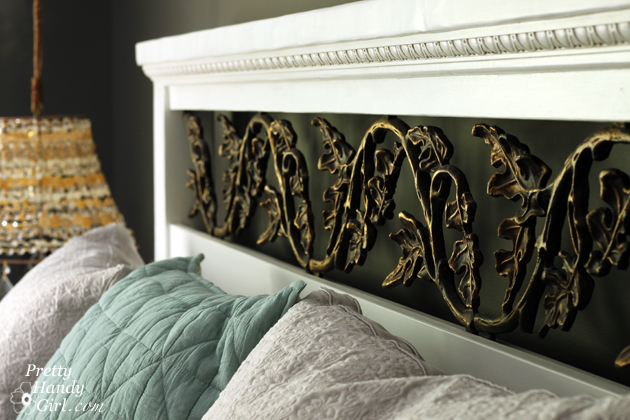
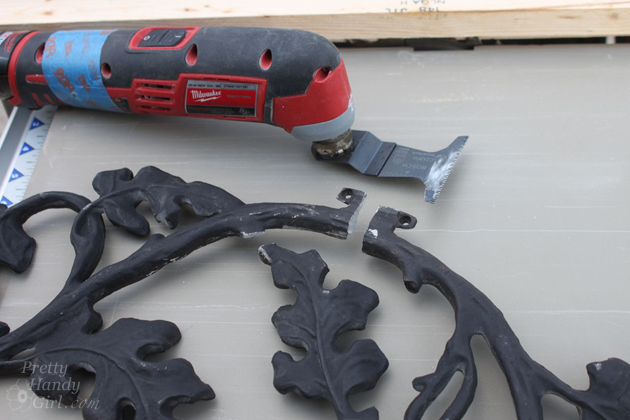
Preparing the Wrought Iron Oak Leaves:
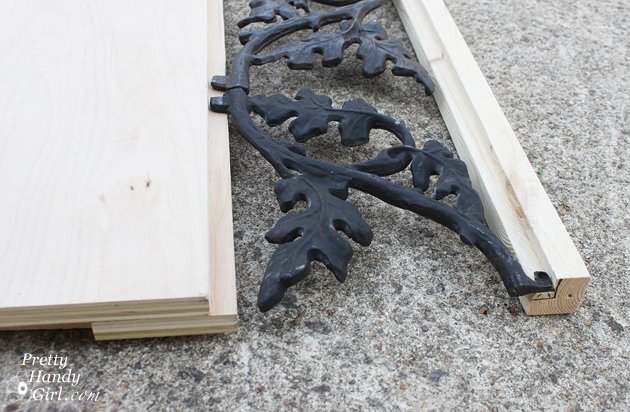
I removed all the wrought iron pieces from our queen-sized sleigh bed (headboard and footboard pieces.) Then I laid out all the pieces and cut one of the iron sections to add enough width to our new king size headboard. If you don’t have wrought iron laying around, head to a salvage shop or get creative. You could use reclaimed boards in the void or cut a fun pattern into thin plywood with a jigsaw (band saw or scroll saw.) Or add an upholstered panel. Get creative and make your new bed your own!
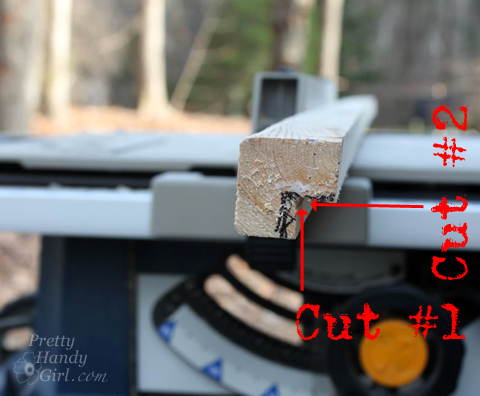
To cut the wrought iron, use a metal cutting blade on a vibrating multi-tool to cut through one of the oak leaf sections.
Build the headboard panel as described by Ana’s plans, but slide the top 1×4 piece up 1″ to create a lip:
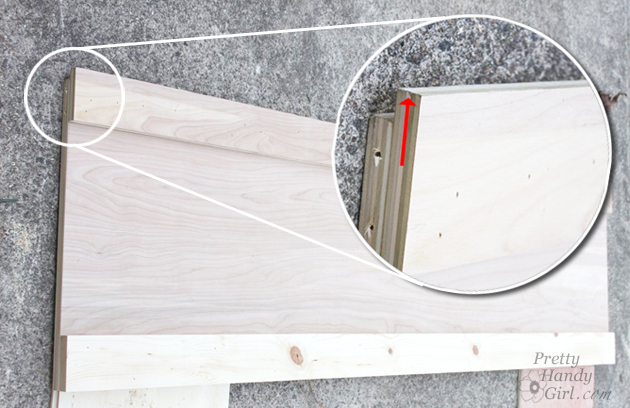
Use the table saw (or router) to cut out a 3/4″ notch out of the 2×2 board to create a channel:
Your headboard construction will accommodate the wrought iron pieces as shown below (view from the backside):
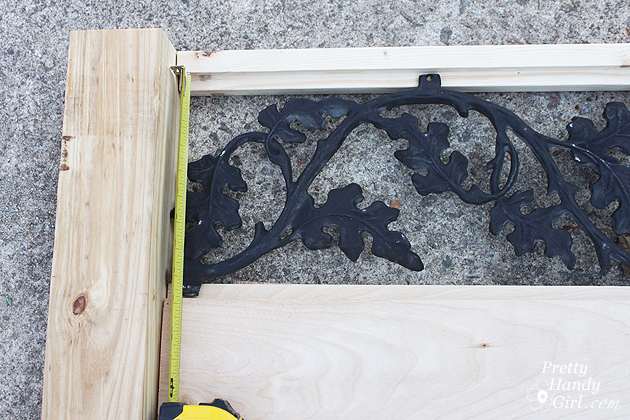
Line the 2×2″ board up with the top of the 4×4 posts. Measure the height of the wrought iron and mark the top of the plywood headboard. Secure both the 2×2 and the headboard using pocket hole joinery.
Follow the rest of Ana’s plans to build the storage boxes and the footboard.
Before securing the wrought iron, prime and paint your headboard.
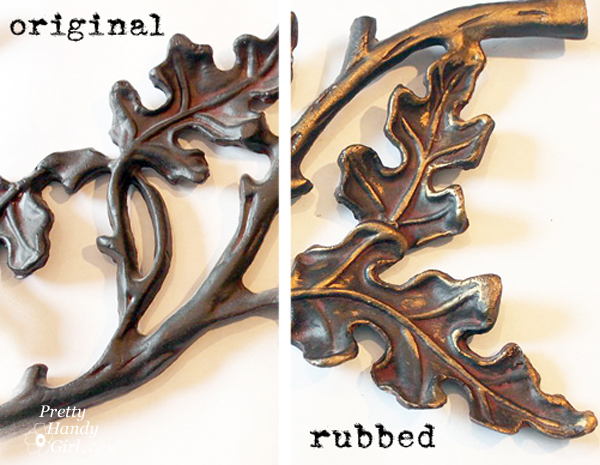
While you are waiting for it to dry, you can add some glam to the wrought iron with a little Rub n’ Buff:
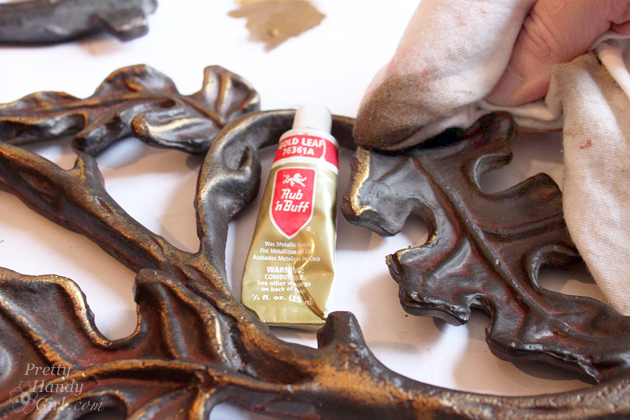
The gold highlighted the wrought iron and makes it show up better against our dark bedroom walls.
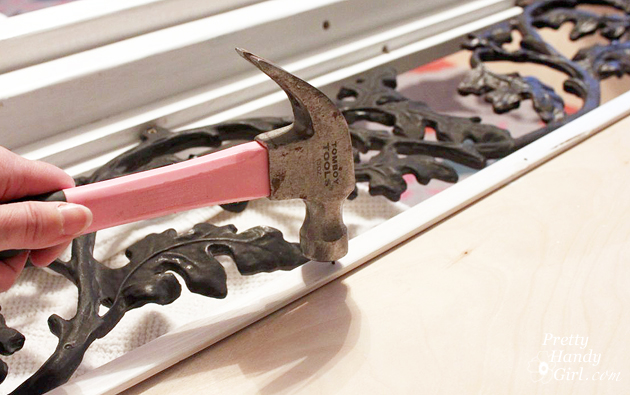
Working from the back of the headboard, use small wood screws (ideally you salvaged them from the old head board) to secure the wrought iron into the headboard.

Set the piece of corner moulding over the bottom of the wrought iron.
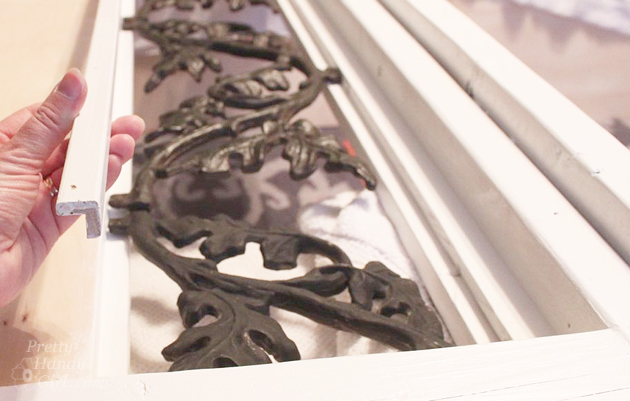
Tack it in place using small brad nails.
Moving right along….secure the storage boxes as instructed by Ana’s plans.
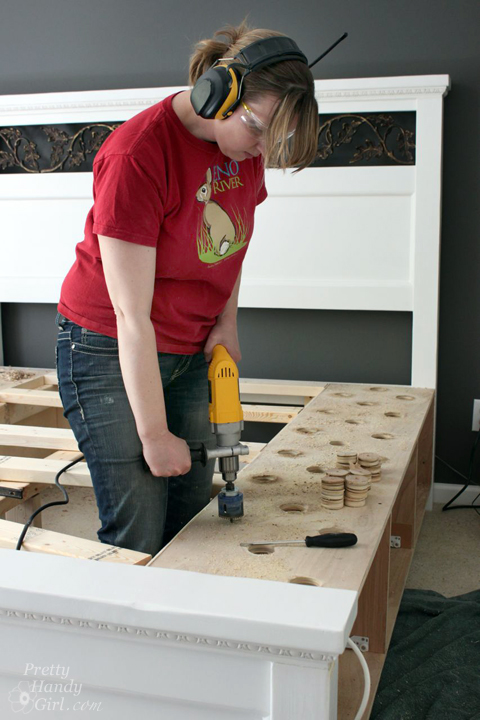
One of the requirements for maintaining the longevity of our latex mattress is to allow for breathability underneath. If you don’t buy a box spring with your latex mattress, you can use a platform bed. To allow for more air flow to our mattress, I drilled holes through the top of the storage boxes with a forstner bit.
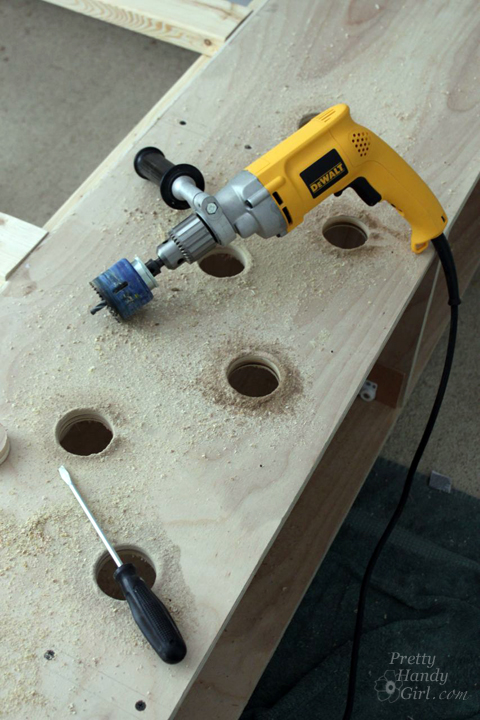
To avoid fatigue and multiple battery charges, use a corded drill with a handle. Brace yourself because the drill will spin if you aren’t ready for it.
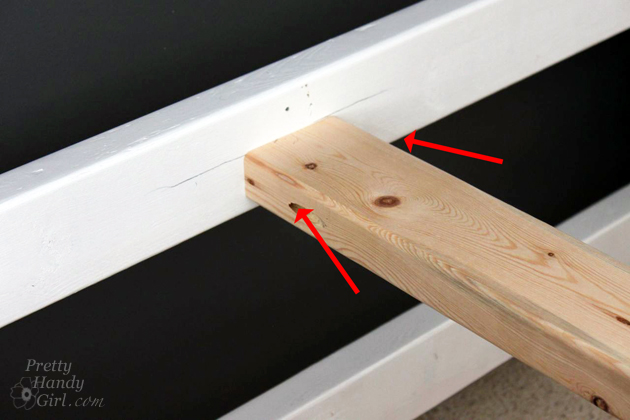
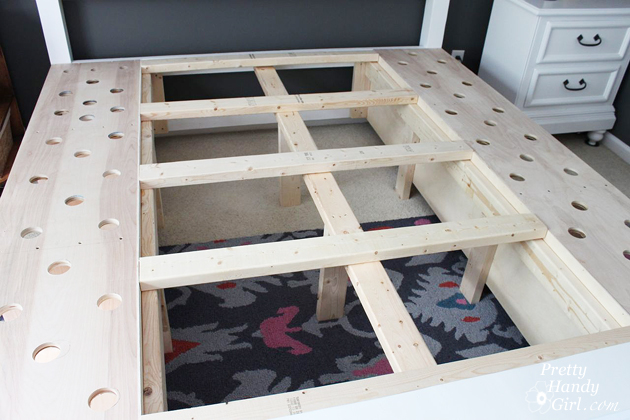
To create the inner support for the king mattress, I beefed up the center with one 2×4 beam attached with pocket hole screws to the headboard and footboard. Be sure to position the beam 1.5″ lower than the top of the storage boxes to accommodate your cross slats. Support the center beam with two 12″ 2×4 legs distributed in the center.
Attach the remaining two 2×4 studs horizontally to the back of the storage boxes. Position them 1.5″ below the top of the storage boxes. Drive screws from the inside of the box out if possible.
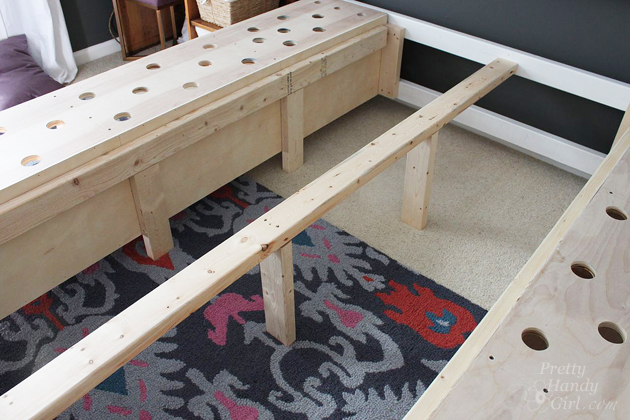
Add two 10″ tall 2×4 legs under each horizontal stud (as shown above and below.)
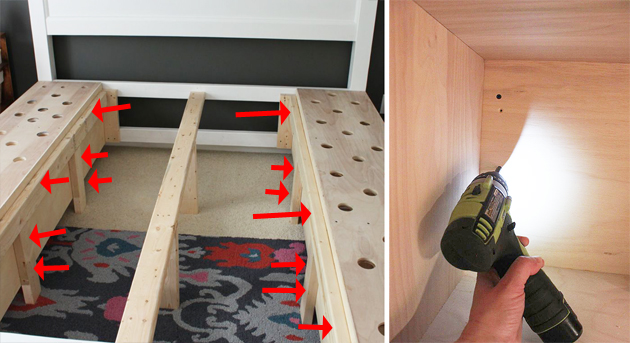
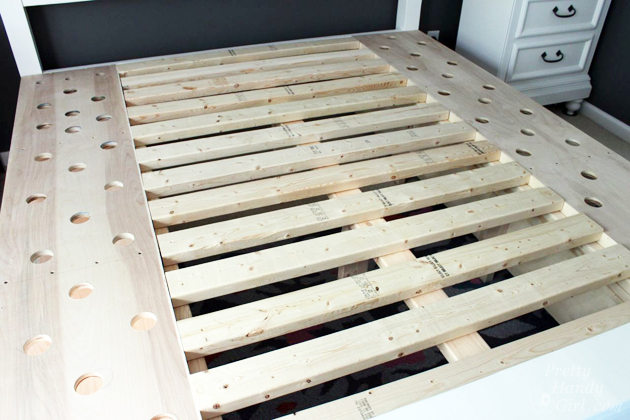
Begin laying the horizontal 2×4 slats on top of the supports you installed. (Side note: I beefed up the slats from 1×4 to 2×4″ studs to accommodate the king mattress and because our latex foam mattress is much heavier than a traditional spring mattress.)
Evenly space the slats.
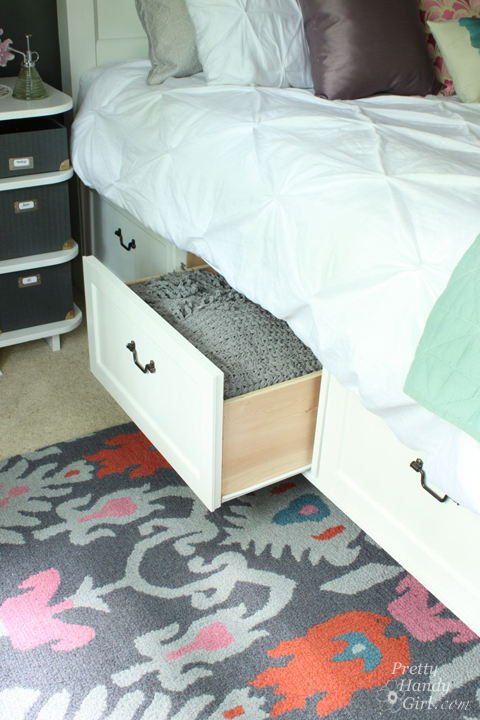
Go ahead and follow Ana’s plans to build the storage drawers. I added some quarter round moulding onto our drawers.
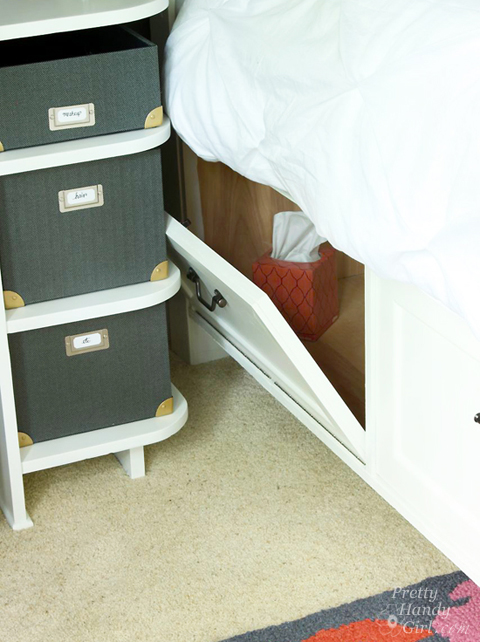
I also modified the drawers closest to the headboard. I knew it would be near impossible to access that drawer without moving furniture, so I added a hinge and a latch so I can tilt the drawer face and access the storage area. As an added bonus, I drilled a hole into this compartment and put a power strip for charging our electronic devices.
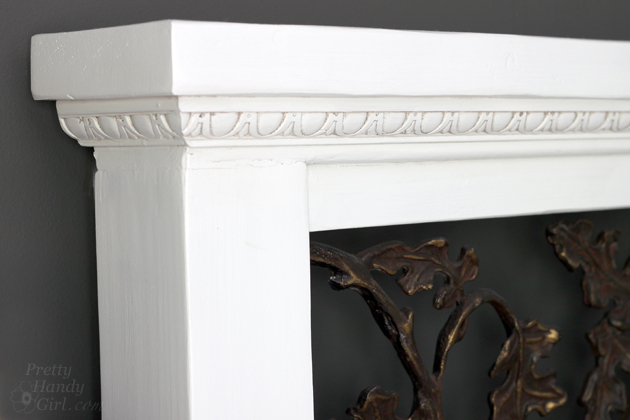
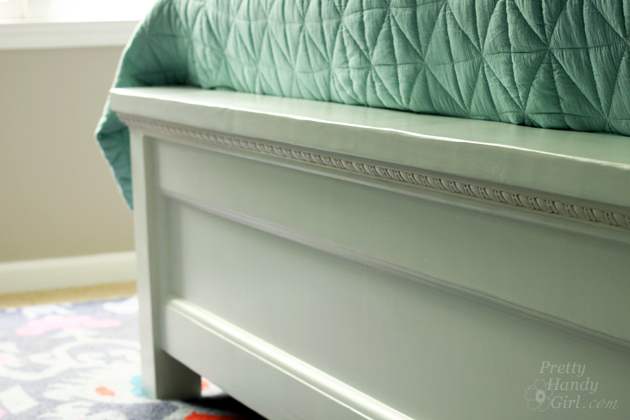
Feel free to add your own decorative moulding. I used egg and dart moulding to the headboard…
…and footboard.
The bed is done and ready for a good night’s sleep!
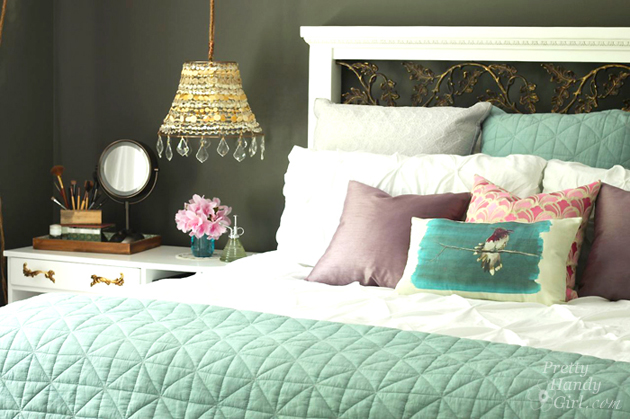
I am so glad I was able to save those oak leaf details from our old bed!
I do want to update you on our new mattress. It’s been 7 months since the Savvy Rest latex mattress arrived — BEST DECISION EVER!!! Not only am I sleeping better, but so is Pretty Handsome Guy. I have no more back pain and I’m sleeping more soundly. This means more energy for more projects! Win-win-WIN!
Just getting caught up? Here are some other tutorials from our master bedroom makeover:
- How to Paint Your Room Twice as Fast
- How to Paint an Ombré Wall Technique
- Make a Button Pendant Light
- Painting a Knotty Pine Dresser
- Our DIY Latex Mattress
Coming up soon! The rest of the master bedroom!
![]()
Pin for later!


Just to tell you how much money you saved. I got an estimate from a custom furniture designer and they said they would charge $2,300.00 to make this bed!!!
Loooove storage beds. Question for you: You drilled holes into the top of the storage boxes for ventilation with what looks like a hole saw bit. But in the photo above and below where it says “evenly space the slats” it looks like there is wood underneath the holes. Not being snarky, genuinely curious…doesn’t that defeat the purpose of the holes?
That’s an illusion. You are seeing the bottom of the boxes for the storage drawers. There is about one foot between the holes and the bottom of the boxes.
Hi Looove your bed before and after. By the way i have the same bed, but i got ut at a yard sale. I was wondering if you could help me out and tell me where you bought it or who makes it. I would love to get some drawers that match it. Thanks in advance!!!
Did you use the same amount of wood (probably not) or remember the extra pieces needed? My husband is building this for the holidays!
Can we get a good picture of the hinge drawer? Having a hard time figure this one out. Placement of the hinge and if it needs to be elevated to accommodate the motion.
Thank You
Cory, I’ll try to do that for you.
Hi, question for you. Is the 2 x 6 on the foot board 1″ all around or even with the back of the 2 x 4 in towards the bed so it doesn’t push in and affect the bed?
Cory, yes, it is centered on the 4×4 post and sticks out an inch toward the mattress. There is still enough room to tuck the blankets, etc.
Hi,
I was wondering how much the bed cost to make? Maybe I overlooked it if you did mention it but I’d like a ballpark before I decide to undertake such a large project. Thanks so much! And what a beautiful job you did!!
Amber, I’d guess $250 – $350 depending on the lumber costs in your area. And if you use PureBond or not. We did, so it cost a little more but piece of mind is worth it for the formaldehyde free.
It cost me $425-ish.
Also note that the 45″ cross beams did not sit in there with the backboards on the drawers. Needed cut to 44.5″
Also, combining the plans, you will see the center supports should be 4″ longer than listed. So 16″ of the middle and 14″ for the backs of the drawers.
Thank you still for the plans, just thought you would like to know it still worked out great in the end
Do you have a shopping list for these wood materials?