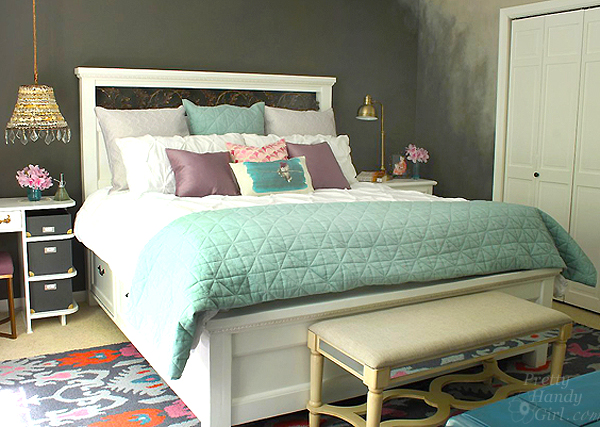
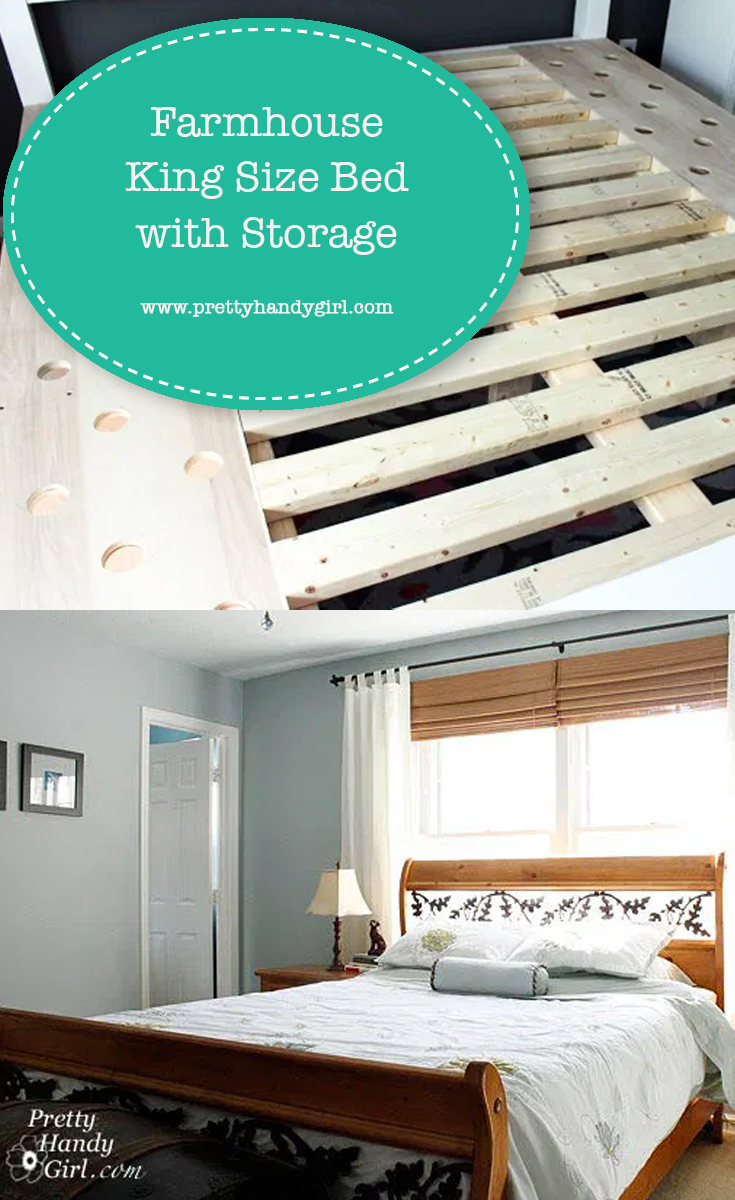
Farmhouse King Size Bed with Storage
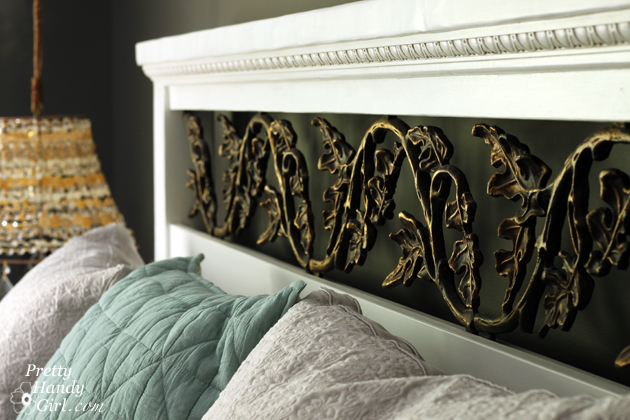
The master bedroom is almost finished. If you’ve been following along, I decided to give our bedroom a makeover when we upgraded our mattress to a king size. That decision has resulted in a few “give a mouse a cookie” decisions. Every time we needed a new mattress, we discussed whether it was time to upgrade to a king. Each time we decided to stick with our queen. Besides the savings, I was attached to our oak leaf sleigh bed. The wrought iron leaves are my favorite part of the bed.

Farmhouse King Size Bed with Storage
This time as the mattress buying decision loomed, I did extensive research and discovered Savvy Rest’s Serenity latex layered mattress. Who knew that this DIY mattress would last us for decades! (You have to read about this mattress, it will probably be the last mattress you ever buy!) Given the length of time we’d be sleeping on it, we decided it was finally time to make the switch and move up to a king. But, I have to admit, I was sad about saying goodbye to the oak leaves. A few sleepless nights later and I had formulated a brilliant plan of how I could use my beloved oak leaves in the new bed:
I ended up altering Ana White’s Queen size farmhouse bed with storage drawers plans by sizing it for a king-sized mattress. Plus, I altered the headboard design to incorporate my beloved oak leaf wrought iron.
Ana’s plans are great, so I’m going to send you to her site to download the basic plans. Then, I’ll give you the details and show you the modifications I made.

Building the King Size Farmhouse Storage Bed:
Cut List: (alterations to Ana White’s plans denoted in red)
Headboard:
*1 – 3/4″ Plywood @ 26″ x 69″
2 – 1×4 @ 69″
1 – 2×2 @ 69″
1 – 3/4″ L shaped corner moulding piece cut to 69″
2 – 4×4 @ 60″
2 – 2×4 @ 69″
1 – 2×4 @ 76″
1 – 2×6 @ 78″
Footboard:
*1 – 3/4″ Plywood @ 15″ x 69″
2 – 1×4 @ 69″
2 – 4×4 @ 19″
2 – 2×4 @ 69″
1 – 2×4 @ 76″
1 – 2×6 @ 78″
Storage Boxes:
*4 – 3/4″ Plywood @ 15 1/2″ x 80 1/4″
*8 – 3/4″ Plywood @ 15 1/2″ x 13 1/2″
*2 – 1/4″ Plywood @ 79 1/2″ x 15″
Support Center:
3 – 2×4 @ 80 1/4″
4 – 2×4 @ 10″
2 – 2×4 @12″
13 – 2×4 @45″
Drawer Boxes:
12 – 1×10 @ 23 1/4″
12 – 1×10 @ 14″
*6 – 1/4″ Plywood @ 24 3/4″ x 14″
*Plywood cut into 9 1/2″ strips can be substituted for 1x10s, use at least 1/2″ plywood, for direct conversion, use 3/4″ plywood
Drawer Faces:
*6 – 3/4″ Plywood @ 25 1/2″ x 13 1/4″
12 – 1/4″ hobby stock, 2 1/2″ wide @ 8 1/4″
12 – 1/4″ hobby stock, 2 1/2″ wide @ 25 1/2″
* I used PureBond plywood for the plywood lumber because I didn’t want to be sleeping on wood glued with formaldehyde.
General Instructions:
Download Ana White’s plans for the basic (and easy to follow) plans to build the bed. Then come back here and I’ll show you my alterations.
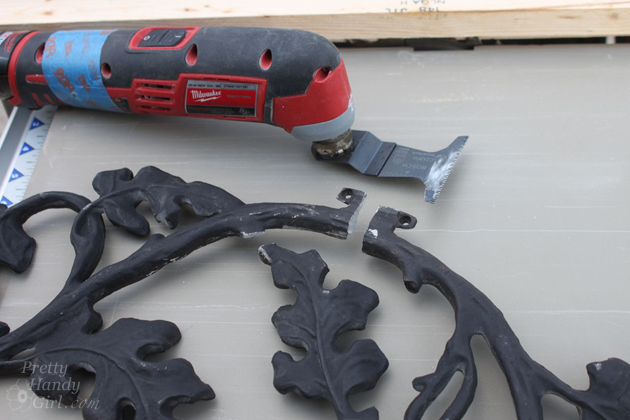
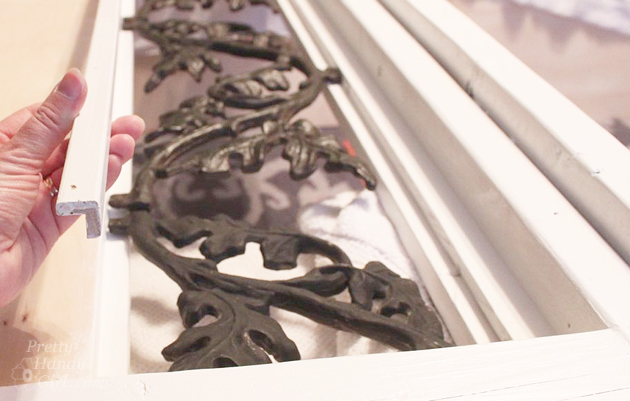
Preparing the Wrought Iron Oak Leaves:
I removed all the wrought iron pieces from our queen-sized sleigh bed (headboard and footboard pieces.) Then I laid out all the pieces and cut one of the iron sections to add enough width to our new king size headboard. If you don’t have wrought iron laying around, head to a salvage shop or get creative. You could use reclaimed boards in the void or cut a fun pattern into thin plywood with a jigsaw (band saw or scroll saw.) Or add an upholstered panel. Get creative and make your new bed your own!
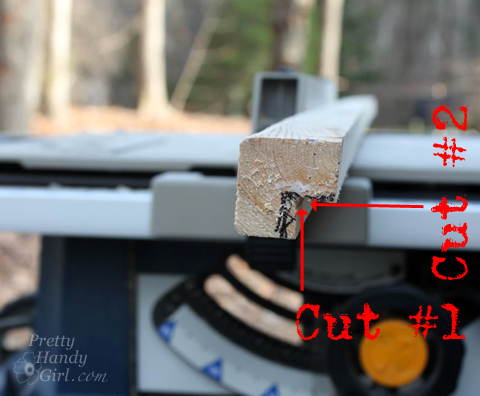
To cut the wrought iron, use a metal cutting blade on a vibrating multi-tool to cut through one of the oak leaf sections.
Build the headboard panel as described by Ana’s plans, but slide the top 1×4 piece up 1″ to create a lip:
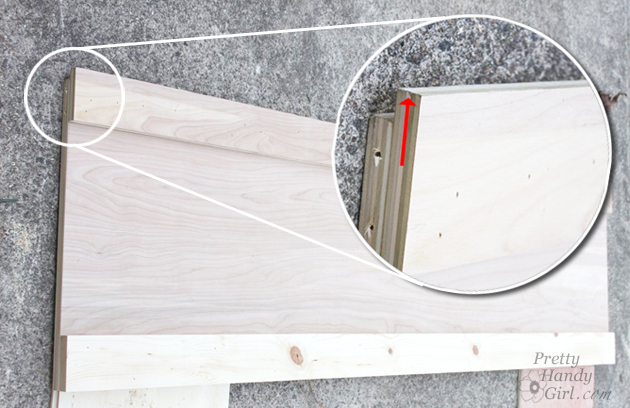
Use the table saw (or router) to cut out a 3/4″ notch out of the 2×2 board to create a channel:
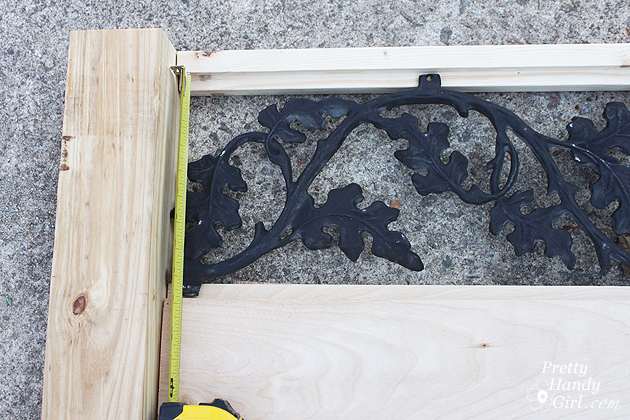
Your headboard construction will accommodate the wrought iron pieces as shown below (view from the backside):
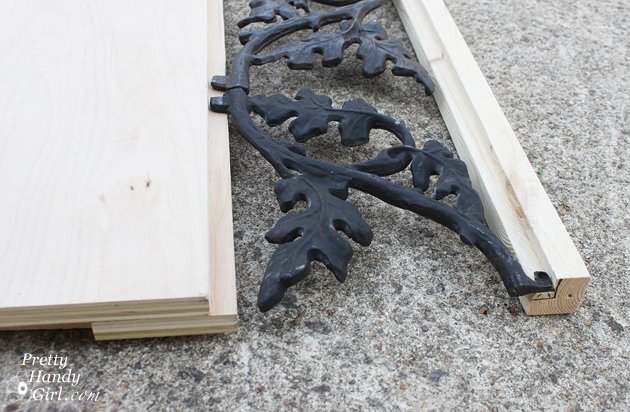
Line the 2×2″ board up with the top of the 4×4 posts. Measure the height of the wrought iron and mark the top of the plywood headboard. Secure both the 2×2 and the headboard using pocket hole joinery.
Follow the rest of Ana’s plans to build the storage boxes and the footboard.
Before securing the wrought iron, prime and paint your headboard.
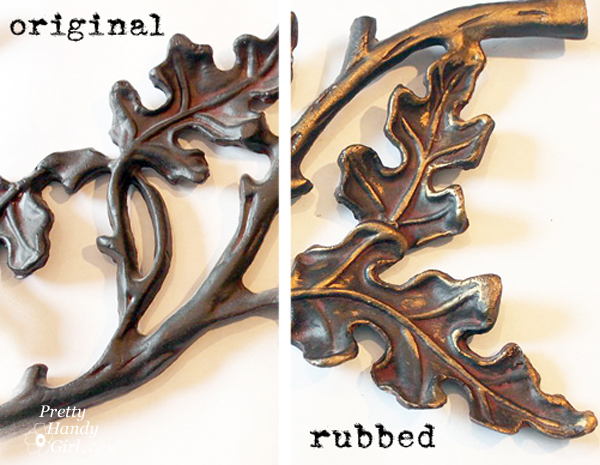
While you are waiting for it to dry, you can add some glam to the wrought iron with a little Rub n’ Buff:
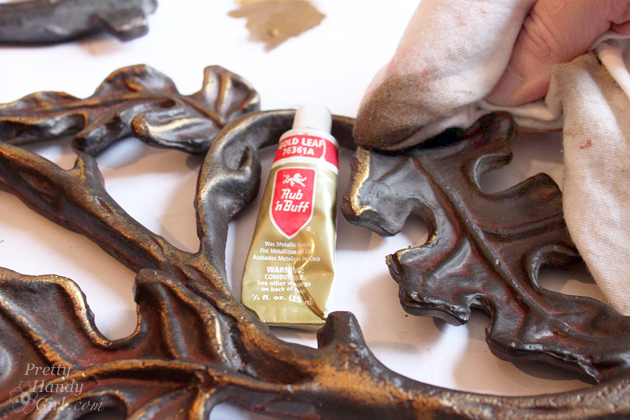
The gold highlighted the wrought iron and makes it show up better against our dark bedroom walls.
Working from the back of the headboard, use small wood screws (ideally you salvaged them from the old head board) to secure the wrought iron into the headboard.

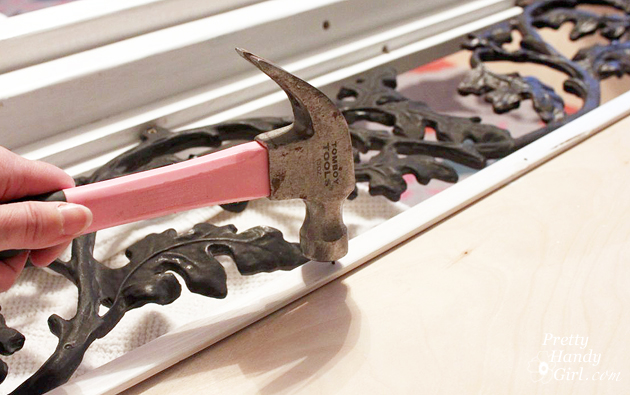
Set the piece of corner moulding over the bottom of the wrought iron.
Tack it in place using small brad nails.
Moving right along….secure the storage boxes as instructed by Ana’s plans.
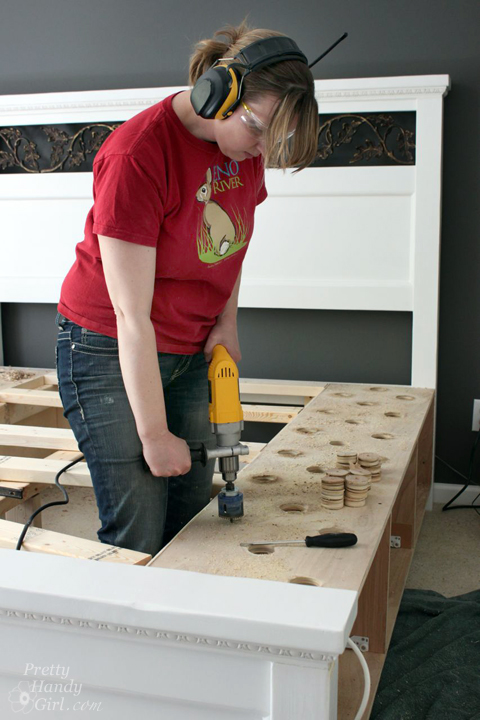
One of the requirements for maintaining the longevity of our latex mattress is to allow for breathability underneath. If you don’t buy a box spring with your latex mattress, you can use a platform bed. To allow for more air flow to our mattress, I drilled holes through the top of the storage boxes with a forstner bit.
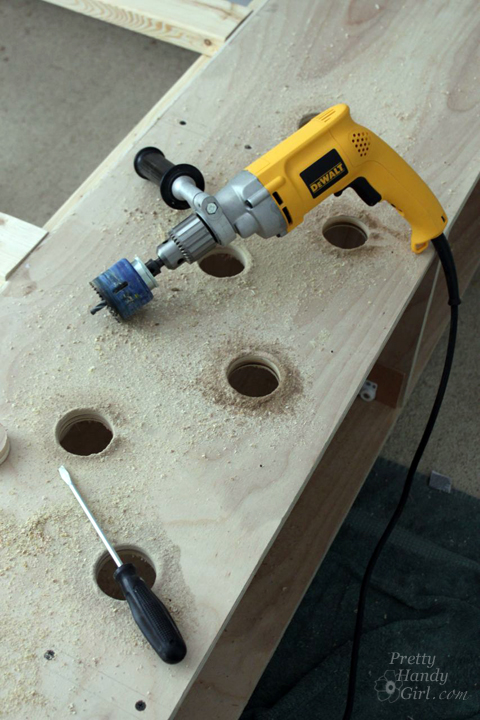
To avoid fatigue and multiple battery charges, use a corded drill with a handle. Brace yourself because the drill will spin if you aren’t ready for it.
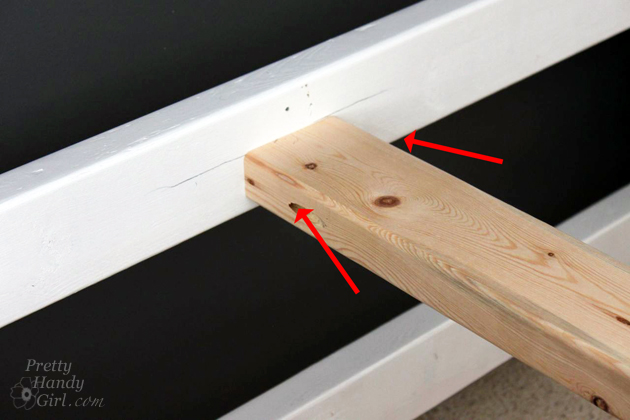
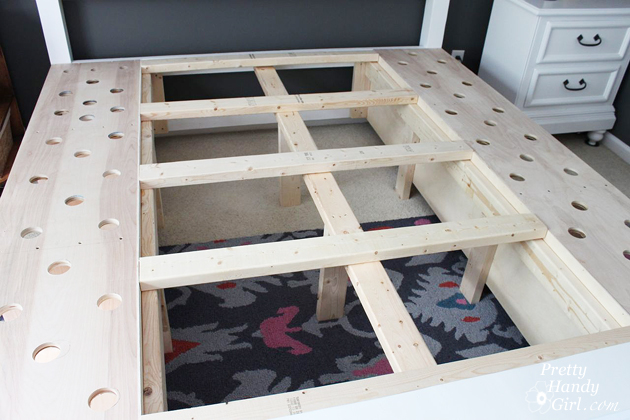
To create the inner support for the king mattress, I beefed up the center with one 2×4 beam attached with pocket hole screws to the headboard and footboard. Be sure to position the beam 1.5″ lower than the top of the storage boxes to accommodate your cross slats. Support the center beam with two 12″ 2×4 legs distributed in the center.
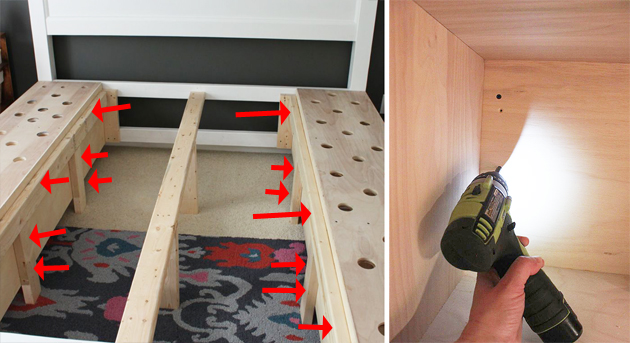
Attach the remaining two 2×4 studs horizontally to the back of the storage boxes. Position them 1.5″ below the top of the storage boxes. Drive screws from the inside of the box out if possible.
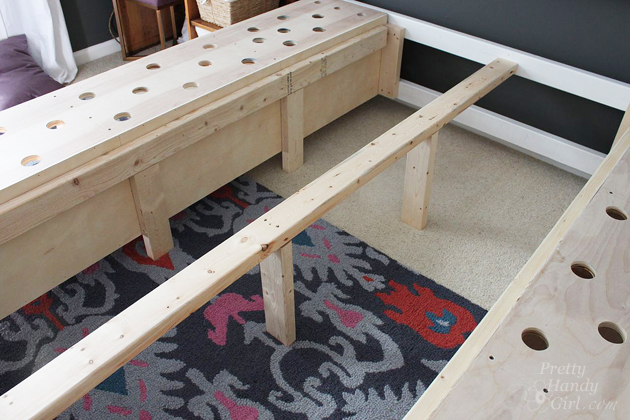
Add two 10″ tall 2×4 legs under each horizontal stud (as shown above and below.)
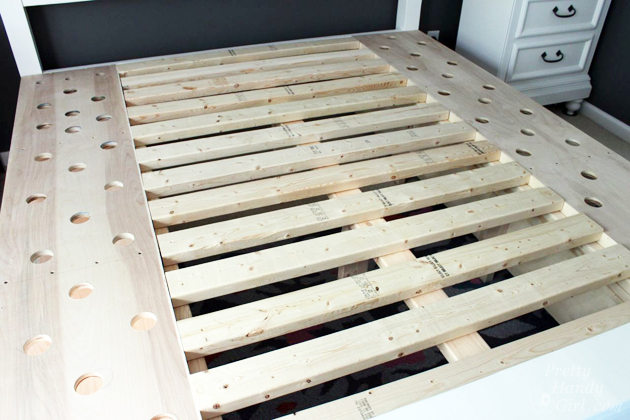
Begin laying the horizontal 2×4 slats on top of the supports you installed. (Side note: I beefed up the slats from 1×4 to 2×4″ studs to accommodate the king mattress and because our latex foam mattress is much heavier than a traditional spring mattress.)
Evenly space the slats.
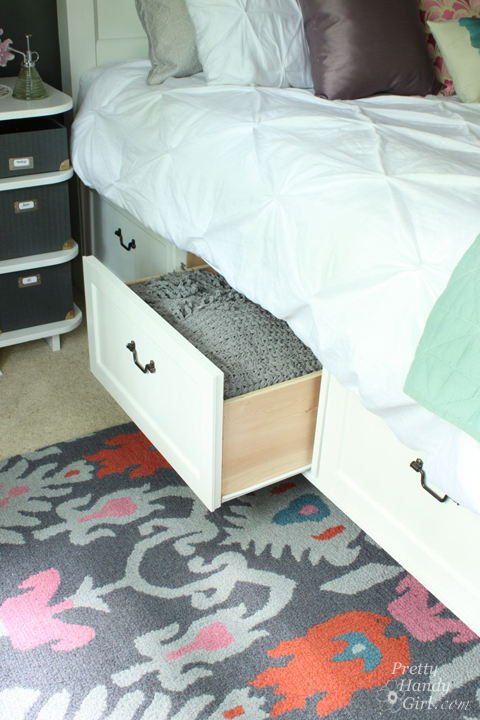
Go ahead and follow Ana’s plans to build the storage drawers. I added some quarter round moulding onto our drawers.
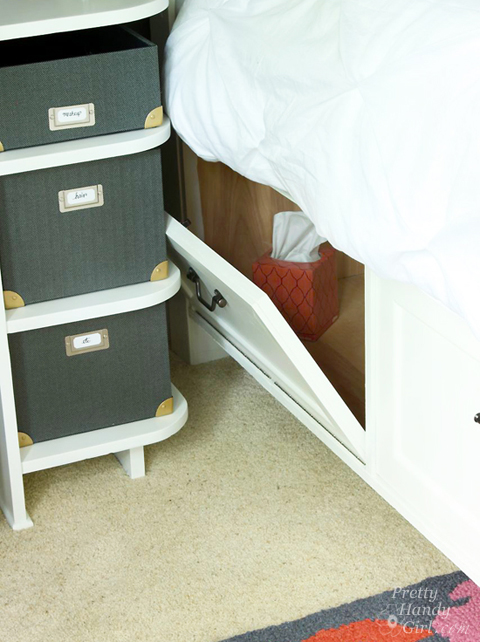
I also modified the drawers closest to the headboard. I knew it would be near impossible to access that drawer without moving furniture, so I added a hinge and a latch so I can tilt the drawer face and access the storage area. As an added bonus, I drilled a hole into this compartment and put a power strip for charging our electronic devices.
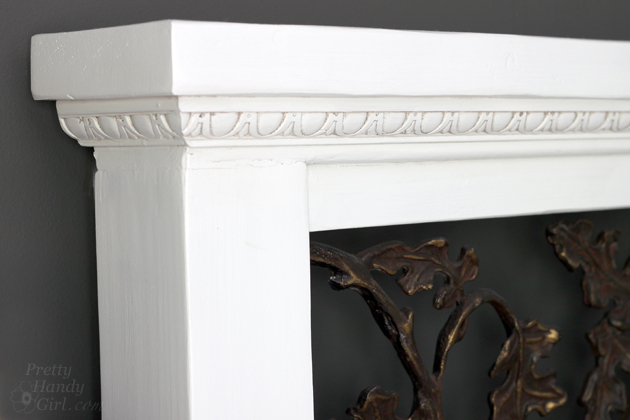
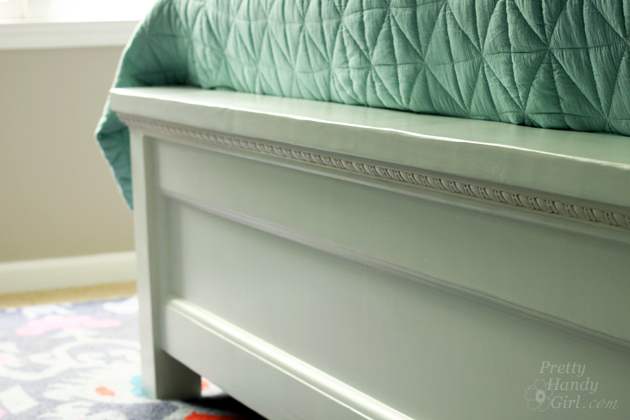
Feel free to add your own decorative moulding. I used egg and dart moulding to the headboard…
…and footboard.
The bed is done and ready for a good night’s sleep!
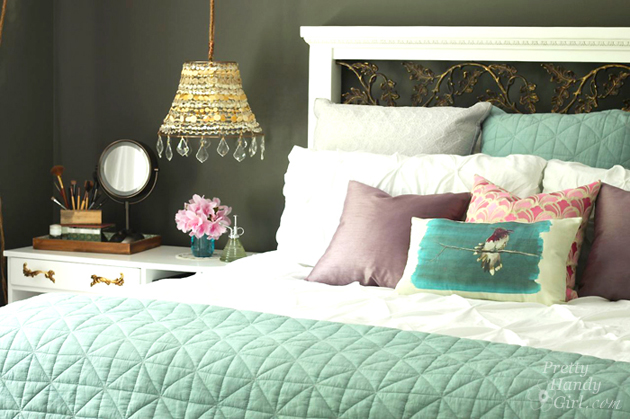
I am so glad I was able to save those oak leaf details from our old bed!
I do want to update you on our new mattress. It’s been 7 months since the Savvy Rest latex mattress arrived — BEST DECISION EVER!!! Not only am I sleeping better, but so is Pretty Handsome Guy. I have no more back pain and I’m sleeping more soundly. This means more energy for more projects! Win-win-WIN!
Just getting caught up? Here are some other tutorials from our master bedroom makeover:
- How to Paint Your Room Twice as Fast
- How to Paint an Ombré Wall Technique
- Make a Button Pendant Light
- Painting a Knotty Pine Dresser
- Our DIY Latex Mattress
Coming up soon! The rest of the master bedroom!
![]()
Pin for later!


That is really nice with the wrought iron! I am getting ready to build something similar with storage. Looking at your plans and Ana’s, what did you guys do about the exposed edges of the boxes that the drawers slide into as the edge of plywood is not usually overly smooth?
Thanks,
Rob
Rob, I used wood putty to fill in any gaps or imperfections. Then sanded it smooth and painted it.
I know your sister helped with color choices but, I have to say, seeing how you made the bed… well, the color choices kinda recede for me. Not that they’re not wonderfully complimentary to the room but, Geez, that bed! I’m so impressed you made it. It looks so… perfect. Good for you!
beautiful job! love how you were able to reuse the iron.
Love this! We are in the process of moving and we were going to use Ana’s plans to build the farmhouse bed without the drawers once we move-in to the house, but your post has made me think that maybe we need the drawers…hmmm. Also because of your post about your Savvy mattress we went to a sleep store that had this mattress. We actually didn’t end up getting the Savvy because we found another earth friendly foam mattress that had a better price tag and was just as comfortable. Had we not read your post I don’t think we would have even considered a foam mattress, so thank you for that!
Hi Heather,
About to start building this bed for ourselves and needing a new mattress to go on it. I was looking into a foam one and wondered if you could tell me the brand you ended up getting and how you like it a few years later?
Thanks!
We went with the company Bed In a Box https://www.bedinabox.com/category/mattresses. The mattress has held up really well and we still love it. I went to their website and I don’t see the mattress we got (or at least I couldn’t tell which was ours). We got a bamboo one, which was supposed to be more Earth friendly. Our only problem is that my husband made our bed, but he made it just a tad too small so that whenever we have to take off or put on our sheets we have to pull the mattress out & it’s very heavy & there are no handles on it to get it out. I’ve heard a lot about the company mattress Casper, but I don’t know what their prices are like.
Thank you so much! Good to know about the bed size and changing sheets.
You are just amazing Brittany! The bed is over-the-top stupendous. I love all the bedding too!!
Thank you Kathy! I owe a huge thank you to my sister who helped me with the bedding choices. I’ll be giving out the sources soon.
Astounding transformation. What a brilliant idea Brittany! It looks better & even more beautiful. Love what you did with the wrought iron part of it as well. Thank you for the download link too.
Colleen, thanks gal. I love our bed and was skeptical that I could build it, but Ana’s plans are awesome!
I must say that of all the projects I have read on your blog and there have been MANY, this one is pure genius!!! Kudos! Beautiful and so functional. Love the hinge and cord hole idea, along with the oak leaves of course!
Thanks Karen, I appreciate your comment ;-).
You amaze me, as always. I’m just awestruck at your talent! However, I spied a little pillow that caught my eye – the one up front with the birdie on it? Did you happen to paint that? Or by chance, remember the source? Thanks! xo
Colleen, you give me too much credit! The little hummingbird pillow is from West Elm ;-). Looks like they are sold out, but I know you could paint one! http://www.westelm.com/products/emerald-hummingbird-silk-pillow-cover-t727/
Very cool! The grey walls are growing on me too!
😉 Thanks Donald.
I looooooooove this room Brittany! Everything just seems to come together! Also, HOW DID WE MISS EACH OTHER AT HAVEN?! Every time I saw you, I was either in a conversation, or you were… and I’d think ‘I’ll snag her later’. And somehow it never happened! HA!
Beth, I know, I saw Nick twice and completely missed you!!! Wahhhh.
where are the blinds and curtains from in the picture of the old bed?
Debbie, the roman shades were from either Bed, Bath & Beyond or Linens & Things on clearance several years ago. The curtains are simple white tab top curtains. They were given to me by a neighbor who wasn’t using them.
Absolutely beautiful!! What a nice bed. Can’t wait to see the whole room.
Glad you could salvage the iron pieces- your bed looks great!
Thanks Sheila! I love that I could re-use them.