
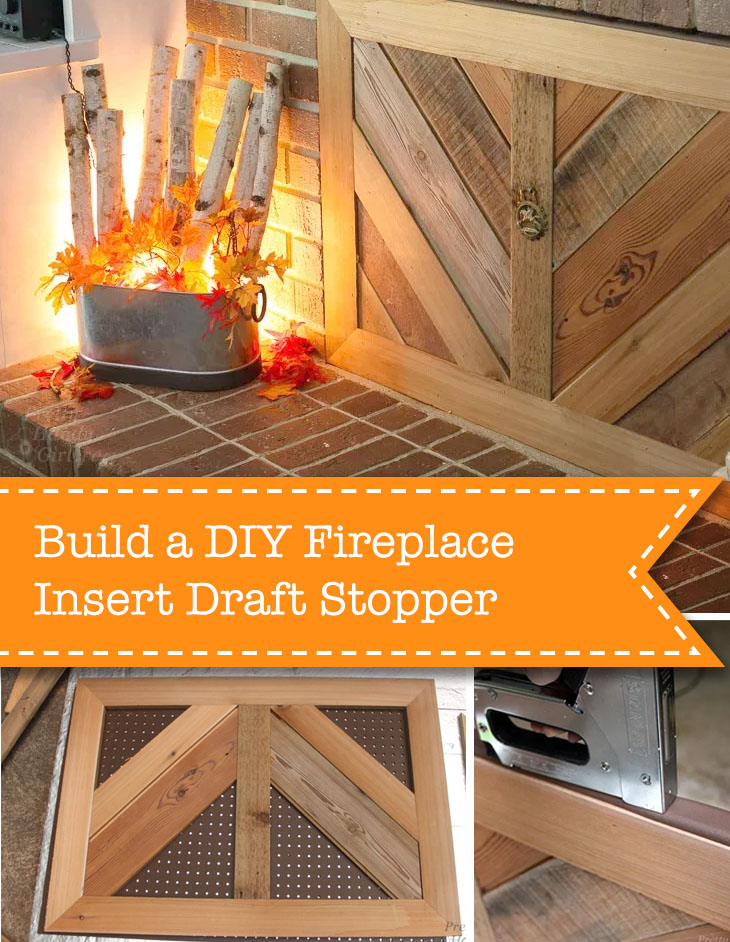
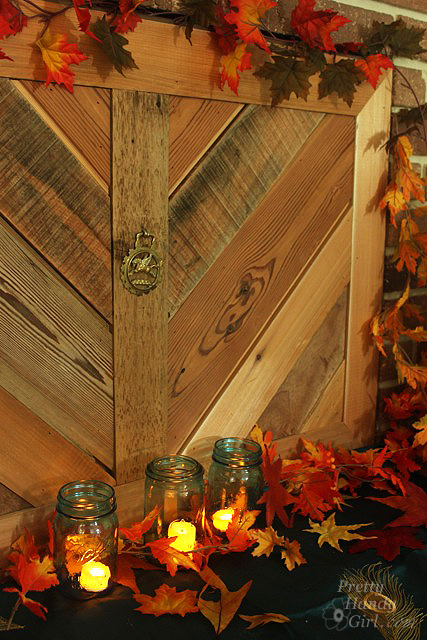
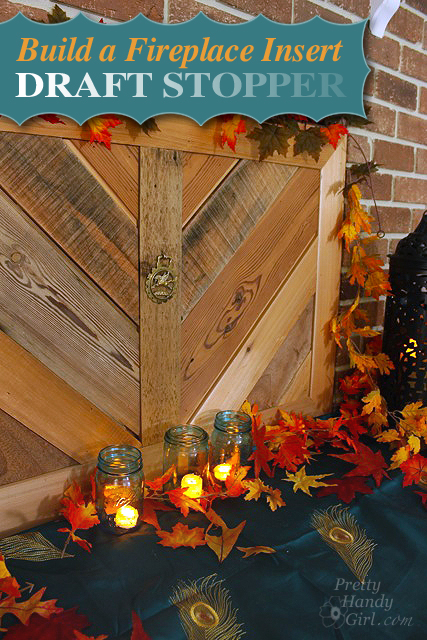
Build a Fireplace Insert Draft Stopper
I’m a little bit of a fanatic when it comes to drafts. (Remember the time I weather-stripped my garage doors?) Over time I’ve addressed most of the pesky cracks and crevices that invite cold air into our home. But, there was one draft that I’ve been meaning to serve an eviction notice to since the first winter we lived in our house. Today I’ll show you how to build a fireplace insert draft stopper!
Build a Fireplace Insert Draft Stopper
If you have an old wood-burning stover, or even one converted to gas logs, you likely know this old fireplace can be the source of cold air and drafts in the winter. Even with the damper closed, there is a draft that escapes into the room.
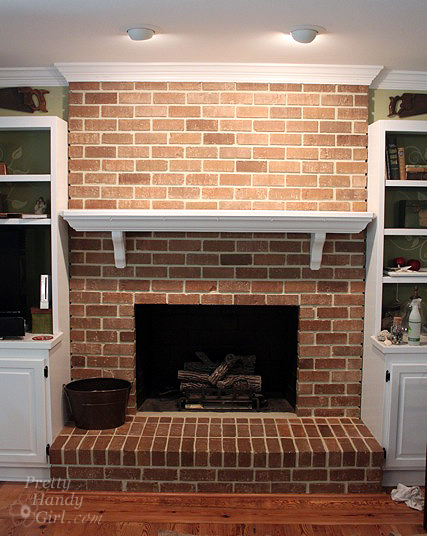
You can’t weatherstrip the damper (that would be a fire hazard), so I solved the issue by building a rustic reclaimed wood fireplace insert to stop the draft.
Want to build your own fireplace insert draft stopper? It’s not hard and you can complete it in an afternoon!
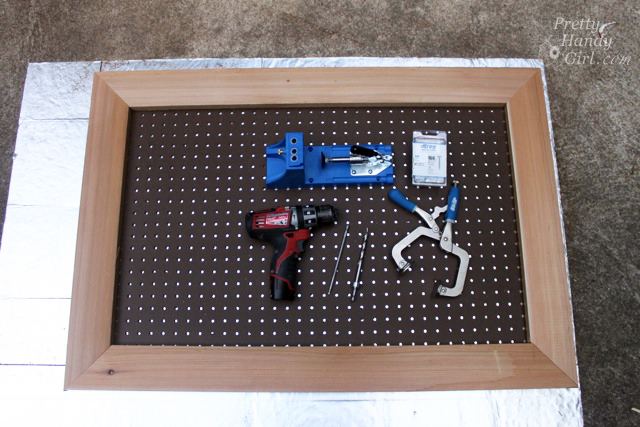
Fireplace Insert Draft Stopper Materials:

(I’ve included affiliate links for your convenience. I earn a small percentage from a purchase using these links. There is no additional cost to you. You can read more about affiliate links here.)
- Rigid foam insulation
- 4′ x 4′ Pegboard or masonite
- Tape measure
- Edge Cushion edge bumpers (in the baby proofing aisle)
- Ear muffs (or ear plugs)
- Eye protection
- Caulk gun
- Construction adhesive
- Utility knife
- Pencil
- Kreg Jig
- Speed square (optional)
- Pocket hole screws
- Circular saw with Kreg Rip Cut (or table saw or jigsaw)
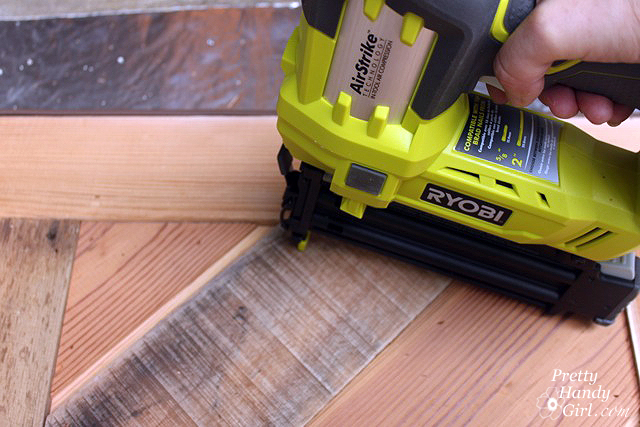
- Finish nailer
- 1.25″ finish nails for the nail gun
- 1×3’s, 1×4’s, 1×6’s or other reclaimed lumber
- Staple gun and 3/8″ staples
Notes: I chose pegboard because it was slightly cheaper and weighed less than the masonite but was still rigid enough to hold the reclaimed wood. You can ask a Lowe’s employee to cut down the rigid foam insulation for you so you can fit it in your car. You can also have your pegboard cut at Lowe’s if you know your measurements upfront. I chose to use the Kreg Rip Cut because I was anxious to try it out. I liked how it worked and it was a good option if you don’t have a table saw or track saw. Finally, adding the reclaimed lumber is not necessary, I just like the look. Another option would be to buy foam insulation and wrap it with fabric and batting and simply fit it in the fireplace opening.
Instructions:
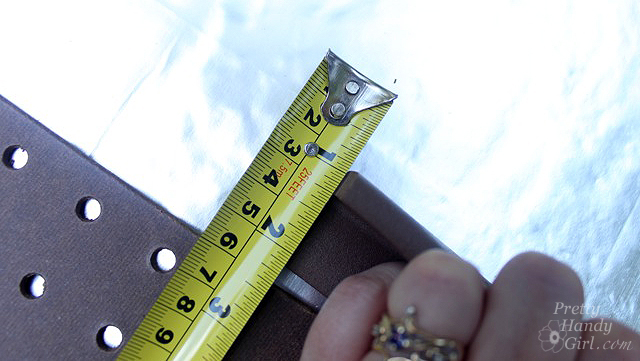
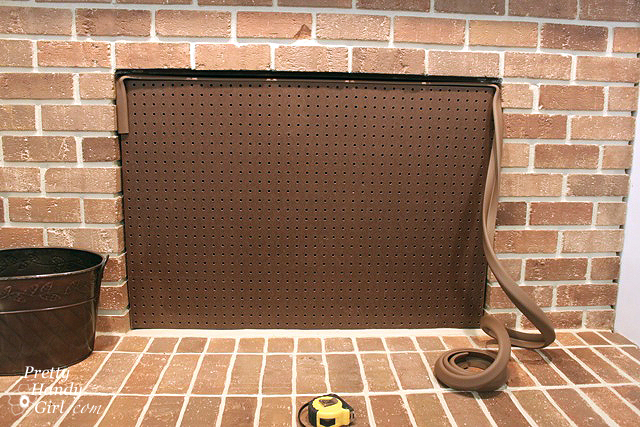
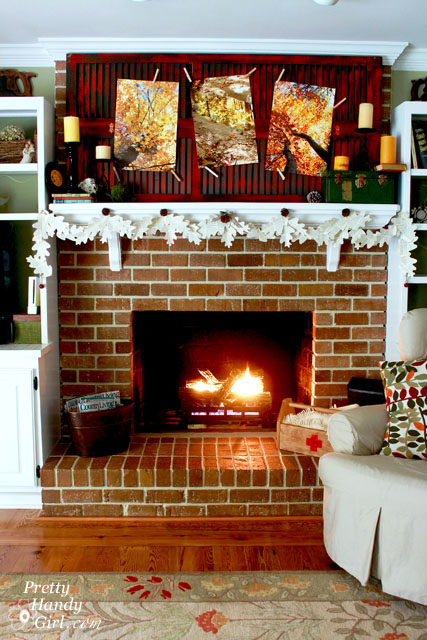
Start by measuring your fireplace opening. (Pssst. You can see that our bricks are faux painted in this picture. Learn how I painted my fireplace back to brick without sand-blasting!)
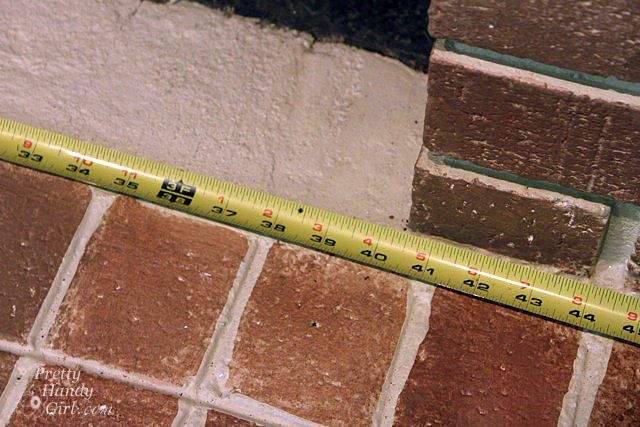
Check the width of the edge bumper (the one I used is 1/4 inch) and subtract that amount from three sides of the fireplace opening measurements.
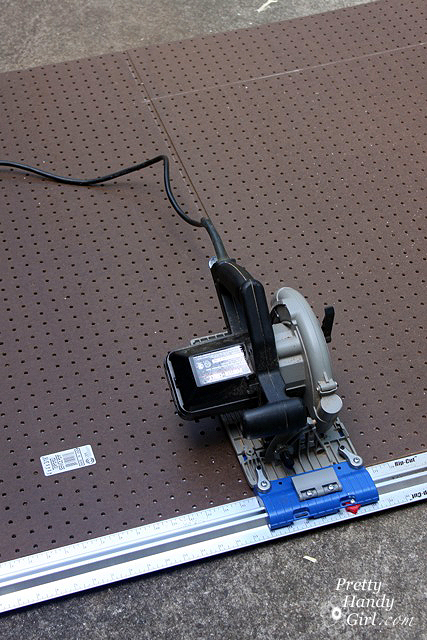
Mark the cut lines on your pegboard material.
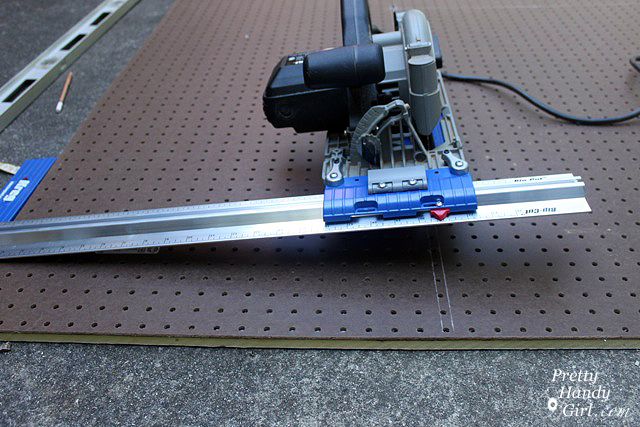
Lay the pegboard on top of the excess foam insulation and set the saw blade depth just below the pegboard.
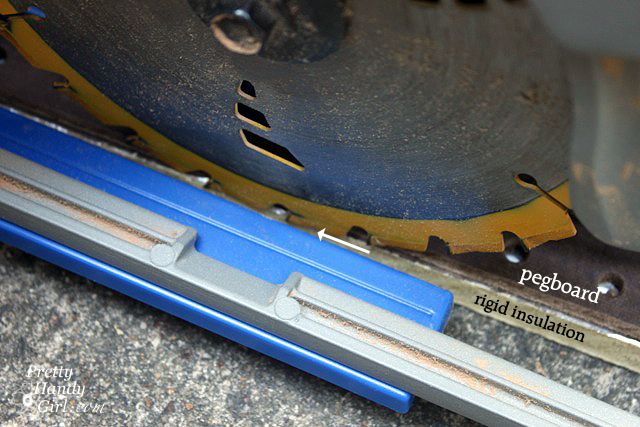
Cut the pegboard to size. (If you don’t own a rip cut or track saw, you can make your own DIY Track Saw for your circular saw here!)
Check the fit of the cut pegboard with the edge bumper inside the fireplace opening. The pegboard should be loose, but allow the edge bumper to compress against the sides for a snug fit.
Building the Reclaimed Lumber Frame:
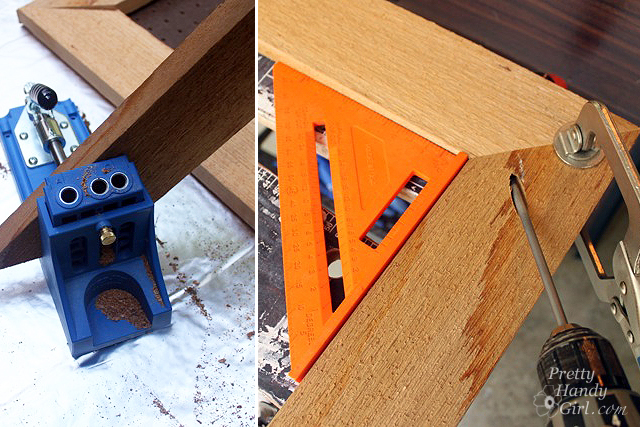
Using the same dimensions as the pegboard, cut your frame pieces (miter cut the corners for a clean look). 1″ x 4″ cedar boards worked well for the frame.
Use a Kreg Jig to make pocket holes in the corners. Clamp the corners (use a square to maintain true 90 degree angles) and drive the pocket screws into place.
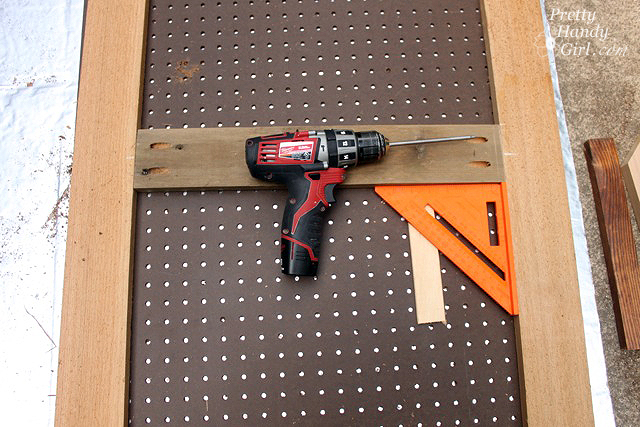
Cut a vertical support piece for inside the center of the frame and attach it with pocket hole joinery.
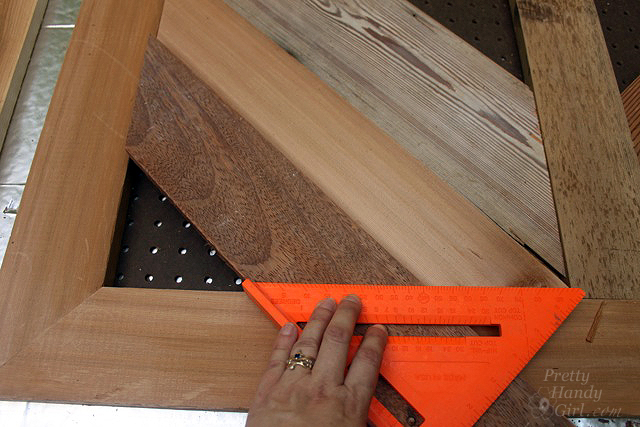
Cut your reclaimed lumber edges at 45 degree angles. Lay each piece inside the frame and use the speed square to scribe a line where you need to cut.
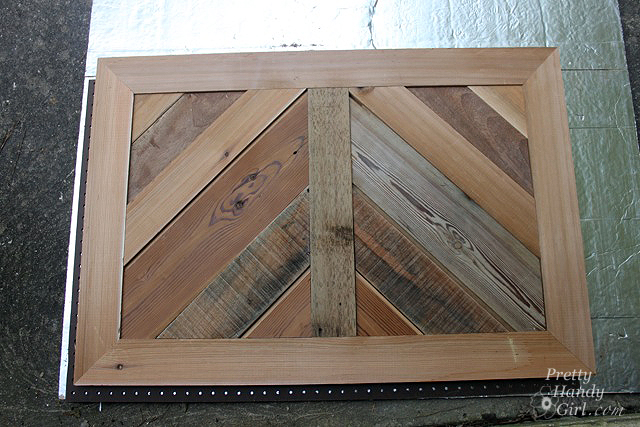
Dry fit each piece and continue until you’ve filled the frame.

When all the pieces are cut, set them in the frame.
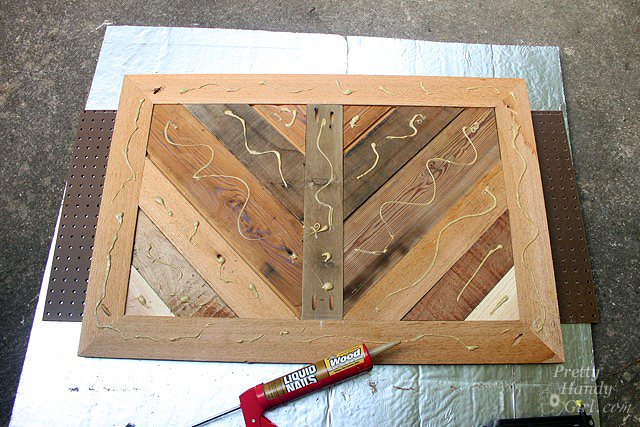
Time to assemble the “sandwich”. Lay something (scrap plywood, pegboard or foam insulation) on top of the reclaimed lumber design and flip it over so the backside is facing up. Use a liberal amount of construction adhesive on the back of the reclaimed lumber frame.
Lay the pegboard onto the reclaimed lumber and press firmly in place.

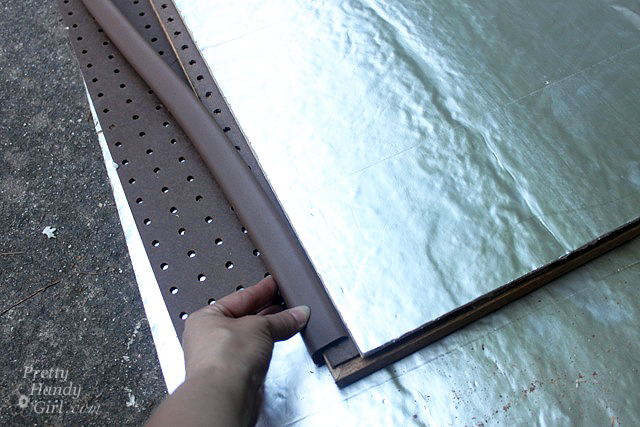
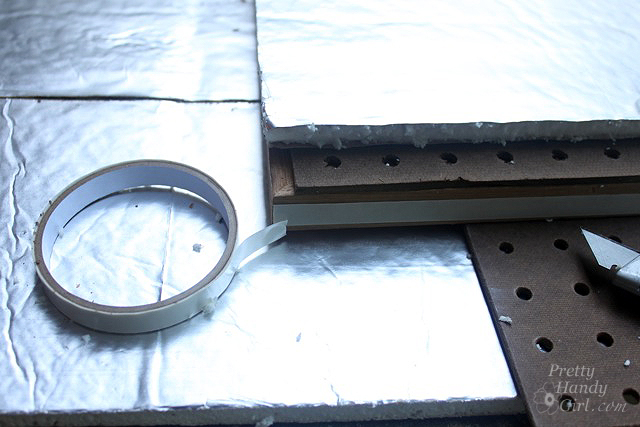
Lay the rubber edge bumper onto the side of the frame/pegboard sandwich and measure the area for the rigid foam insulation. Cut insulation to size. It should be inset on the sides and top to allow room for the bumper (as shown in the photo below.)
Add construction glue to the pegboard. Then lay the rigid foam on top of the pegboard.

Flip the frame over and double secure the frame to the pegboard with finish nails. Be sure that the air pressure is turned down so the nails don’t pierce through the back of the insulation.
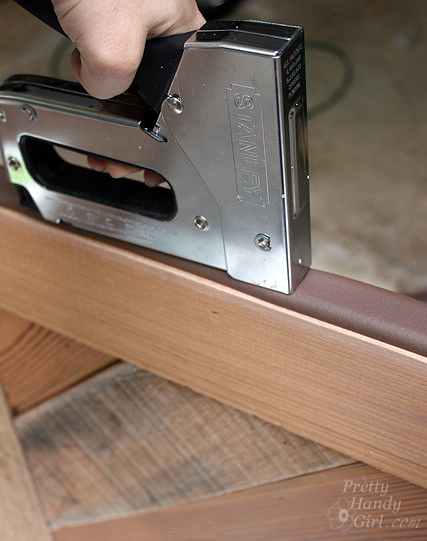
Apply the double-stick tape that came with the bumper to the sides of the frame.
Cut the foam bumper for the first side and press it onto the double-stick tape. Cut the next side and notch out where there are any overlaps.
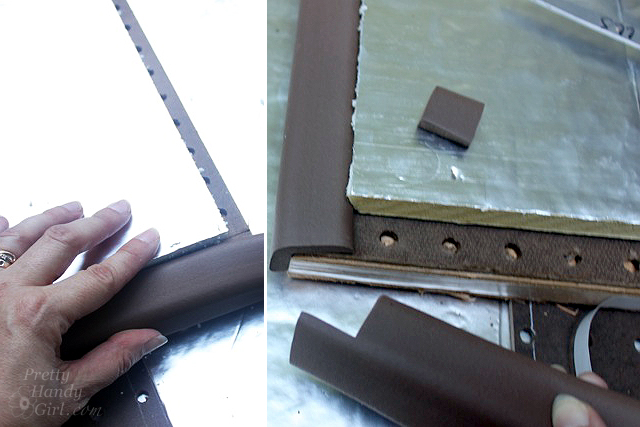
Firmly secure the bumper to the sides of the frame with a staple gun. This is a necessary step because with repeated removal of the insert, the bumper will eventually come off.
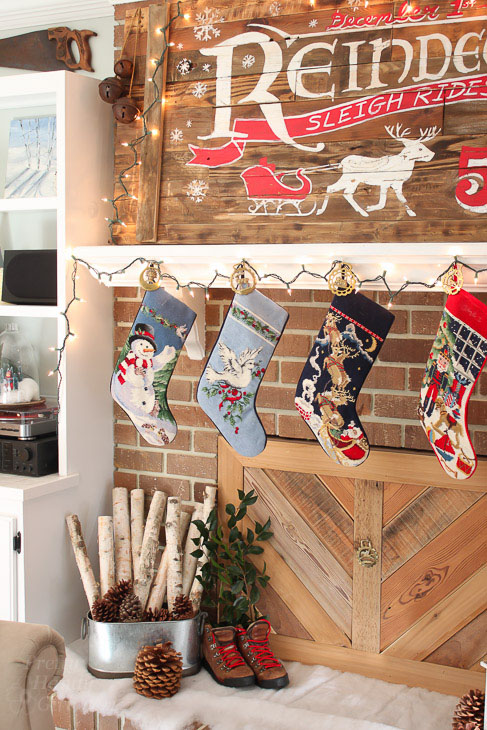
Feel free to add a handle or decorative pull to the front of your insert.
Press the insert into your fireplace and stop the drafts forever!
As a bonus, it also eliminates that big gaping black hole in the living room. And the insert is easily removed to enjoy a warm fire.
This Fireplace Insert Draft Stopper looks good year-round. My only regret is not making it sooner.
 Winter is coming, help a friend stop drafts too by pinning this image!
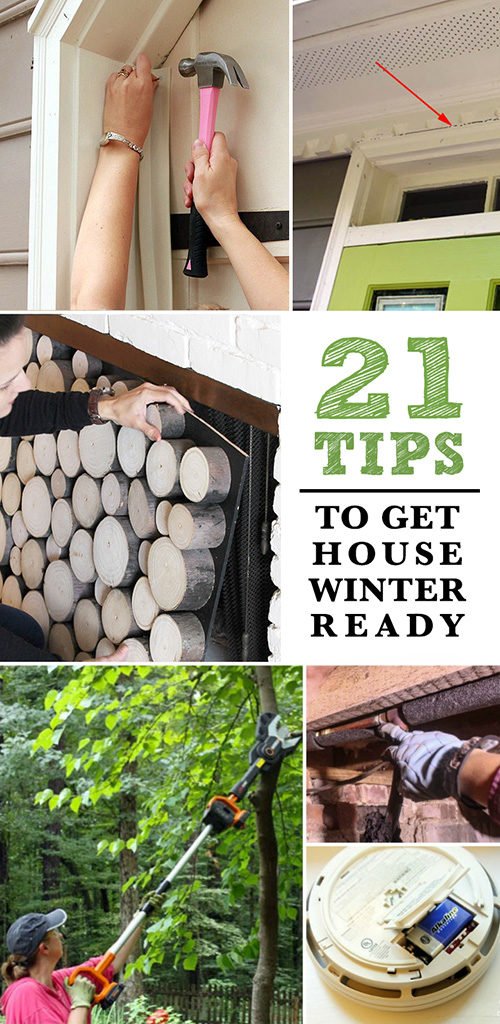
Want more ways to save on energy bills and prepare for winter? Here are 21 Ways to Get Your Home Ready for Winter.

Thank you for this idea and plan. Your directions were spot on and having all the supplies attached to a Lowe’s link was very helpful. Made my insert yesterday and it looks, fits and works great! The draft that was coming around the edges on the insert as I put it in place the first time made me wonder why I hadn’t done this 10 years ago! Thanks again. Great little project.
Pete
Brittany,
Do you know if anybody every converted a traditional fireplace into a direct vent fireplace? I am thinking bout doing so. FYI, I already have a gas insert.
Seems pretty straight forward, one could use a fireplace two tube direct vent kit for external venting, modify a steel plate to accept the incoming air and outgoing exhaust gas, seal the steel plate in the existing damper area, use some steel tubing to guide the fresh air to the bottom gas insert, and then use a replacement direct vent fireplace doors to close off the opening.
The key is the steel plate and the tubing to direct the fresh air to below the fire. This would take a little work, but seems pretty straightforward. All the parts can be procured easily off the internet.
Anyway, just wondering if you every came across this idea before?
Dave
David, I haven’t. Maybe check with a gas company? Or your local building and planning office?
I also had a problem with airflow, so I went a little easier.
I got a piece of Plexiglas and every summer I use silicon to seal the opening. In the winter I reopen it and use the fireplace.
Great idea David!
Fantastic idea! Off to Lowe’s! Thanks for the reply!
Any ideas on how to fit the insert on a fireplace with doors? You would think they would help, but they don’t stop the drafts when it gets really cold out.
Would strong magnets attache to your doors? Or a strap that wraps around the doors?
A bit of an update to my other comment. I noticed how much warmer it has been in the family room this winter since the fireplace insert was installed. Yesterday I got one of those infrared thermometers and was going around the house pointing it at the exterior walls to check the temperatures. Most were in the 67-68 degree range. I then pointed it at the fireplace insert and it too was 68 degrees. Moving the insert to the side and pointing it in the firebox and it showed a reading of 39 degrees! All of that cold air would have been flowing down the chimney into the family room were it not for the insert. Thanks again for a great energy saving project.
That’s great news David! I’ve also noticed our family room is much less drafty now that we have the insert.
Thank you for a great fireplace insert DIY. I’ve been doing what I can to make my home more energy efficient and recently added an additional layer of unfaced R30 insulation in the attic, along with an insulated attic hatch. I’ve decided to tackle the fireplace next, which always struck me as an energy waster. I Googled fireplace inserts and yours was one of the first that impressed me with it’s simplicity and beauty. I’ll be making my own using your advice and hope that mine comes out even half as nice as yours. Thanks for taking the time to post this.
Very cool idea! Or should I say warm idea. Love it! Surprisingly, I have used my ripcut and love that I can avoid using the dreaded table saw.
Thank you for sharing this and all your other wonderful projects. I am in awe of your creativity and skill. And thanks for posting about the Kreg Rip Cut. I’ve been looking for an alternative to a table saw and this looks like it will work great for me.
That turned out great! My mother has been asking me to do something like this for her fireplace forever but never had any ideas that she liked. Hopefully she will like this idea, thanks for the inspiration!
fun and SMART project… and a great backdrop for your fall decor. another great example of your charming style. very cool PHG.
Thanks JB. I’ve been meaning to make this forever! It was one of those projects that was already planned in my head. Thanks to Lowe’s for giving me the push to just make it.
This is a great idea because during the Winter, I have fires in the fireplace all the time so I don’t feel like I can close the damper but it can get darn cold at night so I’d like to block off the entrance into the house. Nice!
Amen Laurie! Besides, I forget to close it half the time.
I love this idea! It drives me nuts looking at our fireplace being open all year. I think I know what our next project will be!!!
Jacque, the gaping hole, kind of like the big gap in my kid’s teeth right now. It’s cute on them, but not in a living room.
I LOVE how this looks! And I LOOOOOVE your mantel! I’m having a serious bout of fireplace jealousy, because our old farmhouse doesn’t have one. Don’t you think 113 years ago a fireplace was a necessity in the midwest? Apparently NOT. K I’m done. 🙂 Love your project!!
Beth, what the heck? Were they cooking the food outside over the campfire? How the heck doesn’t your house have fireplaces? You and your talented hubby need to make a fake one.
You would THINK right? I don’t want a fake one, I want a REAL ONE! With actual legit flames! I have a feeling it will be a year or two before we get to that. 🙁
Have you checked all the walls, maybe the fireplace was covered by a false wall or a brick wall to prevent a draft. This is what happened to a friend, after checking the house they found a beautiful brick fireplace covered in their kitchen
My house is in MI and is 146 yrs old-no fireplace, even in a picture of when the home was 5 yrs old! It was heated by gravity with an Eisenglass stove. BTW, no one was cooking in a fireplace 117 years ago, most had cast iron wood burning stoves with water heating reservoirs on the side to supply the household with hot water.
I love the fireplace draft stopper!