How to Build a Custom Wood Range Hood
Have you seen the beautiful custom range hoods on my Pinterest board? From the beginning of our kitchen planning sessions, I knew I wanted to put in a custom wood range hood. But, finding a tutorial to build one was tough. The one that helped me the most was Cristina’s how to build a range hood tutorial.
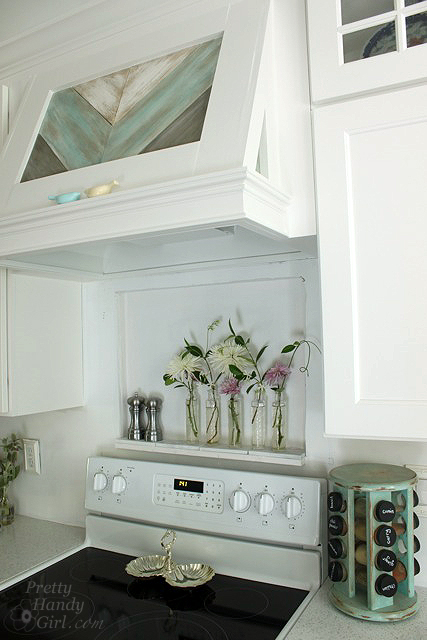
I knew when I built our hood that I’d need to take detailed notes and photos to help you accomplish your own project. I hope this tutorial helps you build your own range hood!
Build Custom Range Hood Materials:
- Insert liner for range hood
- Cabinet screws
- Drill
- Finish nailgun
- Finish nails
- U-staples for finish nailgun
- Wood glue
- Luan plywood (1/8 or 3/16″ thickness)
- 2″ x 4″ boards for blocking
- 1″ x 2″ boards (pre-finished square edge)
- 1″ x 4″ boards (pre-finished square edge)
- 1″ x 6″ board (pre-finished square edge)
- Howe Casing
- Wood Putty
- Putty knife
- Sandpaper
- Caulk
- Primer
- Paint
- Clamps (or extra set of hands)
- Miter Saw
- Table Saw
Side Note: The lumber I used was the best fit for our cabinetry and 8′ ceiling height. You may need to experiment with your own kitchen and range hood and use different sizes. But, this should give you a good baseline to work from. As always, I’m available to answer your questions via email.
Instructions for Building a Custom Wood Range Hood:
You must purchase a liner insert for your wooden hood. The liner is basically a range hood, with the controls underneath and a port to attach to your home’s existing ductwork. But, no fancy exterior since it will be covered up with your own hood. I purchased the Vent-a-Hood single blower wall-mounted liner in white.
Check the installation instructions to insure proper installation of your liner insert. Also follow the electrical hook up instructions.
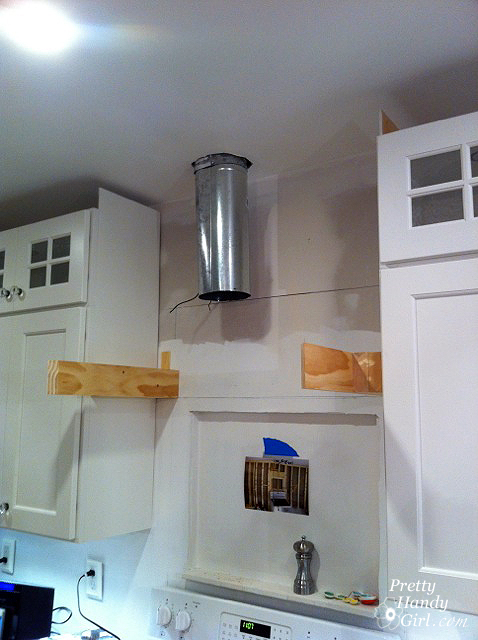
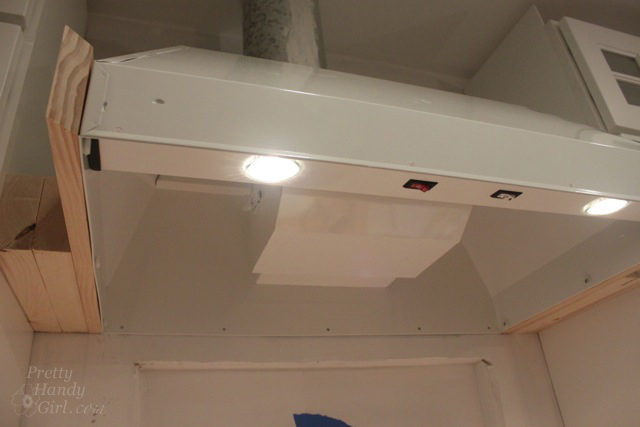
Begin by installing blocking for the liner insert. I used 2×4 blocking cut to fit next to the upper cabinets. Then cut a 1×4″ board that extended out to the front of the liner. The ends of the 1×4″ were mitered to create clean corner joints when attaching the front of the support frame.
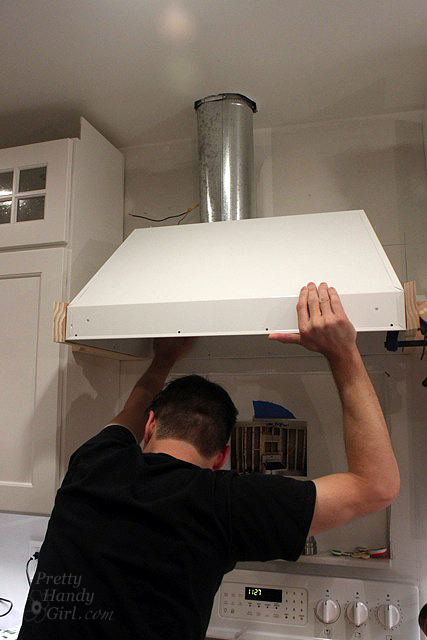
Get an anxious assistant to help hold the liner to make sure it fits. (You can see our house wiring above the liner. Make sure your power to the range hood is turned off during the liner installation. No need to accidentally electrify your metal liner insert!)
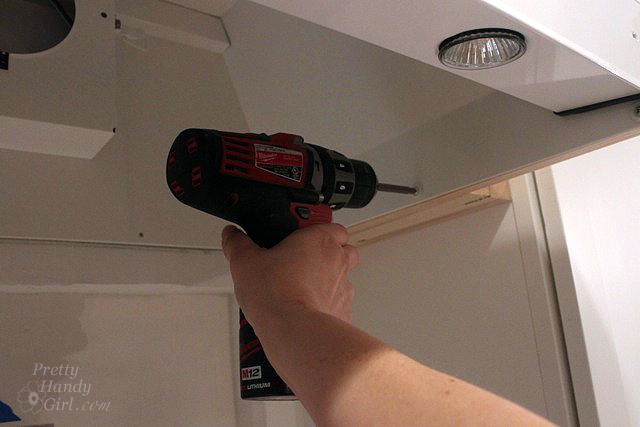
Connect the duct work to the liner. Drive a few mounting screws to secure the liner while you work on the electrical connections.
Cnnect the house wiring to the liner insert as per the manufacturer’s instructions. Make sure your wire connections are contained inside the metal liner hood or a junction box. Do not leave wire connections loose or unprotected (per electrical code.) Turn on the power to the range hood and check lights and exhaust fan before proceeding. If everything is working, drive the rest of the mounting screws through the liner insert into the supports and the wall.
Per our county’s HVAC code, I had to paint mastic on the ductwork to eliminate any air gaps. Now is the time to make any final connections or adjustments to your liner and ductwork because it will be inaccessible after you build the hood.
Cut a 1″ x 4″ to fit across the front of the hood. Miter the corners. Attach the front of the support frame with glue and small cabinet screws. (Pre-drilling holes for the screws is a good idea.)
Measure and cut a 2″ x 4″ to fit between the cabinets. This will be blocking and support for the range hood face frame.
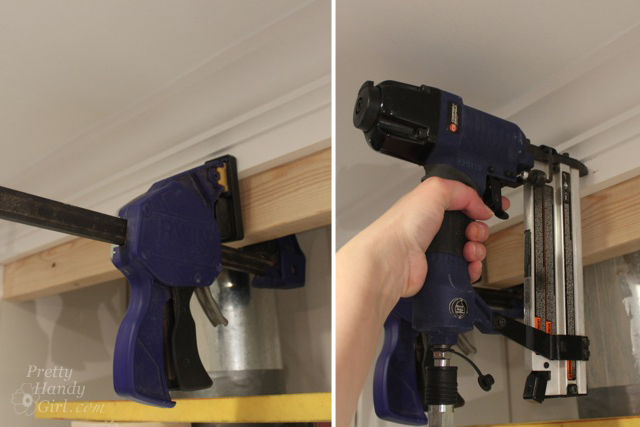
Raise the 2×4″ support up so the crown molding overlaps it (or so your crown can overlap it in the future.) Secure the crown molding to the 2×4″ with finish nails.
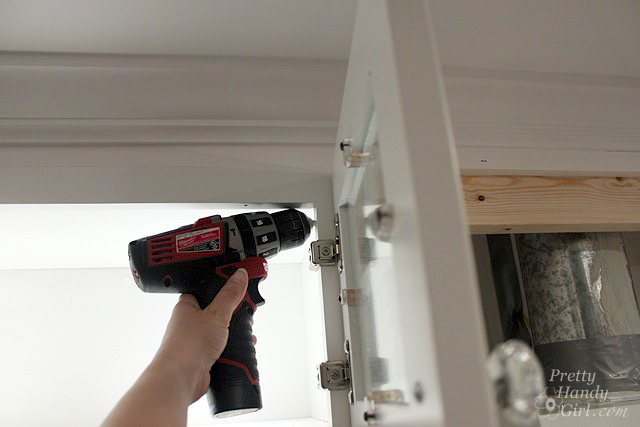
Drive cabinet screws from inside the upper cabinets into the ends of the 2×4″ support board.
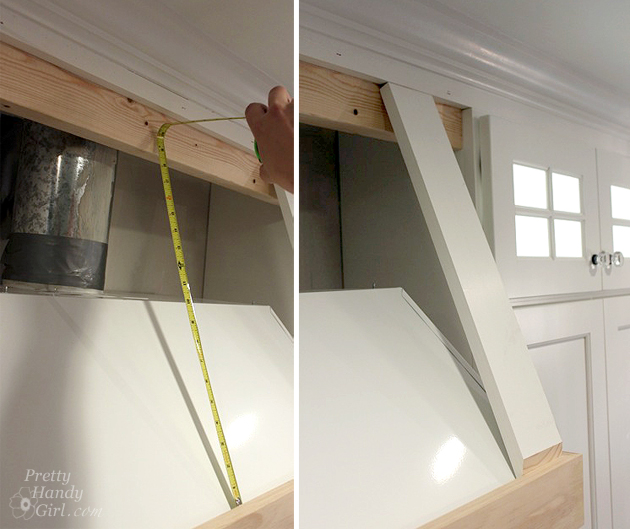
Measure the distance between the bottom of the crown molding (where it meets the blocking) and the front of the frame around the insert liner (where it meets the liner.) Cut two 1×4″ boards to fit, miter the bottom edge to fit behind the frame. (I think I cut the ends at a 60 degree angle.)
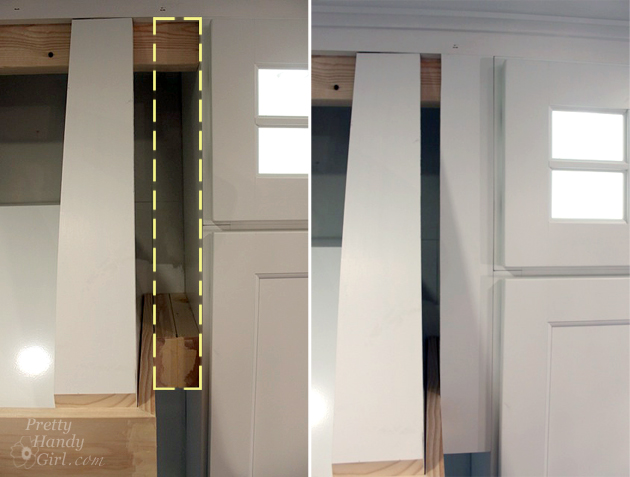
At this point, you want to fill in the gap between the cabinets and the vertical framing. I purchased extra stop pieces when ordering the cabinets. Rip the stops down to size. Secure the stop piece with finish nails. Allow room for another 1″ x 4″ that will make the side frame.
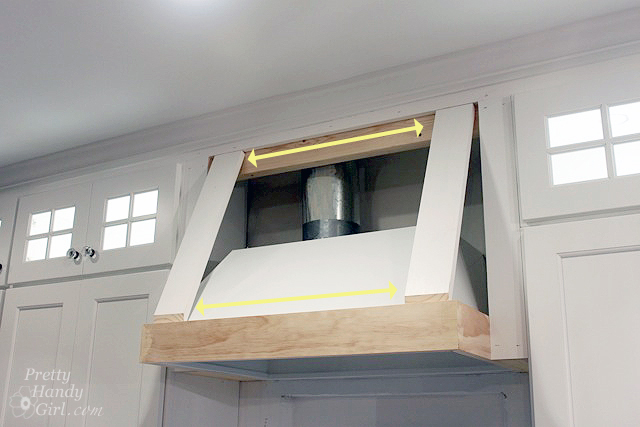
Set the two vertical frame boards in place (set another 1×4″ board between the stop and the vertical frame to hold the width. Not shown here.) Check for fit. Then measure the horizontal space between the vertical boards (both top and bottom.)
Cut another 1×4″ board for the top piece of the frame. For the bottom piece, you’ll need to rip a 1×6″ board at the same angle that you mitered the ends of the vertical frame pieces. Then cut it to fit at the bottom of the frame.
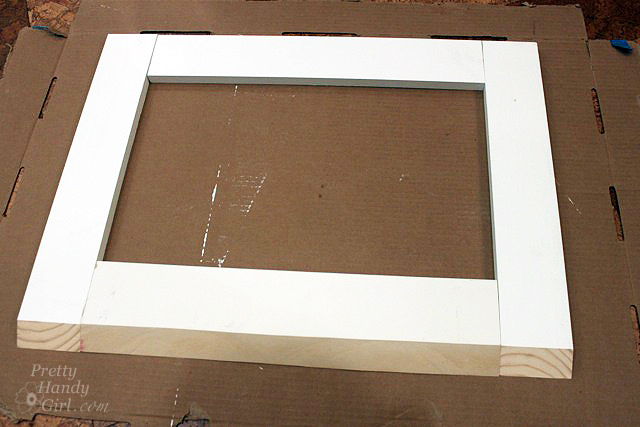
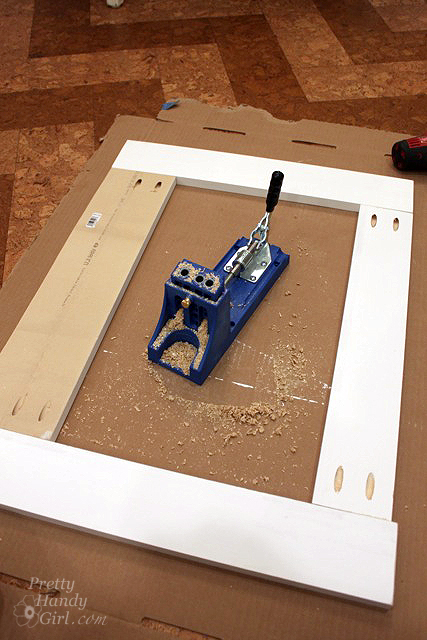
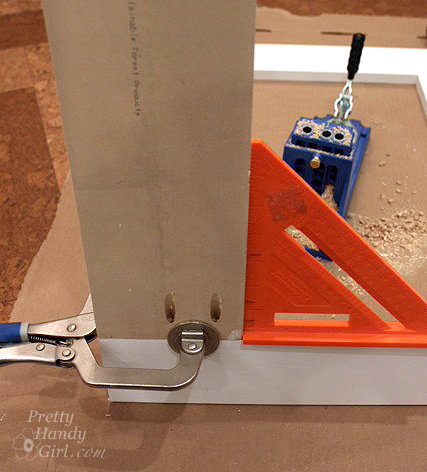
Use the Kreg jig to create pocket hole joinery on the back of the frame. (Read this tutorial to quickly learn how to use a Kreg Jig.)
Square the corners and clamp the frame. Drive the pocket screws into the holes to complete the frame.
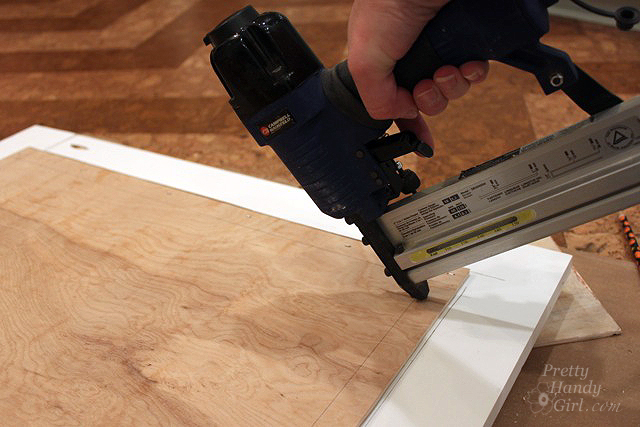
Cut the luan plywood board to fit behind the frame. Cut your board 1″ bigger than your frame hole. This will allow for a 1/2″ overlap onto the back of the frame. Secure with glue and finish nails. (I angled u-staples to avoid nailing through the front of the frame.)
Check the frame to make sure it fits snuggly between the liner support frame and the crown molding.
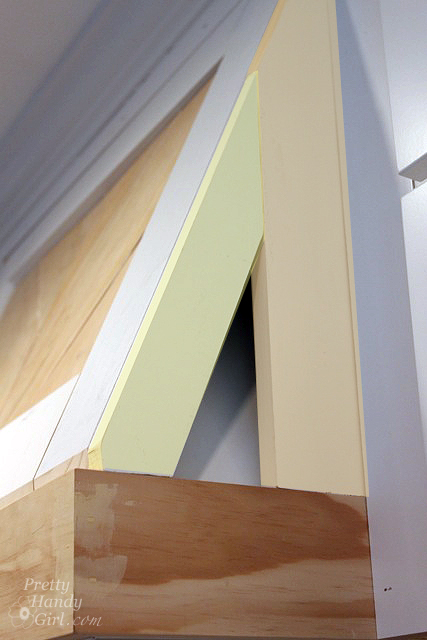
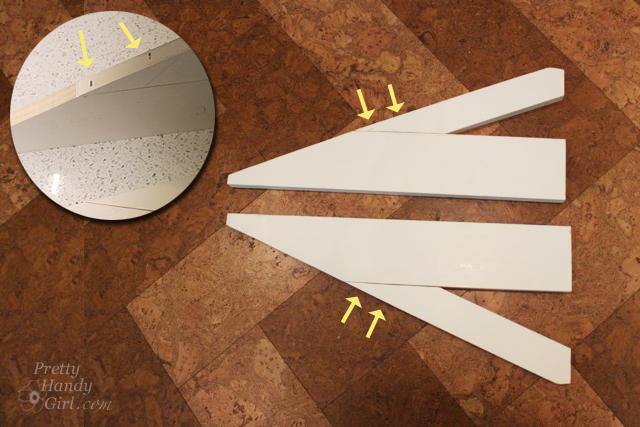
To build the side frames, you’ll need to measure and cut one 1×2″ board (shown as yellow below) and one 1×4″ board (shown as peach below) to fit the size and angle of your range hood.
Add wood glue where the two boards meet and secure with two finish nails through the side of the 1×2″ board into the 1×4″ board as shown below.
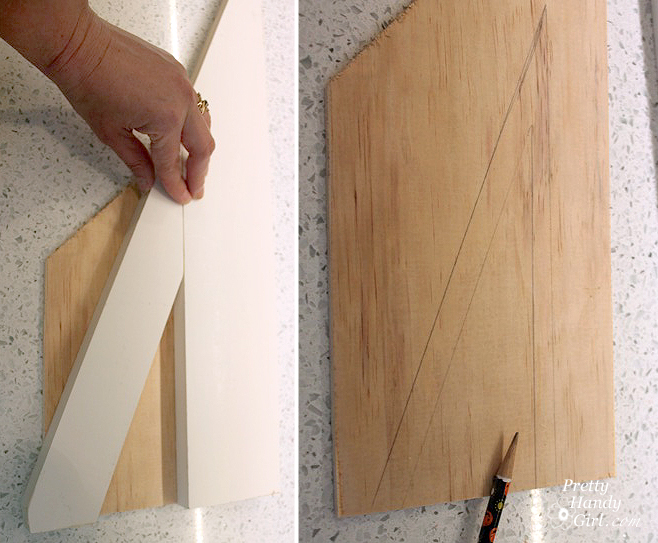
Trace the opening of the side frame onto a scrap of luan plywood. Cut out the insert 1″ bigger than the opening to allow for a 1/2″ overlap.
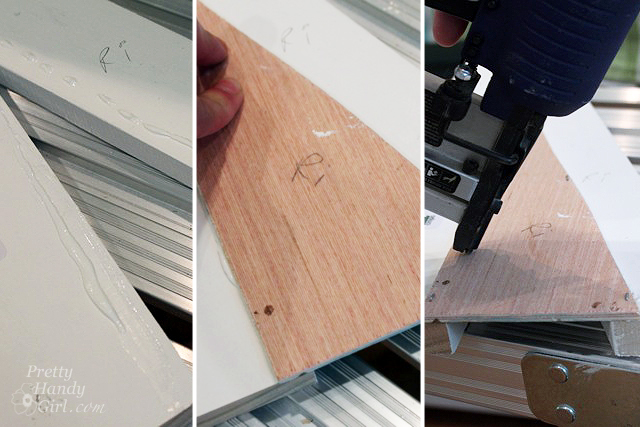
Paint your side frame insert BEFORE securing it. (You’ll thank me when you realize what a pain it would have been to paint inside that little opening.)
Glue and secure the luan backing to the back side of the side frames.
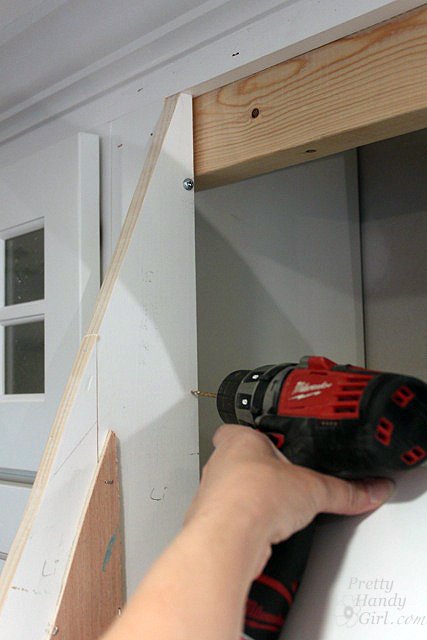
Pre-drill holes through the side frames into the stops you installed earlier.
Secure the side panels with two screws on each side.
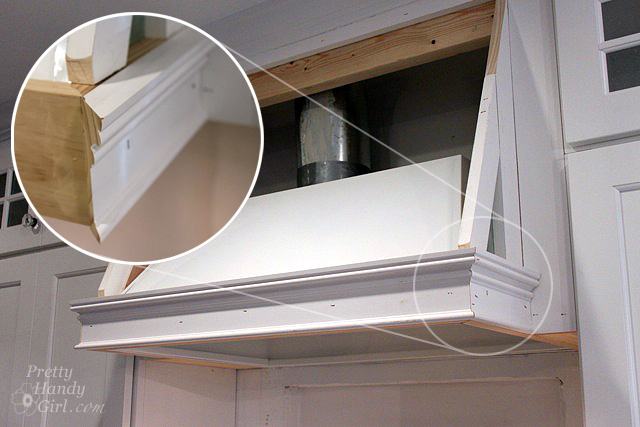
Finish nail decorative molding to the support frame. I used Howe casing mitered at the corners:
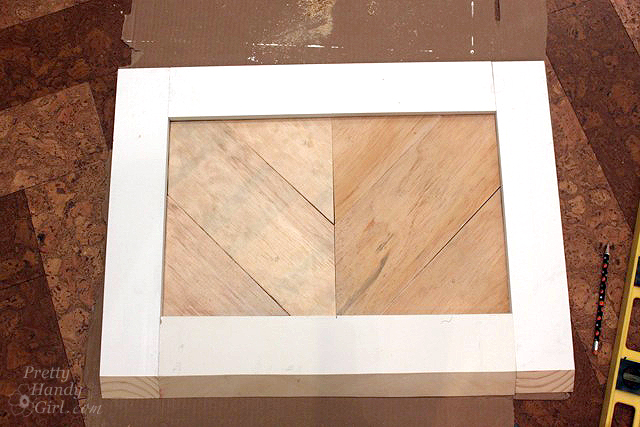
Back to the front frame: Cut angled luann pieces to fit inside the frame. You can follow this tutorial for creating the painted and distressed chevron plank boards.
Paint your luan and glue the pieces inside the frame.
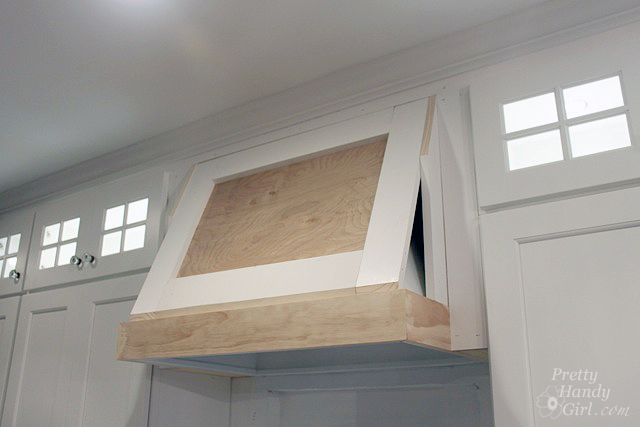
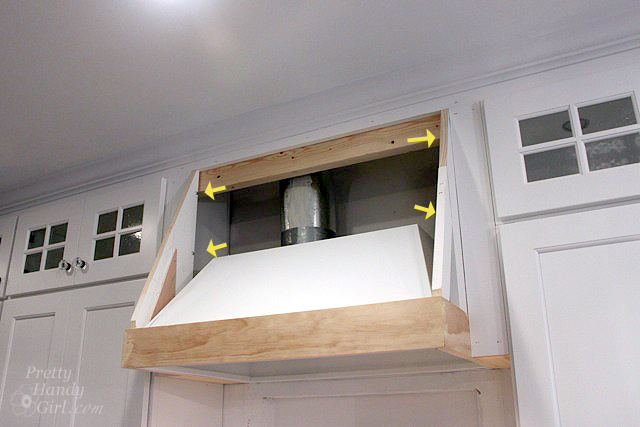
Set the frame in place. The angled bottom should fit behind the support frame. Secure the frame with finish nails into the 2×4″ support board and then attach the side frames to the face frame.
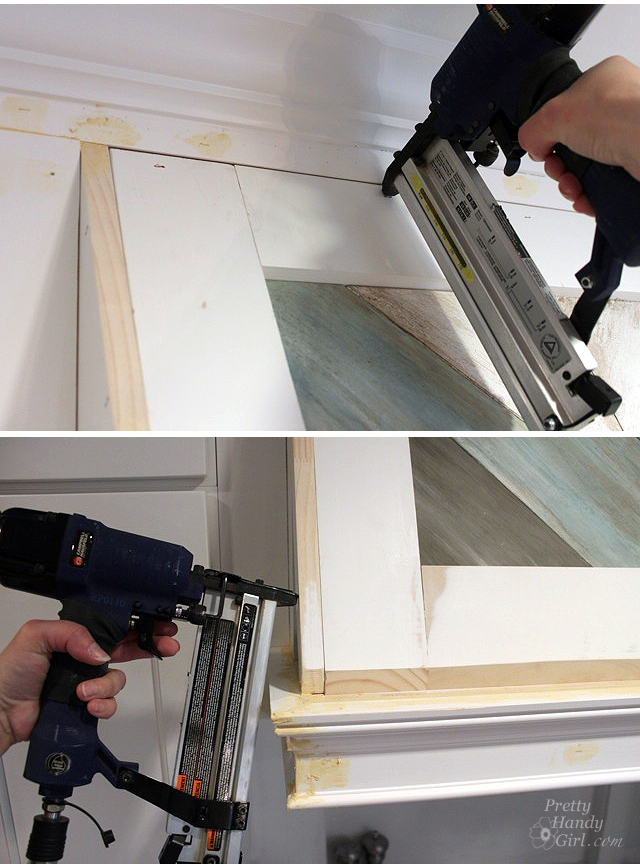
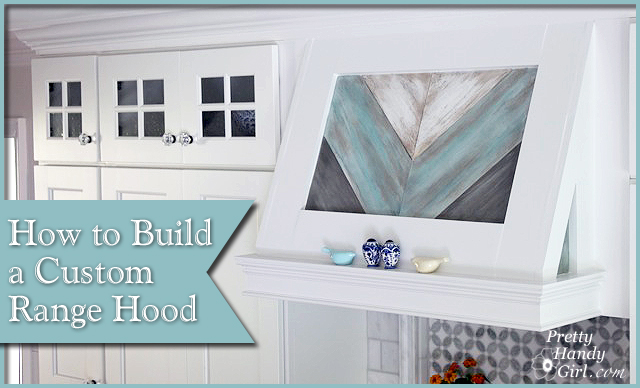
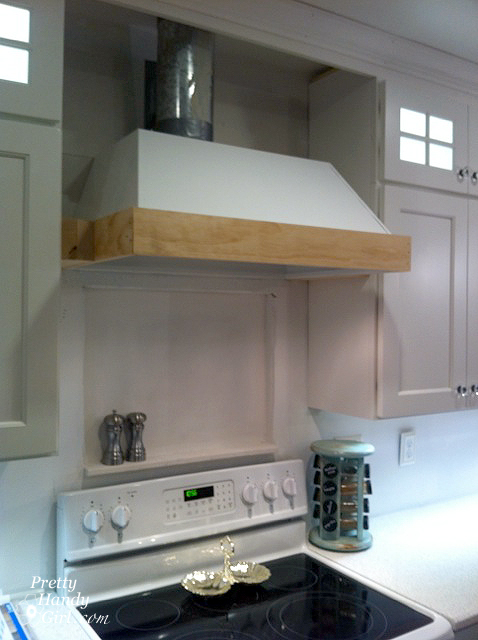
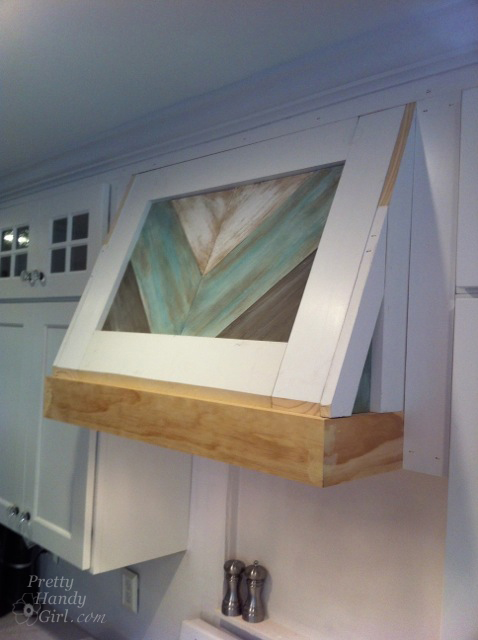
This picture was taken right before I added the Howe casing, but you can see the finished construction.
Use wood putty to cover all nail holes. I also like to use wood putty for any sharp angle seams. Use caulk to fill in seams between the panels and stops.
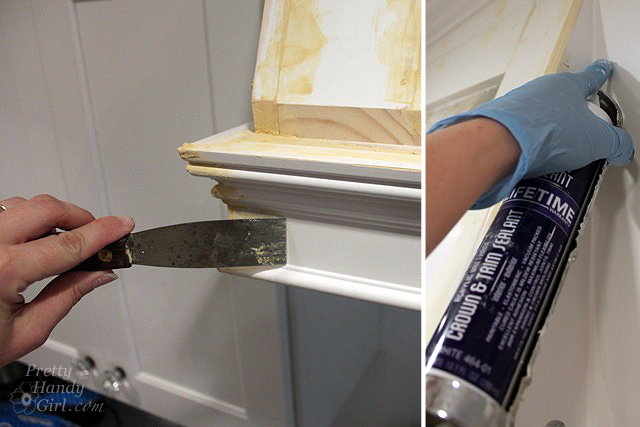
After the wood putty has dried, sand it smooth. Prime any bare wood, wood putty or caulk lines.
Paint your range hood and then do a big victory dance because you just built yourself a custom range hood!
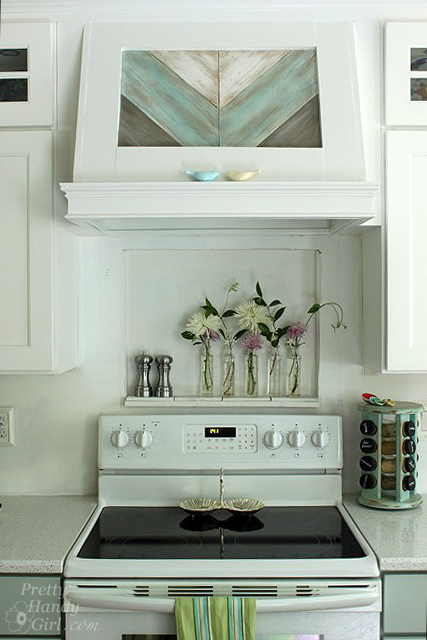
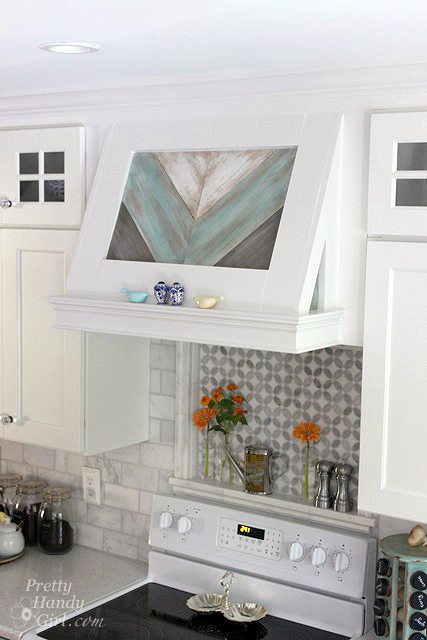
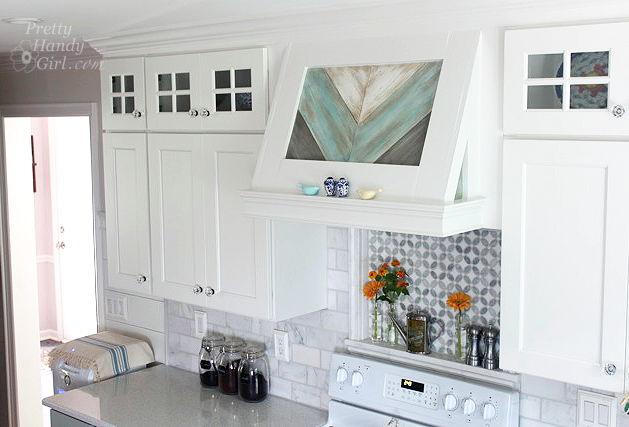
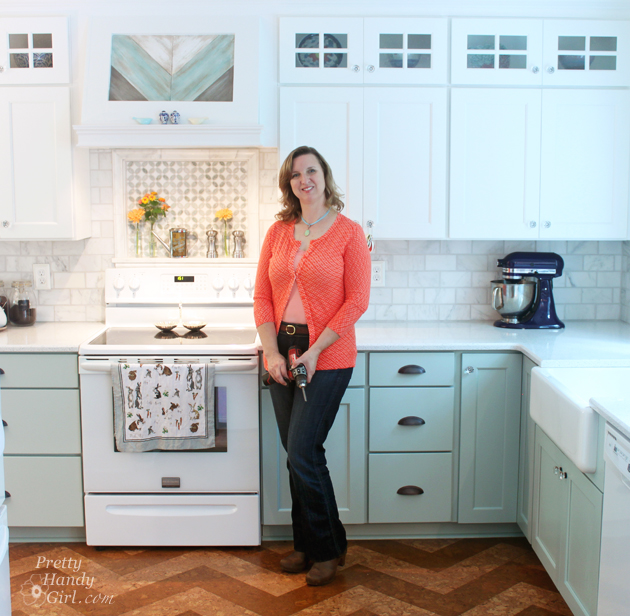
Because you have been so awesome, patient and encouraging me through this monster of a kitchen renovation. I figured you’d like to see a few of the finished kitchen pictures.
I finished the tile recently and it truly is the finishing touches the kitchen needed. The tiles are from TheBuilderDepot.com. I’ll be posting tutorials on installing and cutting tiles as soon as I can ;-).
The kitchen is 99% done. I have two more crucial pieces to install. I’m not going to tell you what they are, but here’s a hint.
If you live in the Raleigh/Durham or surrounding areas of North Carolina, you might recognize a certain handy girl who will be in the News & Observer’s Home & Garden section this Saturday (tomorrow.) I’m a little nervous because I’m not exactly sure what was written about me and the blog. I really hope she leaves out the disaster that was my kids’ bedrooms as we were on our last week of summer vacation. Who knew two boys can destroy their bedrooms in a few hours while I was blogging.
Pin for later!
Sharing with:






Thank you!
Brittany, I see that I’m discovering this YEARS after you’ve posted it, but I hope to ask a question….
I am IN LOVE with this hood and was ecstatic to find that it’s a TUTORIAL! I am ready for the challenge! My question is: do you think it can be built to itself and installed at a later date? I don’t plan on starting my reno until next year, but could start on this hood this year. Is it possible? Or does it need to be built on the wall?
I’d recommend at least having the range hood insert on hand so you can build to the hood to surround the insert perfectly. Allow 30″ in width, since that’s the normal width of a standard range. Have fun!
Where did you get your cabinets at? What are the name brand of your cabinets?
They are Kith Cabinets. I purchased them through Ferguson Kitchen & Bath supplies. But, I’m not sure if they still carry Kith.