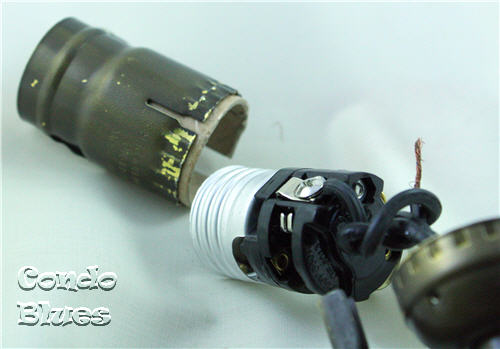

Can you hear the bass drum and the band playing? The DIY Talent Parade is in full swing now. Lisa from Condo Blues is striding this way and ready to show off her mad electrical skills.
Can you hear the bass drum and the band playing? The DIY Talent Parade is in full swing now. Lisa from Condo Blues is striding this way and ready to show off her mad electrical skills.
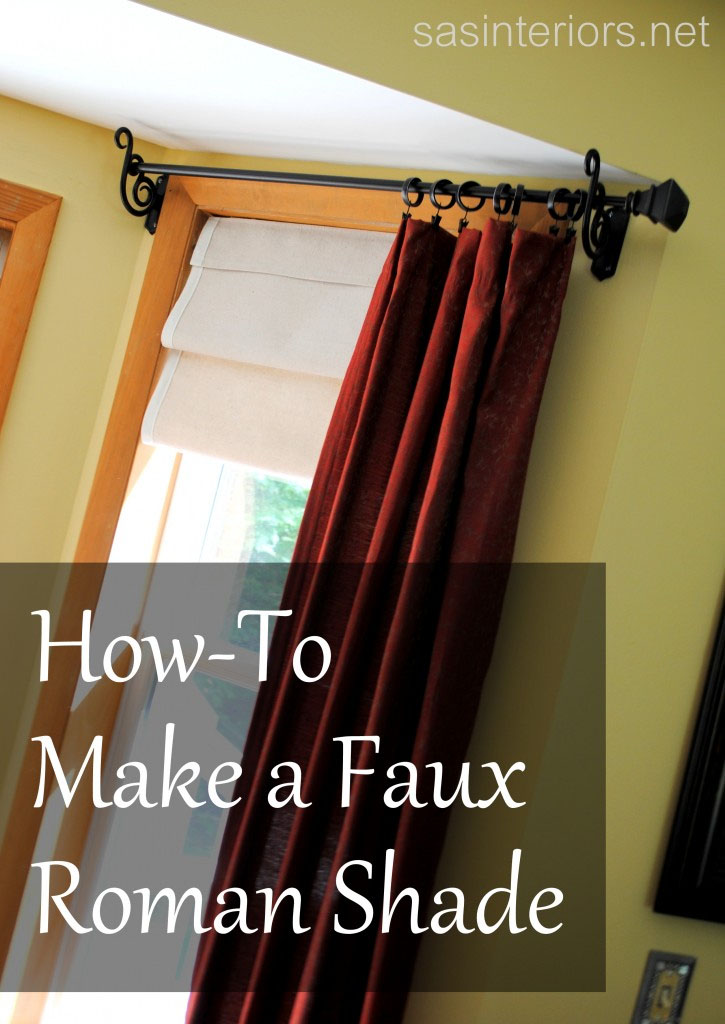
Learn how to make these designer-looking Faux Roman Shades to elevate your window appearance.
I’m honored to have Jenna from SAS Interiors on the blog today. She is an interior designer, blogger and Mom from upstate New York. This is one busy gal! Please put those hands together and give Jenna a warm welcome.
Thanks so much Brittany for having me guest blog today at Pretty Handy Girl! I’m Jenna and I am an Interior Designer & Home Decor Blogger of SAS Interiors.

My home has a lot of warmer tones and for the past year, I have slowly been transitioning to a more casual aesthetic with cooler hues. With updated fabrics on the pillows and windows, and some stylish new accessories and repurposed pieces, my interior is changing into my desired style.
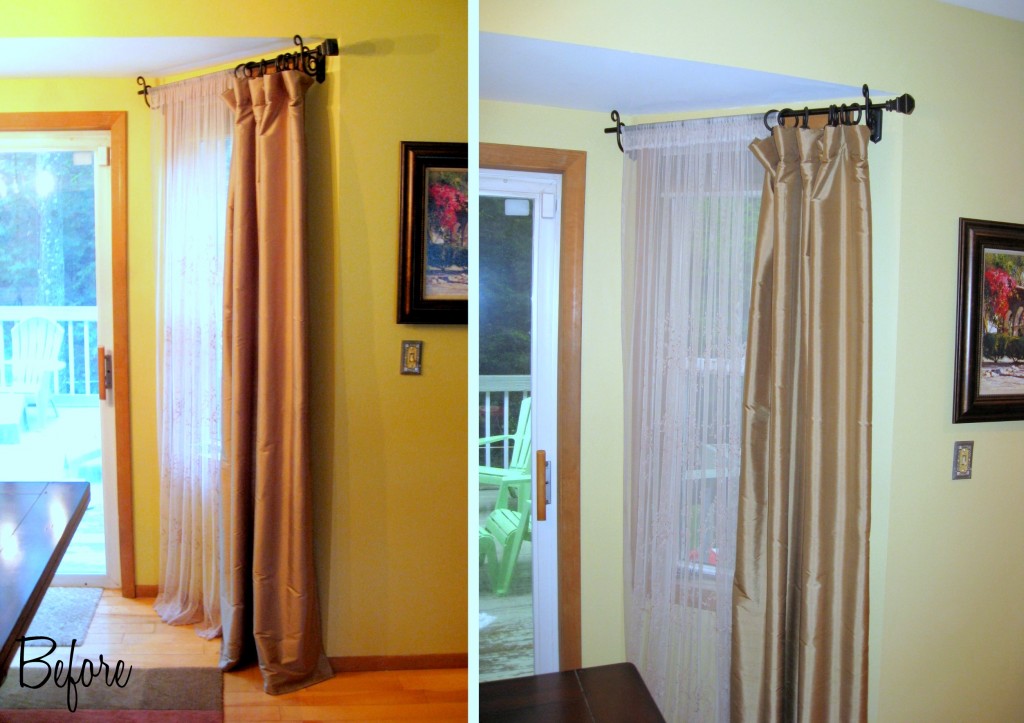
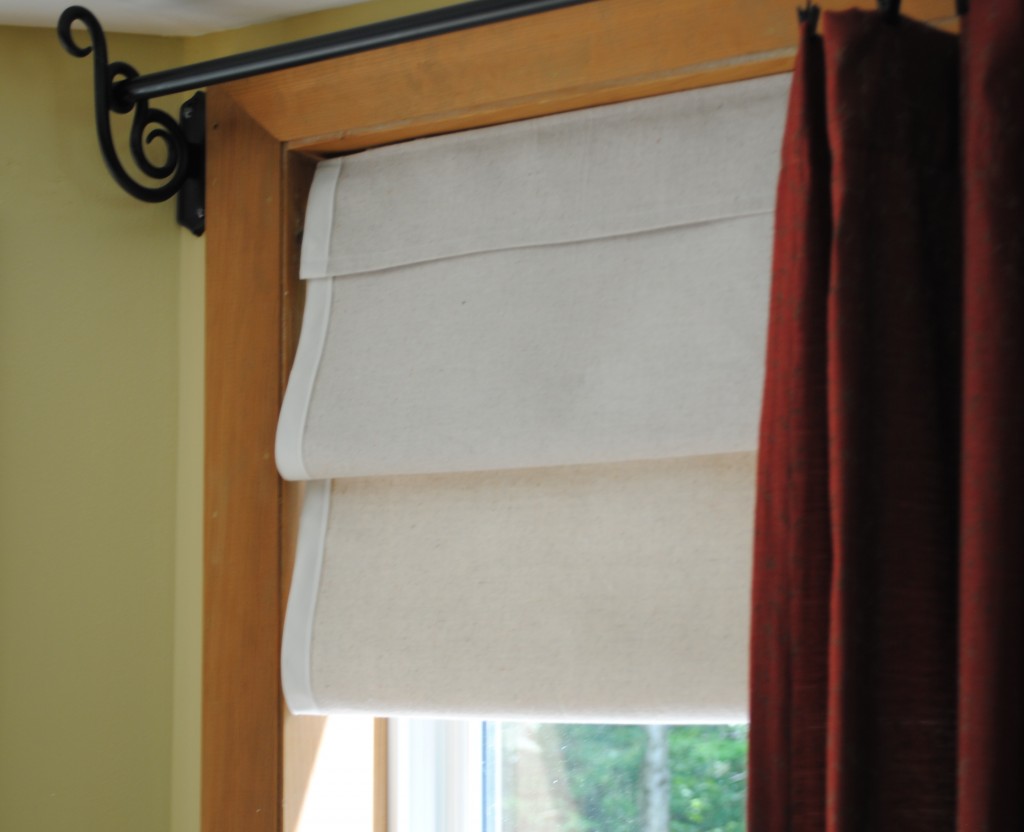
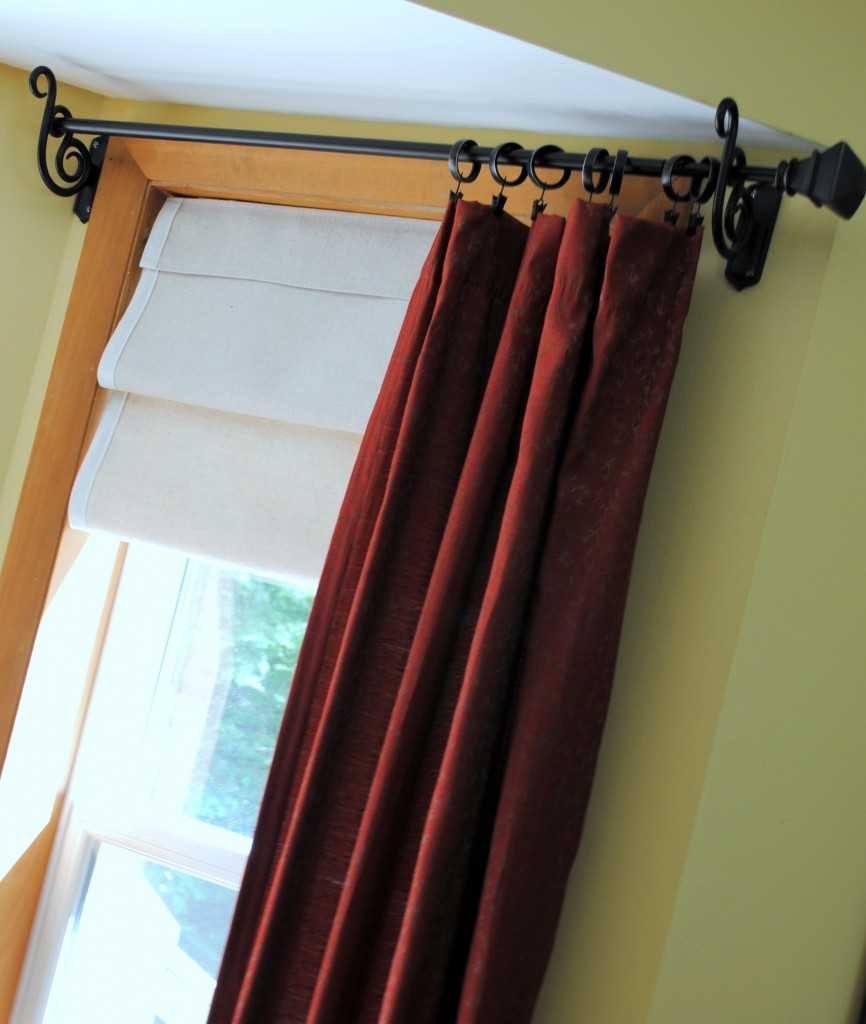
One DIY project that I created to transition into this new look was to use drop cloth material to make faux roman shades for my dining room windows. I am a little crazy-in-love with drop cloth material. And not for it’s intended use of covering furniture while painting, but instead to create DIY projects with. Drop cloth is truly simple, affordable, & stylish, as well as durable, chic, and a great neutral palette for any accent color.
With that, check out how I made my faux roman shades…


These faux roman shades are not functional (I’m not that good, hehe), but are a great neutral backdrop to complement the long drapery side panel.

These are some of the suggested supplies to make the faux roman shades:
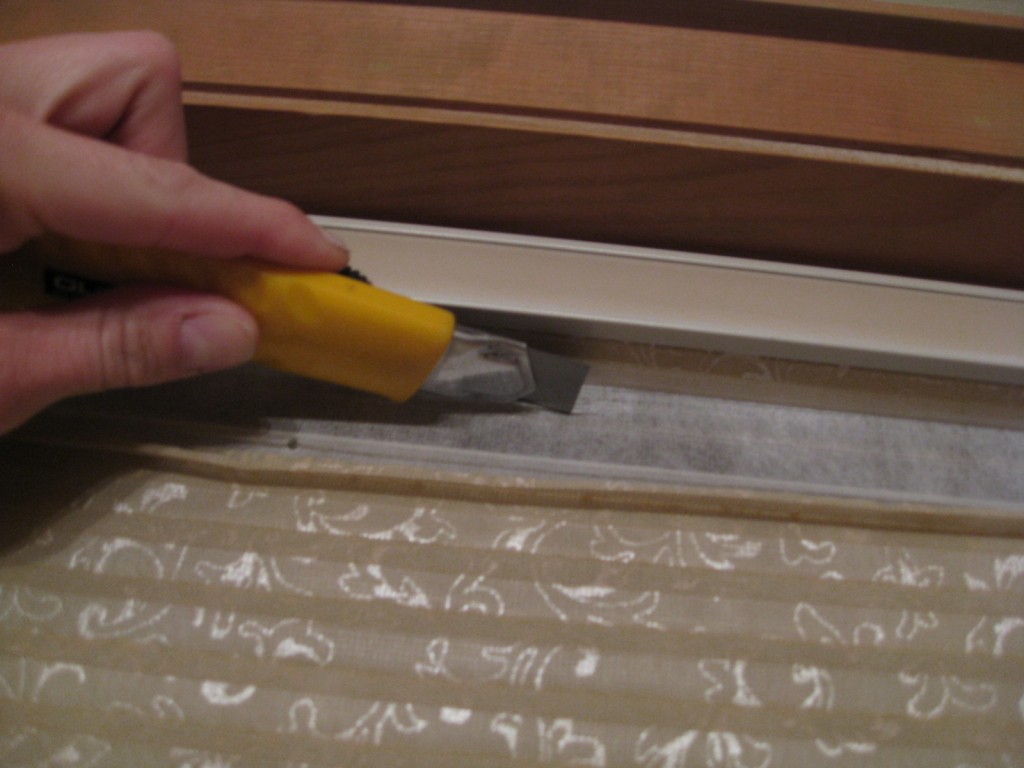
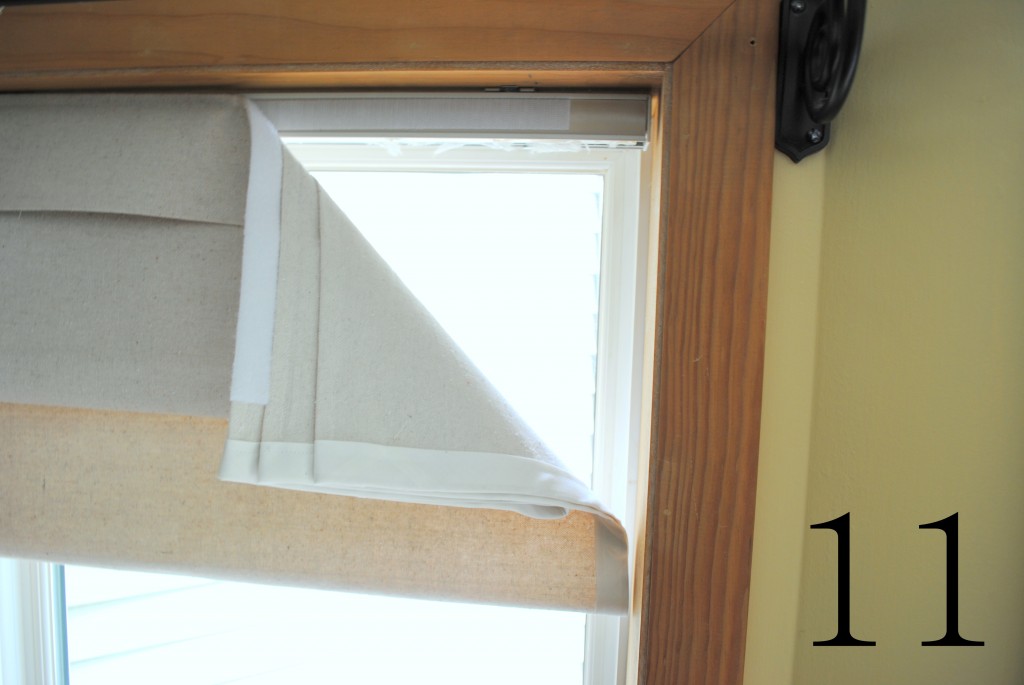
Before I begin the tutorial, I wanted to mention there was an existing honeycomb-style shade where I wanted to install this new faux roman shade. I removed the fabric shade using a straight edge but left the bar in place. This is what I later used to attach the faux roman shade with the Velcro. **If you are starting from scratch, you could put the Velcro directly on the window OR get a tension rod and Velcro the shade to it.

Here is the step by step:
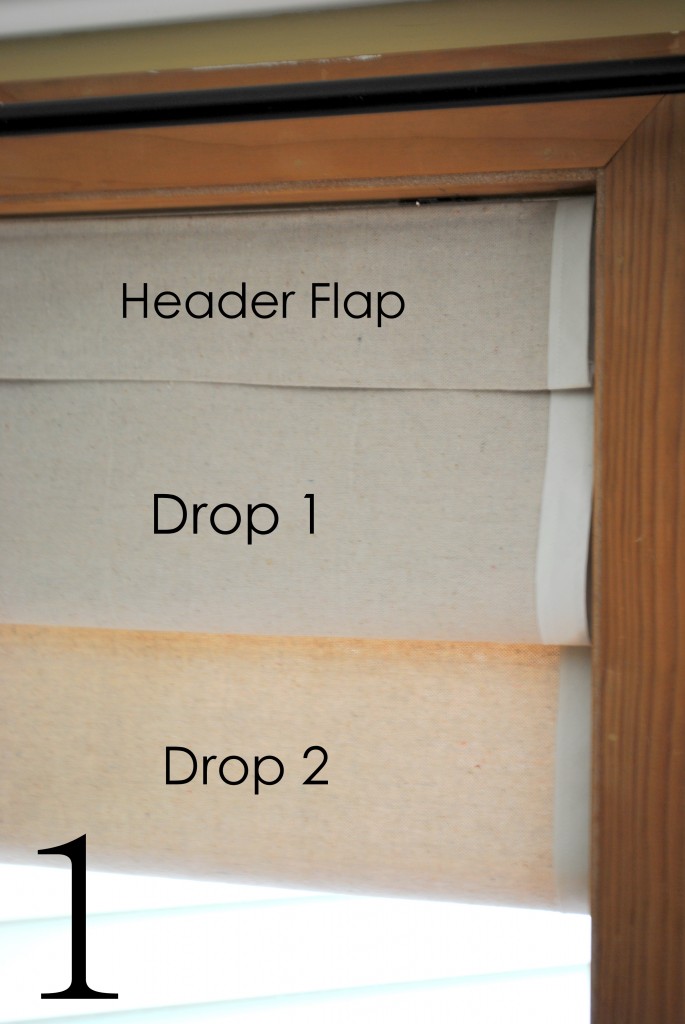
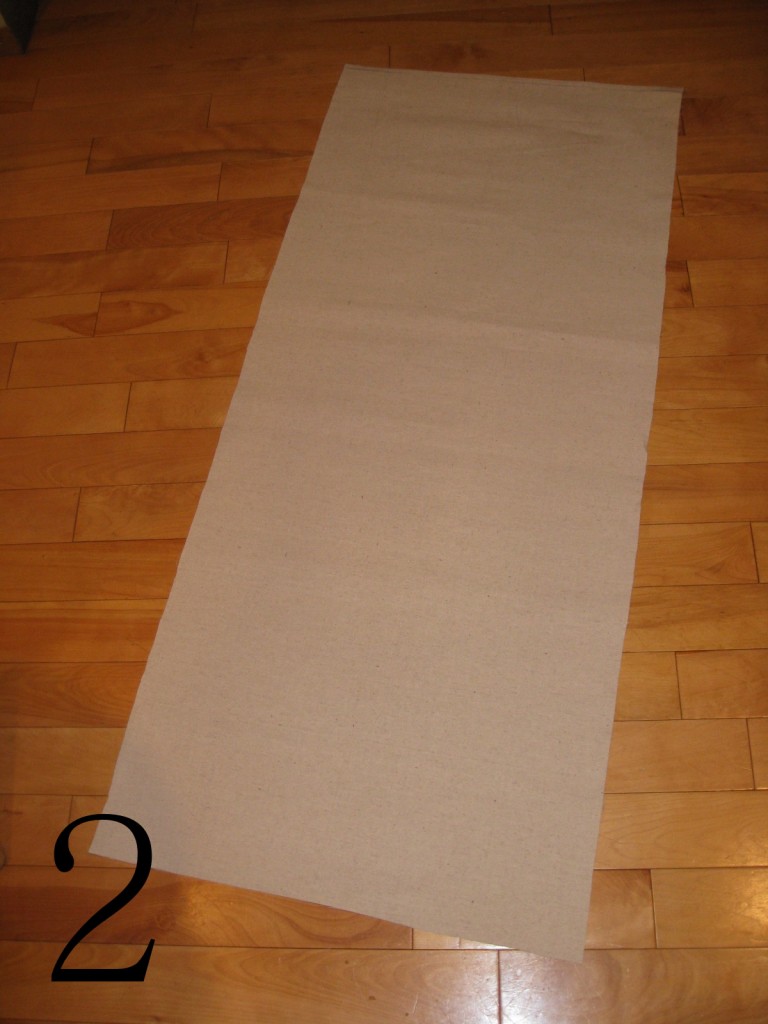
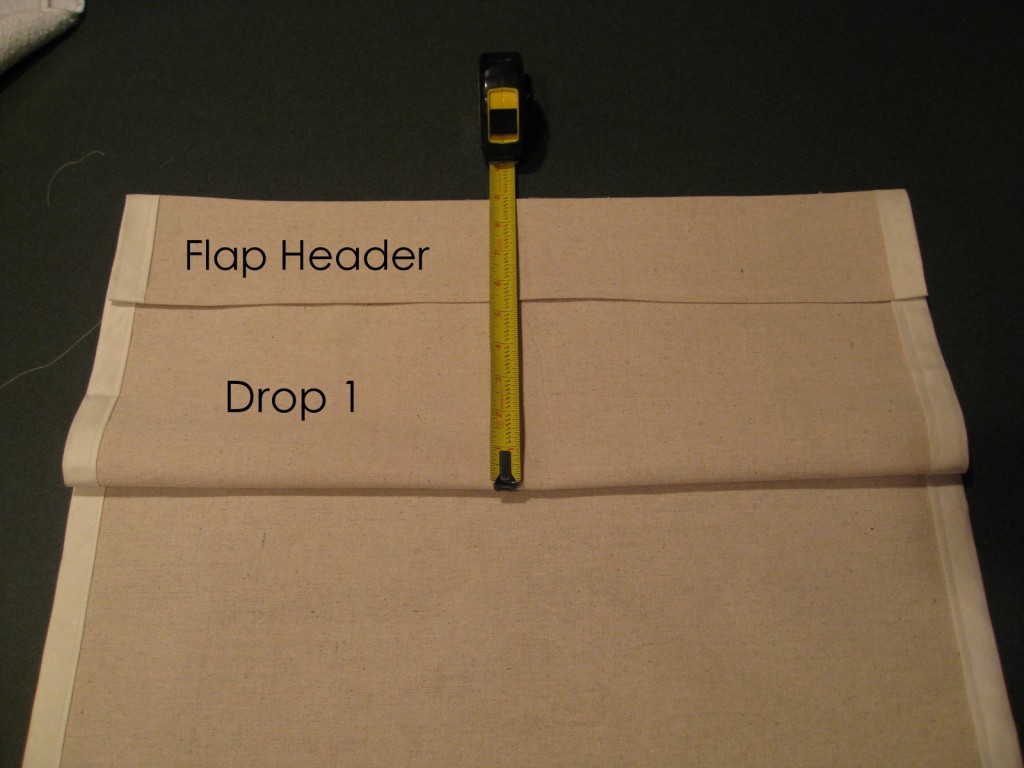
1. Decide how many ‘drops’ you want for your roman shade. I decided on 2 drops, and then I added a Header Flap on the top. Each drop is 5-1/2” and the top flap is 3-1/2”.

2. Measure the width of your window and cut your material. With regard to the length, I cut my material to be about 36” long. It’s important to leave a lot of extra material on the length, so you have enough to create the drops. (Read on and it’ll help you determine your length).

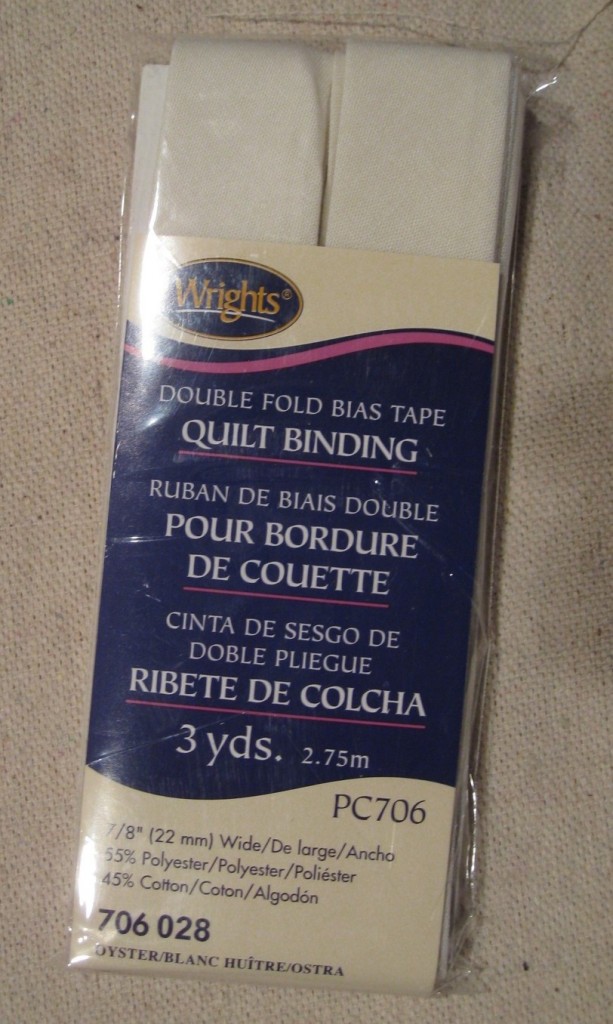
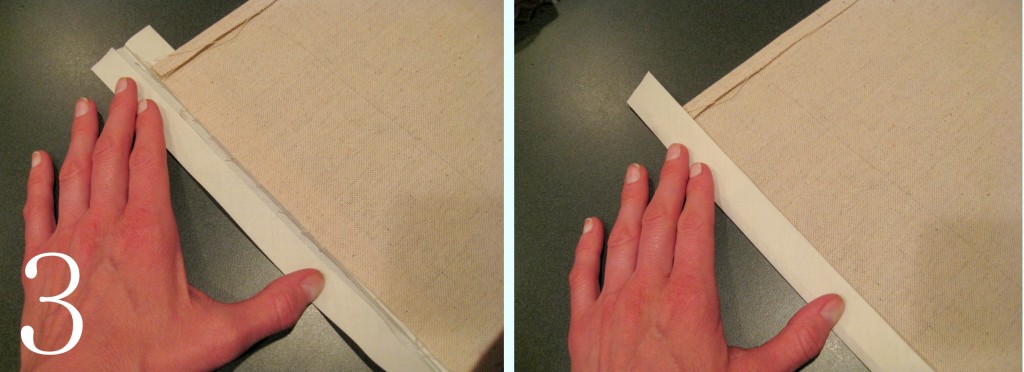
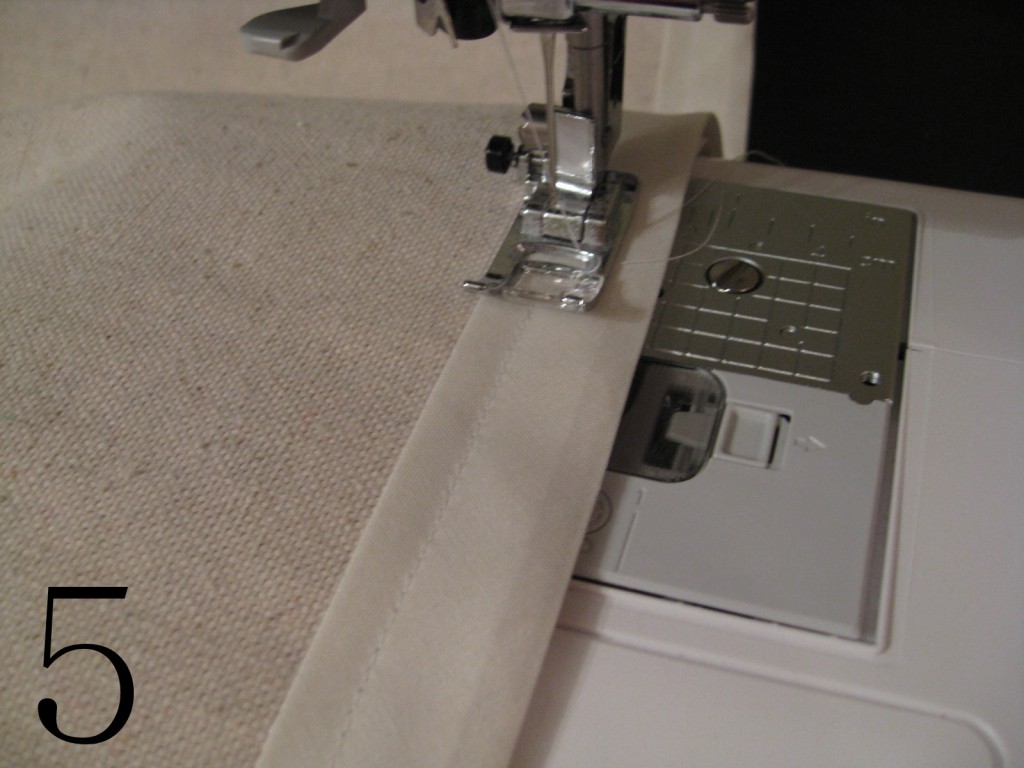
3. Take your Double Fold Bias Tape and edge the length of the roman shade.


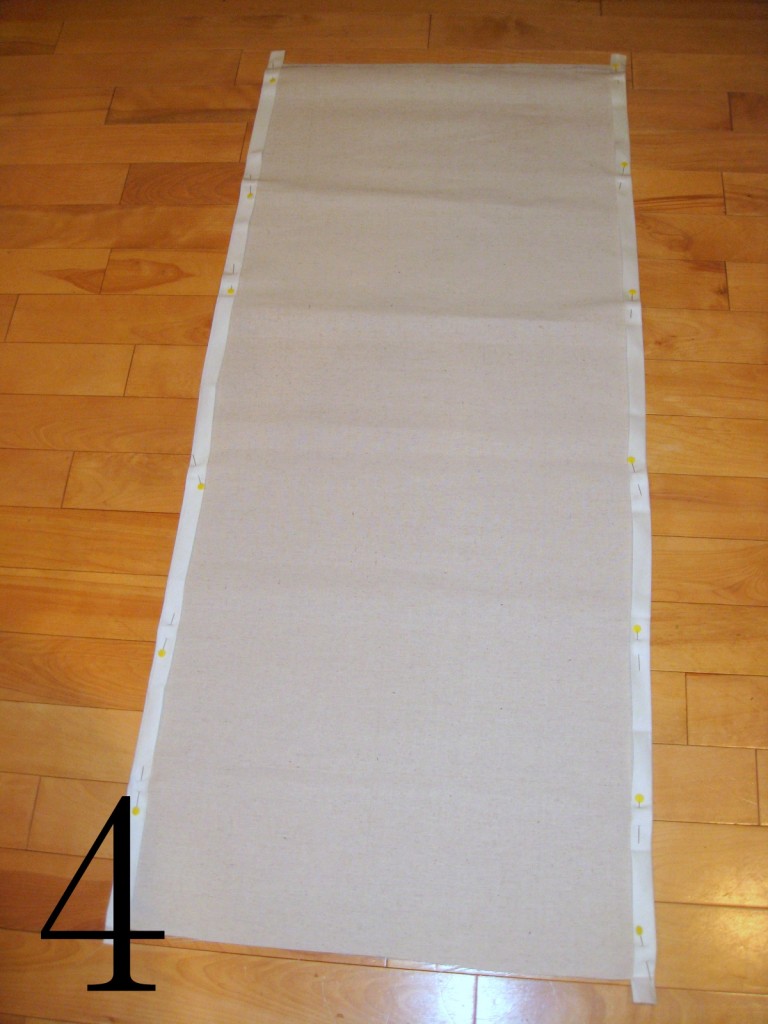
4 and 5. Pin and Sew the bias tape onto your fabric. If your top edge is not finished, fold over and sew, so you have a finished edge.
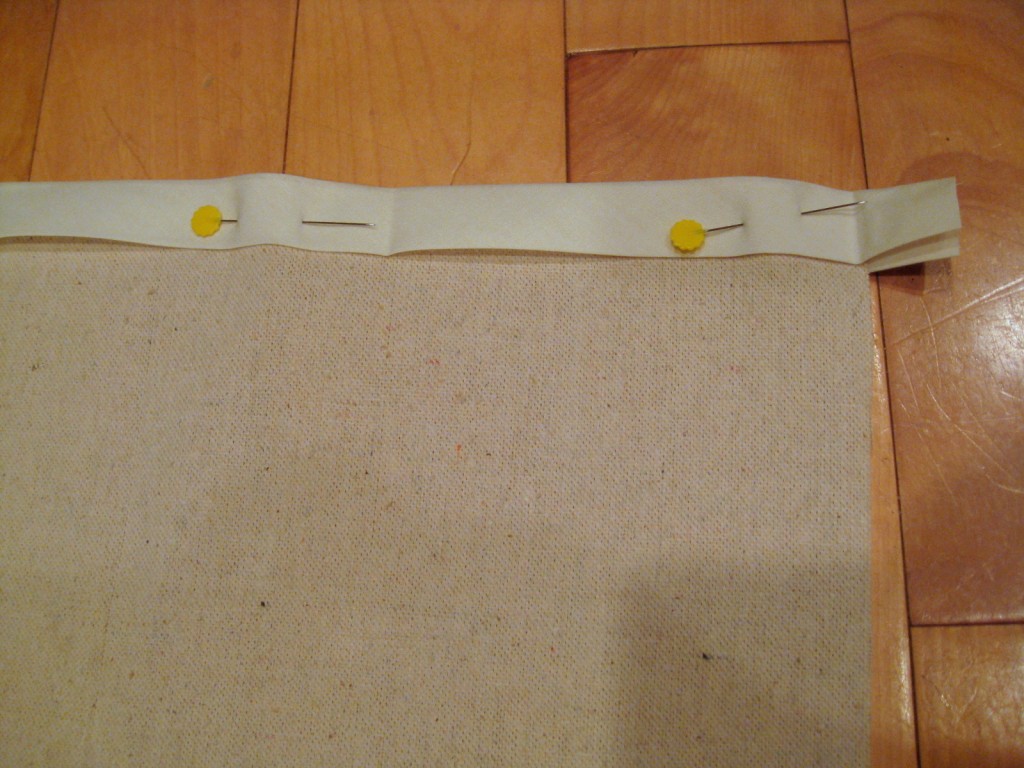


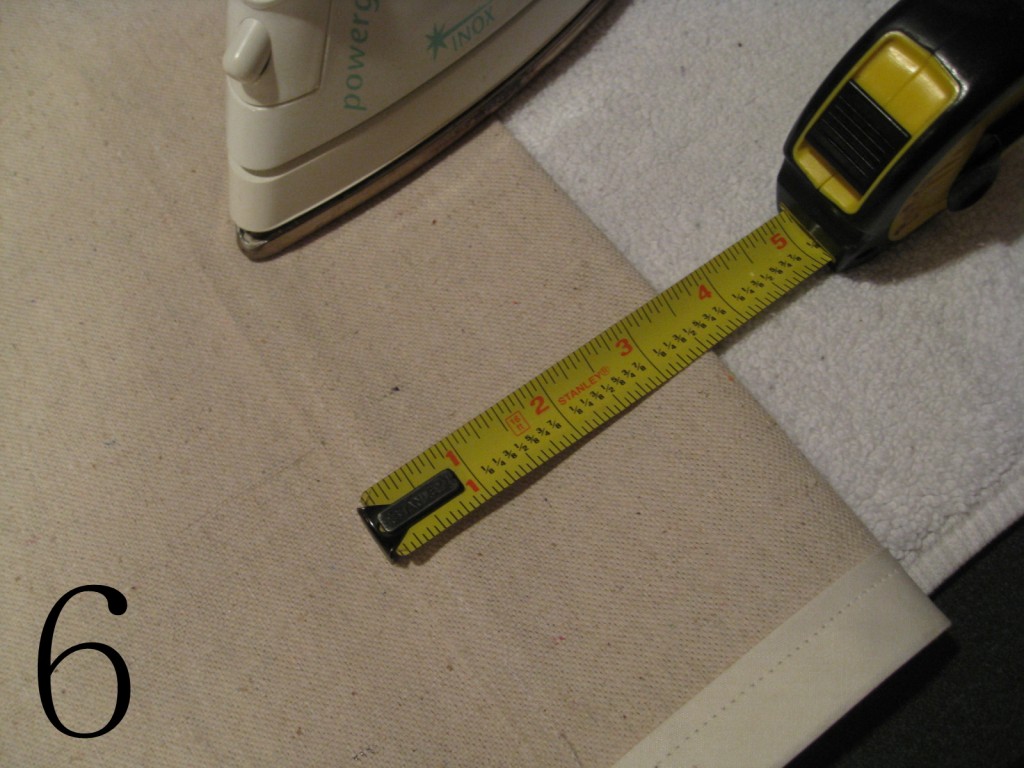
6. Fold over your fabric to create a 3-1/2” Header Flap; Iron the edge and sew along the top with a ½” inseam.

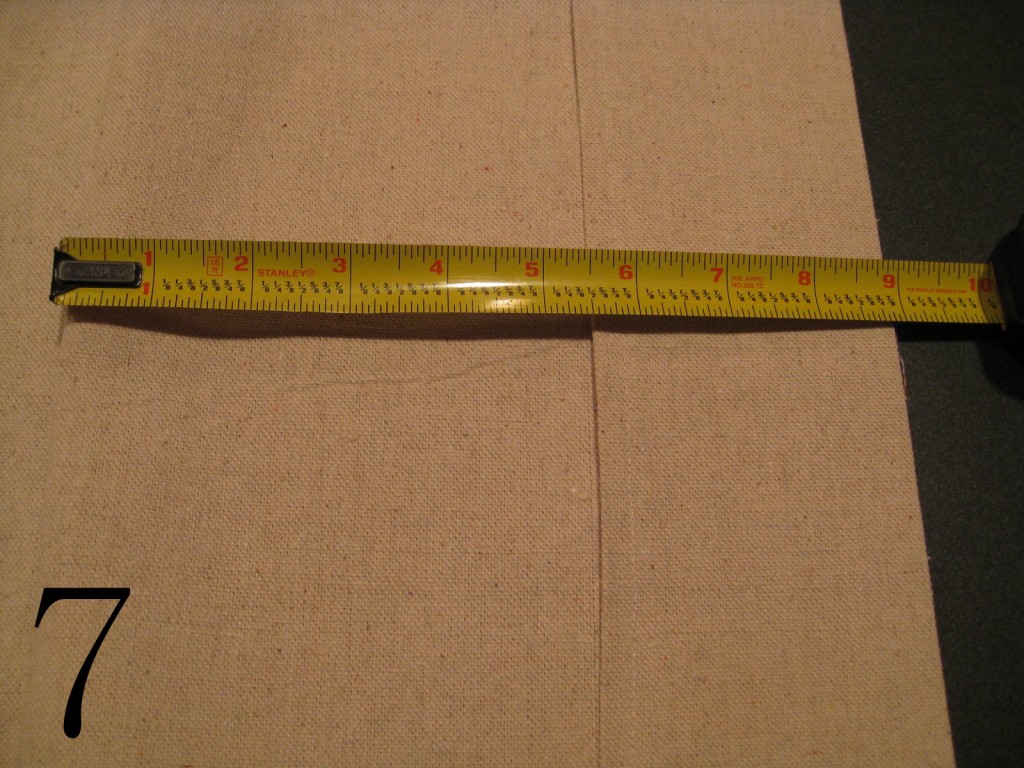
7. It’s time to start your first drop: Measure 9” from the top (3-1/2” for the Header Flap + 5-1/2” for the drop) and then fold the fabric under to create the drop of the roman shade. Bring the fabric all the way to the top of the back.


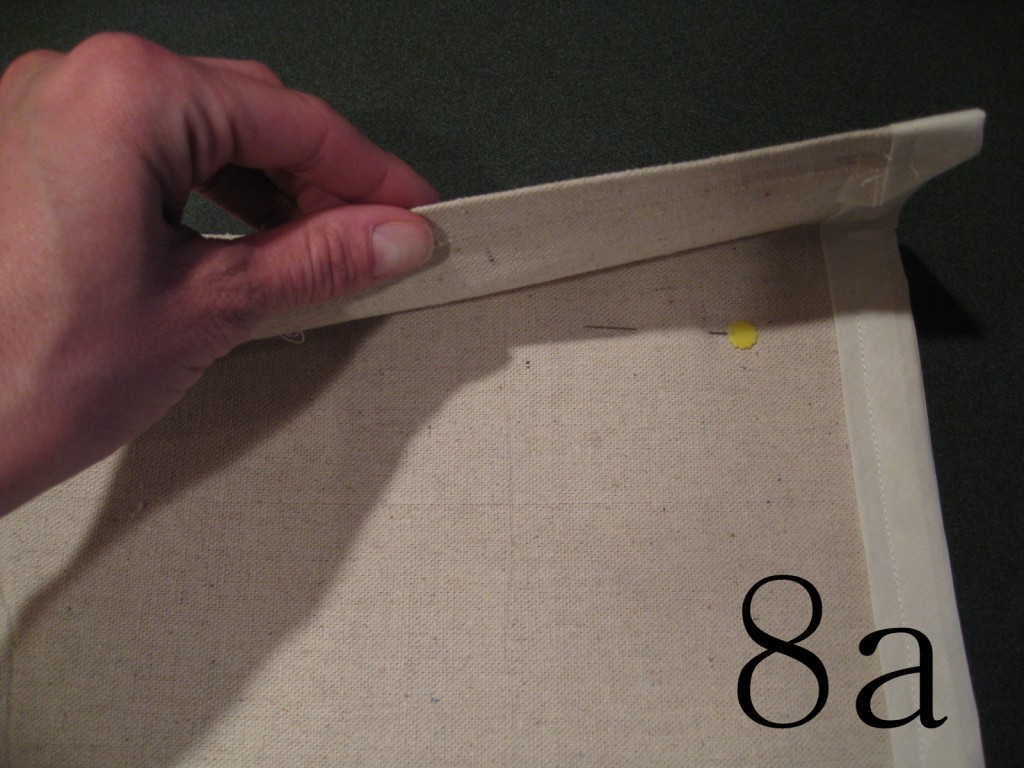
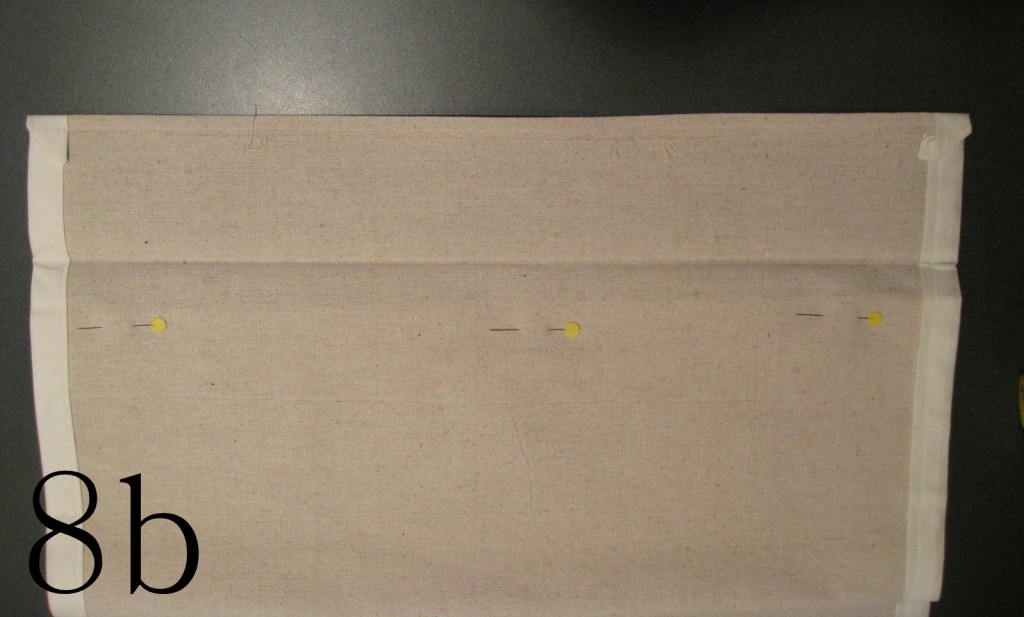
8a and 8b. Flip over the Header Flap. Pin the drop and sew the fabric underneath the flap (along the pinned line as shown in the picture).


9. Onto the second drop: Measure another 5-1/2” for the next drop (which is now 14.5 from the top). Repeat step 8.

You can make as many drops as you’d like to create a longer roman shade. 2 drops worked perfectly for my size window.
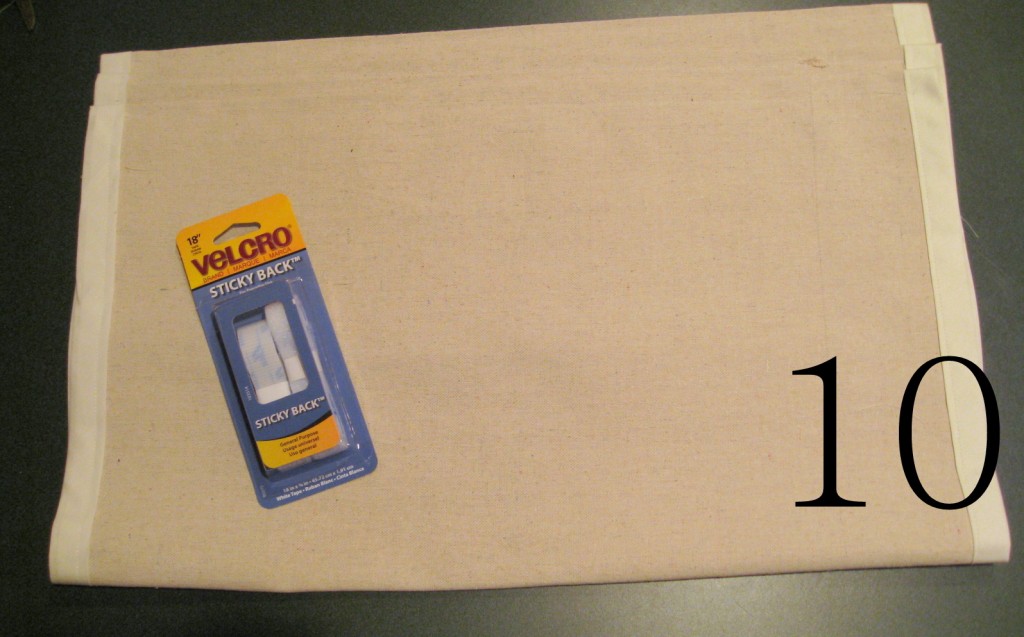
10. When you are complete with your roman shade, flip it over and attach the Velcro to the top edge of the shade.

11. As I mentioned above, I used the existing bar that was already in place. If you are starting new, you can either attach the Velcro right to the window or use a tension rod and attach the Velcro to it.

The faux roman shade is complete!

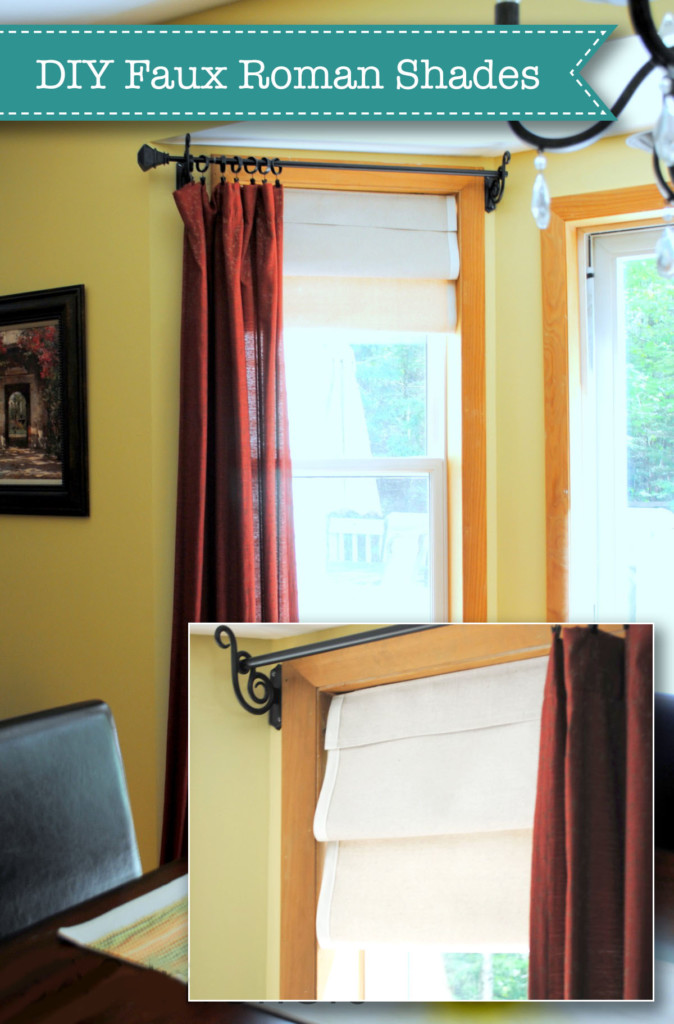
And here is the overall space.

So much lighter and brighter than before, plus the linen-like look of the drop cloth material gives the space a finished, tailored look. If you want to see more DIY projects or decorating ideas & tips, visit me at SAS Interiors. Thanks again Brittany for having me here today – it was so enjoyable to share this project with your readers!
![]()
What talent! Thank you SAS Interiors for a great tutorial. I’m so excited to use this technique to sew my laundry room curtain. Anyone else rushing off to the fabric store right now? I’ll see you there.


I have a bush in our yard that is a pure delight to me.

It has the distinguished honor of being the first flowering plant in our landscaping after a long winter. In the winter, it has pretty dark shiny evergreen foilage. When these little white blossoms open, they produce the most heavenly lemon smell.

My angelic plant is a Daphne bush (maybe the star white variety ) and it seems to like the shaded spot it holds under the protective canopy of oaks over it. If there was ever a plant I want more of, this is it. So, I decided to try to root some clippings this year using rooting hormone. Read more


Anyone else detest cleaning their homes? {Major hand raised over here!} I don’t like to clean, but what I really dislike is paying those exorbitant prices to purchase store bought cleaners. Did you know that you can make your own cleaning products using ingredients that cost pennies compared to a bottle of cleanser!
For example, baby oil makes an excellent stainless steel sink shiner (who knew!)

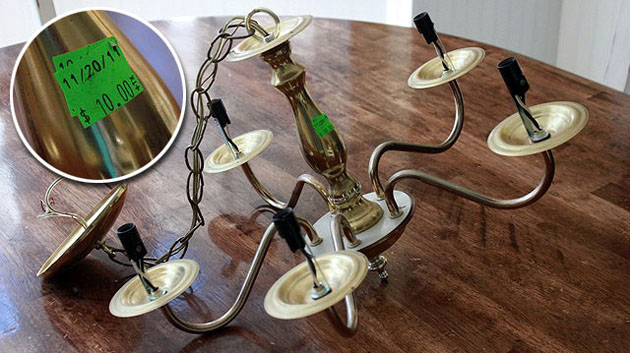

The other day I showed you how to swag a chandelier. I think many of you fell in love with my sunny yellow light fixture (painted Summer Squash by Rustoleum.) Admit it, you fell for her!
I will tell you how you can get your own! It shouldn’t cost you more than $20 with materials!

Jump on over to Parentables to see how you can easily transform a brass chandelier (or any metal light fixture for that matter.) Beware, you may be spraying all of your home’s light fixtures after you see how easy it is.
