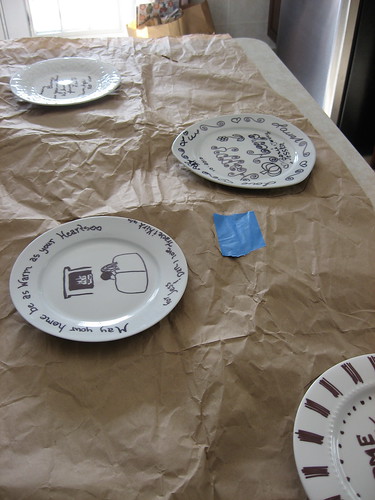
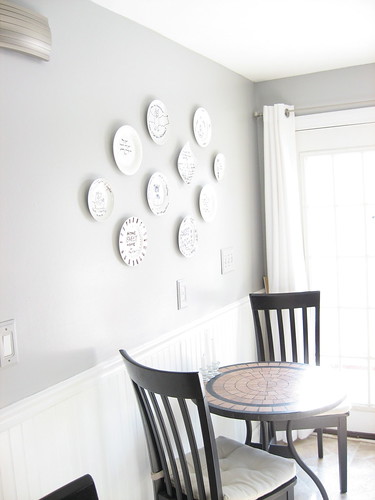
Welcome back. Many of you may participate or read a weekly WIWW (What I Wear Wednesday). Those women in blogland, they really know how to put an outfit together. I am seriously jealous because sometimes I feel wardrobe challenged. Maybe you can help me. Here is what I wore Wednesday:

Ladies, if you want to copy my looks, here is the breakdown:
1. Hooded Knit T-shirt Top bought 15 yrs. ago at Gap
2. Gap Jeans bought about 5 yrs. ago. Those are authentic knee rips!
3. Dansko Clogs with the heels worn down to a hollow core.
4. Latex gloves (the better to paint with.)

This Pretty Handy Girl can’t wear her good duds on a painting day (although I’ve been known to do that occasionally.)

Painting is a nice segue into the first secret for “Falling in Love with Your Home”. Our home started out dark and dreary on the inside. Most of the rooms had dark wall colors, but the biggest problem was the dingy white popcorn ceilings. Those suckers are light sponges! They absorb the natural light and keep it all to themselves.

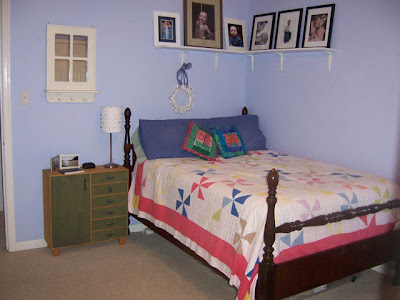
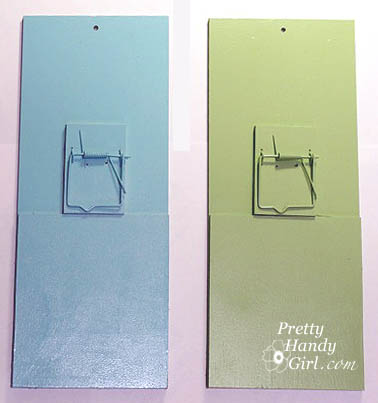
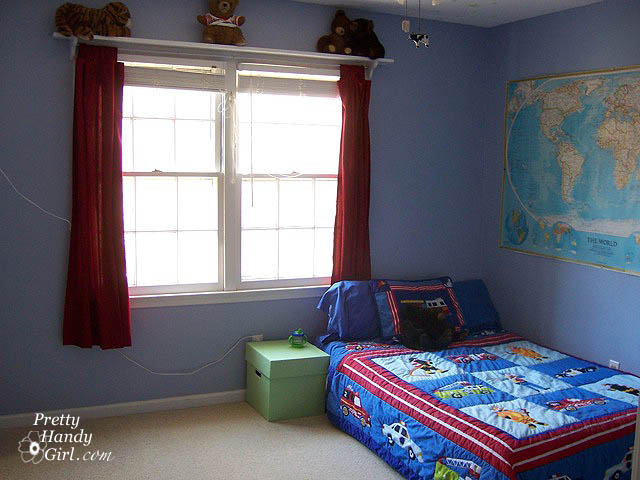
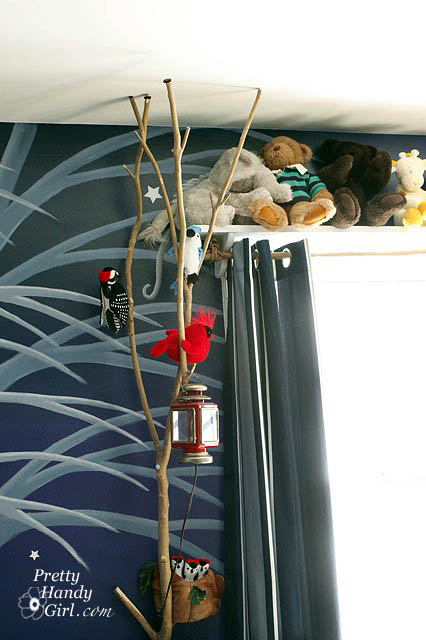
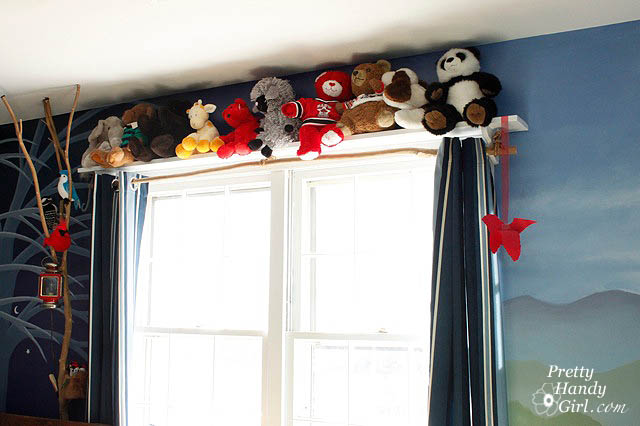
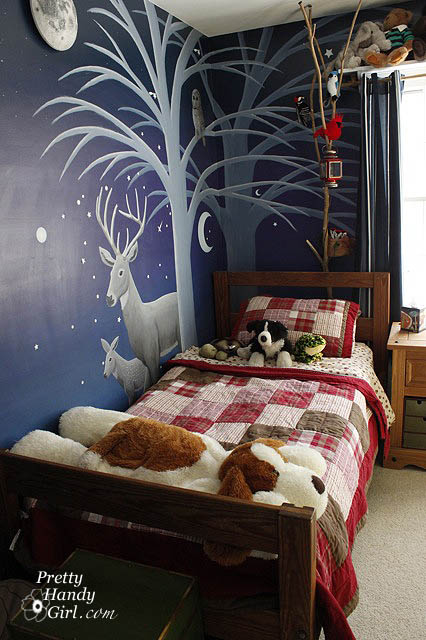
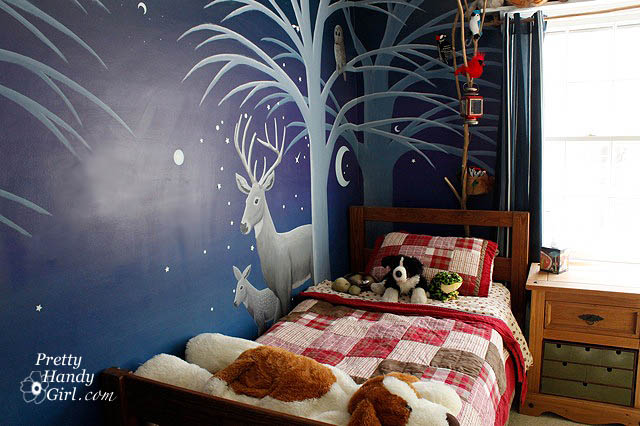
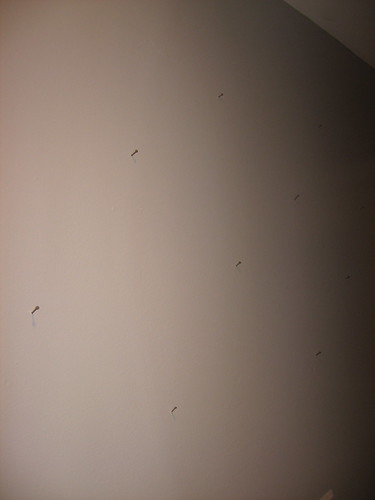
Here is a good example of the light difference between a smooth ceiling and a textured ceiling:

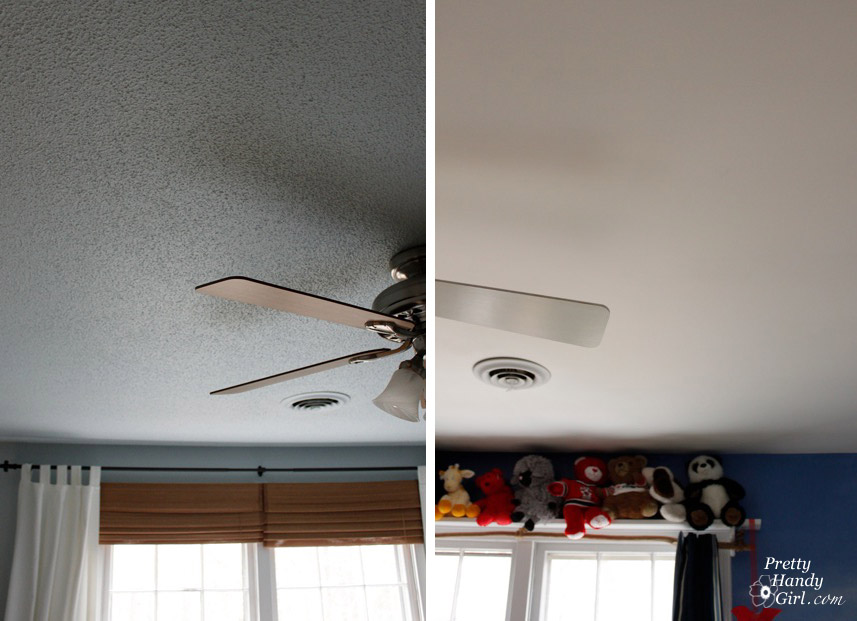
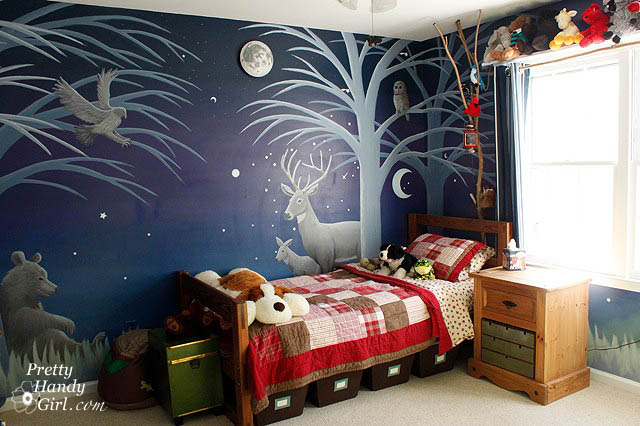
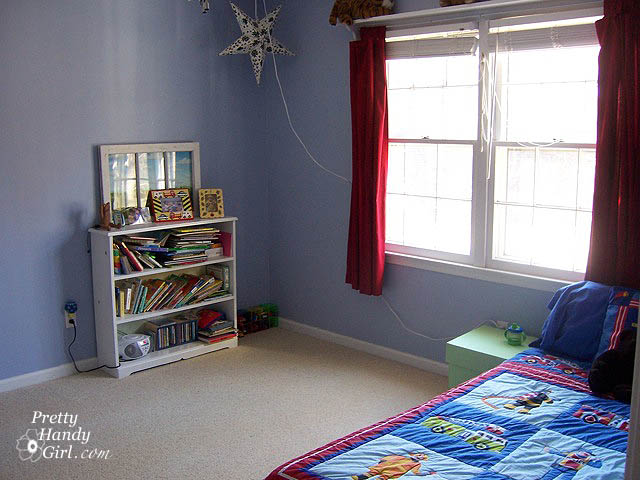
Both pictures were taken minutes apart in adjoining rooms that have the same south facing windows. The rooms are identical in size. The room on the left (master bedroom) has popcorn ceilings and light blue walls. If you look closely, you can see how each pock has a shadow. The texture effectively stops the light from being reflected. Meanwhile the ceiling on the right is smooth but the walls are a dark blue (son’s room). Despite the darker walls, the ceiling appears lighter because the light is reflected due to the lack of texture.

As you can see, we are able to lighten our rooms about 10 – 15% by scraping and painting just the ceilings! (Imagine what painting the walls a lighter color will do!)

Two more benefits of a smooth ceiling:

  • A smooth ceiling will visually raise the ceiling, while the textured ceiling draws your focus to the texture and makes the ceiling feel lower. You’ll have to trust me on this one.
  • And, a smooth ceiling will not collect as much dust. I don’t have to tell you how important that is for allergy sufferers (ahhh- choo! I’m allergic to dust mites.)

In summary, why do you want a bright and smooth ceiling? Because, it will reflect more light and natural light is a mood booster.  And during the seemingly never-ending winter months, we all need more sunlight to avoid mild depression or gloom. Translated: Better mood = Loving Your Room!

This is how we do it:

We have the popcorn (textured) ceilings scraped. Notice how I said, “Have” them scraped. I am handy – as you know – but there are certain tasks that I won’t do. I successfully scraped the ceiling in our pantry, but my neck was in pain for a week afterwards. I vowed never again. It is also a good idea to pay a professional if you live in an older home. Textured ceilings may contain asbestos. (Thank goodness ours didn’t.)

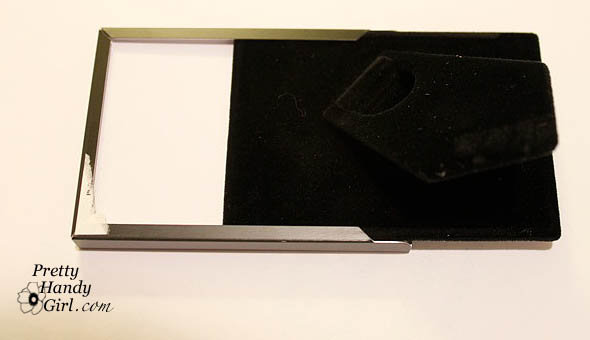
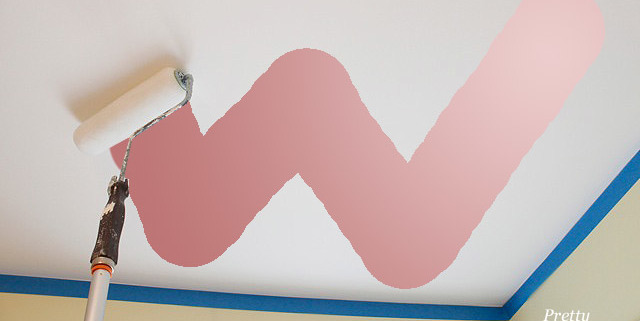
Now, even if you don’t have textured ceilings, you likely can still benefit from adding a fresh coat of paint. Ceilings are usually neglected for years. They are often painted with a builder’s grade white paint. The builder’s white is a dingy off white color compared to an Ultra Bright Flat White. It also doesn’t age as well and will tend to yellow or dull over the years. Here is an approximation of how a builder’s white might look next to an ultra bright white color:

AND, let’s say you really don’t want to mess with those texture ceilings, if you buy a thick nap roller and repaint the ceiling with an Ultra Bright White, you will still notice a big difference. (One word of caution when painting textured ceilings. Paint over one spot and move on. If you go back over that spot while it is still wet it can pull the texture down.)

Tutorial for painting ceilings like a pro

Materials:

  • Valspar Flat Ultra Bright White Latex Paint
    (this is the brightest white we have found. Valspar is sold only at Lowe’s)
  • Latex Primer
  • Paint tray
  • Paint roller
  • Roller extension rod
  • Edger
  • ScotchBlue Painters tape
  • Tarp
  • Fine grit sanding block
  • Car Wash sized sponge and bucket
  • medium size flat artist’s brush

Begin by covering every bare inch of floor with plastic or thick canvas tarps. And cover any furniture left in the room (although you should try to remove everything from a room when you paint, it is just easier that way, trust me.)

Remove blades on a ceiling fan, simply unscrew the arms from the motor:

Then cover your light fixture with a plastic bag and painter’s tape.

Next, apply painter’s tape around the top of the walls of your room. If you are going to re-paint your walls after the ceilings, you can skip this step.

Start with the primer (a must for newly scraped ceilings, but not necessary for previously painted smooth ceilings).

1. Use your edger around the perimeter of your room. I like this handy-dandy edger that has a hole for the extension pole (especially helpful if you have high ceilings or neck issues.)

2. After the perimeter of the ceiling is done, edge around any light fixtures or vents.

3. Reach for your roller. I like to work in 5′ sections. Start by rolling out a letter “W”. Then roll back and forth, up and down and in random directions until you have that section of ceiling covered.

This will insure that you don’t have racing stripes on your ceiling.

4. Continue working next to the section you just finished. Try to work into the previous section while the paint is still wet. Otherwise, let that section dry before trying to roll into tacky half-dry paint.

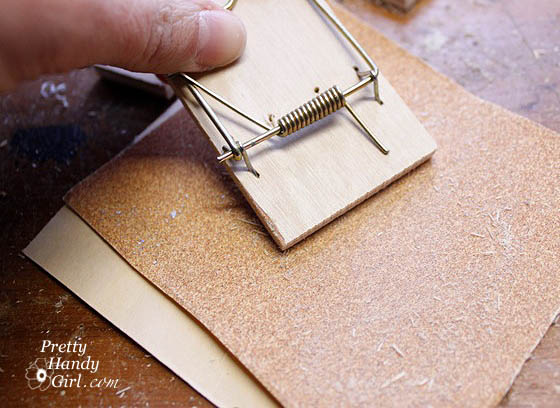
5. Allow the primer to dry, then lightly sand your ceiling to remove any specks that got into the paint. Wipe the ceiling with a damp sponge.

Now repeat steps 1-5 using the ultra bright white paint.

Let your ceiling dry and then add a second coat of the ultra bright white (yes, definitely use two coats to leave your ceiling looking like it was painted by a pro! Don’t skimp.)

When you are done, remove the painter’s tape and pull out a small flat artists brush.

Pour some wall color paint into a small cup (I like to keep spare paint for each room in small jelly containers or jars. That way if one of my boys (adult and child alike) should happen to mar a wall, I can fix it in a jiffy.) Use the flat brush to create a smooth line at the top of your wall. Then finish by touching up any ceiling spots that were missed.

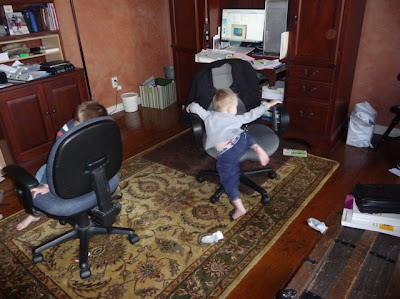
Take a look at the difference in our office! The top picture shows the room right after the ceiling was scraped. During the day!

And this next picture was taken of the same windows (different angle) at night!

Wow, brighten my world! View more pictures of this room HERE.

Okay, so I really like the ultra bright smooth white ceilings, but I did come across this gorgeous ceiling over at Not Just a Housewife, that would also make you swoon over your room if you were to try it. Check out Stacy’s tutorial HERE.

P.s. If you are renting, please don’t despair. I will have some tips that don’t involve painting your home.

I leave you with a glimpse of hope for those of you snowed in this week:

Daffodils Popping Through the Ground
Daphne Buds Getting Ready to Sprout

I just took those pictures yesterday, February 2nd! I live in Raleigh, NC, so thankfully spring is on its way. (Don’t hate me.)


5-Piece Nonstick Coated Paint Tray Set

00500 - Premium Paint Edger 00500 – Premium Paint Edger[635870] UPC: 022384005006 10L x 7.63W x 9.5H 0.2 LB 0.42 Cubes


Hooray, February is here. This is the month of love (and chocolate!!! But, I digress.)

I have a funny story to tell you about our home. We actually fell in love with our house before we owned it.

This story starts during a torrential downpour in 2001. We were driving around with our realtor looking at homes in Raleigh. The rainstorm turned ugly and our realtor pulled into the first neighborhood he could find. As he drove carefully down the tree lined streets, we saw a For Sale sign ahead.  As we drove closer, we saw a handsome two story home on a hill.

The landscaping was well manicured and there was an adorable little side porch.

Our realtor called the office to find out the details on the home. It turns out that the owners were asking 5K over our maximum search. The interior was equally well cared for, so the next day we put an offer on the house and moved in within 2 months.

We didn’t realize how lucky we were to have found this house on a perfect little cul-de-sac. As the months progressed, we got to know all our neighbors on the street. Each and every one of them were warm and welcoming and oozed southern charm.

As the years went by we welcomed our first son into our house and then a second.

The home office, that we had renovated and installed built-in cabinets and a window seat into, became the nursery.

Feeling the pinch of squeezing all four of us, a dog and a home business into a three bedroom house, we began to look at other homes in the neighborhood, but dreaded having to move away from our location (did I mention how much we love our street?)

None of the other houses lived up to our picky needs (again, loved our street!)

Pretty Handsome Guy and I talked between ourselves about the one house on the street that we would love to live in. It was the charming dutch colonial house across the street.

He said, “Heaven forbid that our neighbors would ever move, but if they did we’d have to buy their house.”

And one day that is exactly what happened. It was such a bittersweet moment because we really adored our neighbors and their children. And we didn’t want them to move away. But, we basically said, “Tell us how much you want for your house.”

Three months later, we literally backed out of our old driveway and straight into our new one! (Sadly we didn’t win the Guiness Book’s shortest move on record.)

Our new home needed some updating and a little TLC, but we still loved it! It fits our style (old, casual, comfortable.)

We have slowly transformed one room at a time to fit our personality and allow us to “love” the inside of our house as much as we love the outside.

Office Before

Office After

Living Room Before

Living Room After

Guest Room Before

Living Room After

This month I’ll be sharing some ideas for turning your house into your dream home. Plus, I have a special giveaway announcement as well. But, you’ll just have to be patient.

I hope you’ll come back for some a-moré.
Mousetrap-MemoTrapFinal

I’ve been dying to show you this project, but didn’t want to give away any secrets. You see, I made them for a few bloggers out there in the home décor blogland. And as luck would have it, most of these special women are here at Blissdom! As a tiny token of my appreciation for their inspirational blogs, I put together a little gift bag. Inside (among other things) was this one-of-a-kind memo pad.

With a note attached.
“My mouse is hooked on your blog!”
Get it? The notepad holder is a mousetrap and I was playing on the word, mouse (the one for your computer). Corny, I know.
So, you want one for yourself? I’m happy to share with you the tutorial.
The memo pad started life as a mousetrap (4 for $1) and a mini picture frame also $1 at the Dollar Store!

Materials:

Wooden mousetrap
Small picture frame
Cabinet Toe kick boards or other thin scrap wood (1 – 4.5″ x 4.5″, 1 – 4.5″ x 10″)
Wire
Ribbon
Notepad
Corrugated cardboard
Small 2″ x 3″ picture
E-6000 glue (optional)
Gorilla glue
Primer
Paint
Sandpaper
Needle-nosed pliers
Saw (hand saw is fine)
Drill and bit (for hole)

Start by removing the hook and trap hold parts with pliers. Then remove the bait hook.
All that will remain is the spring and snapping bar.
Cut the excess wood from your mousetrap with a handsaw.
(I used mine in a miter box for a straight cut.)
Sand down the rough edges.
You will need to cut down your scrap wood to the dimensions below.
The 4.5″ square piece is the same thickness as the mousetrap.
This insures an even surface for the memo pad to rest on.
Following the directions for the Gorilla Glue,
I wet each piece of wood and then added the glue.
Glue the 4.5″ square piece to the bottom of the larger piece of wood. Then glue the mouse trap right above the square piece. Make sure your snapping bar is facing down, as shown below.
Set a weight on top of the wood to “clamp” it while the glue dries. (About an hour or so.)
Anyone know what these hand weights are good for?
Beats me, I only use them to weigh down projects.
After the trap is dry, spray your boards with 1 or 2 coats of primer.
Then follow up with your favorite color paint.
At this point, you will want to drill a hole through the top of your board.
Take apart your picture frame and discard the backing.
Replace it with a piece of corrugated cardboard cut to size. Slide in your picture.
Carefully add a small line of E-6000 glue* to the back of the frame and glue it just above the mouse trap. If you use too much glue, it will glue the cardboard to the frame and you won’t be able to switch out your picture from time to time.
*You could use Gorilla glue for this step, but the glue expands and might glue your frame shut so you can’t change the pictures.
Create a bow with the ribbon and slide a piece of wire through the bow knot.
Secure the bow by threading both ends of the wire through the hole at the top of your mouse trap memo holder. Twist the wires together to make a loop for hanging.
Add your memo pad and you have a unique little note center.
So do you think those wonderful bloggy ladies will like it?
It isn’t too cheesy is it? (Pun definitely intended!)
NolanBedView
Today we are going to talk about our Camping Themed Boy’s Room, But first, I have been having the best time meeting most of my favorite bloggers at Blissdom.
Dear sweet Home & DIY bloggers, y’all really rock!
A few of those rockin’ women bloggers:
Sandra (
Sawdust & Paper Scraps), Rhoda (Southern Hospitality), Shaunna (Perfectly Imperfect), Ashley (Pure + Lovely), Erin (Two Story Cottage) and Layla (TheLetteredCottage)

While I am here, I figured you might love a good before and after. Here is my son’s bedroom shortly after we moved into our home.

NolansRmBefore2
NolansBeforeRoom
Pretty boring, huh? Poor guy didn’t even have a bed frame. But, frankly, it let me sleep better at night knowing he wouldn’t roll out of bed.
Two plus years later, we moved beyond the rolling out of bed phase AND something divine happened. I met a “real” mural artist and it was like finding a clone of myself! I promptly hired my clone to help me paint a mural in my son’s room.
A beautiful woodland and mountain theme!
DayWall
Tom Barber (mural artist in Raleigh, NC) painted most of the background and I painted the animals (because wildlife illustration was my major in college.)
NolansNightWalls
I bought some corner rounded shelves at Home Depot and installed them in the corner where Tom painted a big tree.
SecretCloset
A perfect spot to curl up with a good book.
CornerNook
The closet is my son’s super secret hideaway.
HiddenCloset
When you open the door you are met by a tent.
Tent
Pretty Handsome Son can either close it up or secure the tent flaps on the sides with the velcro tie backs.
Tieback
The tree is made from some crepe myrtle branches that we had to trim from our trees out front.
Tree
The lantern in the tree was an old oil lantern. I drilled a hole in the bottom and inserted a candelabra light kit. It is the perfect amount of light for him to read stories by.
Lantern
I used a larger branch for the curtain rod. And tied the rod to the shelf with some rope knots.
WindowView
CurtainRod
And I had to add this adorable bird that my son made in preschool. No kids room is complete without his or her artwork.
KnotandBird
He sleeps soundly under the light up moon on the wall.
BedView2
The bookshelf was re-painted and I mod podged old US Geological Survey maps onto the back.
mapbookcase
Thumbtacks
I wish I had a room like this when I was a child. Heck, when he outgrows it (which I hope he never does), I’ll move into his Camping Themed Boy’s Room!
Before:
After:
BedandTree
Bedding from Target Woolrich collection.
home_tour
Hey all, I’m safely at Blissdom now and meeting many other inspiring bloggers. Unfortunately, there is one blogger who, sadly, I won’t be meeting. Jessica from Decor Adventures. She is as sweet as can be and a real kindred spirit when it comes to DIY projects. Instead she’s staying home to kick DIY butt in her basement, but agreed to take some time to meet you all in my absence. Take it away Jessica!
Jessica

Hello Pretty Handy readers! I’m Jessica from Decor Adventures, a professional by day and project addict by night, decorating my new 111 year old house. Today I want to share with you how to hang plates on a wall.  It’s so simple, with no visible hardware, you’ll be hanging them up in no time.

When we had a housewarming party last fall, we made our guests participate in a fun little activity while helping to decorate all at the same time. I got some inexpensive plates at the thrift stores and asked our guests to freestyle it!  We had them decorate plates to hang in our house with their well wishes for our first place.

Kitchen

First the secret is Dischangers. They are easy to order online, ship super quick and come in different sizes to hold various weight.

To use them, moisten the disc and secure it to the back of your plate then let it dry overnight. Make sure you wait, even if you want them up right away. You don’t want any plates crashing to the ground because the glue is wet!

Plates

To make my arrangement I used a technique I saw online where you make a grid of your art on a piece of paper, hang it on the wall, nail in the holes, hang up your art, pull the paper away and presto! Art on the wall. This actually can be done with different wall arrangements, plates, art or photos, etc.

To get started I pulled out a piece of packing paper that came in box from an item I ordered. I was that thick butcher paper. I laid it out on the counter space which was just about as big as my wall area.

Then I arranged the plates on the paper how I wanted them to look on the wall. This way I could move them around without having to hammer a new hole in the wall.

Plates

Then I traced each plate onto the paper with a sharpie, making sure it didn’t bleed onto the counter underneath. You can write on the plates or art which piece it is. This will help to see what you’ve got going where.

IMG_8563

Then I removed the paper from under the plates and hung it up on the wall with painter’s tape. Now you’ll see the placement of your art/plates.

IMG_8561

After that, measure where each nail hole goes,

IMG_8562

mark that spot on your “plate” on the wall,

IMG_8563

and hammer one in!

IMG_8565

Once you carefully remove the paper, you’ll have your nails all ready to go.

IMG_8566

Lastly, simply hang up your art and you’re done.

IMG_8570

Plates

This is the little bistro corner in our kitchen. So when our friends come over they get to see their handiwork.


Kitchen

IMG_8812

Hoped you learned something today with my plate art. Do you have a technique for hanging things up on the wall? Any tips you want to share?

Thanks again to Pretty Handy Girl for letting me visit!

Please give Jessica a round of applause. Wasn’t that a great tip for hanging plates? I think I’ll be using this technique to hang our family photo wall soon!

You should hop over to her blog where she and her husband are doing some crazy renovations to their home.