Welcome back, I have a very special guest today. She’s another power tool junky, but she wears high heels (I myself struggle with that skill). Perhaps she will take me under her wing and show me some tips for wearing high heels comfortably.

If you haven’t guessed who my guest is today, it is Kristen from High Heels and a Hammer!

Well, if you have been deprived of Kristen’s blog and haven’t realized how amazing she is, let me just show you:

She built that headboard herself. Isn’t it beautiful! But, that’s nothing, wait ’til you see what she has for show-and-tell today! She is going to show you how to “Fall in Love with Your Home” via the most used room in her home, the mudroom. Grab your hammers and click your heels together as we welcome Kristen to Pretty Handy Girl! (Tee hee, get it, hammers and heels? I’m such a nerd.)

Hi everyone, I’m Kristen from High Heels and a Hammer and I’m thrilled to be here on Brittany’s blog today.  I have long admired her talent and creativity and was delighted to get the chance to hang out with her at Blissdom.  She is sincere, supportive, and has a genuine desire to help others.

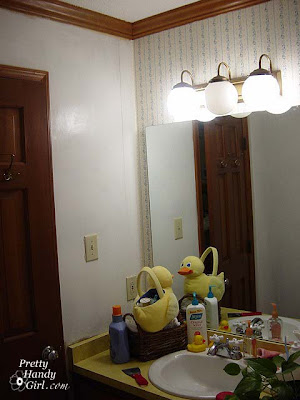
I recently finished revamping my back entryway.  As my old house did not have a proper entryway, I was beyond excited to have a space for backpacks, boots, and snowy jackets.  There was only one problem with my new space, it lacked organization and function.  This is what our mudroom looked like when we moved in.

And here it is now.

After pricing out many options, I decided to build a bench and shelf system using modified plans from Ana White.  I chose to make my bench and shelf out of select pine.  Because I planned on painting them white, I knew I could afford to use a less expensive wood.

I varied the spacing of the cubbies for the bench because I wanted a few bigger baskets for soccer socks and shoes and a smaller one for the dog’s leashes and extra collars.

I made a cushion using foam and a bright, graphic fabric.  Now we can be sitting pretty while we’re taking of our boots and soccer cleats. 🙂

For the shelf, I chose to keep the spacing uniform because I liked both the look and the functionality better.  A set of hooks makes hanging up jackets an easy chore, and a few more baskets provide accessible storage for smaller items.

The finished result is a bench and shelf system that is both functional and beautiful.

Like most families, a tremendous amount of paper passes through our home.  Often this includes permission slips, notices, and other time sensitive items that could easily get lost in the clutter that tends to pile up on our counters.  Keeping these important papers in plain sight inspired another vital addition to an organized and efficient entryway system: a message center.  Because we are a fairly large family, I decided we needed a fairly large message center:

I built a message center (from Janell’s instructions) using a 30″ x 60″ project panel, 1 x 3’s, 1 x 2’s, cork, and a strip of magnetic steel.  I framed out the cork with the 1 x 3’s and added 2 1 x 2 strips at the top for interest.

And because I like things to look pretty I chose to cover the cork with a creamy linen fabric and trim it out with beautiful braided cording.  No more frantic searches for permission slips, or forgotten phone messages.

Our back entryway is one of the most used rooms of our home.  I want it to function in a way that is useful and practical.  The fact that it’s cheerful and pretty is icing on the cake.

I hope you all enjoyed seeing my back entryway/mudroom transformation.  Thank you so much for having me Brittany.

P.s. I am having a giveaway on my blog for a $50 VISA gift card. I hope you will stop by to ENTER!

So, what do you think? Are you loving her mudroom bench, coat rack, and message board organization? I am! I can’t tell you how important it is to have your mudroom organized and standing at the ready to help you on your way in and out of your home each day. Ask my friend Reneé how her mudroom organization has saved her sanity.


I know our mudroom bench and coat rack is the workhorse of our family.


It really is the one thing that makes me love coming into my home. Okay, so is this!
Don’t feel comfortable building your own? How about one of these affordable options? (Commission Links, click on image for more information.)

French Country "French Maple" & "Weathered Linen" Hall Tree with Storage BenchWhite Storage Bench with Seat and 11 in. Height x 10.5 in. Wide Cubbie StorageHall Bench with 3 Baskets by Winsome Wood


Yesterday we had a 78F day in NC. I spent most of the day raking leaves out of our planter beds. I was so thrilled to see little green plants poking through the soil. I don’t know about you, but I am sooooo ready for Spring! Old man winter better be packing his bags pronto.

In anticipation of warmer weather, I have a special guest to help us with “Falling in Love with Your Home” on the outside! She took a ho-hum patio and created an outdoor oasis with trellis planters!


She is none other than Jess from Frugal with a Flourish!

Jess is so down to earth and a pleasure to talk to. After 5 minutes talking to her, I felt as comfortable as if I was talking to a long time friend. Her blog is just as warm and friendly. If you haven’t been to Frugal with a Flourish, you have to take a few minutes to peruse her blog.

One of my favorite projects that she shared was creating these beautiful bird silhouette plates for $5!!! Yup, you read that right. One Abe Lincoln!

I really need to get my act in gear and make some of these! I can’t wait to see what she comes up with next.

Without further delay, put your hands together and give Jess a big warm Pretty Handy Girl welcome! Yeaahhhh!

Hi guys! I am Jess from Frugal with a Flourish and I am so excited to be guest posting at Brittany’s today! People like Brittany helped to inspired me to take on this project! Today I want to talk about loving your outdoor space even if what you have isn’t a whole lot. We are so close to spring that I know that is going to be an area that will be on all of our minds soon! Because of that, I would like to share with you my Patio Redo I did last spring!

What we started with was this – the world’s smallest patio. Isn’t it just pitiful?? I decided that I wanted to turn it into a book nook, since a single chair was almost the only thing that that would fit out there.

So what did I do to transform it? Check it out!

Ta-da! I love it! Here are some more pics! A view from farther away. It looks great from the street! (And per the hubby – my neighbors confessed to being a lil’ jealous of it!)

Now how did I take this from a lonely slab of concrete to a lush little getaway? Let’s break it down.
First, I added these fantastic lattice planters. I built these with my own two little hands – with very little assistance from the hubby – mainly moral support!

These planters were the first thing that I had ever built or conceptualized in my head after looking at a picture. And I have to tell you guys that I have been HOOKED on power tools ever since! If you are interested in how to build them – hop over and check out my detailed tutorial. I hope it inspires you to want to get out there and pick up a nail gun too!
I also got some brackets and hung my PB Knockoff Mason Jar Lanterns out there! This provided two important elements. One, they gave off a lovely glow as it got a little closer to dusk. But more importantly those were citronella candles! So they also provided a little barrier around the patio to ward off those nasty mosquitoes!

Now, to block off the corner a little more from the street, I also added two shepherd’s hooks with hanging baskets and some other planters. Having all the flowers out there was fantastic over the summer months!

Speaking of flowers – I am in love with the ones I put in my planters! They are called Mandevilla or Brazilian Jasmine. They have the most gorgeous blooms! I am actually trying to winter them. We will see how that works out!

They bloomed all summer long and can climb a trellis to over 15 feet high! Here is a pic from later this past summer to show you how well they grew up! Aren’t they gorgeous?


And of course, every book nook needs a place to sit and read. Here is mine. My chair is a rocker – which I love. I also have an umbrella for the stand under that table that I can use to shade my fair-skinned self if it is too sunny! Oh and I have a comfy pillow! It was a no sew pillow I made with some clearance outdoor fabric – the perfect cozy touch.

Ahhh… I just loved getting away out there this past summer and escaping into a good book! I can’t wait to get it all cleaned up again this spring. I hope this post inspires you to create your own beautiful space outside. Just remember, it doesn’t have to be big to be an oasis! Thanks again for having me Brittany!

Thank you Jess for sharing your backyard oasis with my readers. I too hope you have inspired them to create their own private paradise in their own yard.

Today I want to welcome Emily from DecorChick! Isn’t she gorgeous! But, she’s not just attractive, she is brilliant! (And fun to hang with.)

decorechick picture

Why do I think she’s brilliant? Because she has one extra special, creative brain. Just look what she made out of a little lonely drawer!

drawer candle holder

I love her home and all the changes she’s made to it. Especially her staircase makeover! I’m jealous of her staircase because, I live in a two story home, and I spend A LOT of time going up and down the stairs. Every step I take on the stained carpet stairs with an ugly banister and spindles makes me long to live in Texas in Emily’s home. I have been wanting to give our staircase a makeover since we moved in. Sadly, I haven’t started it yet. But, I know when I do I will be more in love with my home because of it.

Emily has agreed to share her staircase moulding tutorial with you today. So, please give her a big welcoming hug.

Heeeeeeeeeeeres, Emily:

Hi everyone, I’m Emily from Decorchick. I’m so happy to be posting on Brittany’s blog today. I’ve always been a fan of Brittany and her blog, and I was fortunate and got to hang out with her at Blissdom and it was so much fun. Brittany is such a sweetheart, but I know you all know that already. 🙂

I finished a big project (with the help of my Dad) and transformed our staircase wall with lots of moulding. I couldn’t be happier with the results and I will be showing you the makeover today.

So, let’s take a look at the before photos.

staircase makeover before
staircase makeover

And now….the after!

staircase makeover after
staircase makeover after paneling

Ahhh, don’t you love wainscoting??

I was actually smart for once and painted the wall white before we added any boxes. I know, can you believe it? I actually followed my own advice. 🙂

staircase makeover painting

When you are trying to do wainscoting up a staircase, you are going to have odd angles and cuts. But this new little gadget my Dad introduced me to is so cool. You just set it on your angle, say for instance our staircase banister, and it tells you exactly what angle it’s sitting at.

staircase makeover tools
staircase makeover protractor

Pretty neat right? Oh, and those are my Dad’s hands. I don’t have man-hands and hairy wrists.

The angle of my staircase is 37 degrees, so the cuts were all made to compliment that.

For the moulding, I chose to use the foam stuff again. The pieces I bought were 7ft in length and cost $2.38 for each piece. I ended up buying 27 pieces. So that is $64.26 just for the moulding for the stair boxes.

First thing we did was cut all of the pieces for all 21 boxes.

staircase makeover supplies

Then we used this make-shift template so we could glue each piece together at the right angle, and on a flat surface.

staircase makeover angle cut

We glued 2 pieces at a time with hot glue, and let them cool.

Some pieces cooling…

staircase makeover glued pieces
staircase makeover resting supplies

And then we would glue a box together.

staircase makeover glued panels

And eventually got all of these.

staircase makeover finished panels

Then we put up the frames temporarily with double-sided tape to get the spacing correct, nailed them in with a nail gun, and added the chair rail. The rail is not an actual “chair rail” but is window casing trim. It is decorative like a chair rail and has a nice ledge to it.

staircase makeover panels installed
staircase makeover panel install

Then came a LOT of caulking and spackling of all of the boxes and chair rail, more painting, and then done! And please, if you need to cover nail holes, use spackle and not caulking. I already knew this but for some dumb reason I used caulk and ended up redoing it with spackle. Caulk does not sand well and it gets rubbery. With spackle, it sands down nicely and you can’t even see the holes. Just my little tip!

I’ll just show you all more after photos because I know that’s what you really care about. 🙂

staircase makeover finished
staircase makeover painted
staircase makeover decor
staircase makeover finished decor
staircase makeover panel closeup
staircase makeover finished diy project
staircase makeover project
staircase makeover diy

And here are a couple of night shots. P.S.- the sconces have flameless candles in them and they are on a timer, so they come on at the same time every day and stay on for 5 hours and turn off.

staircase makeover candles
staircase makeover candle decor
staircase makeover lighting
staircase makeover light decor
staircase makeover evening decor
staircase makeover

So what do you think? I think this is one of, if not, my favorite transformation so far. I think I always say that though. 🙂 This wall was always a challenge to decorate, so that’s why it’s been empty for 2 years now. I think having the wall more as an architectural feature was the way to go.

To see how the design of the staircase came about, you can read about that here. To see a more detailed how-to of the moulding boxes you can read that here.

Source list:

  • Starburst Mirror – Pier 1 for $69 (was on sale over half off! The original price was $149)
  • Candle Sconces – Hobby Lobby $30 each (with half off)
  • Flameless candles – Pier 1. I already had these candles but had to buy one more for about $14. Pier 1 flameless candles are my favorite because they glow from the bottom up, instead of just the top like a lot of others do.

Materials – $64.26 for moulding boxes, and approximately $20 for the chair rail.

Wall color – Baguette from Sherwin Williams — (But it’s soon changing to a different color)

I hope you enjoyed my staircase makeover, and thank you so much for having me Brittany!

Thanks Emily! I appreciate that you shared your tutorial with us. What do you guys think? Pretty fab, huh?! Well, you haven’t seen nothin’ yet.

Checkout her fabulous pantry! Seriously, I love her pantry (and her Dad who helped her build the custom carousels for her pantry. DecorChick Dad, can you adopt me please!!!)

See for yourself:

diy pantry makeover project
Pantry Makeover HERE.

I hope you will hop over to her blog and tell her I sent you. Enjoy your visit!

Stay tuned, we have a few more guest posters helping me with “Falling in Love with Your Home” February!

Earlier in the “Falling in Love with Your Home”series, we talked about increasing natural light. Today I will be expanding on the topic, but this time I’m talking about the man-made type of lighting!

As I mentioned in my previous post, in the quest to fall in love with our home, we have painted almost every room in our home, but I have also replaced almost all of the light fixtures as well!

There is no excuse for putting up with dated, dim, or just plain ugly light fixtures! (Although, I will accept “but, I have 25 foot ceilings” as an excuse.)

I know that sounds like it would cost a fortune, but honestly the average cost I’ve paid per light fixture is $30. I’ve paid as little as $5 and at most I paid $125 for the drum shade pendant in my office.

My sources for lighting are: Craig’s List, Habitat ReStore, Overstock.com, eBay and friends! A new source you might also try is DiggersList.com, it is kind of like a Craig’s List for building supplies.

One day’s haul from the Habitat ReStore!
$20 Semi-flush light fixture from Craig’s List.

And, you do not to spend money hiring an electrician. Removing and rewiring a light fixture should not stop you “Dead in Your Tracks.” Sorry, bad pun, I know. But, seriously, it isn’t rocket science. As long as you are safe and Turn Off the power (flip the circuit breaker) that your fixture is on, you should be able to replace your own light fixture.

Here is a good instructional video for replacing a ceiling light fixture:


Note: They mention you will need a helper in the video. I’ve only needed help when removing a heavy fixture (for example a ceiling fan.)

Still a little scared? Well, think of it this way, all you are doing is unscrewing screws, paying attention to how the light that you are removing is installed. Then repeat the same set up when installing the new. Easy peasy. Oh, and I don’t use the circuit tester (although I should). I turn the light on before I flip the circuit breaker. That way I can see when it is off.

To view another tutorial from Pretty Handy Girl for replacing wall mounted fixtures, CLICK HERE.

Now let the lighting parade begin:

In our foyer I wanted an open glass hanging fixture to light up the small space.

Before: Foyer Brass Light

But, I hated the brass light so much that I settled on a Costco semi-flush light that I paid $45 for.

Interim Foyer Light

Little did I know that I would find the perfect fixture a year later at our Habitat ReStore. A little Oil Rubbed Bronze spray paint and I was in love with my new foyer light.

$10 Spray-painted Habitat Light Fixture. Tutorial HERE

We have all seen the hideous Hollywood style strip lights in a bathroom. That is exactly what we had in our master bathroom. I ended up finding this temporary fixture on Craig’s List.

Brushed Nickel wall mounted sconce from Craig’s List.

You have to love to hate this dated 1970’s fixture. Antique Brass and globes as big as duckpin bowling balls make for an interesting bathroom fixture.

An inexpensive wall mounted light fixture from Lowe’s really brought this bathroom into this decade (not to mention some paint and other updates. Details HERE.)
This shiny brass chandelier was the last of our light fixtures to be converted. I knew what I wanted here, but couldn’t find an affordable black chandelier.
Before: Dining Room Shiny Brass Chandelier
As luck would have it, I saw this baby hanging from a friend’s ceiling and remarked how much I liked it. Right there and then he told me I could have it. I’m only kicking myself for not installing it months sooner!
After: Black Chandelier
(FREE because it wasn’t a friend’s style! I know – seriously – don’t hate me.
Because I would if your friend gave it to you for free!)

When we moved into our home, the light fixture over the kitchen table was a dim 60 watt bulb fixture that really left me craving more light.

Before: Kitchen Brass & Glass Pendant Light

Okay, I really hesitated to post this next picture, but I refuse to hide any of my flaws from y’all. Well okay, maybe just a few.

I bought this light fixture off of Craig’s List hoping to improve the light on our table. BIG MISTAKE! It was such a harsh and direct light that I turned around and sold it a month later.

Interim Light: Modern Glass & Brushed Nickel.
“Ummm, Mr. Spielberg, I have something you might be interested to see in my kitchen.”
WHAT WAS I THINKING?

A few keystrokes on the keyboard brought me to this little gem for our kitchen. I just love the quaintness of this light fixture that I found on Overstock.com. Small, whimsical, yet not too cutesy. To center the chandelier over our kitchen table, I installed a ceiling toggle style hook and sewed a swag cover to hide the chain.

After: Rustic Bronze and Silver Leaf Chandelier $65 from Overstock.com

Chandeliers aren’t just for your dining areas. I’ve seen them in laundry rooms, bedrooms, and even mudrooms!

Black iron & rope 3-arm Chandelier.
Renee’s $10 Habitat ReStore light that we installed in her mudroom.

Don’t neglect your exterior lighting. These wall mounted lights were so small and looked very weathered.

Before: Dirty Brass & Shiny Black Exterior Lights

I finally found some beautiful old world lanterns at Lowe’s for $24 each! SCORE!

After: Copper Wall Mounted Exterior Lights. Installation Tutorial HERE.

Light fixtures don’t have to be hard wired. Some ambient lighting in our home comes from plug-in style lighting. Like these pendant lamps I made from minnow (fish) traps:

They started life as a $5 fisherman’s trap.
And now they have a new life on our screened porch.
$3 Thrift Store Lantern retrofitted with a plug in light kit.
Perfect for reading stories in Pretty Handsome Son #1’s bed.

I saved my favorite light for last. This star light hangs in our upstair’s hallway. The light is on a timer and gives off just enough illumnation for our little late night sleepwalkers.
Paper star light plugs into nearby outlet and is set on a timer.

So how about your home? Do you have any light fixtures you detest? Have you scoured Craig’s List? Be sure to check weekly for new postings.

No truer words have ever been spoken. I LOVE PAINT! I will always profess my undying love to this amazing mood changer! In the course of over three years (the time we’ve owned our house), we have repainted almost every room in our home. Each room must convey a single emotion when we enter.

Kitchen = Sunny
Living Room = Cozy
Our Bedroom = Relaxing
Office = Calm
Mudroom = Inviting
Laundry Room = Fresh

Being an artist makes me a bit of a perfectionist when it comes to color.

I’d love to share some of my tips for picking out the perfect paint colors. Hopefully this will protect you from making a bad decision. But, rest assured that if you really don’t LOVE the color after you have painted one wall, you can take your paint back to the store and ask the “paint guy” to tweak the color for you. Or worst case scenario, you have to buy a new gallon. (Well, okay, that can get expensive.)

But, if you find a color you truly “LOVE”, it will translate into loving your home. So worth it in my book!


Before I paint any room, I go to several paint departments and gather several color chips that appeal to me. The colors that I REALLY think I’m going to like, I will grab a few extra chips of (shhhh, don’t rat me out for stealing paint chips.)

When I get home, I tuck the chips behind the switch plate cover, in the molding, or tape them on several different walls in the room. It is important to place the chips next to your trim moulding so you can see if the color will work well next to it.

After looking at the chips for at least a week during different times of day and different lighting (sunny or cloudy days) I am usually able to narrow down my choices to 2 or 3 choices.

Next I run back to the paint department and buy or have samples mixed up of the colors I like. Because I am a “work until I get it done” type person, I go ahead and paint big swatches on the wall next to the moulding on all four walls.  This is important because a color that looks good on your sunny wall may not look so good on a shady wall. And you need to see the colors and how they coordinate with the wall color in an adjoining room. If you aren’t quite ready to commit to painting your wall, go ahead and buy some poster boards and paint the swatches on the poster board and hang or prop them up in your room.

A few things to keep in mind while you are looking at a color. Just be aware that the color may change as the seasons change. Winter yields brighter and cooler colored light in our home because the trees are bare. In the summer, our light changes to a greener cast and less harsh lighting as the trees fill out with leaves. I can tell you right now, that I wait for summer to roll around before choosing any colors in the green or yellow family. I need to make sure they look good with the light reflecting off the leaves and into the room.

If you are still having trouble choosing a color, invite a friend over who will give you their HONEST opinion.

If you STILL can’t decide, never fear – Pretty Handy Girl is here! “Here I come to save your color dilemma!”

Introducing Paint Preview:

Some of us are visual people, we REALLY need to see the room painted before we know what a color is going to look like up on all four walls. A special thanks to Emily at Decor Chick for testing my new venture last week. I’m calling it Paint Preview. Thanks to the wonder of technology, I can now virtually paint any room in your home or the exterior of your home! Save yourself time and money by previewing your painting project before the first drop cloth is laid.

Emily’s Living Room Before – SW Baguette
Emily’s Living Room Paint Previewed – SW Anew Gray

Want more information about Paint Preview? CLICK HERE TO LEARN MORE.

Until then, I’m thinking about repainting our garage doors and adding grills to them. What do you think?

Our Home Before
Our Garage Paint Previewed