Me and My Little Sister Caitlin
I just got back from surprising my little sister, Caitlin in San Jose, CA. My sister’s husband, Ryan, and I conspired to give her a real treat for her birthday. She was really sad when she couldn’t make it to my 40th birthday party. And she has been lamenting the fact that it was taking too long to get her 3 yr. old daughter’s room big-ified (insert big girl furniture and pull out the baby furniture for when their new baby arrives.) One of the projects that was holding them up was painting an estate sale bed frame. Ryan had sanded it, primed it, and then ran into problems while painting it. It was killing me that I couldn’t be there to help them. With over 3,000 miles between us, it was difficult to help only over the phone.
But, with some frequent flier miles and a few secret phone conversations with Ryan, a plan was hatched. I was to fly out to California and give her a grand birthday surprise.

View over San Jose, CA from the Airplane
The ruse was perfectly planned and timed. Ryan told Caitlin that he was going to the hardware store to pick up some things to finish the bed painting project that had gone awry. Meanwhile, he was actually picking me up from the airport. Upon arriving home, he told her, “Honey, I got everything I need to finish painting our daughter’s bed.” And then I rounded the corner. The look on her face was PRICELESS! You can watch the short video of her reaction if you want.
Caitlin’s Surprise from Brittany aka Pretty Handy Girl on Vimeo.
Ryan and I got busy working on repainting the bed the next day. Here is what had stalled the project:

The paint Ryan had used was Ben by Benjamin Moore. And it was bubbling and gumming up. It wasn’t until I started stirring up the paint can and pulled out a big wad of gummy paint at the bottom that we realized he had a bum can of paint.

The date on the can was almost a year old. Now, Benjamin Moore assured me that it still should have been okay if it had been stored properly. But, for whatever reason, it just gummed up on us.
We returned it to the Ace Hardware near their home. And they kindly upgraded our paint to Benjamin Moore Regal which boasts a paint and primer in one can.

The paint was better, no bubbles or bumps, however, we were still having issues with the paint drying very fast. I have to tell you that I’ve painted in heat before. But, we were having a very hard time painting that day. I’d brush on the paint, and could only brush through it one or two more times before it started to dry! CRAZY! I couldn’t understand what was going on. So, I contacted a few experts:
1. Diagnosis by Benjamin Moore Paint expert (I called their 1-800 number). The Benjamin Moore Regal line is good paint, but it dries much faster than the Impervo (that I am used to using.) The other possibility for the fast drying time is the weather conditions. This makes sense because it was 96F in San Jose, but it was dry. Any paint would have dried faster that day as we slaved away in the garage. In NC, when the temperature reaches above 90F, it is icky, sticky, and muggy humid! You are lucky if your paint dries after 24 hours!
2. Diagnosis by Kate from Centsational Girl (a CA native blogger and furniture painting expert)- I figured she’d be a good resource for advice on painting in the CA dry heat. So I sent her a quick message asking for her help. She replied that I should look into buying some Floetrol to extend the paint and dry it slower. Thanks Kate for your quick reply!
We ended up moving our painting operation inside and that helped a lot. We didn’t buy the Floetrol, but I figured it might help y’all in the dry environments to know about it.
One other issue I had with the Regal Select was that there were a few spots on the furniture that we had sanded a little more thoroughly (through the separate coat of primer that was applied), and the stain or underlying paint kept coming back through the paint. I have to say, I am not exactly thrilled with the Regal “Paint + primer” in one. I suggest that you save yourself the headache and prime with a primer before you paint. Don’t try to cut corners.
Here are my lessons learned on this project:
- Check your new paint can carefully, if when mixing it creates a gummy blob at the end of your mixer, return it immediately!
- Use high quality paint to save you headaches and hassle. If we had driven the few extra miles to the Benjamin Moore store to buy Impervo paint (instead of the Ace Hardware where they only carried only a few Benjamin Moore lines), we would have had better painting results.
- If you have to use paint you already have and are working in a dry region, add Floetrol to it or move indoors.
- Don’t try to eliminate steps with a paint + primer in one product. Spend the time to sand your object, prime it, and then paint at least 2 layers of paint.
The five days I was in CA flew by, but we did accomplish a lot! My little niece has a big girl bedroom now and they have moved her baby furniture into the new baby’s room.

My little niece seems to like her big girl bedroom! She loves to stand on her bed and peek out the window now.

And check out the dresser that Caitlin refinished and hand-painted herself! Reminds me of a Miss Mustard Seed original!


I think she’s pretty talented, don’t you?
We added the “You are my Sunshine” vinyl graphic to the mirror.

Caitlin also wanted a art on the wall. She picked out a graphic from Leen’s site.
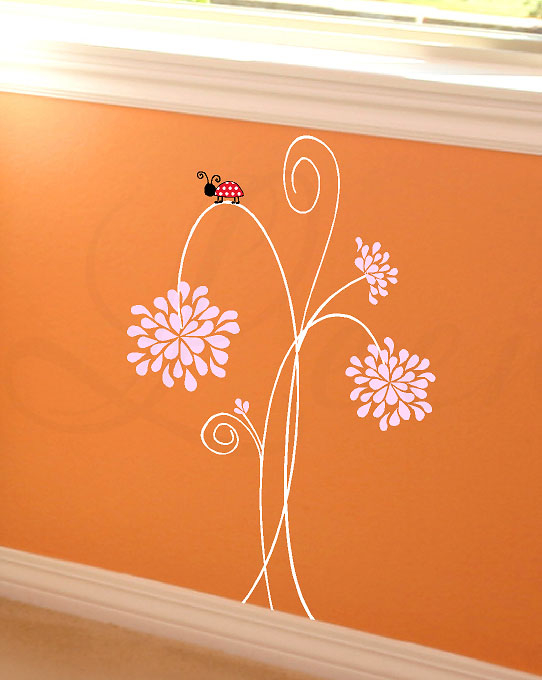
And I hand-painted a similar graphic onto the wall. After doing the dandelion mural in my bedroom, I knew this one would be a snap.


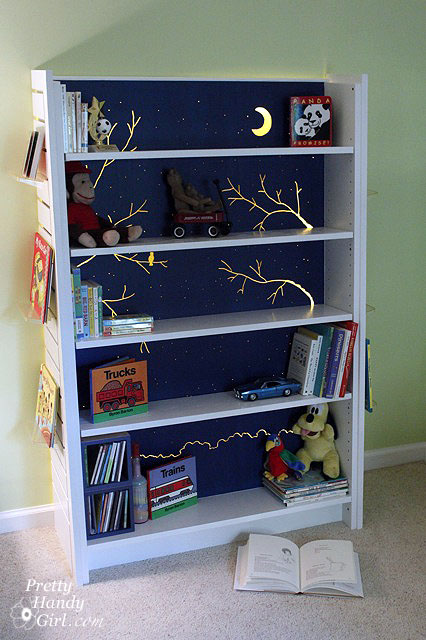
We also repainted this bookcase to match the new color scheme.


Finally, Caitlin found this tutorial written by Jen Duncan for sewing roman shades. She sewed the roman shade herself with just a few questions for me. (It was quite comical because neither one of us are strong at math.) But, we finished, and in the morning we had JUST enough time to hang it before leaving for the airport.

That little blue chair in the room was the first piece of furniture I ever painted. I painted it for Caitlin while I was in college. A long, long time ago.

Caitlin already had the curtain panels. She chose the roman shade fabric to coordinate with them. I love it!

I had so much fun surprising and helping my sister. Plus, it was fun working in and around a girly room. There is so much testosterone flying around my house (1 man + 2 boys + 1 male dog) that pink is not a color usually seen.
What do you think? Do you like my nieces’s big girl room? Have you ever surprised someone you love? I wanna hear!