Two years ago I happened upon a cute little bench being thrown out with a neighbor’s trash. (I am addicted to trashed furniture. In fact, I have a NASTY chair in my garage that needs a lot of help structurally and asthetically.)
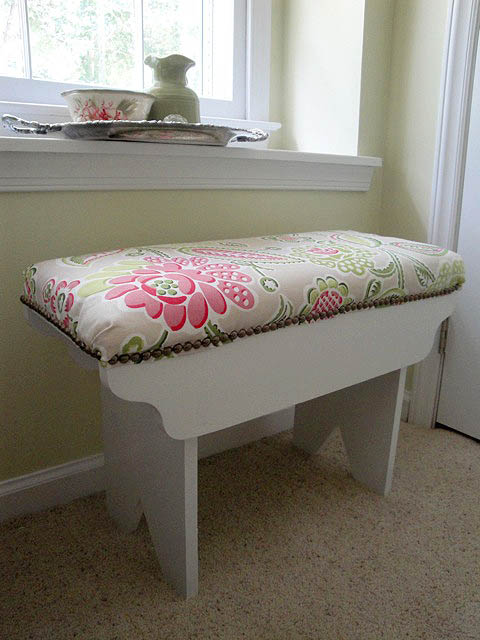
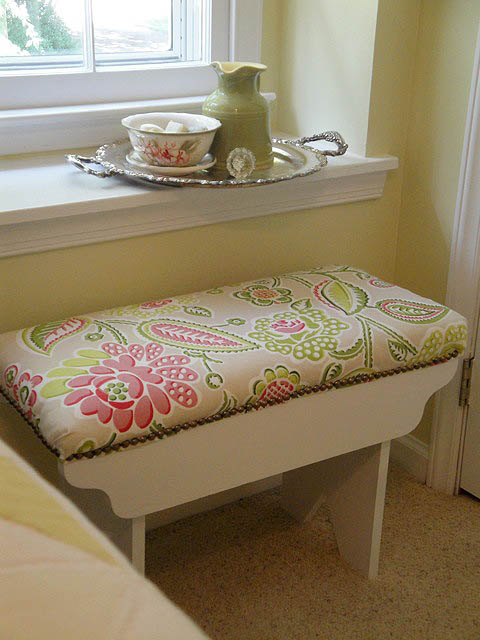
The roadside bench was painted a very blah beige color. I brought her home and gave her some decorative lines and a monogram. At the time we didn’t have anywhere to sit in our mudroom, so this little bench served the purpose well. Later I built a big mudroom hallway bench with built in shoe storage (I promise to create a tutorial for that at a later date.) So, this little bench was moved to the guest room where she sat by the window until this week.
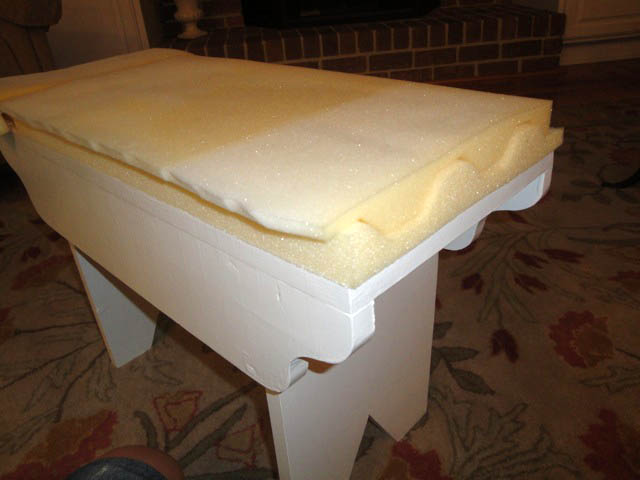
The first thing I did was give her a little rub down with some sand paper. Then I laid down 3 coats of fresh shiny white paint (leftover from trim and moulding painting).
I used some old foam I saved from our move (only 3+ years ago). This foam was the packing material used to ship ice cream cones! I received it from a nice woman off of FreeCycle.org and thought it could be used for a cushion at some point.
I cut some batting to fit over and wrap around the foam (so as to hide all the seams in the foam).
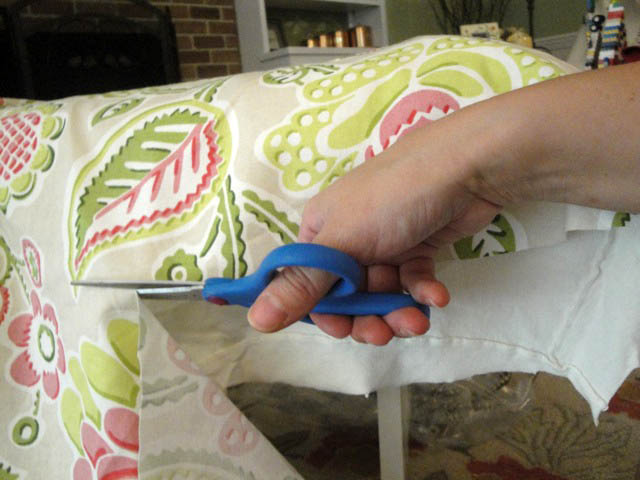
Then cut the arms off of an old t-shirt of Pretty Handsome Guys (don’t worry, he had already said goodbye to it.) And cut up the sides so I could use just the back of the shirt.
And finished off with the decorative fabric cut slightly larger than all the other layers.
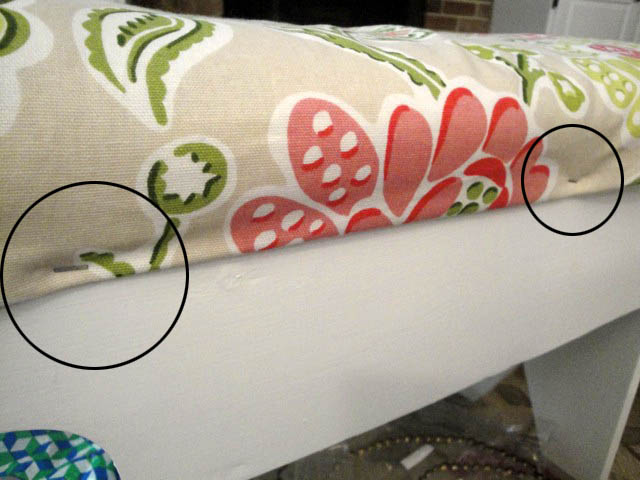
I carefully folded my decorative fabric under being sure that I had the old t-shirt hidden in the fold. And put in two staples with the staple gun to hold the fabric on the one side.
Moving over to the other side, I cut the t-shirt, batting, and decorative fabric down to size being sure to leave about an inch excess on the decorative fabric.
Then I repeated the same fold under and put in two staples.
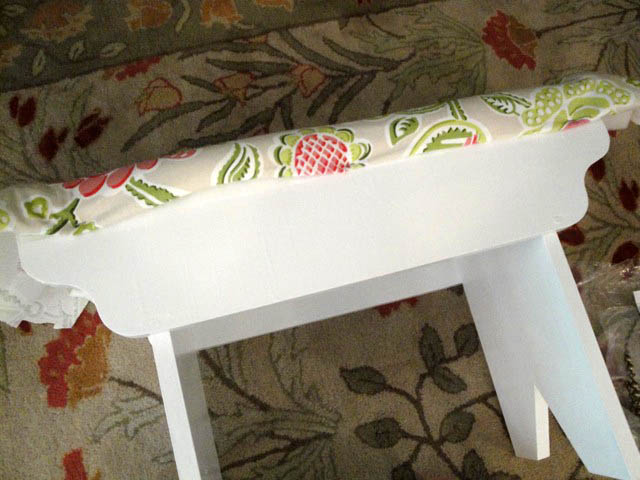
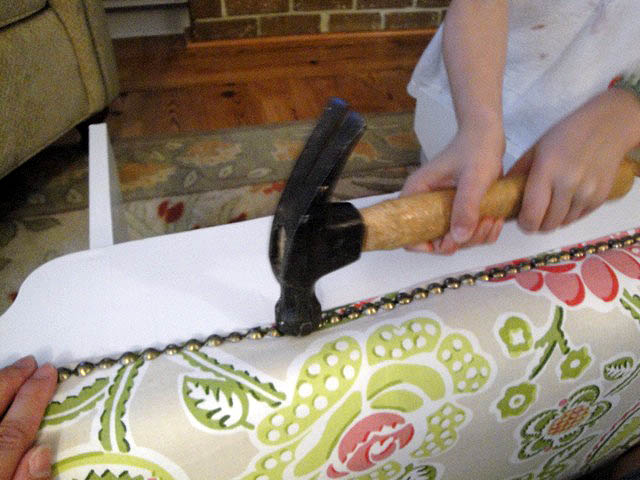
Now for the bling! I had plenty of leftover nailhead trim from this project (check that link out if you need a better tutorial on adding nailhead trim.) I began at the corner of the front of my bench and added the starter nail.
At this point my 6 yr. old had come over to my side telling me how bored he was and, “What can I do now?” I asked if he wanted to help me hammer. Once I started each nail, he was able to hammer it into the nailhead trim for me. (I did have to finish a few off myself.) We worked together adding the nailhead trim to the front and back of the bench.
Before adding the trim to the sides I neatly folded and tucked under all the layers (cutting excess off when necessary.) Until it looked like this. Then I added the trim on top to hold the fabric in place.
https://prettyhandygirl.com/wp-content/uploads/2021/07/PHG-logo-tagline-2020-1030x211-R.jpg00Brittany Baileyhttps://prettyhandygirl.com/wp-content/uploads/2021/07/PHG-logo-tagline-2020-1030x211-R.jpgBrittany Bailey2010-07-20 10:50:002010-07-20 10:50:00Upholstering Little Bench – A sweet spot to land
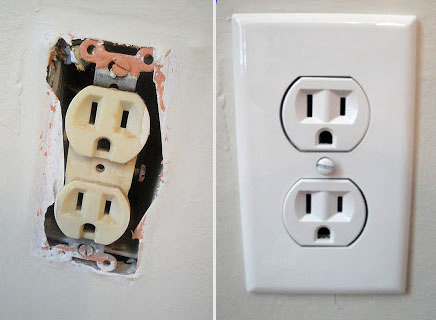
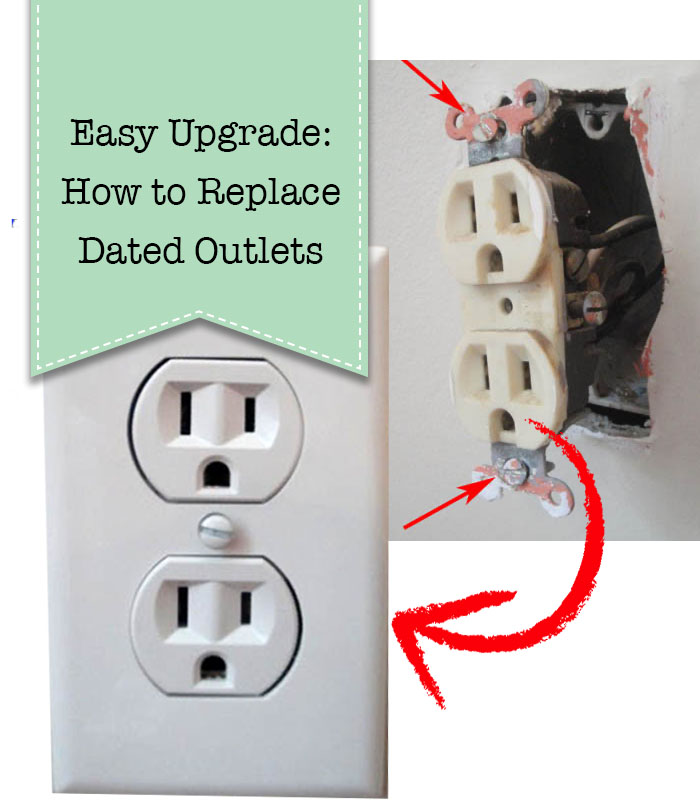
So, this is one of those not so pretty posts, but I promise it is Oh So Handy! Learn how to easily change out an old outlet.
Changing Out an Old (UGLY) Outlet
Our home was built in 1978 and most of our outlets are almond colored and many are so worn that they won’t hold a plug anymore. I used to get annoyed EVERY TIME I vacuumed downstairs and turned the corner only to have the vacuum plug slip from the outlet. Not only is this frustrating, but it is also a fire hazard. Old outlets should be replaced for safety reasons (but, hey, I’m okay if you just want to change them to a pretty white outlet.). Changing Out an Old Outlet is easy!
I distinctly remember my father showing me how to wire an outlet when I was about eight years old. I didn’t remember exactly what he taught me, but I do remember the feeling that – yes, I can do this myself! Being the father of three girls, Dad taught us all the things he would have taught a son. This is a picture of my Dad, my sisters and me teaching him all we knew about bows, barrettes and bobby pins.
I know several of you would never think of taking apart your outlet. You might say electricity scares you. Well, that is a good thing! A healthy fear of electricity will make you more cautious, so don’t lose that fear. It is a good thing to double and triple check your safety when working with electricity. Now, are you ready to update your outlets? Changing Out an Old Outlet is a relatively easy task to do. And, I promise I will show you step-by-step instructions.
I highly recommend performing outlet replacements during daylight hours (or have a lamp that you can plug into an extension cord from another room.) Also, don’t let your little ones watch you, we don’t want them to stick a screwdriver in the outlet when you aren’t looking. Therefore, it is best to handle this fix during nap times.
Materials needed:
(I’ve included affiliate links for your convenience. I earn a small percentage from a purchase using these links. There is no additional cost to you. You can read more about affiliate links here.)
* It is safest to work with tools that have rubber or plastic handles that won’t conduct electricity.
Optional tools:
vacuum to clean out the receptacle box (there will be dirt and dust in there and this may be the only opportunity you will have to clean it!)
cushion to sit on
power drill with screwdriver bits to speed up the process
Required Safety Instruction:
Turn off the power to the outlet you are working on. I highly recommend putting a night light or light in the outlet and turn it on. Then shut off the circuit at your circuit breaker and check to see that the light has gone out.
Also note that just because two outlets are in the same room, it doesn’t necessarily mean that they are on the same circuit. Plus, it is possible for the top and bottom of one outlet to be on separate circuits. Always check both the top and bottom of an outlet before you work on it.
Instructions:
Okay, let’s begin. Take a deep breath and realize that if an 8 yr. old can do it, so can you!
1. First, turn off your power, double check both outlets with your light to make sure the power is out to both top and bottom outlets.
2. Then take out your voltage tester. Insert a probe into each of the top two holes. If the tester lights up, you need to back up and turn off the power to the outlet! If it doesn’t light up, then check the bottom outlet as well. Still no light? Perfect, the power is off to your outlet.
3. If you haven’t done so already, remove the face plate from your outlet by unscrewing the middle screw.
4. Unscrew the two mounting screws as shown below.
5. Gently pull the outlet out of the receptacle box. Inspect the outlet and see if you have the same amp replacement outlet. (Usually there are marking denoting 15A 125V or 20A 120V on the silver tabs, on the back or near the screw hole in the middle of the outlet.)
6. Note which wires are attached to the outlet and where. Then make a drawing if you need to of their position. Or work by transferring one wire at a time.
7. If the wires are wrapped around screws (lucky you), unscrew your wires and skip to step 10. If your wires are poked into holes in the back of the outlet, you may choose to try to release them by poking a flat head screwdriver into the slot next to the wire, or you will need to cut the wires as close to the outlet as possible.
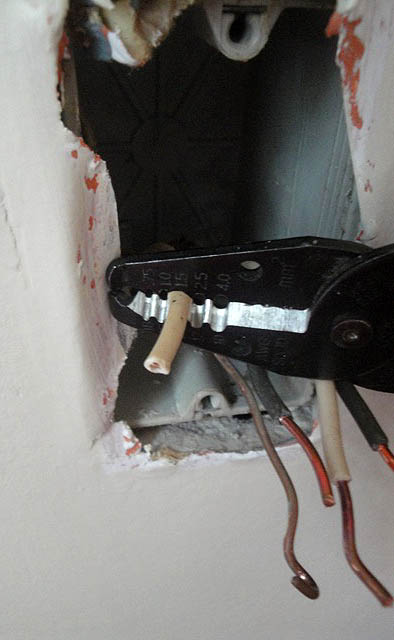
8. Now strip about 1/4 inch of the insulation from the end of your wire.Then gently use your wire strippers to clamp down on the wire being sure it is scoring the insulation. If you need to, rotate your wire strippers 90 degrees and cut through the insulation again. then while the strippers are still around the wire, pull gently towards the end of the wire to remove the cut insulation.
9. Next take your needle nosed pliers and grasp the end of your wire and twist the end to make a shepherds hook shape. Do this for all your remaining wires.
10. Looking at the back of your new outlet, you will see that one side has silver screws and/or markings on the back that says white wire. The other side of the outlet should have gold screws and/or markings indicating hot wires (the black wires). And one screw towards the bottom that is green, this screw is for your bare or ground wire.
11. Hook each of your wires around the appropriate screw (Gold Screws = Black wires; Silver screws = White wires; Green screw = bare or green wire).
12. Further, using your needle nosed pliers, pinch your wires tightly around the screws attempting to close the loop.
13. After that tighten each screw being sure that the wire stays tightly wrapped around the screw.
14. If all your wires have been screwed tightly onto the outlet you can gently push your outlet back into the receptacle box. Try to rock the outlet in by alternately pushing on the top and then the bottom. If your outlet doesn’t go in, pull it out and rearrange the wires so they fold neatly behind the outlet and try again.
15. Screw in the mounting screws.
16. Finally, replace the faceplate.
Now you can turn the power back on and use a nightlight or lamp to make sure your outlet works!
Hey, you are done! Congratulations, you did it. Reach up and pat yourself on the back because I’m proud of you! Now that you know Changing Out an Old Outlet is easy as can be, I have a next level swap for you! You can use the same tutorial to install a USB Charging outlet!
Let me know how you did. Changing Out an Old Outlet was easy, wasn’t it?!
https://prettyhandygirl.com/wp-content/uploads/2010/07/old-outlet-new-outlet.jpg320436Brittany Baileyhttps://prettyhandygirl.com/wp-content/uploads/2021/07/PHG-logo-tagline-2020-1030x211-R.jpgBrittany Bailey2010-07-19 22:32:002023-01-30 19:22:56Changing Out an Old Outlet
Our office renovation is nearing completion. We’ve been working on the room for two plus months now. The majority of the work is complete, but we are waiting for two desk cabinets to come in to the Office Depot warehouse so we can actually order them. At this point I’m wondering if I should just build my own! <<Sigh>>
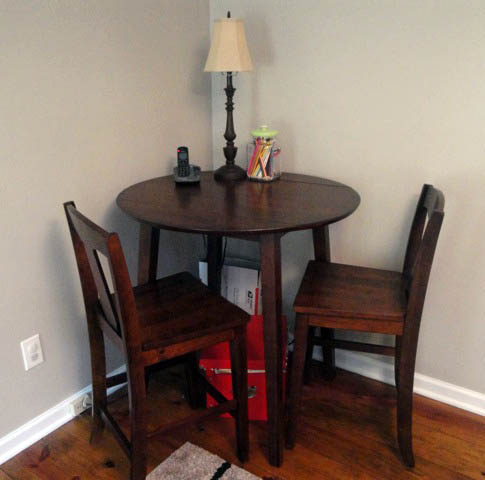
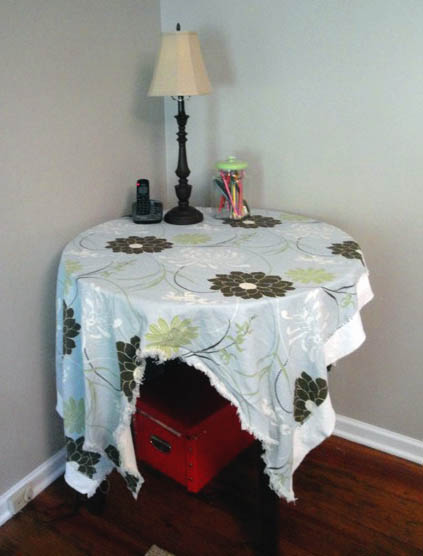
After searching for over a month on Craig’s List, I finally broke down and bought a small counter height bistro set from Big Lots for the corner of our office. We thought it would be a great place for the kids to sit and do homework. Or better yet, for Pretty Handsome Guy and I to talk and have our morning coffee!
The height and footprint is perfect, however, the dark wood (in addition to the other furniture in the room) made the room too dark for my taste. Okay – and I’m a sucker for hidden storage (need to hide that stop sign red box!) So, I came up with the idea to slipcover the table.
Then I bought two small 4′ x 5′ painter’s drop cloths for $5 each. I am seriously addicted to these must have fabrics! I already used a pair for our laundry room curtains and I bleached another one to make grain sack valances for our dining room at a later date.
So, anyone remember their geometry class? I barely remembered enough to figure out that the circumference of my 3′ diameter table is 9.42 (π x diameter or 3.14 x 3= 9.42). Therefore, two 5′ wide cloths would just cover my table!
The first thing I did was trim the fabric around the tabletop allowing a 1″ overage for seam allowance.
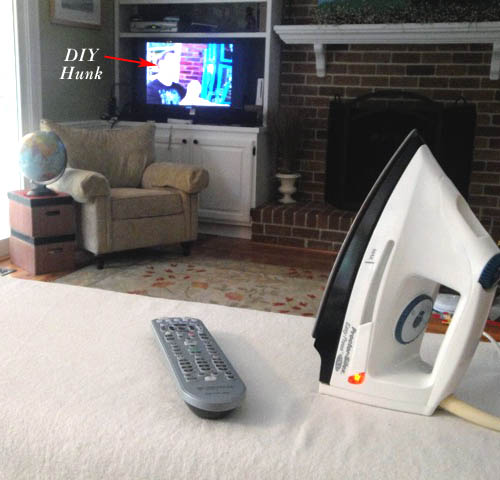
Then I ironed the drop cloths, and decorative table top fabric. I hate ironing – I hardly ever iron. Usually I’ll just spritz water on my shirts or pants in the morning and they dry wrinkle free. Or if it is really wrinkled, I will dampen my clothing and toss them in the dryer for a few minutes.
Sometimes, I just have to break out the iron. But, I found a way to make ironing enjoyable. I set up my ironing board and watched a little HGTV or DIY Network while I de-wrinkle. Nothing like a hot DIY hunk to make me all steamy. Hee, hee.
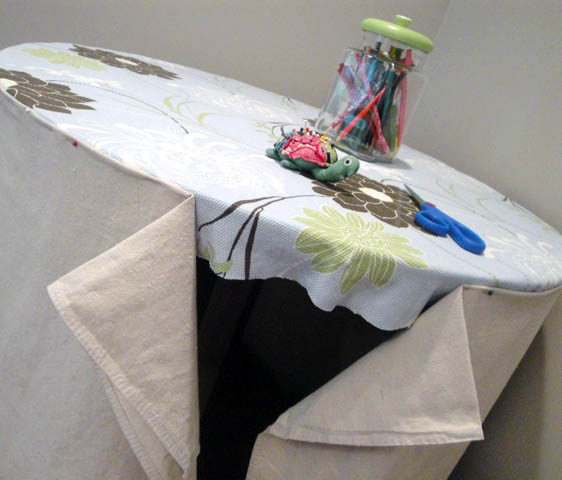
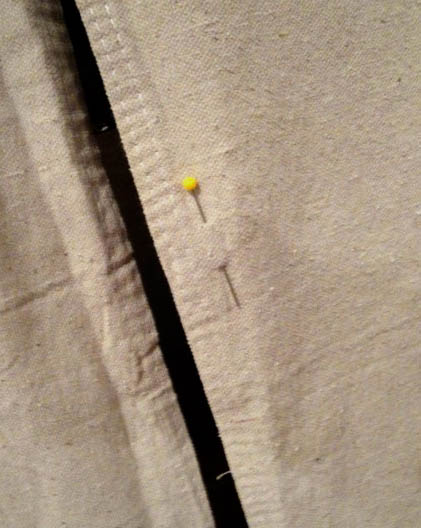
I folded the top of the drop cloths so they just meet the table top and the bottom brushes the floor (this way I won’t have to hem the bottom.) Next I pinned the 2 drop cloth pieces around the table. Being sure to use lots of pins, since sewing around a curve can have a tendency to make the fabric pucker.
Then I stitched on top of the drop cloth, as close to the edge as I could. Being careful to avoid letting the fabric pucker.
After a few trial and errors, I got a smooth line and the drop cloth edges overlapped slightly.
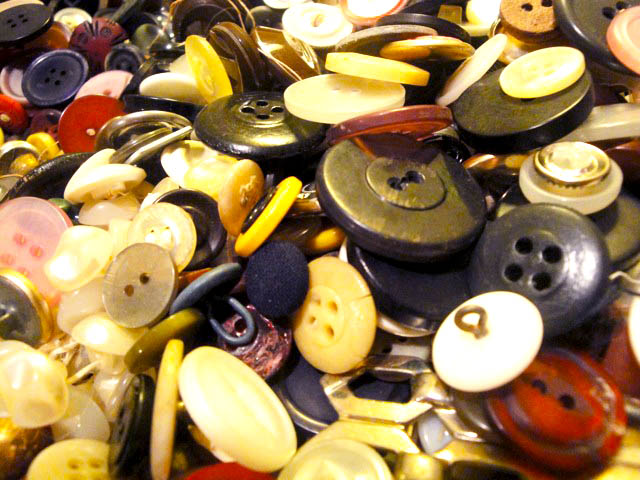
Next the fun part! Digging in my grandmother’s button tin! She passed this down to my mother and somehow it ended up in my possession. (Shhhh, don’t tell my sisters!) I love this tin. The smell I encounter when I open the tin is part metal, part perfume, and 100% nostalgia.
I remember the feeling of running my fingers through the buttons. Isn’t this the prettiest eye candy? All those colors and textures.
<<snap of the fingers>> Okay, back to the project at hand. I chose four large brown buttons. Then eye-balled them on my slipcover and put a pin where each one would be attached.
I used a disappearing pen to mark the size of the button on the side that overlaps the other.
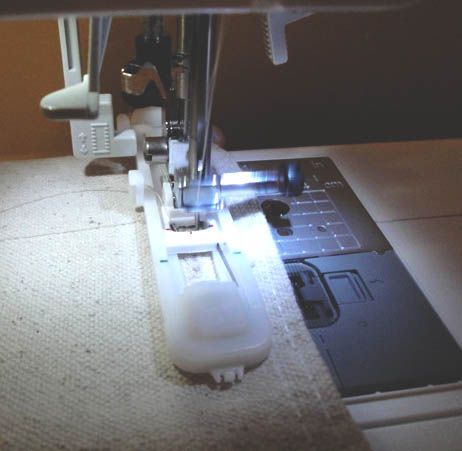
This is the first time I’ve used the buttonhole foot on my Brother CS-6000i sewing machine. (No, I’m not paid to endorse this sewing machine. I just can’t believe all the features it has for the $125 price!) I was impressed by the button holder that automatically tells the machine how big to make the hole.
The machine also has a feature where it can stitch your buttons on, but I knew it would take me longer to read and measure how to tell my machine where the holes in the buttons were. So, I sewed them on by hand.
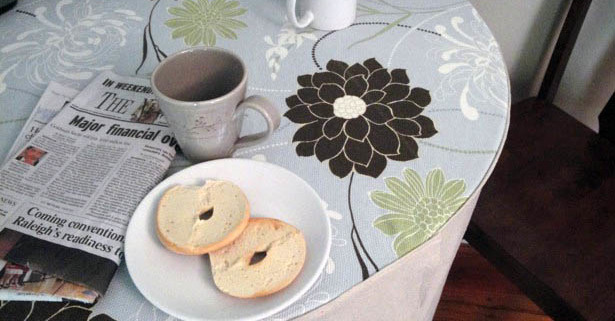
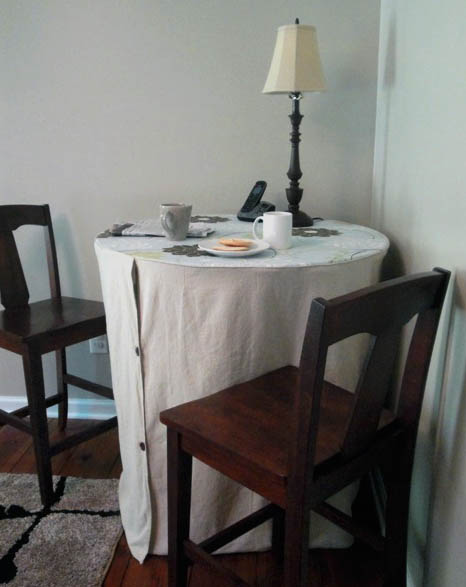
And presto, I have a pretty bistro table with storage underneath!
And, a place to have morning coffee with Pretty Handsome Guy.
And, somewhere for the kids to do homework (or brush up on reading at Starfall.com.)
Originally I thought about using it as a light in our foyer, but that plan changed after I found myself drooling over these lanterns at Pottery Barn and Restoration Hardware. I love going into PB & RH, but rarely have the nerve to plunk down the money they want to steal
claim from my wallet.
This is a relatively easy project that anyone can do! Yes, that means you.
Begin by removing the glass from the light fixture. (A note of caution: You should wear gloves. In other words, do as I say, not as I do!)
My light fixture had little metal prongs that easily bent to release the glass.
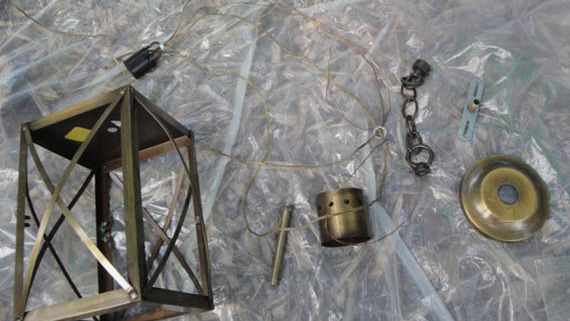
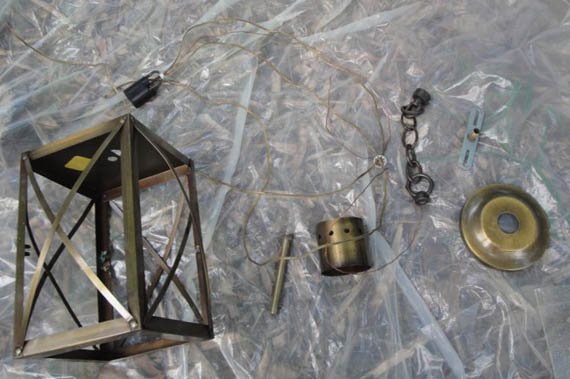
Next take apart your light fixture. Just start trying to unscrew parts. If they resist, grab your pliers.
I decided to save the wires, ceiling canopy and other wiring parts. Who knows, perhaps I will want to use it as our foyer light some day.
Okay, okay, also because I am a bit of a pack rat. I’m admitting one of my faults here: not being able to throw anything away. Don’t get me wrong, the producers of Hoarders are not knocking down my door, but I would prefer to Craig’s List, FreeCycle, reuse, or recycle anything I can’t use.
When all the parts were separated from the lamp, I needed to break the chain to the top of the light fixture. Here is an easy way to open up links in a chain that is not soldered together.
Place two screwdrivers inside the link you want to break. Lean one to the left and one to the right and apply pressure in opposite directions. The link should separate enough for you to remove the chain.
While the lantern is in pieces, you can rough up all the metal surfaces with sand paper. I actually did this to all the parts so I could paint them and potentially use them in the future. Wipe off the metal with a damp rag to remove any particles.
Now, you can re-assemble your light fixture (using only the parts you need to make your decorative lantern.)
I used brown Rustoleum spray primer. I like using a darker primer when my top coat color will be dark.
Be sure to rotate the parts and the lantern so you get all the sides coated with primer.
Now the most gratifying step, spray your lantern with your finished color. I coated the lantern with 3 light coats of a satin black spray paint to allow the lantern to look less new and more like old rustic iron.
And here is my new (old) Pottery Barn inspired lantern! $5 for the lantern + $6 for spray paint = $11
What do you think of that, Mr. Pottery Barn merchandiser who wants to charge me $59 for the same size lantern?
Update: I received several emails and comments on this lantern and a few of you have been inspired to create your own! If you post it in your blog, I’d love to share your results.
Amanda at The Hand Me Down House, shows how she painted hers. She made the glass look like colored glass with Modge Podge and food coloring! Yes, you read that right. See her tutorial here.
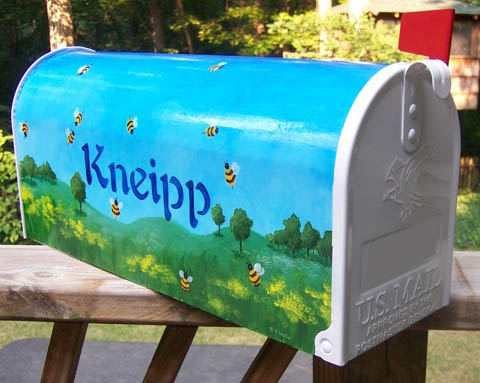
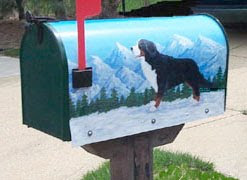
Several years ago I painted a mailbox for my stepmom (the wonderfully talented author, Diane Chamberlain). Her house was on a busy street and the mailboxes on this street were a prime target for mailbox baseball. I wanted to paint her mailbox as a surprise for her birthday, but the thought of spending hours painting the mailbox only to have it bashed did not appeal to me. Plus, this was supposed to be a surprise, and she might notice if her mailbox was gone for a few days (you think?!)
I came up with a solution that worked brilliantly! I painted the design onto automobile magnetic sign material (purchased from a sign shop for about $20). Wrapped it around her metal (won’t work on plastic mailboxes) mailbox and drilled the mounting screws through the magnetic material and the mailbox.
Believe it or not, that mailbox never took a hit by a bat (to my knowledge).
Here is how I did it:
First I wrapped the magnetic around her mailbox and cut it down to size. Then I traced the locations that needed to be cut out (bottom door hinges and flag bracket). The magnetic material cuts very easily with an x-acto knife or utility knife. Read more
https://prettyhandygirl.com/wp-content/uploads/2010/07/sideviewday.jpg383480Brittany Baileyhttps://prettyhandygirl.com/wp-content/uploads/2021/07/PHG-logo-tagline-2020-1030x211-R.jpgBrittany Bailey2010-07-08 22:49:002021-08-30 17:26:28A Mailbox that Can Take a Beating and Still Looks Great