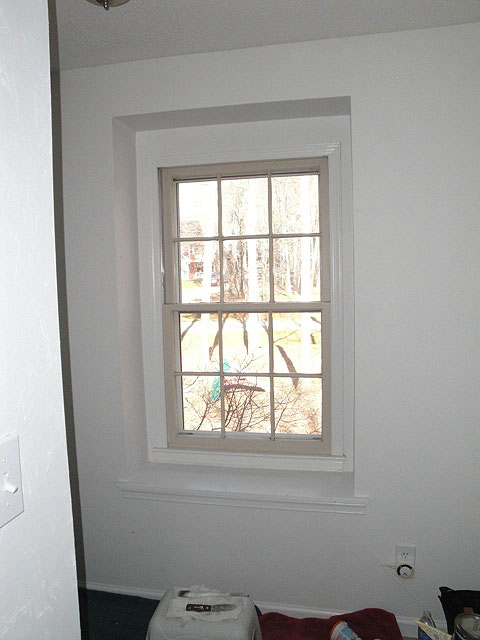
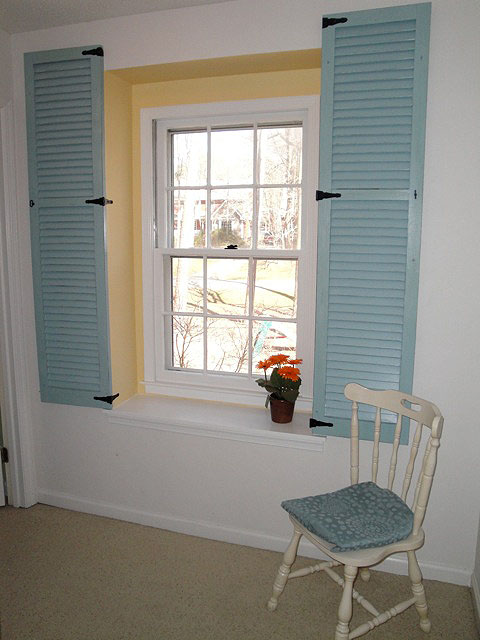
I love the little recessed ledges inside each dormer. But, the window in our hallway always looked so sad.
Then one day it hit me! This poor window has been neglected and has no character, jewelry or bling! For whatever reason (maybe because I was sleep deprived?) it took me a year to realize that the window itself had not been painted white like the other windows in our home.
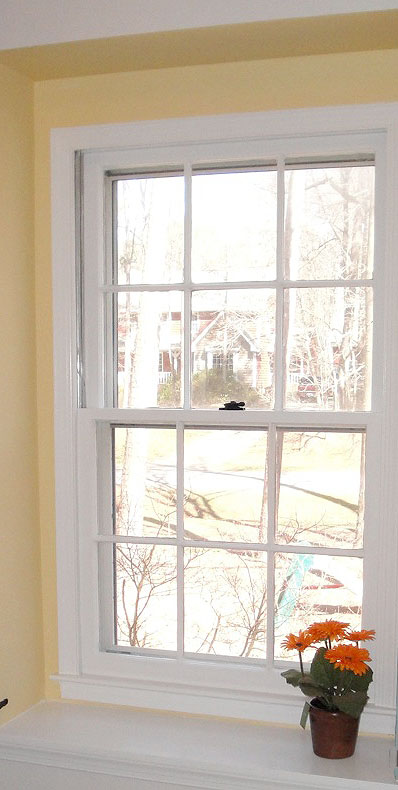
The first thing I did was grab a paint brush and paint the muntin bars (or grille), the bars that separate and hold the panes of glass. Don’t say I never taught you anything on this blog! Want to learn more about the anatomy of a window? Look on Pella’s website.
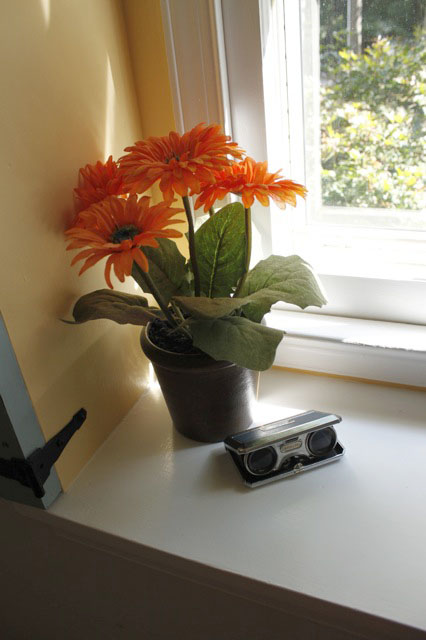
It looked better, but there was too much white, so I painted the recessed area a sunny yellow.
Wow, that looks better! But, the window still looked a little stark. That lonely plant just wasn’t pulling its own decorative weight.
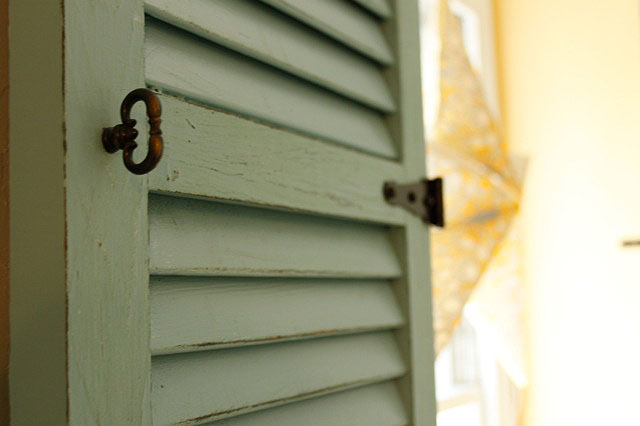
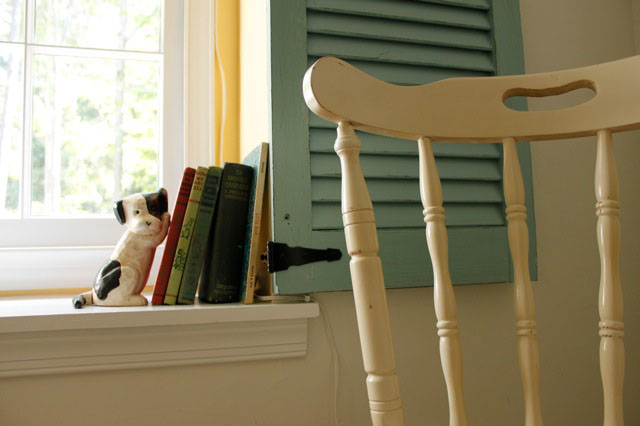
So, I ran up to the attic where all the original shutters from our home are stored. I pulled two out of the attic and painted them with a pretty aqua blue oops paint.
Next, I took a sand paper and roughed up the edges and distressed them until you could see the dark green peeking through.
I bought four gate hinges at Lowe’s and mounted them on the bottom and middle rails. I knew that there were studs on the edges of the window well, so I drove my screws into those corner studs.
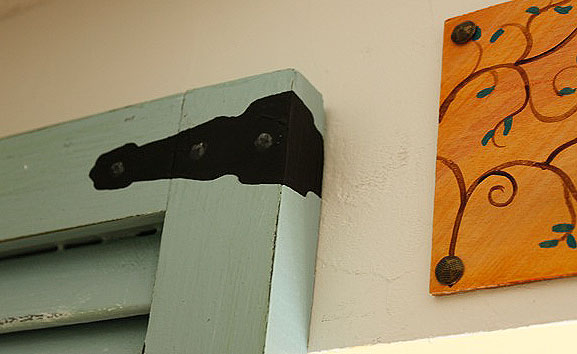
The tops of the shutters protruded over the window well, so I couldn’t use a gate hinge there. I painted a faux hinge on the shutters instead.
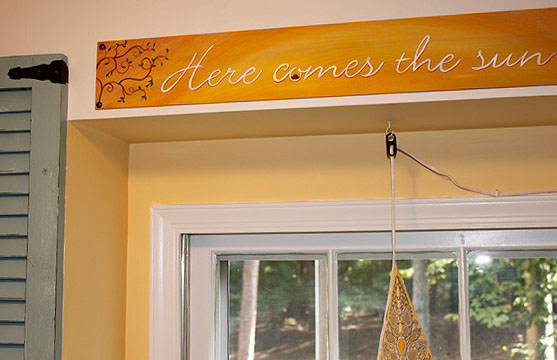
I also painted a little sign over the dormer to fill up the visual blank space between the tops of the shutters. The board was just piece of scrap cabinet toe kick. And, yes, those are simple upholstery tacks holding it to the wall.
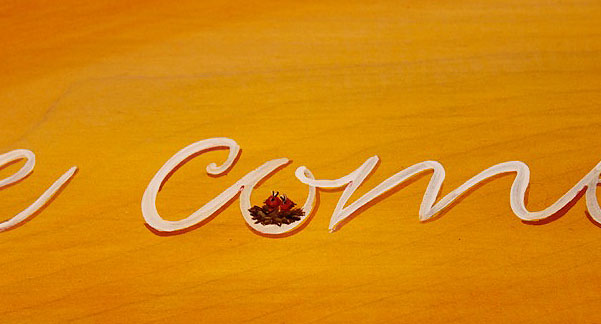
To create this little sign, I found a font I liked, then typed out the phrase on the computer. I was able to tile two sheets together to span the width of the board. I rubbed pencil on the backside of my paper. Then traced the letters on the front of the paper. By pushing hard with the pencil, my type was transferred on the wood. This allowed me to paint over the pencil marked letters: “Here Comes the Sun…” one of my favorite Beatles songs.
Sweet little birds waking up in their nest.
I dressed up the shutters by adding little keyhole drawer pulls.
I accessorized and put a little $5 Goodwill chair in the corner.
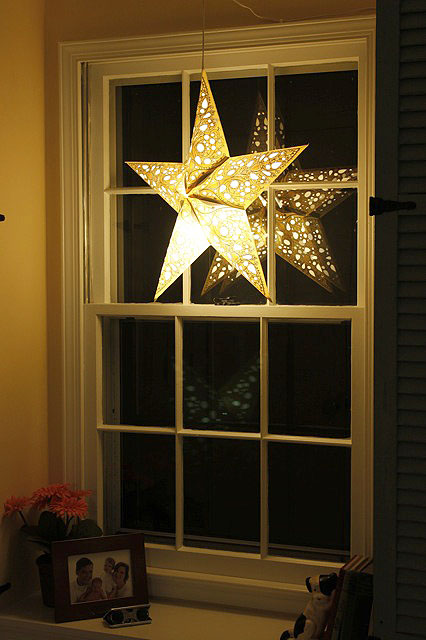
Around Christmas time I hung the star light for decoration, but it puts off the perfect amount of light for those darn night wakers. (Anyone else have those in your home?) So, it now hangs year round.
I think this window is very happy now!
What do you think? Does it need anything else? Maybe paint the chair or distress it? Or maybe that chair just needs a colorful cushion.
https://prettyhandygirl.com/wp-content/uploads/2010/09/keypull.jpg426640Brittany Baileyhttps://prettyhandygirl.com/wp-content/uploads/2021/07/PHG-logo-tagline-2020-1030x211-R.jpgBrittany Bailey2010-09-18 17:07:002021-08-23 19:19:07Dressing Up a Dormer Window with Shutters
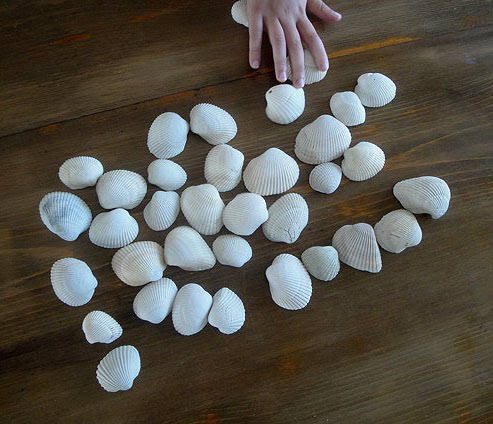
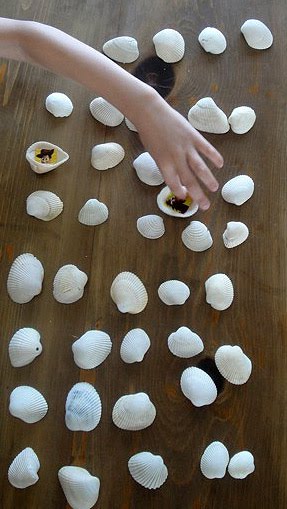
Oh so sad that summer is over. If you were fortunate to get some time at the beach, you may have come home with a few dozen of these:
Especially if you have little children who insist on keeping every shell that they find! So, what to do with all those shells? Gather up your little ones and make a sea shell matching game!
This craft couldn’t be easier. You will need an even number of shells that are approximately the same size and color. Plus, stickers that you have at least two of.
Be sure your shells are clean, dry and free of sand. Then peel and stick your stickers inside the shells. Try not to pick shells that look identical or it will make it too easy for your players to make a match. Let’s not make it too easy on the kids. The true goal of this game is to keep your kids occupied for 15 minutes!
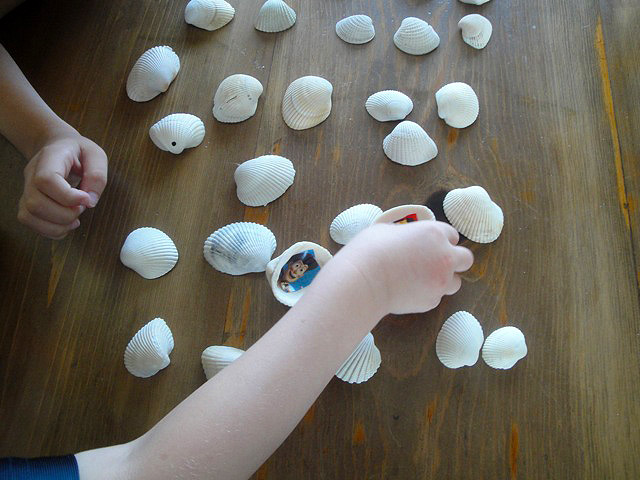
You may have to trim a few stickers to help them fit better. See how I trimmed the Buzz sticker:
Then set out your shells sticker side down and let the game begin!
Make sure they play fair and only turn over two shells at a time. If a match is made then they can keep those two shells.
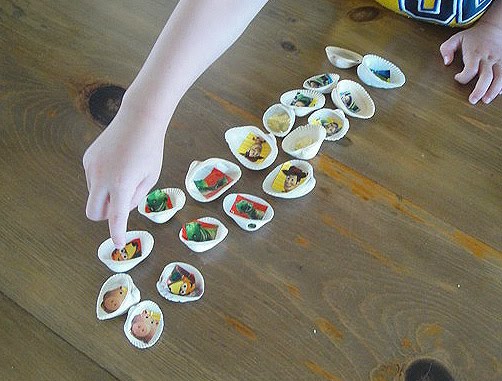
At the end, let them count their pairs. The person with the most matches wins!
Be sure to encourage re-matches! If you want the stickers to hold up to many games and sticky fingers, you may choose to coat the sticker side with Mod Podge.
She has thrown down a challenge to anyone willing to close up their pocketbooks this month (well, at least for spending on arts and crafts and DIY projects), and use what you have in your home, workshop, craft room or wherever you create. The challenge is called Stashbusting September and you can read more about it here.
She also has a link party called Upcycled Awesome every Wednesday. I hope you hop over to check out some of the fantastic ideas she and other bloggers have shared.
I am always up for a challenge, so I jumped in with both feet ready to complete some projects and do it without spending a dime!
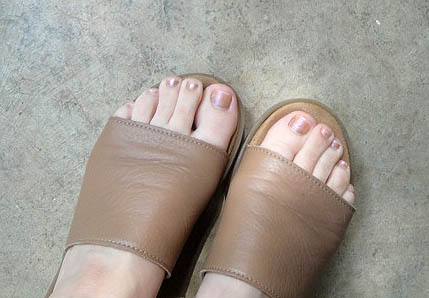
Obviously toe-less shoes are not safe in the workshop, unless you want to be,
ummm toe-less!
So, what about you? Up to the challenge? I hope you step up to the plate and try your hand at re-using and making-do with what you have on hand! Altogether now: Hey ho, let’s go!
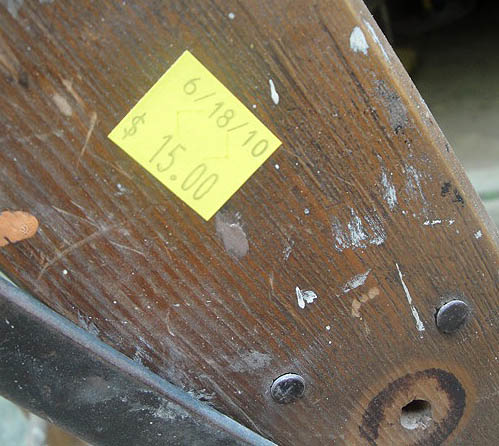
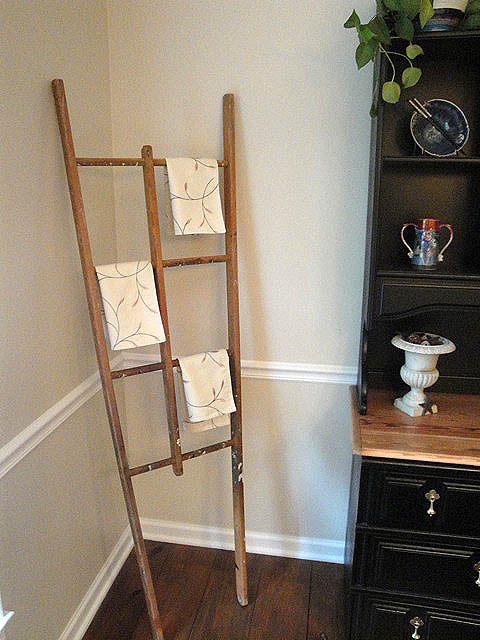
Here is one of the projects that has been sitting around waiting to be given a new life. An old ladder that I picked up from The Habitat for Humanity ReStore (visit this post for more details).
$15 dollars was a little more than I wanted to pay, but Habitat for Humanity is one of my favorite charities, so I don’t mind spending a little more when the money goes to people who need housing.
I actually made this ladder into two separate items. I’ll show you the results of the other half when I finish that project.
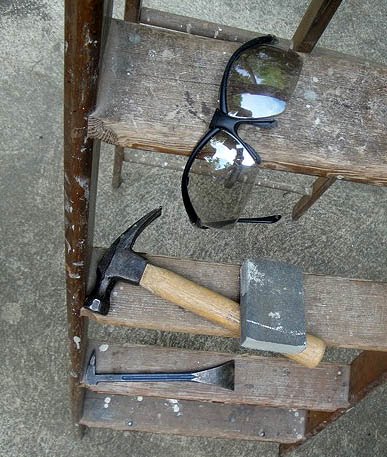
Tools Needed:
Safety Goggles (Definitely wear your safety goggles when using a pry bar!)
Hammer
Sand paper or sanding block
Pry Bar
Drill
Screws
Piece of L-shaped moulding
I used the chisel end on my pry bar to loosen the rivets. Some of those rivets were hanging in there and weren’t ready to come out yet. But, I showed them who’s boss. That would be me, the woman in a skirt and toe-less sandals!
Then used the claw end of a hammer to to remove it the rest of the way.
After removing the brace and top rivets, the ladder’s front and back were free from each other forever. I wiped the whole ladder down with a damp cloth and then lightly sanded it to remove any splinters.
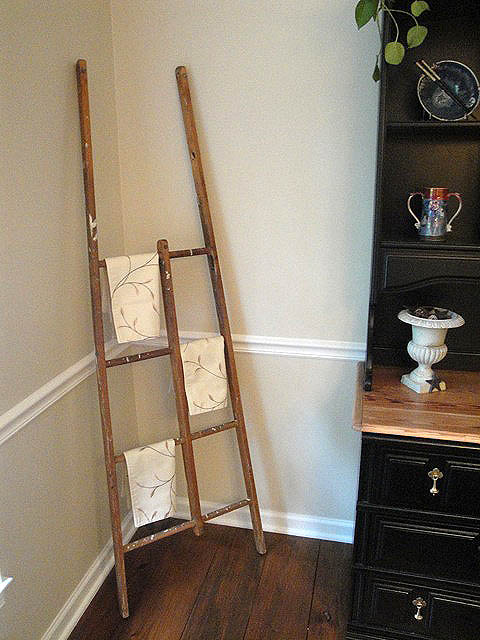
I played around with the back of the ladder in our dining room…
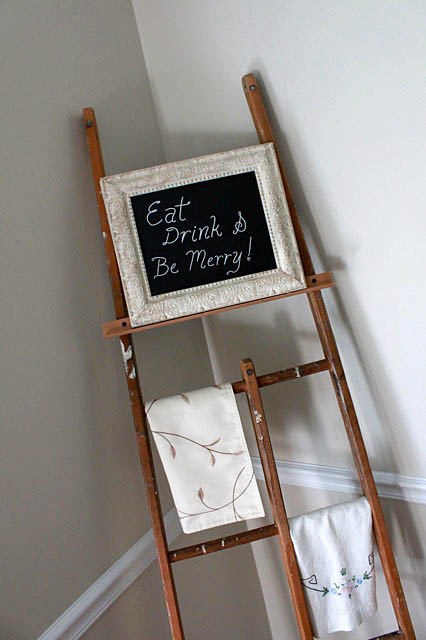
…but ultimately decided I wanted to use it as an easel.
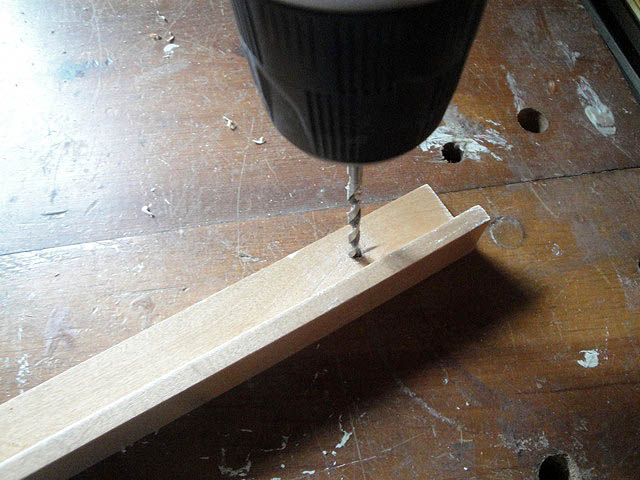
I have a decent scrap pile with leftover boards and trim pieces. A little scrap of L shaped moulding was exactly what I needed.
I measured how high I wanted the moulding to be and then marked where my screws would go.
I predrilled the holes.
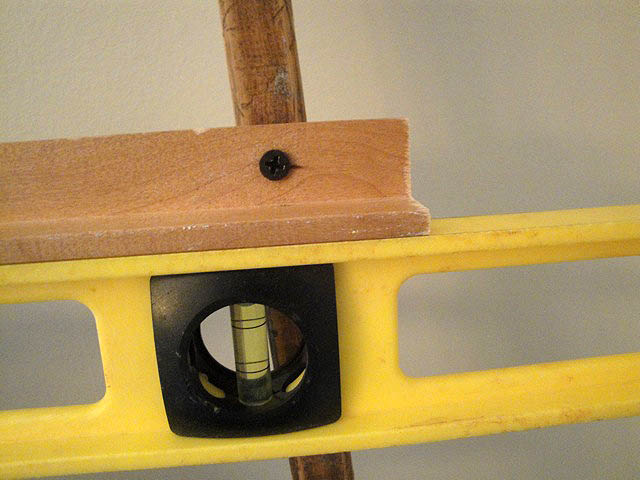
Leveled the moulding and screwed it into the ladder.
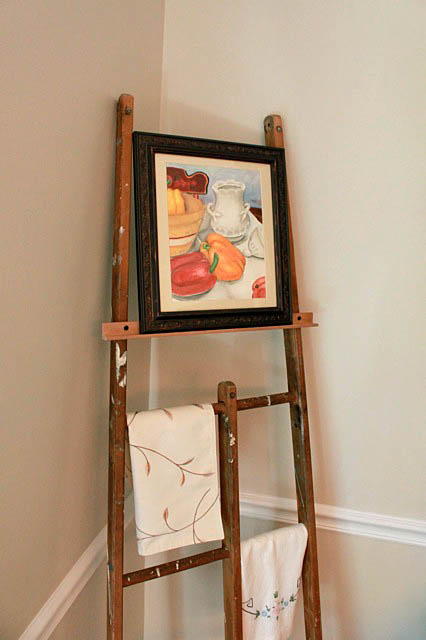
Instant easel!
Love it! Especially those paint splotches.
It looks great next to our repainted Craig’s List buffet and hutch.
Plus, I can change out the artwork on a whim.
I hope this has inspired you to do some Stashbusting this month. Check out what some other Stashbusting bloggers are doing this month: HERE!
https://prettyhandygirl.com/wp-content/uploads/2021/07/PHG-logo-tagline-2020-1030x211-R.jpg00Brittany Baileyhttps://prettyhandygirl.com/wp-content/uploads/2021/07/PHG-logo-tagline-2020-1030x211-R.jpgBrittany Bailey2010-09-09 13:39:002012-04-29 23:15:11Ladder Stepping Up to the Stashbusting September Challenge
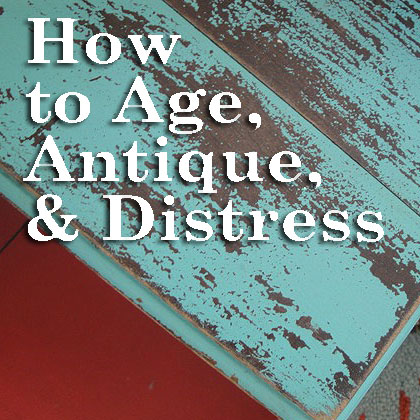
Well, despite the fact that I am starting to feel my age, this post will help you achieve that beautiful well worn, loved, aged and antique look on furniture and decor items. This is something you can do to new furniture or to give old furniture a new rustic look.
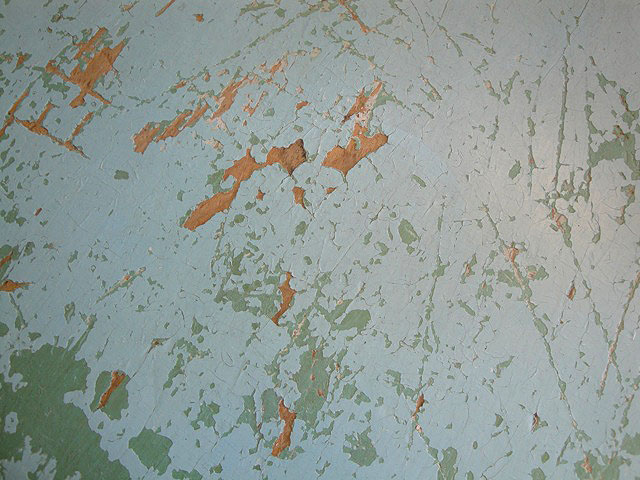
Aren’t these layers of paint, scratches and wear marks art to your eyes?
Nothing shows character like chipping paint and multiple revealed layers on metal.
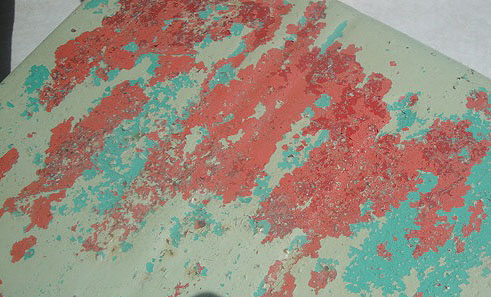
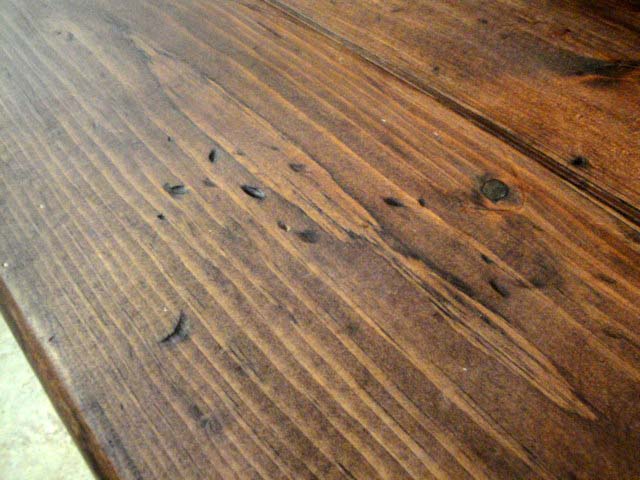
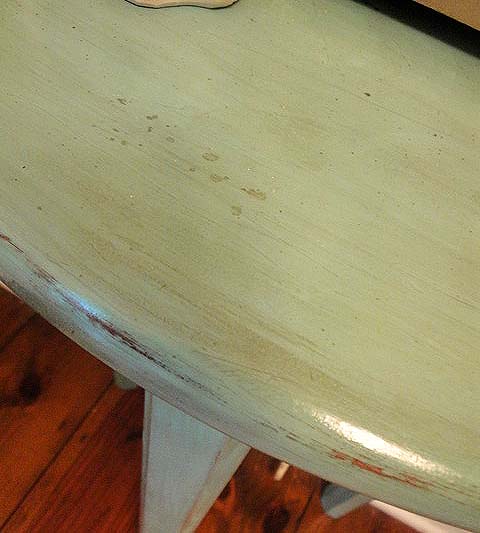
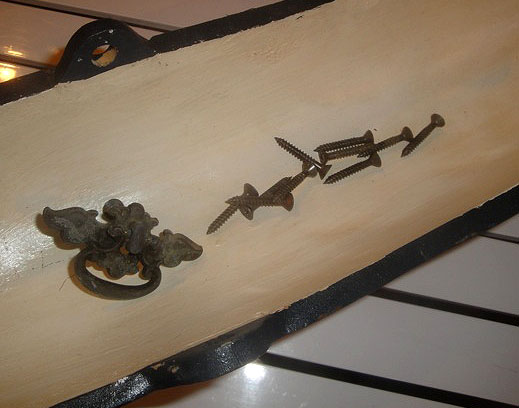
Weathered paint worn thin and rubbed off give a table character!
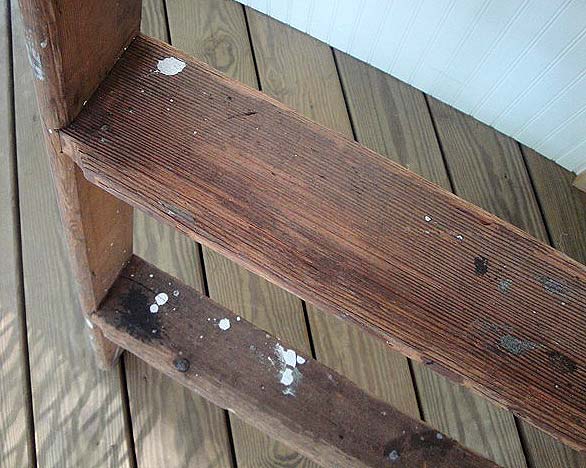
Paint splotches on an old ladder beg to tell stories of the projects it has seen.
And you can’t forget rust, love that beautiful brown patina!
I have been experimenting with several techniques to add age to “newer” pieces of furniture. Here are a few ways to add some character through distressing. (This post contains affiliate links. To learn more read my disclosure page.)
Distress Marks:
Achieving a worn look can be as easy as adding dings and scratches. This process can also be a great stress reliever! Grab some chains and let’s work out some of that pent up aggression!
Throwing a chain at wood gives you those elliptical dents. Dragging the sharp edges of a pry bar across wood will give it some deep grooves. Set a screw on its side and lightly hammer it into the wood. Finally a few random hammer marks here and there finish off the worn look.
This is the same technique I used on my mudroom bench.
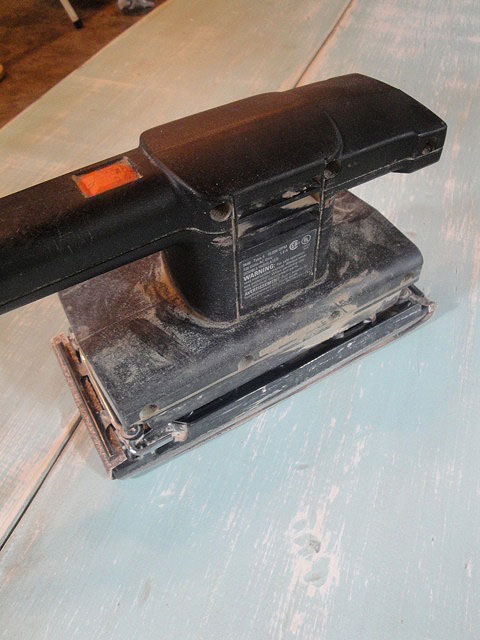
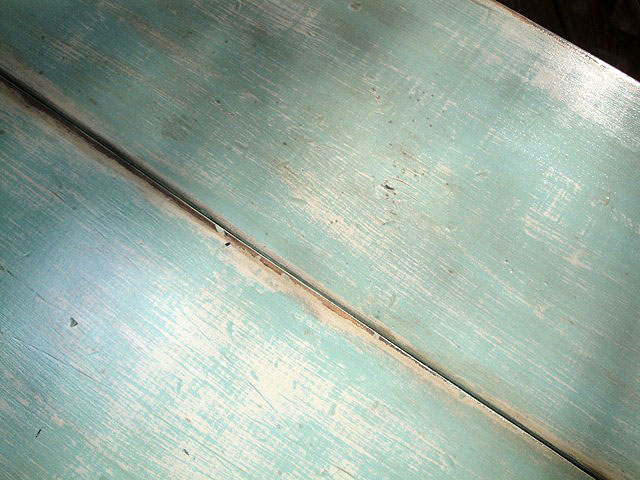
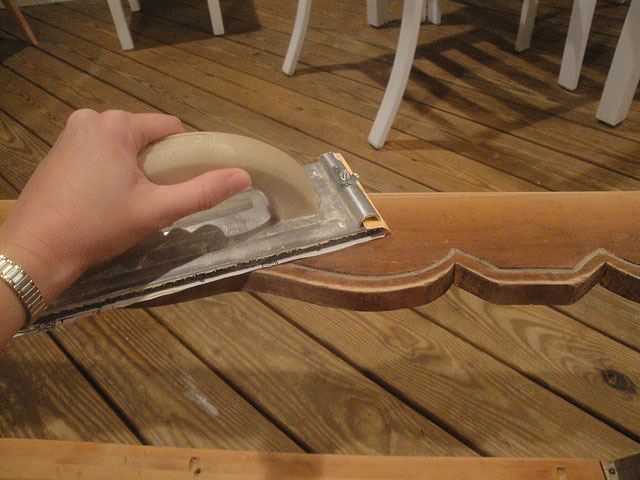
Sanding through layers:
The easiest way to add some age to a piece of furniture is to expose layers of paint. Whether you paint a few contracting colors on yourself or you sand a pre-finished piece, sanding is one of my favorite ways to add age. A note of caution: Before you begin sanding, always check for the presence of lead paint. You can learn more about how to detect lead paint in this post.
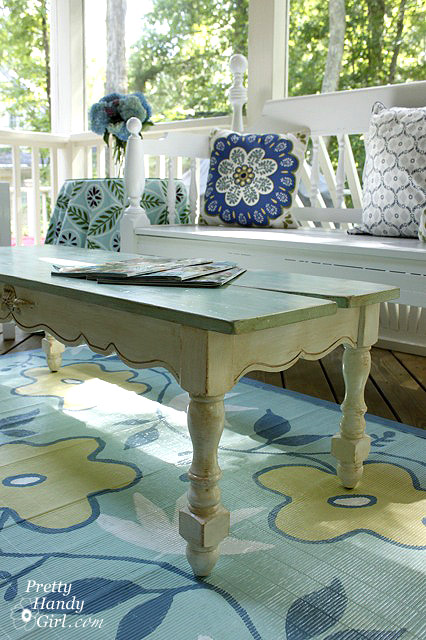
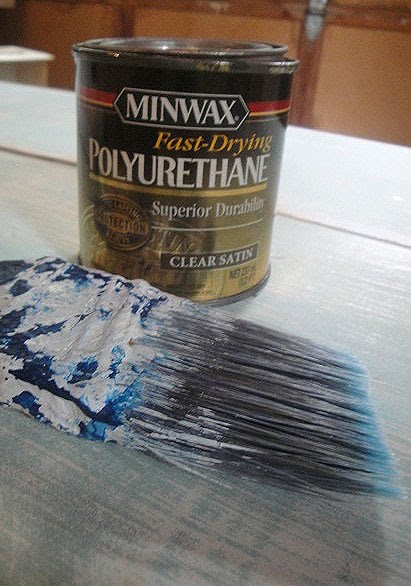
You’ll get the best results using 150 grit sand paper (but use whatever you have on hand). Attach it to your power sander and go to town on the furniture! Work in areas that would normally get a lot of use or abuse. Corners and edges of furniture usually take more abuse. Table center is a good place to show signs of worn paint. Be sure to move the sander around and be random rather than symmetrical. A good example of a sanded finish can be seen on this Trashy Coffee Table.
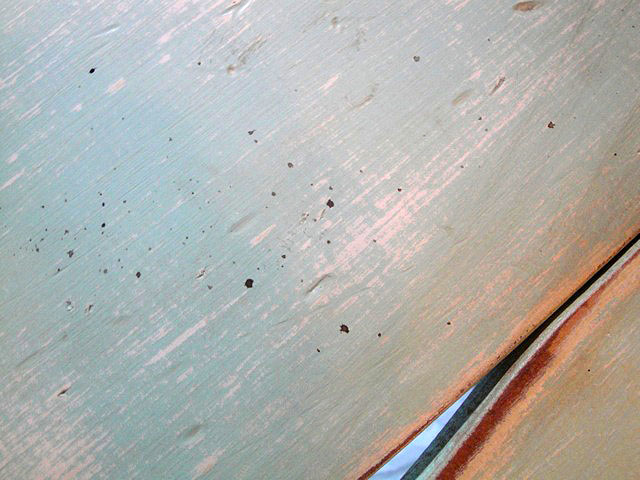
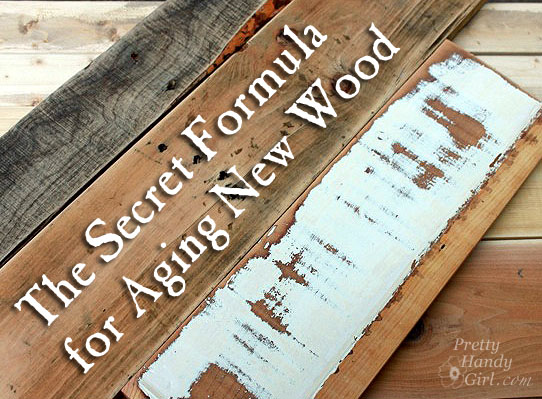
A table that was previously painted white received a sea-inspired blue layer of paint on top of the white. (You could always add a third color if you want more colors showing through.) Sand through the layers of paint down to the bare wood in spots. The challenge with a new piece of wood is it lacks the deeper darker color tone of antique lumber. Unfortunately, when new wood is exposed, it will look blonde and – well – brand spankin’ new. Read on to learn how I solve this problem.
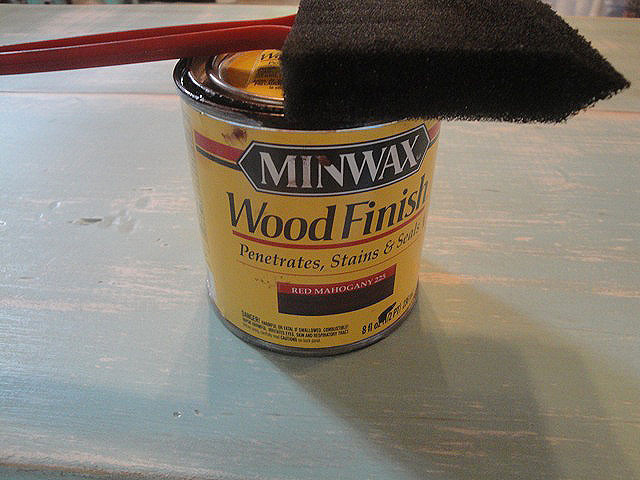
Faking Age with Stain:
I have a trick up my sleeve for creating those darker wood tones in seconds! Ready to learn my secret?
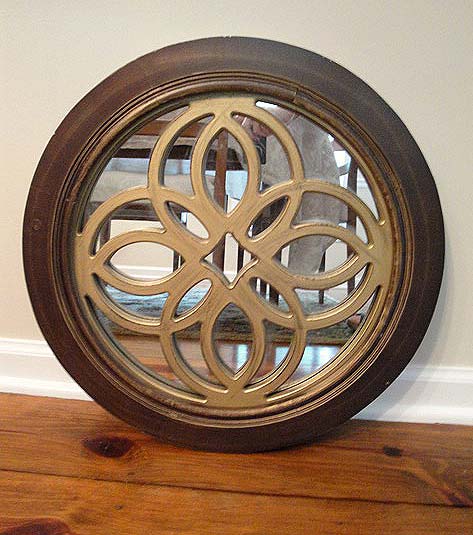
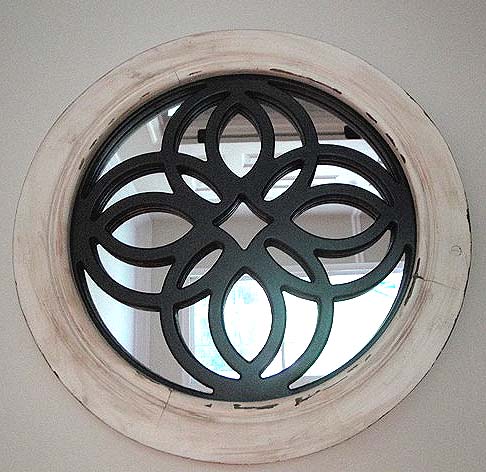
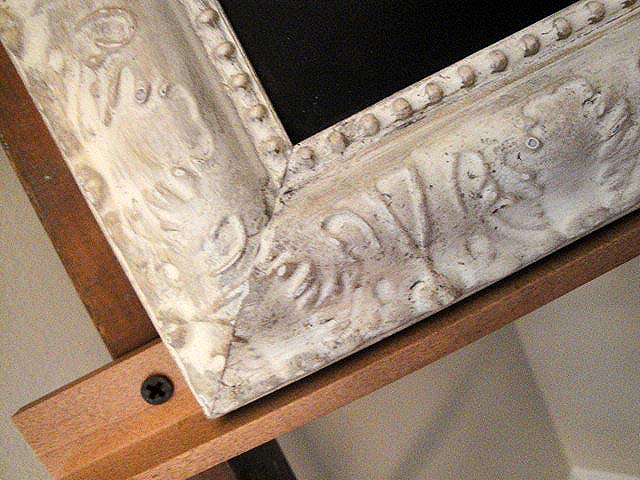
You can use the same dark stain to give your object a faux “tea stain”. This antique gold 80’s mirror is easily transformed with spray paint and some stain.
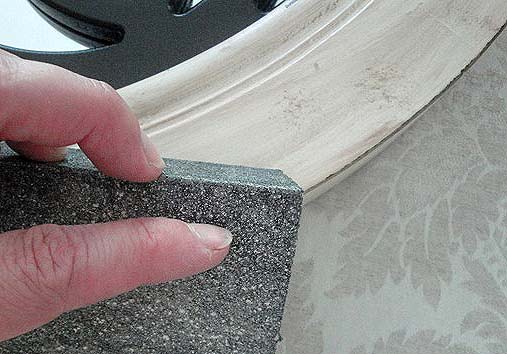
If you use regular white spray paint, it will be difficult to “dirty” your object. Instead I like to use Rust Oleum Heirloom White which gives a soft antique white look. (FYI, I used Rust-Oleum Oil Rubbed Bronze for the inside decorative design.)
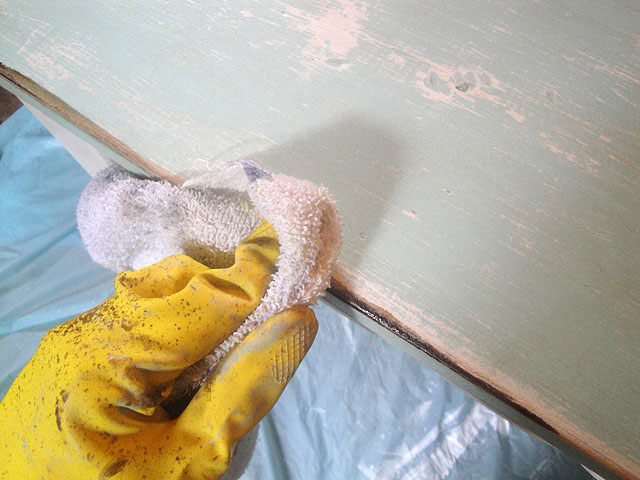
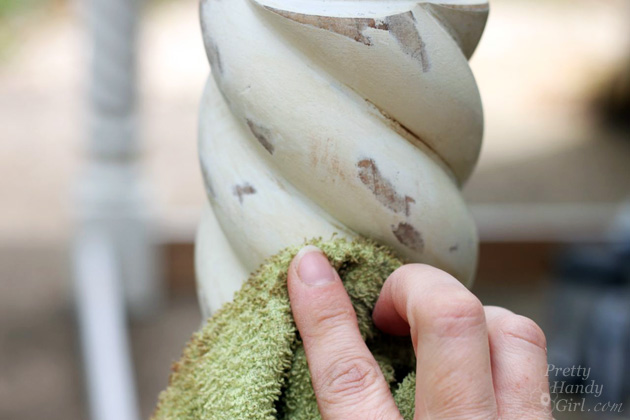
After the paint dries, hand sand some of the edges to expose the stained wood beneath.
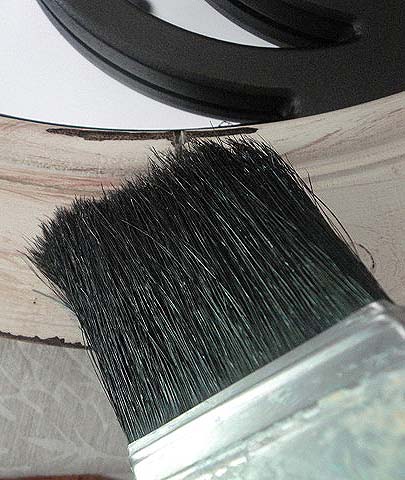
Use a dry brush technique* to brush on the stain and wipe the excess off immediately. *Keep your brush dry by dipping in the stain and wipe off your brush on a rag before using it.
For the best results, use an old shaggy brush or rough up your chip brush. The rattier the brush the better because anywhere the stain lands is where it will remain.
The end results are pretty tea stains and peek-a-boo dark wood below.
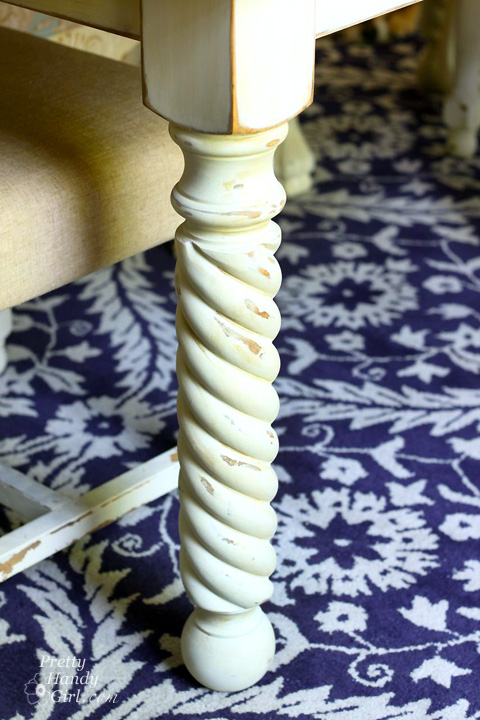
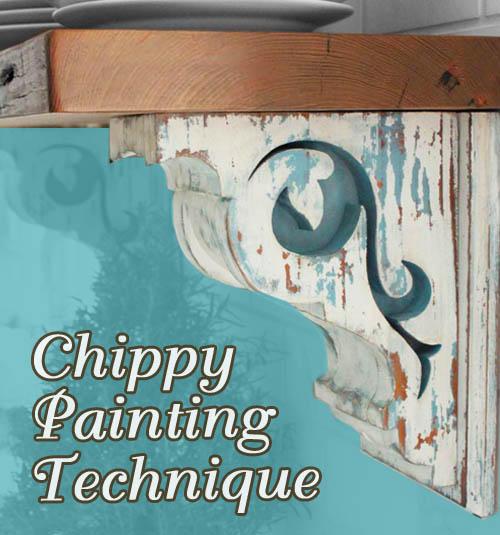
Glazes add depth and dimension to furniture that has a detailed profile. Glazes can be used on everything from kitchen cabinet doors to table legs and picture frames. But, don’t let that limit the places you can use glazes.
The table legs on my DIY Farmhouse Table have Van Dyke glaze on it that accentuates the rope turns.
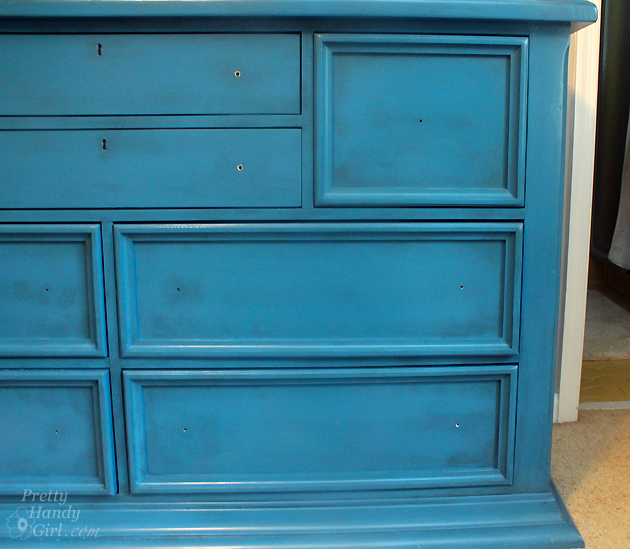
This dresser needed more than a coat of paint to give it an attractive new look. I added black glaze for pretty gray tones.
Simply brush on the glaze (again use a ratty almost dry brush.) Push more glaze into the gouges and crevices to show off the details.
Wipe off any excess with a clean dry rag.
The glaze stays wet for longer than the wood stains. It can be wiped off immediately if you make a mistake. Once you like the look, let the glaze dry to permanence.
It may take a while to build up the glazing. But, you end up with a really nice final product.
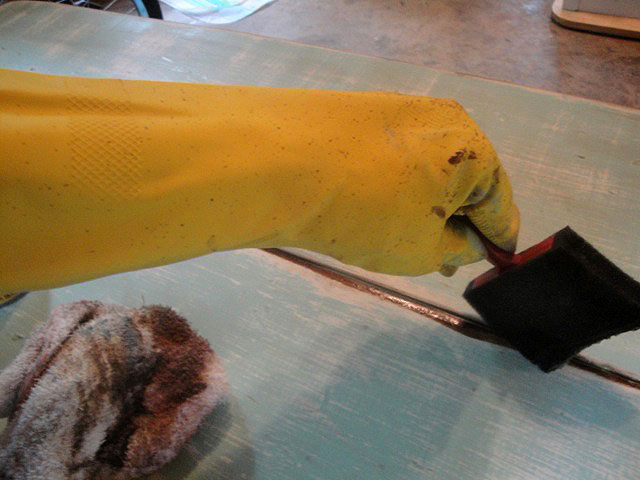
Spattering:
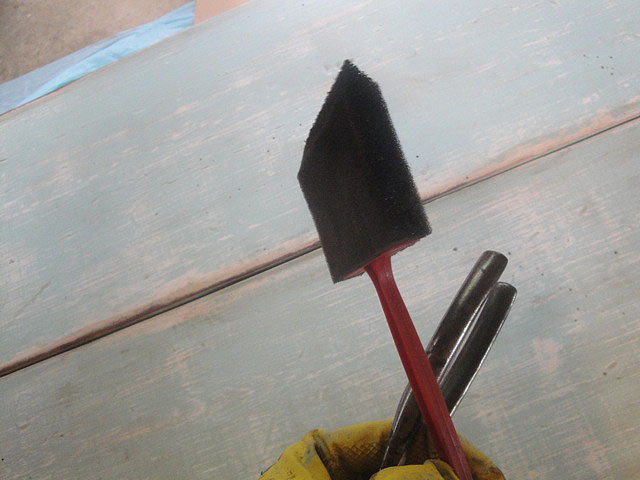
Another technique I like is adding paint or stain spatters. This is easy to do, but if you aren’t wearing protective clothing you might give yourself some freckles.
Dip a foam brush into the stain and wipe off any excess. Then gently tap the brush on a stick or handle of something sturdy. (A large screwdriver or other solid object works well.) This time I don’t wipe the stain off. Let it dry a little then dab up any excess.
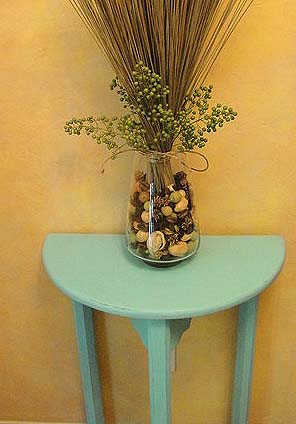
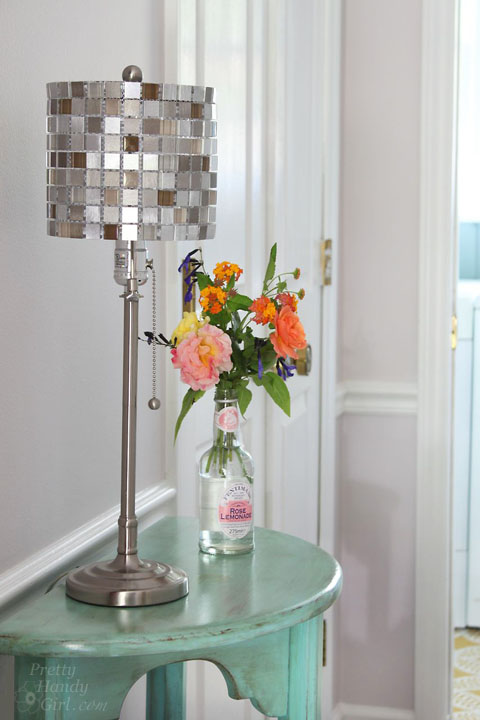
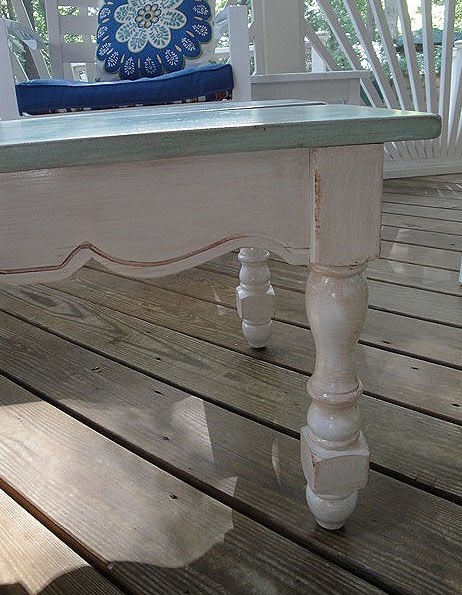
With these techniques, you can take a plain painted side table from this:
To a more sophisticated antiqued older sister:
Protective Coating:
Once you have achieved the antiqued look you like, be sure to put a protective coating over your furniture. I prefer using Minwax Oil-Based Polyurethane. This adds the perfect age to furniture. (If you use new oil-based poly, it will yellow in a few years time.) If you don’t like the yellowing effect, stick to Minwax Satin Polycrylic.
Now, don’t be distressed, grab some sandpaper and a brush and give your furniture an age boost!
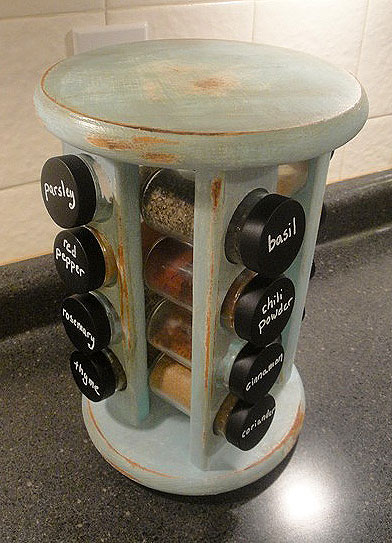
Yard Sale spice rack turned rustic! Chalkboard lids tutorial here.
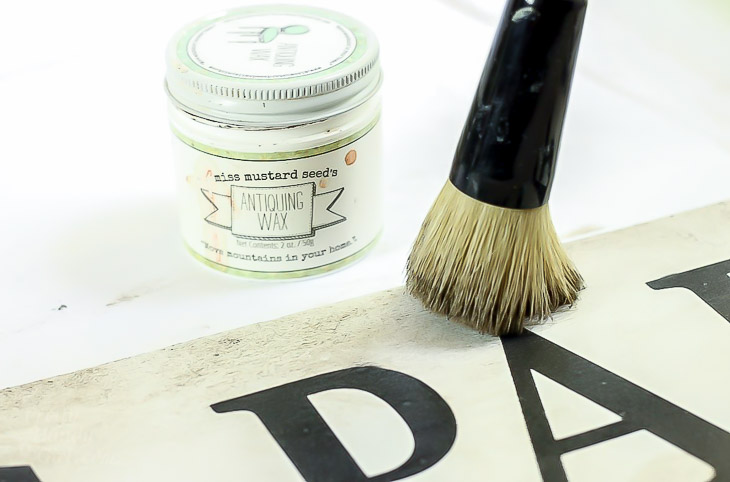
Watch a live tutorial to see how I accomplished an aged paint look on this trough. And be sure to subscribe to my YouTube channel to get notifications when a new video is uploaded.
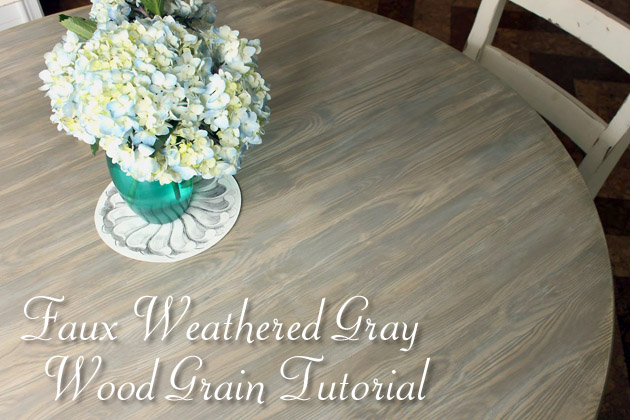
Now that you have some aging and distressing techniques under your belt, you can push your skills by trying your hand at some more complicated techniques! Like creating a faux wood texture on surfaces following this tutorial.
https://prettyhandygirl.com/wp-content/uploads/2010/09/age_antique_distress_wood.jpg420420Brittany Baileyhttps://prettyhandygirl.com/wp-content/uploads/2021/07/PHG-logo-tagline-2020-1030x211-R.jpgBrittany Bailey2010-09-07 07:44:002018-07-10 15:54:21Aging is so Distressing – Techniques for Antiquing Furniture
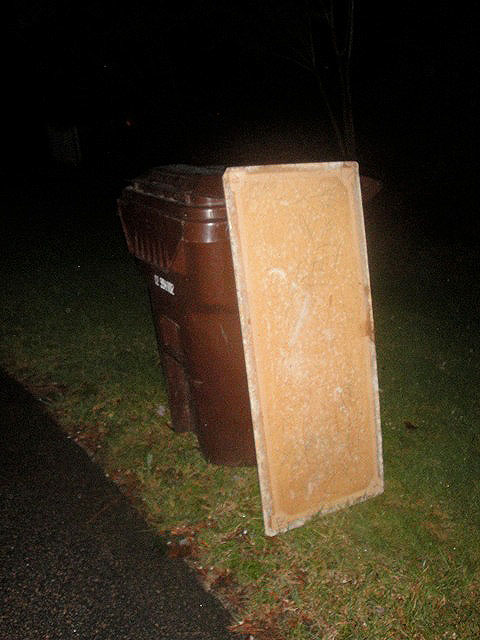
Okay readers, so the truth is out, I just can’t seem to pass up discarded furniture. They look so sad and pitiful awaiting the trash trucks. They plead with me to rescue them from life in the dump. That is how I found this coffee table.
It was resting against a dumpster. The legs and skirt of the coffee table were in good shape structurally, but the top was cheap masonite (compressed and glued fibers of wood.) This type of wood will swell and absorb water like a sponge. I’m one of those unfortunate homeowners who’s house is sided with hardboard (essentially the same as masonite.) Now you can see why that isn’t a good thing:
Moisture causes mold to grow, and the retained moisture also causes the wood to swell, become misshaped and will eventually rot away. The first thing I did was unscrew the top and throw it away! Yuck.
Sorry Mr. Tabletop, there was no rescuing you.
I also removed the hardware from the table skirt and saved it with the screws.
I cleaned the base of the coffee table with bleach cleaner to get rid of all the mold.
After it dried, I roughed up all the surfaces on the legs and base.
Then I primed it to seal the wood and prepare it for painting.
I painted the legs and skirt with two coats of Benjamin Moore Impervo white paint (leftover from our living room trim.)
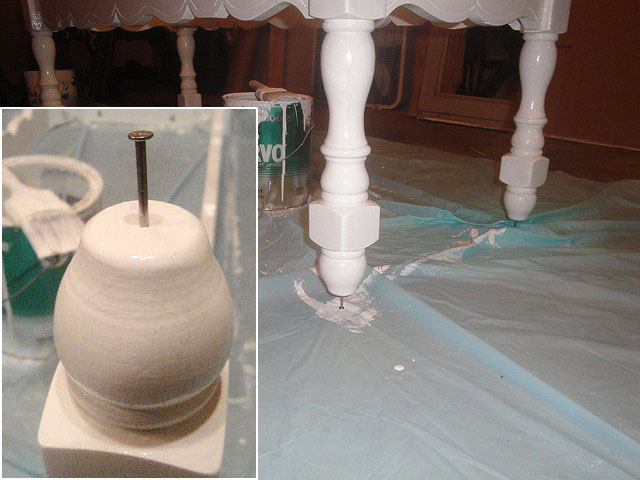
I always paint the undersides or the hidden side first, then I use a technique for elevating my object and keeping it from sticking to the drop cloth.
Simply tap a nail into each leg after you have painted the foot. Then turn the table over and continue to paint. Some other bloggers have found the Rockler painting pyramids, but I have yet to find any in my local stores to try them out. Hey Rockler, if you are reading this, send me some painting pyramids so I can give them a spin and see if they work better than my nail technique!
After the paint dried, I removed the nails from the bottom of the legs and hammered floor protectors in their place.
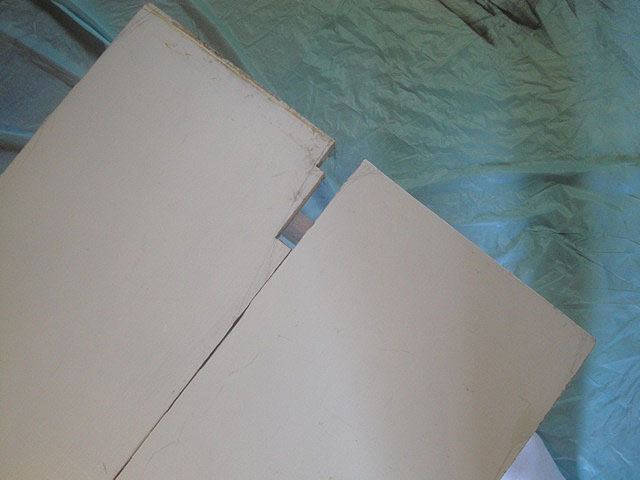
Now, to replace the masonite top with something with more age and character. I searched through my wood stash and found these two discarded boards that I think used to be in someone’s closet or pantry.
The boards fit well on the skirt of my coffee table, but it had a funny cut out on the edge of one of the boards. It was probably a profile cut.
It didn’t look very old or interesting to me, so I drew a line diagonally along the board and cut it off with my jigsaw. That looked much better! More like a salvaged board. Then I flipped the cut board to the inside edge.
I distressed my new table top with a heavy chain, pry bar, and hammer (read more here.)
At this point, I went to my “oops” paint stash and chose this gallon of $5 baby blue color.
I know it looks like a nursery color, but I wanted something vibrant to show through after glazing and antiquing. I painted the whole table top this light blue color. Luckily I was able to skip the priming step because the boards had previously been painted.
Then I turned the boards upside down, and used the screws I set aside to attach my boards to the table skirt.
I decided not to re-use the handle hardware that was originally on the coffee table. Instead I wanted to give this table a beachy look. So, I added some shells to the front of the coffee table using my new favorite glue, E-6000 glue. This glue holds super strong, I even set the table down on the shell edge (forgetting they were there,) and the shell broke, but all the shells remained glued to the table. Now that is a strong bond!
My last step was to put a protective coating of polyurethane over the whole coffee table. I used an old can of oil based polyurethane that had yellowed. This added the perfect age to my coffee table.
And here is my Trashy Coffee Table turned into a Beautiful Beachy Babe!
Not bad for a new coffee table for our porch that essentially cost me NOTHING, since I already had all the paint and supplies leftover from other projects. What do you think? Do you like her color? Or too baby blue for you?
(I’ve included affiliate links for your convenience. I earn a small percentage from a purchase using these links. There is no additional cost to you. You can read more about affiliate links here.)